Table of Contents
Advertisement
Available languages
Available languages
®
KOBALT
and the K Design
trademarks of LF, LLC. All Rights Reserved.
ATTACH YOUR RECEIPT HERE
Serial Number
Questions, problems, missing parts? Before returning to your retailer, call
our customer service department at 1-888-3KOBALT, 8 a.m. - 8 p.m., EST,
Monday - Friday.
AB13766
are registered
®
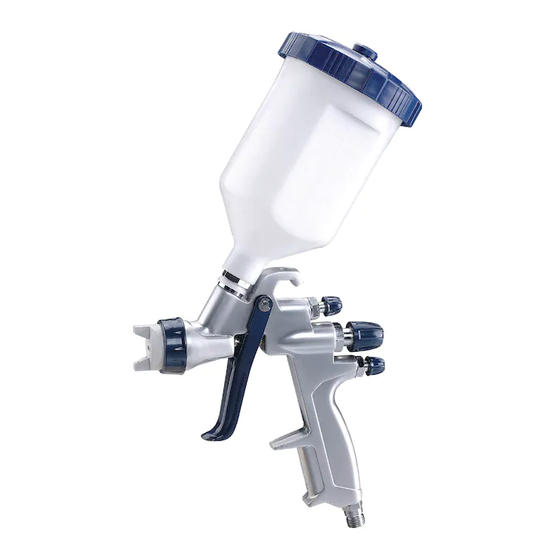
GRAVITY FEED
SPRAY GUN
Purchase Date
1
ITEM #0301329
MODEL #SGY-AIR88TZ
Français p. 15
Français p. 15
Español p. 30
Advertisement
Chapters
Table of Contents

Related Manuals for Kobalt SGY-AIR88TZ


Summary of Contents for Kobalt SGY-AIR88TZ
- Page 1 ITEM #0301329 GRAVITY FEED SPRAY GUN MODEL #SGY-AIR88TZ Français p. 15 Français p. 15 Español p. 30 ® KOBALT and the K Design are registered ® trademarks of LF, LLC. All Rights Reserved. ATTACH YOUR RECEIPT HERE Serial Number Purchase Date Questions, problems, missing parts? Before returning to your retailer, call our customer service department at 1-888-3KOBALT, 8 a.m.
-
Page 2: Table Of Contents
TABLE OF CONTENTS Product Specifications ...................3 Package Contents ....................3 Safety Information ....................3 Preparation ......................6 Assembly Instructions ....................6 Operating Instructions ..................8 Repair Instructions ....................9 Care and Maintenance ..................11 Troubleshooting ....................12 Warranty ......................13 .. -
Page 3: Product Specifications
GRAVITY FEED TYPE EXTERNAL MIX TYPE BLEEDER BLEED TYPE 0.055 IN. (1.4 MM) FLUID NOZZLE I.D. 60 PSI MAX. WORKING PRESSURE AIR REQ’D (SCFM @ 60 PSI) 4.4 AVERAGE/8.6 CONTINUOUS PATTERN SIZE 8 IN. @ 50 PSI/8 IN. DISTANCE FROM WORKPIECE AIR INLET 1/4 IN. - Page 4 SA FETY INFORMATION Wear a respirator when using tools whenever possible. KEEP CHILDREN AWAY FROM WORK AREA AND TOOL: Keep tool out of reach of children and never allow children to handle equipment or tool. Keep work area clear from clutter and other work hazards. Do not use this product in unsafe work conditions.
- Page 5 SA FETY INFORMATION Use a face mask/respriator and protective clothing when spraying. Always spray in a well ventilated area to prevent health and fire hazards. Refer to material saftey data sheets (MSDS) of spray materials for details. Certain materials that can be used with this device if coming in direct contact with skin may cause skin irritation.
-
Page 6: Preparation
PREPARATION Before beginning the assembly and operation of the product, make sure all parts are present. Compare parts with package contents list. If any part is missing or damaged, do not attempt to assemble or operate the product. Contact customer service for replacement parts. Estimated Assembly Time: 3 minutes Tools Required for Assembly: Wrench (included) ASSEMBLY INSTRUCTIONS... - Page 7 ASSEMBLY INSTRUCTIONS 4. Pour paint into paint cup and put on cover. Clockwise (See Fig. 4 – Oil and water extractor, and air compressor not included) Load paint 5. Connect air tube to air intake connector from air compressor. Set pressure to 60 psi. Fully open air adjustment knob and adjust the spray pattern adjustment knob to proper range (See Figure 5;...
-
Page 8: Operating Instructions
OPERATING INSTRUCTIONS Proper handling of the gun is essential for obtaining a good finish. The gun should be held at a 90 ° angle to the surface being covered and moved parallel to it. For precise control keep the gun 6-12 inches away from the surface and material. The trigger should be released before the end of the stroke for a uniform and consistent covering. - Page 9 REPAIR INSTRUCTION Remove air pressure from air hose / gun. Take care not to damage the seals on the gun body when removing the CAUTION: air distribution ring. 1. Remove the nozzle set: a. Remove air cap w/ring by turning counter clockwise (See Figure 1). b.
-
Page 10: Repair Instructions
REPAIR INSTRUCTIONS 4. Mount the nozzle set: a. Screw on paint nozzle (See Fig. 8). b. Attach the air cap w/ring and tighten (See Fig. 9). c. Put on paint needle (See Fig. 10). d. Attach the needle spring (See Fig.11). e. -
Page 11: Care And Maintenance
CARE AND MAINTENANCE NOTE: There are two methods for properly submerging spray gun nozzle into cleaning solvent material(s). Method 1: Remove the spray gun nozzle completely from spray gun and place into a container that will not cause Solvent solvent deterioration when solvent material(s) are added material Nozzle (See Fig. -
Page 12: Troubleshooting
TROUBLESHOOTING If you have any questions regarding the product, please call customer service at 1-888-3KOBALT, 8 a.m. - 8 p.m., EST, Monday - Friday. SPRAY PATTERN/ PROBLEM SOLUTION CONDITION One side of nozzle is clogged. Soak nozzle in solvent to loosen clog, then blow air through until clean. -
Page 13: Warranty
WARRANTY This tool is warranted by the manufacturer to the original purchaser from the original purchase date for three (3) years subject to the warranty coverage described herein. This tool is warranted to the original user to be free from defect in material and workmanship. - Page 14 O-ring 2.5x 2.1 O-ring 5.3x 1.6 Paint filter O-ring 6x 1.5 Paint Cup O-ring 12x 1.8 Brush Stem Air adj. knob Printed in China ® ® KOBALT and the K Design are registered trademarks of LF, LLC. All Rights Reserved.
- Page 15 ARTICLE #0301329 PISTOLET DE PULVÉRISATION À GRAVITATION MODÈLE #SGY-AIR88TZ KOBALT et le motif de K sont des marques de ® ® commerce déposées de LF, LLC. Tous droits réservés. JOIGNEZ VOTRE REÇU ICI Numéro de série Date d'achat Des questions, des problèmes, des pièces manquantes? Avant de retourner l'article au détaillant, communiquez avec notre service à...
- Page 16 TABLE DES MATIÈRES Caractéristiques du produit ..................17 Contenu de l'emballage ..................17 Consignes de sécurité ..................17 Préparation ......................21 Instructions pour l'assemblage................21 Mode d'emploi ..................... 23 Instructions pour la réparation ................24 Entretien .......................26 Dépannage......................27 Garantie ....................... Vues éclatées ...................... Tool Requirements Exigences relatives aux outils Requisitos de herramientas...
-
Page 17: Caractéristiques Du Produit
CARACTÉRISTIQUES DU PRODUIT COMPOSANTE CARACTÉRISTIQUES GRAVITÉ TYPE D’ALIMENTATION EXTERNE TYPE DE MÉLANGE PURGEUR TYPE DE PURGE DIAMÈTRE INTÉRIEUR DE 1,4 M M (0,055 PO) 60 LB/PO PRESSION DE SERVICE MAXIMALE 4,4 EN MOYENNE/8,6 EN CONTINU AIR REQUIS (PI /MIN À 60 LB/PO ) LARGEUR DU JET 20,32 CM (8 PO) À... - Page 18 CONSIGNES DE SÉCURITÉ GARDEZ LES ENFANTS À DISTANCE DE L’AIRE DE TRAVAIL ET DE L’OUTIL : Gardez l’outil hors de la portée des enfants et ne laissez jamais les enfants manipuler l’équipement ou l’outil. Gardez l’aire de travail dépourvue de débris et de tout danger lié au travail. N’utilisez pas cet article dans des conditions de travail dangereuses.
- Page 19 CONSIGNES DE SÉCURITÉ Ne pointez jamais le pistolet vers vous-même ou une autre personne, car vous pourriez causer de graves blessures ou la mort. Ne pulvérisez pas d’acide, de matières corrosives, de produits chimiques toxiques, de fertilisants ou de pesticides. L’utilisation de ces matières peut causer de graves blessures, voire entraîner la mort.
- Page 20 CONSIGNES DE SÉCURITÉ AVERTISSEMENT LA POUSSIÈRE CRÉÉE PENDANT LE PONÇAGE, LE SCIAGE, LE POLISSAGE, LE PERÇAGE ET D'AUTRES ACTIVITÉS PEUT CONTENIR DES PRODUITS CHIMIQUES RECONNUS PAR L'ÉTAT DE LA CALIFORNIE COMME ÉTANT LA CAUSE DE CANCERS, D'ANOMALIES CONGÉNITALES ET D'AUTRES PROBLÈMES LIÉS AUX FONCTIONS REPRODUCTRICES.
-
Page 21: Préparation
PRÉPARATION Avant de commencer l'assemblage et d'utiliser le produit, assurez-vous de disposer de toutes les pièces. Comparez les pièces dans l'emballage avec la liste et le tableau ci-dessus. Si des pièces sont manquantes ou endommagées, ne tentez pas d'assembler ou d'utiliser le produit. Communiquez avec le service à... - Page 22 INSTRUCTIONS POUR L'ASSEMBLAGE 4. Versez la peinture dans le réservoir à Sens des aiguilles d’une montre peinture et mettez le couvercle en place. (Consultez la fig. 4. L’extracteur d’huile Versez la peinture et d’eau et le compresseur d’air ne sont pas inclus.) 5.
-
Page 23: Mode D'emploi
MODE D'EMPLOI La manipulation appropriée du pistolet est essentielle à l’obtention d’un fini adéquat. Le pistolet doit être tenu à un angle de 90° de la surface couverte et il doit être déplacé parallèlement à celle-ci. Pour plus de précision, gardez le pistolet à une distance de 15,24 cm à... -
Page 24: Instructions Pour La Réparation
INSTRUCTIONS POUR LA RÉPARATION Éliminez la pression d’air des tuyaux à air du pistolet de pulvérisation./ ATTENTION: Veillez à ne pas endommager les joints du corps du pistolet lorsque vous retirez la bague de distribution d'air. 1. Retirez l'ensemble de la buse : a. - Page 25 INSTRUCTIONS POUR LA RÉPARATION 4. Montez l'ensemble de la buse: a. Vissez la buse à peinture (consultez la figure 8). b. Fixez l’anneau de l’obturateur d’air et serrez (consultez la figure 9). c. Mettez l'aiguille à peinture en place (consultez la figure 10). d.
-
Page 26: Entretien
ENTRETIEN REMARQUE: Il existe deux moyens d’immerger correctement la buse du pistolet de pulvérisation dans le solvant. Méthode 1: retirez la buse du pistolet de pulvérisation et déposez-la dans un récipient qui n’altérera pas le solvant Solvant (consultez la figure 14). La buse Méthode 2: laissez la buse du pistolet de pulvérisation fixée au boîtier du pistolet et immergez complètement la partie... -
Page 27: Dépannage
DÉPANNAGE Pour obtenir des pièces de rechange, communiquez avec notre service à la clientèle au 1 888 3KOBALT, entre 8 h et 20 h (HNE), du lundi au vendredi. RÉPARTITION/ÉTAT PROBLÈME SOLUTION DE L A PULVÉRISATION Faites tremper la buse dans du solvant pour Un côté... -
Page 28: Garantie
DÉPANNAGE Pour obtenir des pièces de rechange, communiquez avec notre service à la clientèle au 1 888 3KOBALT, entre 8 h et 20 h (HNE), du lundi au vendredi. RÉPARTITION/ÉTAT PROBLÈME SOLUTION DE L A PULVÉRISATION a) Le pistolet est tenu trop loin de la surface. -
Page 29: Vues Éclatées
Guide de réglage du fluide Douille Bouton de réglage du fluide Support à pistolet Bouton de réglage de l’air Tige Imprimé en Chine ® ® KOBALT et le motif de K sont des marques de commerce déposées de LF, LLC. Tous droits réservés. - Page 30 ARTÍCULO #0301329 PISTOLA ATOMIZADORA ALIMENTADA POR GRAVEDAD MODELO #SGY-AIR88TZ KOBALT y K & Design son marcas registradas ® ® de LF, LLC. Todos los derechos reservados. ADJUNTE SU RECIBO AQUÍ ú ¿Preguntas, problemas, piezas faltantes? Antes de volver a la tienda, llame a nuestro Departamento de Servicio al Cliente al 1-888-3KOBALT, de lunes a viernes de 8:00 a.m.
- Page 31 ÍNDICE Especificacions del producto ................32 Contenido del paquete ..................32 Información de seguridad ..................32 Preparación ......................36 Instrucciones de ensamblaje................36 Instrucciones de funcionamiento ................38 Instrucciones de reparación ................. 39 Cuidado y mantenimiento ..................41 Solución de problemas ..................42 Garantía .......................
-
Page 32: Especificacions Del Producto
ESPECIFICACIONES DEL PRODUCTO COMPONENTE ESPECIFICACIONES GRAVEDAD TIPO DE ALIMENTACIÓN EXTERNO TIPO MIXTO CON PURGA TIPO PURGA 0,14 CM (0,055 PULG) I.D. DE LA BOQUILLA DE FLUIDO 60 PSI PRESIÓN DE TRABAJO MÁXIMA AIRE NECESARIO (SCF, @60PSI) 4,4 PROMEDIO/8,6 CONTINUO TAMAÑO DE LA MODALIDAD 20,32 CM @ 50PSI/20,32 CM DISTANCIA DE LA PIEZA DE TRABAJO ENTRADA DE AIRE NPS de 1/4 PULG (M) - Page 33 INFORMACIÓN DE SEGURIDAD MANTENGA A LOS NIÑOS LEJOS DEL ÁREA DE TRABAJO Y LA HERRAMIENTA: Mantenga la herramienta fuera del alcance de los niños y nunca permita que los niños manipulen el equipo o la herramienta. Mantenga el área de trabajo libre de desorden y otros peligros de trabajo. No use este producto en condiciones de trabajo inseguras.
- Page 34 INFORMACIÓN DE SEGURIDAD Nunca se apunte ni rocíe a usted mismo ni a otra persona, esto podría provocar lesiones graves o la muerte. No rocíe ácidos, materiales corrosivos, químicos tóxicos, fertilizantes ni pesticidas. El uso de estos materiales puede provocar lesiones graves y/o la muerte. Nunca rocíe materiales inflamables en las cercanías de llamas abiertas o cerca de fuentes de ignición.
- Page 35 INFORMACIÓN DE SEGURIDAD ADVERTENCIA PARTE DEL POLVO PRODUCIDO POR EL LIJADO, EL SERRUCHADO, LA TRITURACIÓN Y LA PERFORACIÓN ELÉCTRICA Y OTRAS ACTIVIDADES RELACIONADAS CONTIENE QUÍMICOS RECONOCIDOS POR EL ESTADO DE CALIFORNIA COMO CAUSANTES DE CÁNCER, DEFECTOS CONGÉNITOS U OTROS DAÑOS EN EL APARATO REPRODUCTIVO. SE PUEDE OBTENER UNA LISTA DE LAS SUSTANCIAS QUÍMICAS EN www.oehha.ca.gov BAJO PROPOSITION 65 (PROPUESTA 65).
-
Page 36: Preparación
PREPARACIÓN Antes de ensamblar y hacer funcionar el producto, asegúrese de contar con todas las piezas. Compare las piezas con la lista del contenido del paquete y el diagrama. Si faltan piezas o están dañadas, no intente armar ni usar el producto. Comuníquese con el departamento de Servicio al Cliente para obtener las piezas de repuesto. - Page 37 INSTRUCCIONES DE ENSAMBLAJE 4. Vierta pintura en el recipiente y coloque En dirección de las manecillas del reloj la tapa. (Consulte la figura 4: Extractor de aceite y agua y compresor de aire no Carga de pintura incluidos) 5. Conecte el tubo de aire al conector de la entrada de aire desde el compresor de aire.
-
Page 38: Instrucciones De Funcionamiento
INSTRUCCIONES DE FUNCIONAMIENTO La manipulación adecuada de la pistola es esencial para obtener un buen acabado. La pistola se debe sostener en un ángulo de 90° con respecto a la superficie donde se rociará y se debe mover paralelamente a ella. Para un control preciso, sostenga la pistola a una distancia de 15,24 a 30,48 cm de la superficie y del material. -
Page 39: Instrucciones De Reparación
INSTRUCCIONES DE REPARACIÓN Retire la presión de aire de la manguera de aire comprimido /pistola. PRECAUCIÓN: Tenga cuidado para no dañar los sellos del cuerpo de la pistola al retirar el anillo de distribución de aire. 1. Retire el conjunto de boquillas: a. - Page 40 INSTRUCCIONES DE REPARACIÓN 4. Monte el conjunto de boquillas: a. Atornille la boquilla de pintura (Consulte la Figura. 8). b. Conecte la tapa de aire con anillo y apriete (Consulte la figura 9). c. Coloque la aguja de pintura (Consulte la Figura. 10). d.
-
Page 41: Cuidado Y Mantenimiento
CUIDADO Y MANTENIMIENTO NOTA: Existen dos métodos para sumergir adecuadamente la boquilla de la pistola rociadora en el material disolvente de limpieza. Método 1: Retire completamente la boquilla de la pistola rociadora de la pistola rociadora y colóquela en un contenedor que no se dañe con el disolvente cuando se material disolvente... -
Page 42: Solución De Problemas
SOLUCIÓN DE PROBLEMAS Si usted tiene alguna pregunta relacionada con el producto, llame a nuestro Departamento de Servicio al Cliente al 1-888-3KOBALT, de lunes a viernes de 8:00 a.m. a 8:00 p.m. hora estándar del Este. MODALIDAD DE AMELBORP NÓICULOS ROCÍO/CONDICIÓN Sumerja la boquilla en solvente para liberar Obstrucción en un lateral de la... -
Page 43: Garantía
SOLUCIÓN DE PROBLEMAS Si usted tiene alguna pregunta relacionada con el producto, llame a nuestro Departamento de Servicio al Cliente al 1-888-3KOBALT, de lunes a viernes de 8:00 a.m. a 8:00 p.m. hora estándar del Este. MODALIDAD DE AMELBORP NÓICULOS ROCÍO/CONDICIÓN a) La pistola está... -
Page 44: Vistas Detalladas
Conjunto de guías para ajuste de fluido Brocha Perilla de ajuste de fluido Porta pistola Vástago Perilla de ajuste de aire Impreso en China ® ® KOBALT y K & Design son marcas registradas de LF, LLC. Todos los derechos reservados.
Need help?
Do you have a question about the SGY-AIR88TZ and is the answer not in the manual?
Questions and answers