dji Mavic pro User Manual
Hide thumbs
Also See for Mavic pro:
- Quick start manual ,
- Disclaimer and safety manuallines (183 pages) ,
- Manual (62 pages)
Table of Contents
Advertisement
Advertisement
Table of Contents

Related Manuals for dji Mavic pro


Summary of Contents for dji Mavic pro
- Page 1 MAVIC PRO User Manual V1.0 2016.10...
-
Page 2: Using This Manual
We recommend that you watch all tutorial videos on the official DJI website and read the Disclaimer before you fly. Prepare for your first flight by reviewing the Mavic Pro Quick Start Guide and refer to the User Manual for more details. -
Page 3: Table Of Contents
Contents Using this manual Legends Read Before the First Flight Video Tutorials Download the DJI GO App Download the DJI Assistant 2 Product Profile Introduction Features Highlights Preparing the Mavic Pro Aircraft Diagram Remote Controller Diagram Aircraft Aircraft Profile Flight Mode... - Page 4 Flight Limits and No-Fly Zones Preflight Checklist Calibrating the Compass Auto Takeoff and Auto Landing Starting/Stopping the Motors Flight Test Appendix Specifications Firmware Updates Intelligent Flight Mode Remote Controller LCD Screen Menu Information After-Sales Information Compliance Information © 2016 DJI All Rights Reserved.
-
Page 5: Product Profile
Product Profile This section introduces the Mavic Pro and lists the components of the aircraft and remote controller. © 2016 DJI All Rights Reserved. -
Page 6: Product Profile
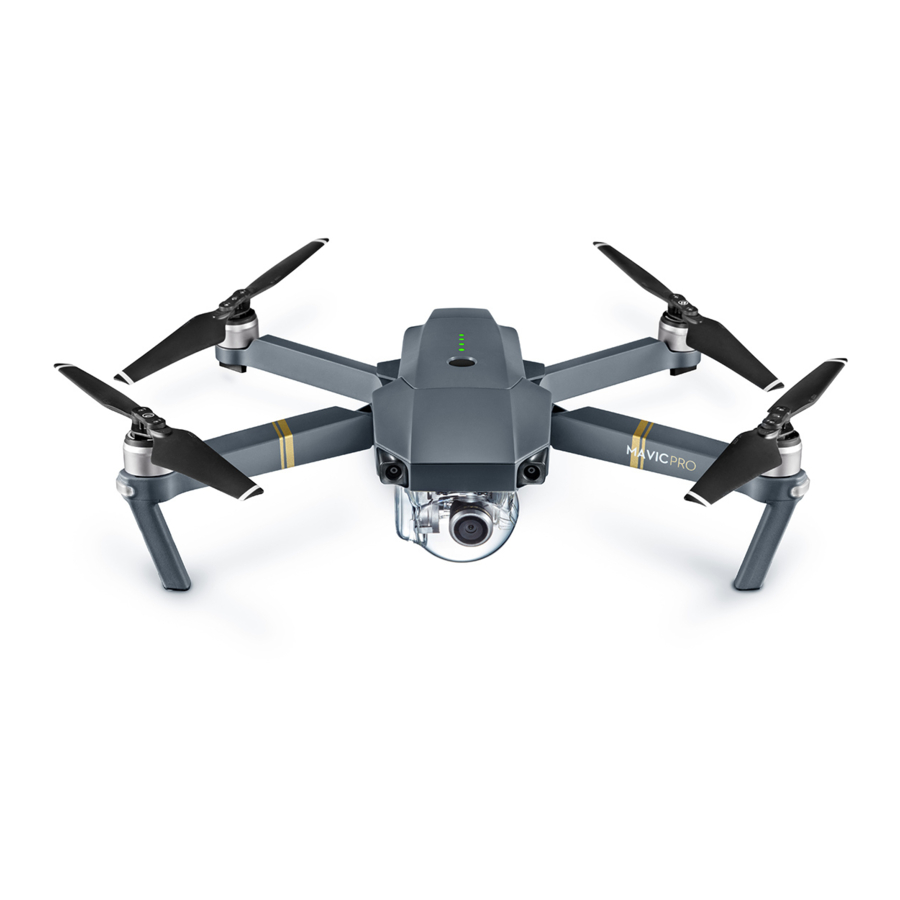
The Mavic Pro is an ultra-portable aircraft thanks to its revolutionary folding design. Camera and Gimbal: With the Mavic Pro, you are shooting 4K video at up to 30 frames per second and capturing 12 megapixel photos that look crisper and cleaner than ever, all stabilized by the compact on- board gimbal. - Page 7 Mavic Pro User Manual Marked Unmarked Unfold the Arms 1. Unfold the front arms, followed by the rear arms of the aircraft as shown. 2. Unfold all propeller blades. Unfold the front arms and the propellers before the rear ones. All arms and propellers must be unfolded before takeoff.
-
Page 8: Aircraft Diagram
Mavic Pro User Manual Aircraft Diagram 1. Propeller 2. Motor 3. Front LED Indicator 4. Forward Vision System 5. Landing Gear (with built-in antennas) 6. Gimbal and Camera 7. Intelligent Flight Battery 8. Link Button 9. Linking Status Indicator 10. Camera Micro SD Card Slot 11. - Page 9 Displays the aircraft and Remote Controller's the remote controller. system status. 9. USB Port 6. Flight Pause Button Connection to mobile device for DJI GO Press once for emergency braking. app. 7. 5D Button The default configuration is listed below. Set these values based on your preference in the DJI GO app.
- Page 10 Aircraft This section introduces the Flight Controller, Forward and Downward Vision System, and the Intelligent Flight Battery. © 2016 DJI All Rights Reserved.
-
Page 11: Aircraft
Aircraft Aircraft Profile The Mavic Pro aircraft comprises of a flight controller, video downlink, propulsion system and an Intelligent Flight Battery. This section introduces the features of the flight controller, video downlink and other aircraft components. Flight Mode The following flight modes are available for Mavic Pro: P-mode (Positioning): P-mode works best when the GPS signal is strong. -
Page 12: Flight Status Indicator
The Front LEDs show the orientation of the aircraft. The Front LEDs glow solid red when the aircraft is turned on to indicate the front (or nose) of the aircraft (the Front LED can be turned off in the DJI GO app). -
Page 13: Return-To-Home (Rth)
The aircraft cannot avoid obstruction during Failsafe RTH if Forward Vision System is disabled. It is important to set a suitable Failsafe altitude before each flight. Launch the DJI GO app, enter “Camera” and tap to set the Failsafe Altitude. - Page 14 Smart RTH Use the RTH button on the remote controller or tap the RTH button in the DJI GO app and follow the on- screen instructions when GPS is available to initiate Smart RTH. The aircraft status indicator will blink to display the current status.
- Page 15 Home. When current terrain matches home point terrain, the Mavic will start landing immediately to achieve precision landing. The DJI GO app will show a terrain feature mismatch prompt if matching fails. Precision Landing performance is subject to the following conditions: a.
- Page 16 The aircraft cannot avoid obstructions during RTH when the Forward Vision System is disabled. Therefore, it is important to set a suitable Failsafe altitude before each flight. Launch the DJI GO app and enter “Camera” and tap set the Failsafe altitude.
-
Page 17: Tapfly
Then follow the steps below to use TapFly: 1. Take off and ensure the aircraft is flying at least 9ft (3m) above the ground. 3 meters SPORT 2. Launch the DJI GO app and tap , then tap , read and understand the prompts. P-GPS... - Page 18 Mavic Pro User Manual 3. Tap once on the target direction and wait for the icon to appear. Tap again to confirm the selection and the aircraft will fly in that direction. READY TO GO (GPS) P-GPS 09:29 H 10.0M 10.0...
-
Page 19: Activetrack
ActiveTrack allows you to mark and track a moving object on your mobile device screen. The aircraft will automatically avoid obstacles in its flight path. No external tracking device is required. The Mavic Pro can automatically identify and trace bikes and other vehicles, people and animals, and use different tracking strategies for each. - Page 20 Use the roll stick on the remote controller or can be used to maneuver the on the remote control to circle the slider in DJI GO to circle aircraft, but yaw is disabled. Using the subject. the subject.
-
Page 21: Gesture Mode
Fly the aircraft 2 meters or higher above the ground then move in front of the camera to be recognized. Front LED Indicators will blink red rapidly if the Mavic Pro fails to recognize a subject. Enabling GPS on your phone will allow the Mavic to follow with more accuracy while flying in Gesture Mode. -
Page 22: Tripod Mode
Tripod Mode Tap the icon in the DJI GO app to enable Tripod Mode. In Tripod Mode, the maximum flight speed is limited to 2.2 mph (3.6 kph) and the braking distance is reduced to 3.2 ft (1 m). Responsiveness to stick movements is also reduced for smoother more controlled movements. - Page 23 Forward and Downward Vision Systems cameras installed on the aircraft are calibrated on delivery. However these cameras are vulnerable to excessive impact and will require occasional calibration via DJI Assistant 2 or the DJI GO app. Follow the steps below to calibrate the camera. Point the aircraft toward the screen...
- Page 24 Mavic Pro User Manual Assisted Braking from Forward Vision System Powered by the Forward Vision System, the aircraft is able to actively brake when obstacles are detected in front. Forward and Downward Vision Systems work best when lighting is adequate and the obstacle is clearly marked or textured.
-
Page 25: Flight Recorder
PC through the Micro USB port. Attaching and Detaching the Propellers Use only DJI approved propellers with your Mavic Pro. White ring and unmarked propellers indicate where they should be attached and in which direction whey should spin. -
Page 26: Intelligent Flight Battery
Intelligent Flight Battery Introduction The DJI Intelligent Flight Battery has a capacity of 3830 mAh, a voltage of 11.4 V, and a smart charge/ discharge functionality. It should only be charged using an appropriate DJI approved charger. Intelligent Flight Battery Charger The Intelligent Flight Battery must be fully charged before using it for the first time. - Page 27 2. Batteries cannot be used in extremely low temperature (< -10°C) environments. It is recommended to fully charged the battery when taking off in temperature between -10°C and 5°C. 3. End the flight as soon as the DJI GO app displays the “Low Battery Level Warning” in low temperature environments.
- Page 28 6. The charger will stop charging the battery if the battery cell’s temperature is not within the operating range (5°C to 40°C). Always turn off the battery before inserting it or removing it from the Mavic Pro. Never insert or remove a battery when it is turned on.
- Page 29 DJI does not take any responsibility for damage caused by third-party chargers. How to discharge the Intelligent Flight Battery before transport the batteries for long trip: Fly the Mavic Pro outdoors until there is less than 20% of power left, or until the battery can no longer be turned on.
- Page 30 Remote Controller This section describes the features of the remote controller and includes instructions for controlling the aircraft and the camera. © 2016 DJI All Rights Reserved.
-
Page 31: Remote Controller
Using the Remote Controller Turning the Remote Controller On and Off The Mavic Pro remote controller is powered by a 2S rechargeable battery that has a capacity of 2970 mAh. Follow the steps below to turn on your remote controller: 1. - Page 32 Mavic Pro User Manual Power Outlet Charger Controlling the Camera Shoot videos/photos, and adjust camera settings via the Shutter Button, Record Button, and Camera Set- tings Dial on the remote controller. 1. Camera Settings Dial Turn the dial to adjust camera settings such as ISO, shutter speed, without letting go of the remote controller.
- Page 33 Moving the right stick up and down changes the aircraft’s forward and backward pitch. Push the stick up to fly forward and down to fly backward. Mavic Pro will hover in place if the stick is centered. Push the stick further away from the center position for a larger pitch angle (maximum 30˚) and faster flight.
- Page 34 Maximum speed is increased to 40mph (65kph). Forward Vision System is disabled in this mode. The Flight Mode is locked in P Mode by default, regardless of switch position. To switch flight modes, go to Camera view in the DJI GO app, tap and enable “Multiple Flight Modes.” After enabling multiple flight modes, toggle the switch to P and then to S to fly in Sport Mode.
- Page 35 Mavic Pro User Manual Optimal Transmission Range The transmission signal between the aircraft and the remote controller is most reliable within the area that depicted below: Optimal Transmission Range strong weak Ensure that the aircraft is flying within the optimal transmission zone. To achieve the best transmission performance, maintain the appropriate relationship between the operator and the aircraft.
-
Page 36: Linking The Remote Controller
Mavic Pro User Manual Linking the Remote Controller The remote controller is linked to your aircraft before delivery. Linking is only required when using a new remote controller for the first time. Follow these steps to link a new remote controller: 1. - Page 37 Camera and Gimbal This section provides the technical specifications of the camera and explains the gimbal’s operation modes. © 2016 DJI All Rights Reserved.
-
Page 38: Camera And Gimbal
To ensure the stability of the camera system, single video recordings are capped at 30 minutes. Camera Data Port Turn on the Mavic Pro and connect a USB cable to the Micro USB Port to download photos and videos to your computer. -
Page 39: Gimbal
-90° Use the gimbal dial on the remote controller to control camera tilt, or go to Camera View in the DJI GO app, tap and hold on the screen until a blue circle appears, then drag the circle to control the camera’s tilt. - Page 40 DJI GO App This section introduces the main functions of the DJI GO app. © 2016 DJI All Rights Reserved.
-
Page 41: Dji Go App
DJI GO App The DJI GO app is a mobile application designed specifically for DJI equipment. Use this app to control the gimbal, camera, and other aircraft functions. The app features Equipment, Editor, SkyPixel and Me sections, which are used for configuring your aircraft, editing and sharing your photos and videos with others. - Page 42 Mavic Pro User Manual 1. System Status : This icon indicates aircraft flight status and various warning messages. READY TO GO (GPS) 2. Obstacles Detection Status : Red bars are displayed when obstacles are close to the aircraft. Orange bars are displayed when obstacles are in detection range.
- Page 43 Mavic Pro User Manual 13. Auto Exposure Lock : Tap to lock the exposure value. 14. Gimbal Slider : Displays the pitch of the gimbal. 15. Photo/Video Button : Tap to switch between photo and video recording modes. 16. Shoot / Record Button : Tap to start shooting photos or recording video.
- Page 44 Mavic Pro User Manual Slide left in the Camera view to enter the menu shown below. READY TO GO (GPS) P-GPS 09:29 Portrait/Landscape Gimbal up/down Home Point: Aircraft Home Point: Me Adjust screen brightness H 10.0M 10.0 VS 2.0M/S VPS 2.0M Portrait/Landscape Switch to Portrait mode by tapping the icon.
- Page 45 Mavic Pro User Manual Launch the DJI GO app and tap the icon on the top right of your screen, then scan the Wi-Fi QR Code on the front arm to start connection. Note that this feature is available on Android devices.
-
Page 46: Editor
SkyPixel View and share the photos and videos in the SkyPixel page. If you already have a DJI account, you will be able to participate in forum discussions, and share your creation with the community. © 2016 DJI All Rights Reserved. - Page 47 Flight This section describes safe flight practices and flight restrictions. © 2016 DJI All Rights Reserved.
-
Page 48: Flight
Maximum flight altitude & Radius Limits Maximum flight altitude and radius limits may be changed in the DJI GO app. Be aware that the maximum flight altitude cannot exceed 1640 feet (500 meters). In accordance with these settings, your Mavic Pro... -
Page 49: Preflight Checklist
Fly the aircraft only within your line of sight. No-Fly Zones All No-Fly Zones are listed on the DJI official website at http://www.dji.com/flysafe/no-fly. No-Fly Zones are divided into Airports and Restricted Areas. Airports include major airports and flying fields where manned aircraft operate at low altitudes. -
Page 50: Calibrating The Compass
Mavic Pro User Manual Calibrating the Compass Only calibrate the compass when the DJI GO app or the status indicator prompt you to do so. Observe the following rules when calibrating your compass: DO NOT calibrate your compass where there is a chance of strong magnetic interference, such as magnetite, parking structures, and steel reinforcements underground. -
Page 51: Auto Takeoff And Auto Landing
3. a. When Landing Protection determines that the ground is suitable for landing, the Mavic Pro will land gently. b. If Landing Protection determines that the ground is not suitable for landing, the Mavic Pro will hover and wait for pilot confirmation. -
Page 52: Starting/Stopping The Motors
Stopping the Motors There are two methods to stop the motors. Method 1: When Mavic Pro has landed, push the left stick down , then conduct the same CSC that was used to start the motors, as described above . Motors will stop immediately. Release both sticks once motors stop. - Page 53 Video Suggestions and Tips 1. Go through the full pre-flight checklist before each flight. 2. Select the desired gimbal operation mode in the DJI GO app. 3. Only shoot video when flying in P-mode. 4. Always fly in good weather and avoid flying in rain or heavy wind.
- Page 54 Appendix © 2016 DJI All Rights Reserved.
-
Page 55: Appendix
100 - 3200 (video), 100 - 1600 (photo) Electronic Shutter Speed 8 s to 1/8000 s Max Image Size 4000×3000 Single shot Burst shooting: 3/5/7 frames Auto Exposure Bracketing (AEB): Still Photography Modes 3/5 bracketed frames at 0.7EV Bias Interval © 2016 DJI All Rights Reserved. -
Page 56: Firmware Updates
Use DJI Assistant 2 or DJI GO app to update aircraft and remote controller. Using the DJI GO App Connect the remote controller and the DJI GO app, You will be reminded if a new firmware upgrade is available. To start upgrading, connect your mobile device to the Internet and follow the on-screen instructions. -
Page 57: Intelligent Flight Mode
1. Connect the aircraft to a computer with a USB cable. 2. Launch DJI Assistant 2 and login with your DJI account. 3. Select “Mavic Pro” and click on the “Firmware Updates” on the left panel. 4. Select the firmware version that you wish to update. -
Page 58: Remote Controller Lcd Screen Menu Information
Compass Error. See DJI GO app for more information. BATTERY ERR+CHECK APP Battery Error. See DJI GO app for more information. SD ERR+CHECK APP Micro SD Card Error. See DJI GO app for more information. CALIBRATING IMU Calibrating/Did not restart aircraft after calibration is complete. -
Page 59: After-Sales Information
WHEEL ERR+RE-CTR WHEL Left Dial on the remote controller is not centered. Re-center it. STICK ERR Control stick error. Calibrate the control sticks in the DJI GO app. MECH ERR Remote Controller Error. Calibrate the remote controller in the DJI GO app. If this problem persists, contact DJI support. - Page 60 Mavic Pro User Manual pursuant to part 15 of the FCC Rules. These limits are designed to provide reasonable protection against harmful interference in a residential installation. This equipment generates uses and can radiate radio frequency energy and, if not installed and used in accordance with the instructions, may cause harmful interference to radio communications.
- Page 61 Mavic Pro User Manual © 2016 DJI All Rights Reserved.
- Page 62 This content is subject to change. Download the latest version from http://www.dji.com/mavic If you have any questions about this document, please contact DJI by sending a message to DocSupport@dji.com. MAVIC is a trademark of DJI. Copyright © 2016 DJI All Rights Reserved.
Need help?
Do you have a question about the Mavic pro and is the answer not in the manual?
Questions and answers
hi my mavric pro needs an up date what is the procedure
To update the DJI Mavic Pro firmware:
1. Connect your phone or tablet to Wi-Fi or mobile data.
2. Open the DJI GO 4 app.
3. Power on the drone and the remote controller, and connect them to the app.
4. Go to the Equipment tab in the app.
5. If an update is available, you’ll see a notification at the top. Tap the information icon to view update details.
6. Ensure the remote controller battery is above 40%.
7. Click the update button to begin. The process will start automatically and takes about 30 minutes.
8. Do not power off the drone or controller during the update.
9. If you have multiple batteries, repeat the process with each one to ensure firmware consistency.
This answer is automatically generated
What is the weight? thank you