
Summary of Contents for AOR ard300
- Page 1 ® MULTI-DIGITAL VOICE DECODER ARD300 User Manual AOR Ltd. Authority On Radio Communications...
-
Page 3: Table Of Contents
4.Panels ....................... 5 Front panel ..................... 5 Rear panel....................6 5.Connect ARD300 to AR8600MK2 ............. 7 Known issues with the AR8600MK2 IF signal output ......8 How to enable 10.7MHz IF output in all modes ........9 How to change the IF output from 10.7MHz to 45.05MHz ....10 6.Connect ARD300 to AR5000/5000A/5000A+3 ........ -
Page 4: Introduction
This is where ARD300 comes in place! ARD300 is a digital voice decoder to be connected to a radio receiver’s I.F output. This powerful device offers many great features as follows:... -
Page 5: To Read Before Use
For power sharing, when the receiver used is either AR8600MK2, or AR2300/5001D/6000. 2. DC cable (open-end) 1 Use this cable to connect ARD300 to your own power supply; in case ARD300 cannot share power with the receiver. 1 3. IF cable 1... -
Page 6: Power Supply
However, when used in combination with the AOR AR8600MK2、AR2300、AR5001D、 AR6000 receivers, the supplied DC cable allows ARD300 to share the receiver’s AC adapter. In that case ARD300 is able to detect the receiver’s ON/OFF state and switches itself ON whenever the receiver is ON. -
Page 7: Digital Voice Mode Compatibility Chart
The D-Star call-sign might sometimes not appear on the LCD screen. The most likely reasons are: -ARD300 did not receive the header at the beginning of each transmission, as the header contains the call-sign data. This is likely to happen during receiver SCAN or SEARCH. -
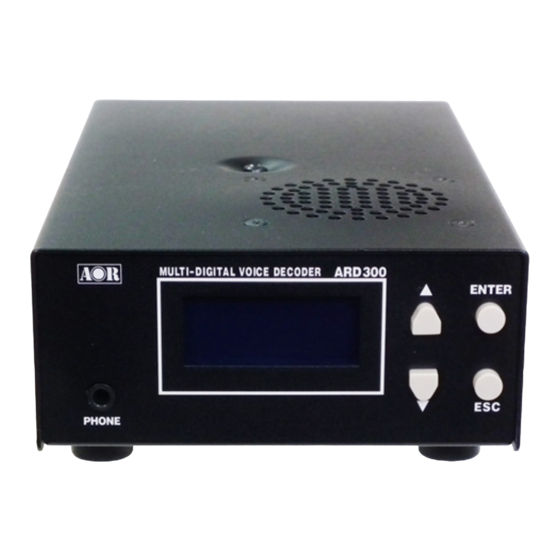
Page 8: Panels
4. Panels Front panel ② ③ ⑤ ⑥ ① ④ Φ3.5mm stereo jack for earphones and head phones. PHONE socket ① ① ① ① Left & right channels identical. LCD display Alphanumeric display, 8 characters x 2 lines ② ② ②... -
Page 9: Rear Panel
SERVICE D-SUB 9pin, male. ④ ④ ④ ④ Service socket For factory maintenance and firmware upgrade. Used to power the receiver when ARD300 and the DC12V OUT receiver share the same power source. (12V@2A ⑤ ⑤ ⑤ ⑤ Power output max.) -
Page 10: Connect Ard300 To Ar8600Mk2
EXT SP socket and the SP IN socket of ARD300. At last, plug in the AC adapter’s DC plug into the DC12V IN socket of ARD300. •... -
Page 11: Known Issues With The Ar8600Mk2 If Signal Output
IF signal peak. Nevertheless it has been noticed that in some cases of a strong signal close to the tuned frequency, ARD300 might wrongly lock to the adjacent signal rather than on the IF center signal, and therefore miss the digital signal to decode. -
Page 12: How To Enable 10.7Mhz If Output In All Modes
Only apply the following hardware modification if you have some experience in soldering on a PCB. Proceed at your own risk! AOR should not be held responsible for any receiver damage. If you don’t feel confident, it is strongly advised to get help from a qualified technician. -
Page 13: How To Change The If Output From 10.7Mhz To 45.05Mhz
Only apply the following hardware modification if you have some experience in opening a receiver and manipulating a coaxial cable. Proceed at your own risk! AOR should not be held responsible for any receiver damage. If you don’t feel confident, it is strongly advised to get help from a qualified technician. -
Page 14: Connect Ard300 To Ar5000/5000A/5000A+3
Each unit needs its own power source; therefore you will need to supply the power source for ARD300. If you happen to own the AR8600MK2 receiver, you can use its AC adapter AA8600. (The AA2300 adapter of AR2300/5001D/6000 can be used as well) Connect ARD300 to your power supply by using the supplied “open-end”... -
Page 15: Connect Ard300 To Ar2300
SP OUT socket and the SP IN socket of ARD300. At last, plug in the AC adapter’s DC plug into the DC12V IN socket of ARD300. •... -
Page 16: Connect Ard300 To Ar5001D/6000
SP OUT socket and the SP IN socket of ARD300. At last, plug in the AC adapter’s DC plug into the DC12V IN socket of ARD300. •... -
Page 17: Connect To Non-Aor Receivers
The quality of the digital voice decoding does depend on the receiver’s sensitivity. AOR support is limited to use with AOR receivers. The supplied IF, DC and audio cables are designed to be used with AOR receivers. If your non-AOR receiver is equipped with sockets of different types, the supplied AOR cables will be incompatible. -
Page 18: Receiver Menu Setup Of Ard300
10. Receiver menu setup of ARD300 1)The radio receiver is switched OFF. 2)Switch ARD300 ON. The switch is located on the rear panel. The firmware version will be displayed. ARD300 Ver . 309F The start-up procedure is complete when a white dot is flashing slowly at the lower right corner. -
Page 19: Volume Control
The LCD will display “NOW WRITING” while saving your settings. 5)The saving procedure is complete when a white dot is flashing slowly at the lower right corner. >AR5001D Volume control Press the ▲ key to increase, or ▼ key to decrease the decoded digital sound volume. Volume adjustable from 0 to 9. -
Page 20: Digital Mode Selection Menu
(Digital Private Mobile Radio) While AUTO is the most convenient mode when you don’t know what kind of signals to expect, it is the slowest mode since ARD300 needs some time to analyze the signal and decide which mode to apply. - Page 21 Presetting a particular mode can be interesting to shorten that detection time, providing that you know in advance what kind of digital format will be received. If you manually selected a specific digital format to be decoded, its name will be displayed, as follows (example for Digital CR mode): –...
-
Page 22: Decoding D-Star
When scanning the listed repeater frequencies, we definitively advise that you manually select “D-STAR” in the mode selection menu of ARD300. When a D-STAR signal is being decoded, ARD300 does display the call-sign name and other user information as follows. The information appears in a looped cycle until the next transmission. - Page 23 Going back to Fr display and looping the same information until the next transmission. Whenever a new transmission is detected, ARD300 will first complete its current display loop cycle, before starting a new display cycle with information of the new transmission.
-
Page 24: Encryption Code Setting (Digital Cr Only)
This standard exists in both unencrypted and encrypted modes, although there are only 32767 different encryption codes, from 00001 to 32767. If you know the encryption code, it is possible to set this code into ARD300 to allow decoding of the encrypted Digital CR signal. - Page 25 ⑤ Validate your choice with ENTER. The star has now become an arrow again. To change the other digits, repeat steps ② to ⑤. When you have finished entering the entire code, press ESC.
-
Page 26: Firmware Update
14. Firmware update Whenever a new firmware is released, the new firmware file and the update utility will be made available on our website at http://www.aorja.com/support/software.html A device RESET is necessary after performing a firmware update. 15. Device RESET If you need to reset the device to its default settings, proceed as follows: Power ON the device while pressing and holding the ENTER and ESC keys for about 5 seconds, until the firmware version is displayed. -
Page 27: Specifications
V/D mode only. (*3) Japanese “Digital Convenience Radio” standard (351MHz). AMBE+2 system only. (*4) 6.25kHz mode only. (*5) dPMR446 and Tier1 mode only. (*6) Non-encrypted, conventional mode only. AOR is a member of the dPMR (Digital Private Mobile Radio) Association. - Page 28 ® AOR Ltd. 2-6-4 Misuji, Taito-ku, 111-0055 Tokyo, Japan www.aorja.com Authority On Radio Communications AOR is a member of the dPMR (Digital Private Mobile Radio) Association. ©AOR, LTD. All rights reserved. Nov.12, 2013...
Need help?
Do you have a question about the ard300 and is the answer not in the manual?
Questions and answers