Table of Contents
Advertisement
Advertisement
Table of Contents

Related Manuals for DVTEL Ariel CM-3011


Summary of Contents for DVTEL Ariel CM-3011
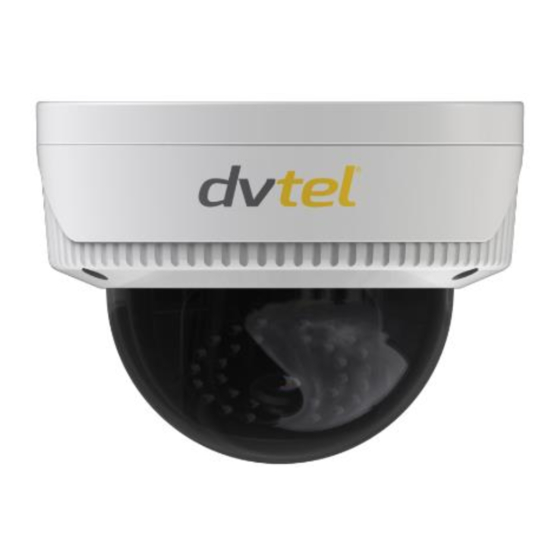
- Page 1 DVTEL INC. 65 Challenger Road Ridgefield Park, NJ 07660 Ariel CM-3011 Mini-Dome Camera User and Installation Guide The contents of this guide may not be reproduced or reprinted in whole or in part without the express written permission of DVTEL, INC.
-
Page 3: Table Of Contents
Ariel CM-3011 Mini-Dome Camera User and Installation Guide Table of Contents Document Information ..................... v Introduction ........................1 Package Contents ......................1 System Requirements ..................... 2 Hardware Description ..................... 3 Camera Dimensions ....................... 4 Installing and Connecting the Camera ................5 Pre-Installation Checklist .................... - Page 4 Ariel CM-3011 Mini-Dome Camera User and Installation Guide List of Figures Figure 1: CM-3011 Dome Camera ......................1 Figure 2: CM-3011 Components ........................3 Figure 3: Drill Template ..........................6 Figure 4: Remove the Lower Dome ......................6 Figure 5: Fix the Mounting Base ........................7 Figure 6: Side Opening in Mounting Base ....................7...
- Page 5 Document Information Figure 56: Modify IP Address Dialog Box ....................55 Figure 57: Events Tab ..........................55 Figure 58: Motion Detection Screen ......................56 Figure 59: Motion Detection Screen – Area Settings ................... 57 Figure 60: Edit Schedule Time Screen ....................... 58 Figure 61: Tamper-Proof Screen ......................
-
Page 6: Revision History
Ariel CM-3011 Mini-Dome Camera User and Installation Guide Revision History Version Date Author Comments January 2, 2014 Alan Singer First release. February 20, 2014 Alan Singer Updated look and feel. March 18, 2014 Alan Singer Deleted installation message. April 8, 2014 Alan Singer Updated section 6.4.2.5 (Security). -
Page 7: Document Information
DVTEL, Inc. and its agents make no guarantees or warranties to the suitability for the users’ intended use. DVTEL, Inc. accepts no responsibility for improper use or incomplete security and safety measures. - Page 8 Failure to follow proper procedures may cause permanent damage to the unit and may void the product warranty. Only qualified trained personnel should service and repair this equipment. DVTEL assumes no responsibility for problems caused by unauthorized repair or maintenance.
- Page 9 Document Information To help ensure safety and to help reduce risk of injury or damage, observe the following: Warning: 1. The camera cover is an essential part of the product. Do not open or remove it. 2. Never operate the camera without the cover in place. Operating the camera without the cover poses a risk of fire and shock hazards 3.
- Page 10 Ariel CM-3011 Mini-Dome Camera User and Installation Guide Electrical Safety Notice and Warnings Warning: 1. Read the installation instructions before you connect the unit to a power source 2. Electrical safety should always be observed. All electrical connections must be performed by a certified electrician.
- Page 11 Document Information Minimizing EMI and RFI When wires run for a significant distance in an electromagnetic field, electromagnetic interference (EMI) can occur. Strong EMI (e.g. lightning or radio transmitters) can destroy the units and can pose an electrical hazard by conducting power through lines and into the system. Poor quality or worn wiring can result in radio frequency interference (RFI).
-
Page 13: Introduction
Introduction Introduction This User and Installation Guide is intended to help you physically install, configure settings for, and operate the CM-3011 indoor/outdoor, mini-dome IP camera. The unit is a 1.3 megapixel day/night camera that supports two HD 720p streams with H.264 or MJPEG compression and includes an IR cut filter. A choice of lenses is available. -
Page 14: System Requirements
Ariel CM-3011 Mini-Dome Camera User and Installation Guide System Requirements Item Minimum System Requirement Personal Computer Intel® Pentium® IV, 3GHz or higher with minimum 1GB RAM Monitor display with minimum 1024 x 768 resolution Operating System Microsoft Windows XP SP1 and above, Windows 7... -
Page 15: Hardware Description
Hardware Description Hardware Description Following is an exploded view illustration of the CM-3011 dome camera. Figure 2: CM-3011 Components Number Description Mounting base Horizontal stand Vertical stand Lower dome Cables Infrared lamp plate Lens Black liner Safety rope... -
Page 16: Camera Dimensions
Ariel CM-3011 Mini-Dome Camera User and Installation Guide 4.1 Camera Dimensions Following are the CM-3011 camera’s dimensions. -
Page 17: Installing And Connecting The Camera
Installing and Connecting the Camera Installing and Connecting the Camera This section describes how to install and connect the unit. It includes the following topics: Pre-Installation Checklist Outdoor Mounting Recommendations Mounting Instructions Powering the Camera Connecting the Camera to the Network ... -
Page 18: Mounting Instructions
Ariel CM-3011 Mini-Dome Camera User and Installation Guide 5.3 Mounting Instructions Ceiling mounting is recommended for this camera. To mount the camera in the ceiling 1. Drill the screw holes on the ceiling with the supplied drilling template. If you need to route the cables from the bottom of the camera, cut a cable hole in the ceiling. -
Page 19: Figure 5: Fix The Mounting Base
Installing and Connecting the Camera 3. Fix the mounting base on the ceiling with screws. Figure 5: Fix the Mounting Base f required, run the cables through the side opening on the side of the mounting base Figure 6: Side Opening in Mounting Base 5. -
Page 20: Powering The Camera
The camera can be powered by a 12VDC power supply or via an 802.3af PoE (Class 3) connection over the unit’s network cable. Figure 9: Power Connections The 12VDC power supply is not provided by DVTEL. The power supply should provide 12VDC +/- 10% and at least 5 watts at 1 ampere. 5.5 Connecting the Camera to the Network To view and configure the camera via a LAN, you must attach the camera via the network switch or router to the same subnet (network segment or VLAN) as the computer that manages the unit. -
Page 21: Configuring The Unit's Initial Ip Address
Installing and Connecting the Camera 5.5.1 Configuring the Unit’s Initial IP Address Use the DVTEL DNA utility to discover the unit on the network and to set the unit’s initial IP address. If the camera is managed by DVTEL’s Horizon VMS configured as a DHCP server, Horizon automatically assigns the camera an IP address. -
Page 22: Figure 12: Cm-3011 Web Interface
Ariel CM-3011 Mini-Dome Camera User and Installation Guide 6. Click Login. The CM-3011 web interface opens. Figure 12: CM-3011 Web Interface 7. Click the on-screen message to install the DVTEL plug-in. Follow the instructions. Figure 13: DVTEL Plug-in Message... -
Page 23: Figure 14: Dna Assign Ip - Use Dhcp Screen
9. Click Login. The CM-3011 web interface opens. See Figure 12: CM-3011 Web Interface (page 10). 10. Click the on-screen message to install the DVTEL plug-in. The DVTEL Plug-in message is displayed. See Figure 13: DVTEL Plug-in Message (page 10). -
Page 24: Resetting The Camera
Ariel CM-3011 Mini-Dome Camera User and Installation Guide 5.6 Resetting the Camera The camera includes a reset button, which is located above the mounting base of the camera housing. Figure 15: Reset Button To reboot the camera Press the reset button for approximately five seconds. The unit reboots. -
Page 25: Accessing The Cm-3011 Via A Web Browser
5. If you are using the system for the first time or you have uploaded a new firmware version, click the message displayed on the screen to download and install the ArielWebComponents.exe plug-in. The DVTEL Plug-in message is displayed. See Figure 13: DVTEL Plug-in Message (page 10). The Setup – Ariel Web Components screen is displayed. -
Page 26: Figure 17: Setup - Ariel Web Components Screen 2
Ariel CM-3011 Mini-Dome Camera User and Installation Guide 6. The ArielWebComponents plug-in is installed on your PC. Figure 17: Setup - Ariel Web Components Screen 2 7. Click Finish when the following screen is displayed after the installation is completed. -
Page 27: Figure 20: Live View Window
Accessing the CM-3011 via a Web Browser 9. Click Allow. The Live View window opens. Figure 20: Live View Window The following information is displayed in the top right corner of the user interface: About – Click About to display the unit’s firmware version and the Web Components ... -
Page 28: Live View
Ariel CM-3011 Mini-Dome Camera User and Installation Guide 6.1 Live View Live View mode enables you to control pan/tilt/zoom movements, set and call presets, play back video files, capture a picture, start or stop recording, view live video, and select display parameters. The following... - Page 29 Accessing the CM-3011 via a Web Browser The Live View screen includes the following areas and buttons: Item Description Navigation bar Tabs for navigating the web interface. Includes the following: Live View (page 16) Playback (page 20) (page 23) ...
-
Page 30: Recording
Ariel CM-3011 Mini-Dome Camera User and Installation Guide To switch between Live View and Full-Screen Mode 1. Double-click a Live View tile to switch to the full-screen viewing mode. 2. To switch back to Live View mode, double-click on the screen or press the ESC key on your keyboard. -
Page 31: Viewing Live Video From A Media Player
Accessing the CM-3011 via a Web Browser 6.1.3 Viewing Live Video from a Media Player The Live Video main stream and sub-stream can be viewed with a media player, such as VLC (download from http://www.videolan.org/vlc/index.html). Streams can be viewed for all channels and video encoding formats. -
Page 32: Playback
Ariel CM-3011 Mini-Dome Camera User and Installation Guide 4. Click Play. The video stream is displayed in the media player. Figure 23: VLC Media Player Screen 6.2 Playback The Playback screen is used to download and view recorded video files or captured pictures (snapshots) via the web browser. -
Page 33: Downloading And Viewing A Snapshot
Accessing the CM-3011 via a Web Browser Caution: Before using this function, make sure the network disk has been initialized for first time use. See section 6.4.3.7.3 (NAS). The Playback screen includes the following control buttons: Icon Description Play/Pause Stop playing Fast rewind Fast forward Play by single frame... -
Page 34: Downloading And Playing Video Clips
Ariel CM-3011 Mini-Dome Camera User and Installation Guide 3. Do one of the following: If you know the file name: Select a file from the list that is displayed. Click Download. If you do not know the file name: ... -
Page 35: Log
Accessing the CM-3011 via a Web Browser 5. From the toolbar, select the buttons required to perform the desired action. 6. To locate the playback point, do one of the following: Drag the progress bar to the starting point with your mouse. ... -
Page 36: Configuration
Ariel CM-3011 Mini-Dome Camera User and Installation Guide Note: Up to 100 log files can be displayed in the list. Click to save the searched log files to a local directory. 6.4 Configuration Device and client PC parameters are set from the Configuration tab. From the navigation bar, select the Configuration tab. -
Page 37: Basic Configuration
Accessing the CM-3011 via a Web Browser 2. Set the Live View parameters: Select the Protocol – Select TCP, UDP, Multicast or HTTP. TCP ensures complete delivery of the stream, but with a possible delay. UDP provides superior real-time audio and video streams over TCP, but the audio or video packets could get lost or corrupted during transmission. -
Page 38: Figure 29: Basic Information Screen
Ariel CM-3011 Mini-Dome Camera User and Installation Guide 6.4.2.1.1 Device Information From the Basic Configuration tab, select System. The Device Information screen opens. Figure 29: Basic Information Screen The Device Information screen displays the following details about the camera: ... -
Page 39: Figure 30: Time Settings Screen
Accessing the CM-3011 via a Web Browser 6.4.2.1.2 Time Settings From the Basic Configuration tab, select System > Time Settings to set the local time. The Time Settings screen is displayed. Figure 30: Time Settings Screen To configure time settings 1. -
Page 40: Figure 31: Dst Screen
Ariel CM-3011 Mini-Dome Camera User and Installation Guide c. To enable Daylight Savings Time, go to Configuration > Advanced Configuration > System >DST. The DST screen opens. Figure 31: DST Screen Select Enable DST. Set the Start Time, End Time and DST Bias for Daylight Savings Time. -
Page 41: Figure 32: Maintenance Screen
Accessing the CM-3011 via a Web Browser To perform maintenance on the unit 1. From the Basic Configuration tab, select System > Maintenance. The Maintenance screen opens. Figure 32: Maintenance Screen 2. Choose from the following actions: Click Reboot to reboot the device. The device reboots after restoring. ... -
Page 42: Figure 33: Tcp/Ip Screen
Ariel CM-3011 Mini-Dome Camera User and Installation Guide Note: The upgrade process takes 1-10 minutes. Do not disconnect the device, which reboots automatically after upgrading. 6.4.2.2 Network Tab The Network tab includes the following tabs: TCP/IP Port 6.4.2.2.1 TCP/IP Tab The TCP/IP screen is used to configure the camera’s network settings. - Page 43 Accessing the CM-3011 via a Web Browser 2. Configure the following settings: From the NIC Type drop-down menu, select one of the following options: 10M Half-dup 10M Full-dup 100M Half-dup 100M Full-dup Auto (default) Configure your IP settings. If your network uses IPv4, configure the following settings: ...
-
Page 44: Figure 34: Port Screen
Ariel CM-3011 Mini-Dome Camera User and Installation Guide 6.4.2.2.2 Port Tab The Port tab is used to configure port settings. To enter port settings 1. From the Configuration tab, select Network > Port. The Port screen opens. Figure 34: Port Screen 2. -
Page 45: Figure 35: Video Screen
Accessing the CM-3011 via a Web Browser 6.4.2.3 Video Tab The Video tab is used to configure video settings. 6.4.2.3.1 Video Settings The Video Settings screen is used to configure camera video parameters such as resolution, bitrate type, frame rate, video encoding compression type, and more. From the Configuration tab, select Basic Configuration >... - Page 46 Ariel CM-3011 Mini-Dome Camera User and Installation Guide 3. From the Bitrate Type drop-down list, select Variable or Constant. The default is Variable. Constant Bit Rate (CBR) is used for setting a constant, maximum bit rate. CBR is not optimal for storage or quality, because it does not allocate enough data for complex sections (which results in degraded quality), and wastes data on simple sections.
-
Page 47: Figure 36: Display Settings Screen
Accessing the CM-3011 via a Web Browser 6.4.2.4 Image The Image screen enables you to configure basic image settings. To configure image settings 1. From the Configuration tab, select Basic Configuration > Image. The Display Settings screen opens. Figure 36: Display Settings Screen 2. - Page 48 Ariel CM-3011 Mini-Dome Camera User and Installation Guide Day/Night Switch ̶ From the drop-down menu, select one of the following options: Day, Night, Auto, or Schedule. The default is Auto. Sensitivity ̶ From the drop-down menu, select one of the following options: High, Normal, or Low.
-
Page 49: Figure 37: Basic > Security > User Screen
Accessing the CM-3011 via a Web Browser 6.4.2.5 Security The User tab displays and enables you to modify user credentials and permissions. It also displays camera configuration settings. From the Configuration tab, select the Basic Configuration > Security screen. The User screen is displayed. Figure 37: Basic >... -
Page 50: Advanced Configuration
Ariel CM-3011 Mini-Dome Camera User and Installation Guide To modify a user’s credential 1. Select the user. 2. Click Modify. The Modify user screen is displayed. Figure 39: Modify User Screen 3. In the User Name text box, enter the new user name. -
Page 51: Figure 40: Dst Screen
Accessing the CM-3011 via a Web Browser 6.4.3.1 System Tab Selecting Configuration > Advanced Configuration > System opens the System tab, which includes the following screens: Device Information Time Settings Maintenance 6.4.3.1.1 Device Information This screen is the same screen accessed in the Basic Configuration > System section. For details about this screen, see section 6.4.2.1.1, Device Information (page 26). -
Page 52: Figure 41: Ddns Screen
Ariel CM-3011 Mini-Dome Camera User and Installation Guide 6.4.3.2 Network Selecting Configuration > Advanced Configuration > System opens the System tab, which includes the following screens: TCP/IP Port DDNS PPPoE SNMP 802.1X ... - Page 53 Accessing the CM-3011 via a Web Browser 2. Check Enable DDNS to use this service. 3. From the DDNS Type drop-down list, select one of the following: IPServer In the Server Address text box, enter the IP address of your IP server (e.g., members.dyndns.org).
-
Page 54: Figure 42: Pppoe Screen
Ariel CM-3011 Mini-Dome Camera User and Installation Guide 6.4.3.2.4 PPPoE The encoder can access the network via a DSL modem using the Point-to-Point Protocol over Ethernet (PPPoE). To configure PPPoE settings 1. From the Network tab, select PPPoE. The PPPoE screen opens. -
Page 55: Figure 43: Snmp Screen
Accessing the CM-3011 via a Web Browser 6.4.3.2.5 SNMP To configure SNMP settings 1. From the Network tab, select SNMP. The SNMP screen opens. Figure 43: SNMP Screen... - Page 56 Ariel CM-3011 Mini-Dome Camera User and Installation Guide 2. Enter the following settings For networks using SNMPv1 and SNMPv2c: Check Enable SNMPv1 or Enable SNMP v2c for the SNMP version used on your network. ii. In the Write SNMP Community text box, verify that the name is synchronized with the SNMP manager.
-
Page 57: Figure 44: 802.1X Screen
Accessing the CM-3011 via a Web Browser x. Select the Authentication Algorithm (MD5 or SHA). xi. Enter the Authentication Password in the text box. xii. Select the Private-key Algorithm (DES or AES). xiii. Enter the Private-key password in the text box. Note: HTTPS must be enabled if your network uses SNMPv3. -
Page 58: Figure 45: Qos Screen
Ariel CM-3011 Mini-Dome Camera User and Installation Guide 6.4.3.2.7 QoS QoS (Quality of Service) helps to solve network delay and network congestion by configuring the priority in which data is sent. A QoS-aware network can thus allow critical flows to be served before flows with lower priority. -
Page 59: Figure 46: Ftp Screen
Accessing the CM-3011 via a Web Browser 6.4.3.2.8 FTP The File Transfer Protocol (FTP) can be used for uploading captured pictures and sending them via the FTP server. To configure FTP settings 1. From the Network tab, select FTP. The FTP screen opens. Figure 46: FTP Screen 2. -
Page 60: Figure 47: Upnp Screen
Ariel CM-3011 Mini-Dome Camera User and Installation Guide 4. Select the Upload Picture checkbox to upload a captured picture to the FTP server. Note: To upload captured pictures to an FTP server, you must enable an Event-Triggered snapshot. See Snapshot (page 64). -
Page 61: Figure 48: Osd Display Screen
Accessing the CM-3011 via a Web Browser 6. Use the following default port addresses or change them as required: HTTP – 80 RTSP – 554 HTTP – 443 SDK – 8000 (used by client software applications) 7. - Page 62 Ariel CM-3011 Mini-Dome Camera User and Installation Guide 2. Check Display Name to display the assigned camera name. 3. Check Display Date to display the current date. 4. Check Display Week to display the current week. 5. In the Camera Name text box enter a friendly name for the camera.
-
Page 63: Figure 49: Text Overlay Screen
Accessing the CM-3011 via a Web Browser 6.4.3.4.3 Text Overlay The Text Overlay function enables you to write text for up to four overlays in the On-Screen Display (OSD). Use the mouse to drag the text overlay to the desired location on the screen. To activate the Text Overlay function 1. -
Page 64: Figure 51: Rtsp Authentication Screen
Ariel CM-3011 Mini-Dome Camera User and Installation Guide To set a privacy mask 1. From the Image tab, select Privacy Mask. The Privacy Mask screen opens. 2. Check Enable Privacy Mask. 3. To create a privacy mask, click Draw Area. -
Page 65: Figure 52: Anonymous Visit Screen
Accessing the CM-3011 via a Web Browser 2. From the drop-down list in the Authentication text box, select basic or disable to enable or disable the RTSP authentication. Note: If you disable the RTSP authentication, the video stream is unsecured and anyone can view it via the RTSP protocol. -
Page 66: Figure 54: Ip Address Filter Screen
Ariel CM-3011 Mini-Dome Camera User and Installation Guide 6.4.3.5.4 IP Address Filter The IP address filter enables access control. To filter access to the camera by IP address 1. From the Security tab, select IP Address Filter. The IP Address Filter screen opens. -
Page 67: Figure 56: Modify Ip Address Dialog Box
Accessing the CM-3011 via a Web Browser To modify an IP address 1. Select the IP address in the table. 2. Click Modify to change the IP address. The Modify IP Address dialog box opens. Figure 56: Modify IP Address Dialog Box 3. -
Page 68: Figure 58: Motion Detection Screen
Ariel CM-3011 Mini-Dome Camera User and Installation Guide 6.4.3.6.1 Motion Detection Motion detection is a function that automatically records video and sends alarms related to motion that has been detected in the surveillance scene. To configure motion detection settings 1. From the Events tab, select Motion Detection. The Motion Detection screen opens. -
Page 69: Figure 59: Motion Detection Screen - Area Settings
Accessing the CM-3011 via a Web Browser To configure motion detection area settings 1. In the Area Settings section, click Draw Area. 2. Drag the mouse over a zone in the Live Video image. Repeat as necessary. Figure 59: Motion Detection Screen – Area Settings Note: 1. -
Page 70: Figure 60: Edit Schedule Time Screen
Ariel CM-3011 Mini-Dome Camera User and Installation Guide To set the motion detection arming schedule 1. In the Arming Schedule section, click Edit. The Edit Schedule Time screen opens. Figure 60: Edit Schedule Time Screen 2. Do the following: Select the day of the week to configure scheduled recording. -
Page 71: Figure 61: Tamper-Proof Screen
Accessing the CM-3011 via a Web Browser 6.4.3.6.2 Tamper-proof The Tamper-proof function enables you to create an alarm to notify of potential camera tampering. To enable the Tamper-proof function 1. From the Events tab, select Tamper-proof. The Tamper-proof screen opens. Figure 61: Tamper-Proof Screen 2. -
Page 72: Figure 62: Tamper-Proof Zone On Screen
Ariel CM-3011 Mini-Dome Camera User and Installation Guide To create a tamper-proof zone 1. In the Area Settings section, click Draw Area. 2. Drag the mouse over a zone in the live video image. The zone appears on the screen. -
Page 73: Figure 63: Edit Schedule Time Screen
Accessing the CM-3011 via a Web Browser To create a tamper-proof alarm schedule 1. Click Edit. The Edit Schedule Time screen opens. Figure 63: Edit Schedule Time Screen 2. To set the day and time, do the following: Select the day of the week to schedule the alarm. Set the Start Time and End Time for each period. -
Page 74: Figure 64: Exception Screen
Ariel CM-3011 Mini-Dome Camera User and Installation Guide To set an exception action 1. From the Events tab, select Exception. The Exception screen opens: Figure 64: Exception Screen 2. From the Exception Type drop-down list, select one of the following options: HDD Full –... -
Page 75: Figure 65: Email Screen
Accessing the CM-3011 via a Web Browser To configure Email settings 1. From the Events tab, select Email. The Email screen opens. Figure 65: Email Screen 2. In the Sender section, enter the following information: In the Sender text box, enter the name of the sender. In the Sender’s Address text box, enter the Email address of the sender. - Page 76 Ariel CM-3011 Mini-Dome Camera User and Installation Guide 3. Do one of the following: If your mail server requires authentication to login, check Authentication. In the User Name text box, enter the user name assigned in the mail server.
-
Page 77: Figure 66: Snapshot Screen
Accessing the CM-3011 via a Web Browser To create a snapshot 1. From the Events tab, select Snapshot. The Snapshot screen opens. Figure 66: Snapshot Screen 2. In the Timing section, do the following: To enable the continuous taking of snapshots, select Enable Timing Snapshot. By default, JPEG is displayed in the Format field and 704*576 (PAL) or 704*480 (NTSC) is displayed in the Resolution field. - Page 78 Ariel CM-3011 Mini-Dome Camera User and Installation Guide 3. In the Event-Triggered section, enter the following information: Select Enable Event-Triggered Snapshot. Verify that the format is JPEG. Verify that the resolution is 704*576 (PAL) or 704*480 (NTSC). From the Quality drop-down list, select one of the following levels: ...
-
Page 79: Figure 67: Record Schedule Screen
Accessing the CM-3011 via a Web Browser 6.4.3.7 Storage Selecting Configuration > Advanced Configuration > Storage opens the Storage tab, which includes the following screens: Record Schedule Storage Management 6.4.3.7.1 Record Schedule The Record Schedule screen is used to configure recording or capture (snapshot) settings. Caution: Before you start, make sure that: The camera is connected to a network disk. -
Page 80: Figure 68: Edit Schedule Screen
Ariel CM-3011 Mini-Dome Camera User and Installation Guide 5. Click Edit to edit the recording schedule. The Edit Schedule screen opens. Figure 68: Edit Schedule Screen 6. Configure the following settings: Select the day of the week to configure a scheduled recording. -
Page 81: Figure 69: Storage Management Screen
Accessing the CM-3011 via a Web Browser To set a recording schedule during different time periods, check Customize. a. Set the Start Time and End Time for each period. b. From the drop-down list, select one of the following event types: Normal, Motion Detection, Alarm, Motion | Alarm, or Motion &... -
Page 82: Figure 72: Nas Screen
Ariel CM-3011 Mini-Dome Camera User and Installation Guide 5. From the Property drop-down list, select one of the following for the storage unit: Read-only Redundancy 6. If you want to initialize all units, check Select All. 7. Click Set. The changes are saved. -
Page 83: Appendix
Appendix Appendix The Appendix includes the following sections: Technical Specifications (page 72) Network Settings (page 74) Maximum Video Cable Length (page 75) -
Page 84: Technical Specifications
Ariel CM-3011 Mini-Dome Camera User and Installation Guide Technical Specifications Following are the CM-3011 technical specifications: Camera Image Sensor 1/3” Progressive Scan CMOS Effective Pixels (H x V) 1280 x 960 1/25 to 1/100000 sec. (PAL) Shutter Speed 1/30 to 1/100000 sec. (NTSC) Sensitivity 0.01 lux@F1.2 (with AGC on at 0 lux and IR on) - Page 85 Appendix Network 1 x 10/100 Mbps Ethernet RJ45 interface Interface (IEEE 802.3/802.3u) PPPoE, QoS Layer3 DiffServ, IPv4/v6, TCP, UDP, IGMP, ICMP, Services and Protocols DHCP, DNS, DDNS, RTP, RTSP, NTP, SNTP, SMTP, HTTP, HTTPS, FTP, SNMPv1/v2c/v3 (MIB-II), UPnP, 802.1X Video Streaming RTSP/RTP Email, FTP, and ONVIF (by VMS) for motion detection, Event Notification...
-
Page 86: Network Settings
Ariel CM-3011 Mini-Dome Camera User and Installation Guide Network Settings The following are the network protocols and ports used by the camera: Protocol Port Usage Uploading files to the FTP server HTTP Sending commands, requests, replies and notifications Using the secure socket protocols SSL/TLS over HTTP. HTTPS HTTPS must be enabled if your network uses SNMPv3. -
Page 87: Maximum Video Cable Length
Appendix Maximum Video Cable Length Use the following table to determine maximum length for the 75Ω coaxial cable that connects the camera’s analog video output to the camera: Maximum Distance Maximum Distance Cable Type (Meters) (Feet) 3-Core RVVP 7-Core RVVP 1,230 75-2 75-3... -
Page 88: Contacting Dvtel
Mobile: +852 9479 4195 電郵: info.northasia@dvtel.com info.northasia@dvtel.com To request the latest versions of firmware and software or to download other product-related documents, visit http://www.dvtel.com/support. If you have obtained a login go to our support gateway. For assistance, email us at support@dvtel.com...
Need help?
Do you have a question about the Ariel CM-3011 and is the answer not in the manual?
Questions and answers