Table of Contents
Advertisement
Quick Links
Advertisement
Table of Contents

Subscribe to Our Youtube Channel
Related Manuals for Jarv JRV-TW800


Summary of Contents for Jarv JRV-TW800
- Page 1 JRV-TW800 FREE BLUETOOTH STEREO SPORT EARBUDS U S E R S G U I D E...
- Page 2 FEATURES • Water / Sweat resistant • True Wireless technology- No Wires! • Comfortable lightweight in-ear design with ear hooks for added support • High definition stereo sound with noise reduction • Rechargeable battery with up to 6 hours of talk / music time •...
-
Page 3: Package Contents
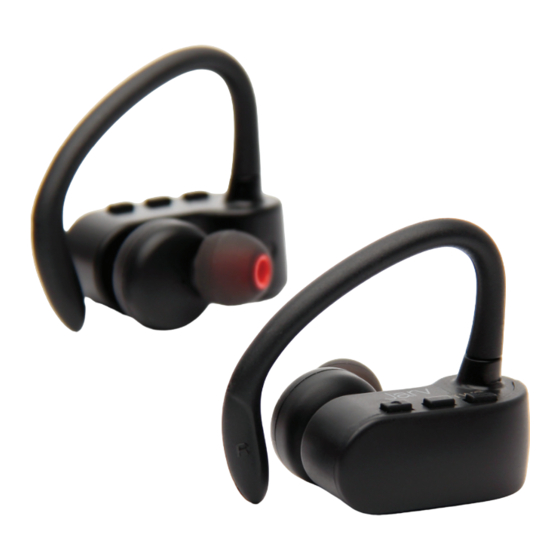
PACKAGE CONTENTS • Jarv NMotion Free Bluetooth Stereo Sport Earbuds (Left+Right) • Micro USB Y charging cable • 3 sets of ear bud tips and silicone hooks (S,M,L) • Carry case • Users guide... - Page 4 EARBUD CONTROLS Volume + / Next Track TWS Pairing (True Wireless Sound) Volume – / Multi-Function Button Previous Track Power / Play / Pause / Pair Micro USB Charging port LED Indicator...
-
Page 5: Led Indicator Guide
LED INDICATOR GUIDE INDICATOR STATUS Blue Light Power On Turns Red to power off Power Off Red Light Charging Blue Light Charging Complete Red and Blue Light flash alternately Bluetooth and TWS Pairing Flashing Red Light Low Power Blue LED flashing slowly Connected to Bluetooth Blue LED flashes every 5 seconds... -
Page 6: Getting Started
GETTING STARTED To use your Jarv NMotion Free Bluetooth Stereo Earbuds, please follow the steps below: 1. Ensure your Bluetooth Earbuds are fully charged. 2. Pair your Bluetooth Earbuds to a Bluetooth-enabled device prior to use. (See Pairing your Headset instructions) -
Page 7: Pairing Your Headset
PAIRING YOUR HEADSET Your Jarv NMotion Free Bluetooth Earbuds are True Wireless Earbuds and require that the earbuds be paired individually to your Bluetooth enabled device firstly and secondly to each other in order to achieve stereo sound from both. - Page 8 Once each earbud has successfully been paired to your device, the LED indicator will slowly flash Blue confirming your Bluetooth connection and your phone should show a connection to each of the earbuds (L+R) separately. Please note you must now Pair the earbuds to each other. PAIRING YOUR EARBUDS TO EACH OTHER FOR TRUE WIRELESS SOUND (TWS) 1.
- Page 9 POWERING ON THE HEADSET Powering On the Headset Press and hold down the Multi-Function button for 3 seconds until a blue light appears PRESS & HOLD 3 SECONDS BLUE LIGHT Powering Off the Headset Once powered on, Press and hold down the Multi-Function button for 3 seconds until a red light appears.
-
Page 10: Wearing Your Headset
WEARING YOUR HEADSET The Left / Right indicator is located on the inside of the Earbuds and on the ear hooks Because everyone’s ears are different, be sure to try all sizes of earbud tips. Only with the right size earbud tips will you enjoy a snug fit &... -
Page 11: Call Mode
CALL MODE Please note that in Call Mode only the Left OR Right earbud can be supported. Answering a Call Short Press the Multi-Function button once to accept the call, or answer the call normally via your mobile phone. Rejecting a Call Press and hold the Multi-Function button for 2 seconds to reject the incoming call. -
Page 12: Music Mode
MUSIC MODE: Please note in Music mode, both earbuds can work together simultaneously. Adjusting the Volume Short Press the Volume + to increase volume or Volume – to decrease volume. You can also adjust the volume on your handset or device Play/Pause Music Once connected, Press the Multi-Function button once to play music. - Page 13 Connection with the Last Paired Device When powered on, the earbuds will automatically connect with the last successfully paired device. In Music mode, True Wireless pairing will also automatically connect with the last successfully paired device. Resetting your Bluetooth device Turn the headset on, simultaneously press and hold down the "Volume -”...
-
Page 14: Troubleshooting
TROUBLESHOOTING If you are unable to connect your headset and mobile phone, please try the following: Ensure that your headset is fully charged and powered on. Ensure that the headset is paired with your mobile phone. Ensure that your mobile phone's Bluetooth feature is activated. Please refer to your mobile phone user’s guide for specific instructions. -
Page 15: Warranty
WARRANTY At Jarv, we are dedicated to making the best quality product. To back this up, your Jarv Bluetooth earphones are warrantied for One (1) full year from the date of purchase. Please visit our website www.jarvmobile.com for more details Or Email us at: customerservice@jarvmobile.com... -
Page 16: Safety Information
SAFETY INFORMATION Check local laws regarding the use of mobile phones and headsets while driving. If you use the headset while driving, ensure that your attention and focus remains on the road and you drive in a responsible and safe manner. Never allow children to play with the headset, as the small parts may be a choking hazard. - Page 17 headset comes with a premium quality carry pouch for your convenience. ii. Do not expose the headset to liquid, moisture or humidity, as it is not waterproof. iii. Do not use abrasive cleaning solvents to clean the headset. iv. Do not expose the headset to extreme temperatures. The best storage temperature range is from 40-80 F, otherwise, the life of the headset will be affected.
-
Page 18: Product Specifications
PRODUCT SPECIFICATIONS Basic Specs: Model No. JRV-TW800 Product Size: 1.9X1.6X1.3 inches Product Weight (bare): 0.42 oz. X 2 Charging Current: 100mA Charging Time - Less than 2 hours Bluetooth Version: Bluetooth 4.2 Wireless Range: 33 feet Input voltage: Micro USB DC 5V Battery: DC Battery power: 3.7V 95mAh Built-in rechargeable... -
Page 19: Warning And Precautions
WARNING AND PRECAUTIONS WARNING: To prevent fire or shock hazard, do not expose this unit to rain or moisture. WARNING: Do not place this unit directly onto furniture surfaces with any type of soft, porous, or sensitive finish. As with any rubber compound made with oils, the feet could cause marks or staining where the feet reside. -
Page 20: Fcc Warnings
FCC WARNINGS Warning: Changes or modifications to this unit not expressly approved by the party responsible for compliance could void the user’s authority to operate the equipment. NOTE: This equipment has been tested and found to comply with the limits for a Class B digital device, pursuant to Part 15 of the FCC rules.
Need help?
Do you have a question about the JRV-TW800 and is the answer not in the manual?
Questions and answers