Table of Contents
Advertisement
Quick Links
This instruction manual offers reference
information using a matrix system.
For example, information
about "Recording" appears
in the manual section
w h e r e c o l u m n 2 a n d
Operating Instructions
row c meet (indicated as
IC Recorder
page 2-c).
Regarding Zoom recording
Model No.
RR-US500
Zoom recording is not available when the
Recording mode is stereo or when recording to
the dictation folder.
Dear customer
Thank you for purchasing this product.
For optimum performance and safety, please
read these instructions carefully.
Before connecting, operating or adjusting this
product, please read the instructions completely.
P
PC
Please keep this manual for future reference.
En
Panasonic Consumer Electronics Company,
Panasonic Puerto Rico, Inc.
Division of Panasonic Corporation of North
Ave. 65 de Infantería, Km. 9.5 San Gabriel Industrial
Park, Carolina, Puerto Rico 00985
America
Panasonic Canada Inc.
One Panasonic Way Secaucus, New Jersey 07094
http://www.panasonic.com
5770 Ambler Drive, Mississauga, Ontario L4W 2T3
www.panasonic.ca
© 2006 Matsushita Electric Industrial Co., Ltd.
RQT8310-1P
Printed in Japan
H0106WM1026
THE FOLLOWING APPLIES ONLY IN THE U.S.A.
FCC Note:
This equipment has been tested and found to comply with the limits for a Class B digital device, pursuant
to Part 15 of the FCC Rules. These limits are designed to provide reasonable protection against harmful
interference in a residential installation. This equipment generates, uses and can radiate radio frequency
energy and, if not installed and used in accordance with the instructions, may cause harmful interference
to radio communications. However, there is no guarantee that interference will not occur in a particular
installation. If this equipment does cause harmful interference to radio or television reception, which can be
determined by turning the equipment off and on, the user is encouraged to try to correct the interference by
one or more of the following measures:
• Reorient or relocate the receiving antenna.
• Increase the separation between the equipment and receiver.
• Connect the equipment into an outlet on a circuit different from that to which the receiver is connected.
• Consult the dealer or an experienced radio/TV technician for help.
Any unauthorized changes or modifications to this equipment would void the user's authority to operate this
device.
This device complies with Part 15 of the FCC Rules. Operation is subject to the following two conditions: (1)
This device may not cause harmful interference, and (2) this device must accept any interference received,
including interference that may cause undesired operation.
Responsible Party:
Panasonic Corporation of North America
One Panasonic Way
Secaucus, NJ 07094
Telephone No.: 1-800-211-7262
This statement is applied to only Canada
This Class B digital apparatus complies with Canadian ICES-003.
Preparation 1
Inserting and charging batteries
g Inserting batteries
The battery indicator
*
D r y c e l l b a t t e r i e s ( n o t
(Displayed during recording/playback)
1
included) can also be used.
3
*
Replace the batteries within
2
30 seconds to preserve
the settings. (Recordings
Charge or replace the batteries
remain intact.)
*
When "
" is displayed, charge or replace the batteries.
*
The clock, however, will
*
When dry cell batteries are being used
stop until the batteries
and the unit is inserted into recharging
have been inserted.
AAA battery
cradle, the battery indicator will flash.
g Charging batteries
Upon purchasing, charge once before initial use.
1
2
3
*
Connect the
Insert the AC
Insert the unit into
Charging takes approx.
AC adaptor to
adaptor plug into a
the recharging
3 hours.
*
Batteries do not need
recharging cradle
household AC outlet
cradle
to be fully depleted
Recharging cradle
before recharging.
When the unit is off
(included)
*
Batteries charge the
Household AC
consumed portion only
Insert the unit firmly
outlet
when you operate and
so that the pin on the
(100 V to 240 V
charge the unit at the
charging unit
inserts
and 50/60 Hz)
same time.
into the USB jack
DC IN 4.8 V
(
page 4-a).
It is not unusual for
The charge lamp is lit while charging.
the batteries to be hot
AC adaptor (included)
The lamp goes out when charging is completed.
after charging.
Before use
MEETING
1
2
Hint
Hint
RECORDING
Using different combinations of
Before operating,
Choose a
recording modes and microphone
sensitivity levels, you can adjust
switch hold off,
recording method
audio quality according to recording
when finished,
that best suits
situations.
switch hold on
the situation
Hold
DICTATION
(Slide up)
RECORDING
As the dictation recording settings are all
factory-set, dictation can be recorded quickly
and simply. Use this mode when computer voice
Hold off
recognition software is to be used.
(Slide down)
g Possible recording settings when using meeting recording
By switching hold on...
Accidental unit operation is prevented.
Microphone
sensitivity
HI (Distance)
The display turns off and the battery power is saved.
Recording settings
*
There is no power button.
A large-scale meeting
Stereo
etc.
Unfinished settings will be cancelled if you
stop setting operations for 30 seconds in the
Monaural
A normal meeting etc.
menu mode and 10 seconds in other modes.
Zoom recording [OFF]
In this case, please repeat from the beginning.
Monaural
A lesson, lecture etc.
Zoom recording [ON]
Preparation 2
Setting the time
*
When the year is flashing (e.g.
on the display), begin from step 4 below.
*
The clock returns to standby when you perform no time setting operation for 30 seconds. If this happens
restart setting the time.
1
2
3
4
Release
Display the
Select
Set the time
hold
menu
"
"
Year
[
]
[
(Select)
(Enter)
Press
[
]
[
Month
(Select)
(Enter)
(Press to
select)
A menu (
page
[
]
[
Day
5-a) is displayed.
(Select)
(Enter)
Time display (12/24H)
[
]
[
(Press to
(Select)
(Enter)
enter)
[
]
[
Time
(Select)
(Enter)
You can set the year, month, day and time quickly
by pressing and holding [
].
*
The clock operates with the monthly error margin
of +/– 60 seconds at room temperature.
3
Meeting
Dictation
Hint
recording
recording
Recorded
contents are
Recording
stored in
contents
File
folders
To record a low-level sound
source...
• Place the unit on a desk etc.
DICTATION
closer to the source
MEETING
FOLDER
There are 4 folders, A through D,
• Use "LO" microphone
FOLDERS
for meeting recording use.
sensitivity for close proximity
hand-held recording
*
A maximum of 99 files can be stored in each folder.
g Recording mode and approximate total recording time of all folders
*
The minimum memory
LO (Close)
Stereo
Monaural
unit used may cause
total recording times
t o b e c o m e s l i g h t l y
A language lesson etc.
HQ (High quality)
10 hours 10 minutes 19 hours 30 minutes
s h o r t e r t h a n t h o s e
A meeting held in a small
l i s t e d i n t h e t a bl e.
FQ (Fine quality)
19 hours 30 minutes
39 hours
room etc.
( S e e " C o n fi r m i n g
the remaining time"
An interview during a
SP (Standard play)
33 hours 20 minutes 66 hours 50 minutes
meeting etc.
page 5-b)
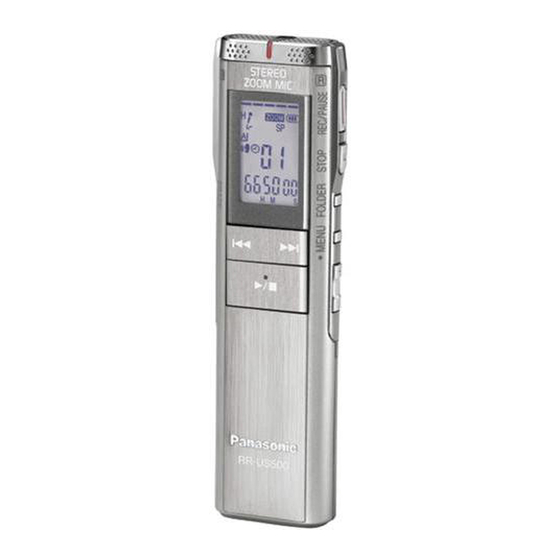
Part names
g Main unit
Display
Built-in microphone
Recording mode (Stereo, monaural/tone)
Recording level/
Recording indicator
Remaining memory
Battery indicator
]
Display
Folder
Zoom
[
]
File
Forward, backward/
]
Erase
select
W Headphone/
Repeat
earphone jack
Recording (Play) elapsed time/
]
(In standby mode: current time)
External
Handstrap hole
microphone
(Handstrap not
Recording/
g Recharging cradle
jack
included)
pause
]
Speaker
USB pin ("Charging
[
]
Stop
batteries"
Play, stop/
Zoom
enter
Folder
microphone
]
(dented area)
Menu
(Equalizer)
Hold
Volume
Charge lamp
USB jack
USB jack
Battery cover
DC IN 4.8 V jack
Other recording methods
1
2
3
Press to
Select "
"
Select "
"
Preventing
display a
menu
[
]
[
]
unnecessary
(Select)
(Select)
recording
[
]
[
]
R e c o r d i n g
i s
(Enter)
(Enter)
automatically paused
if there is no sound for
VAS: Voice
g
more than 3 seconds
To turn the function off: Select "
Activated
(approximately).
Turn the function off when recording important files.
System
Preparation: Select the folder to be recorded to and the recording settings ("Recording"
1
2
3
4
Press to
Select
Select "
"
Set the time
Timer
display a
"
"
① Start time
recording
menu
T i m e r r e c o r d i n g
can be set to make
1 r e c o r d i n g a t a
[
]
[
]
specified time. After
② Finish time
(Select)
(Select)
s e t t i n g t h e t i m e r,
y o u c a n k e e p t h e
[
]
[
]
u n i t o n s t a n d b y
(Enter)
(Enter)
by s e t t i n g h o l d o n
(
page 2-b).
You can stop timer recording in progress, but you cannot bring it to a pause.
g
To confirm the recording start and finish time, press [
g
" in step 3.
To cancel the timer: Select "
List of menus
Press to
Press [STOP] to stop an operation midway/cancel the setting.
display a menu
If an operation is not started within 30 seconds, the display returns to
the standby mode.
(While stopped)
Press [
] to select, and press [
] to enter
Remaining recording
Microphone sensitivity
※1
Search-speed control
Recording mode
time (
page 5-b)
(
page 3-c)
(
page 4-d)
(
←
←→
←→
←→
Setting the time
Confirmation beep
File lock
※2
Timer recording
※3
page 2-a)
(
page 3-a)
(
page 4-d)
(
page 3-d)
(
page 4-b)
(
←
←→
←→
←→
←→
※ 1 Displayed only when a meeting recording
※ 2 Displayed only when there is a recorded file
folder (A through D) is selected
※ 3 Displayed only when the clock is set
4
g To record a distant voice (Zoom recording)
g Confirming the remaining time
Record
Zoom recording enables you to clearly record
(
page 2-c)
Displayed when
sounds coming from a direction towards the built-in
a menu screen
Press
"
" flashes when
microphone. It is suitable for recording lectures and
is selected.
the VAS function is
interviews. Set the recording mode to monaural
active.
when recording to a meeting folder (
page 2-c).
Remaining recording
(While
time in the current
recording or
on standby)
recording mode
Slide up
" in step 3.
"ZOOM" is displayed when zoom
g
To return to the original screen:
recording is being used.
While stopped; Press [STOP].
Do not block the zoom microphone (
page
page 2-c)
While recording; Press [MENU (EQ)] again.
4-a) intentionally with your fingers or other items.
*
Remaining recording time also appears when
*
Zoom recording can be switched on and off
it becomes very short.
even when hold is switched on.
[
]
*
The zoom recording function is cancelled when
(Select)
recording to the dictation folder, when the recording
[
]
g Recording through an external microphone
mode is stereo, or when using an external microphone.
(Enter)
g Listening to the recording in progress
[
]
Microphone
Connect stereo earphones (not included).
(Select)
(not included)
Plug type: ø 3.5 mm (
1
/
in.) stereo mini plug
8
[
]
Insert
(Enter)
securely
Insert
securely
Plug type: ø 3.5 mm (
1
/
in.) stereo mini plug
8
] in step 2.
*
When you attach an external microphone, the
built-in microphone automatically goes off.
W
※1
page 2-c)
→
VAS
page 4-b)
→
Advertisement
Table of Contents

Related Manuals for Panasonic Matrix System


Summary of Contents for Panasonic Matrix System
- Page 1 Park, Carolina, Puerto Rico 00985 and 50/60 Hz) America Panasonic Canada Inc. DC IN 4.8 V One Panasonic Way Secaucus, New Jersey 07094 http://www.panasonic.com 5770 Ambler Drive, Mississauga, Ontario L4W 2T3 www.panasonic.ca © 2006 Matsushita Electric Industrial Co., Ltd. RQT8310-1P...
- Page 2 Supplied accessories Recording Select the folder Please check and identify the supplied accessories. Use numbers indicated in parentheses when asking for replacement parts. Meeting (Product numbers correct as of January 2006. These may be subject to change.) recording Only for the U.S.A.: To order accessories, refer to “Accessory Purchases” ( page 10-b).
- Page 3 Using the operating instructions (PDF file) Recording and operating problems may occur on some computer systems. Please note that Panasonic and Panasonic dealers cannot be held liable for any lost audio data or other In the Windows “Start” menu, click “All Programs”...
Need help?
Do you have a question about the Matrix System and is the answer not in the manual?
Questions and answers