Advertisement
Quick Links
Advertisement

Summary of Contents for Motic SFC-11 Series
- Page 1 Instruction Manual SFC-11 Series Copyright © 02/02 Motic Microscopes, European Division.
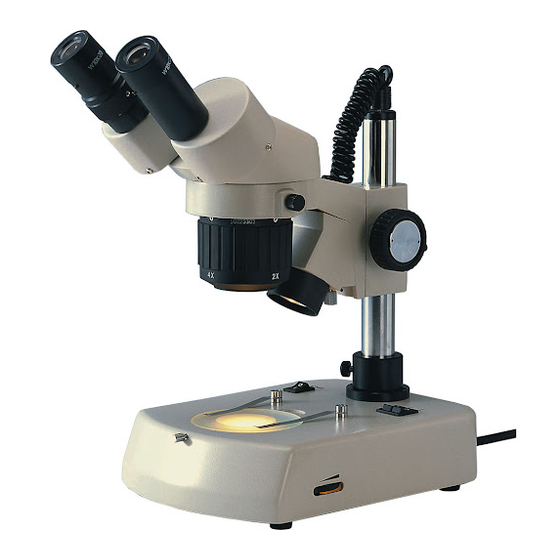
- Page 2 14. Head 1. Eyepieces 15. Incident 2. Diopter illumination adjustment collar connection 3. Eyepiece tubes 4. Prism housing 16. Head holder 5. Head locking screw 17. Focus knob 6. Objective turret 18. Support collar 19.Locking knob of Incident illumination support collar 8.
- Page 3 Introduction Thank you for your purchase of a Motic stereomicroscope. Motic stereomicroscopes are precision instruments, subjected to meticulous examination to reach you in perfect condition. Their design combines easy management and optimum functioning with minimum maintenance. The information contained in this manual is likely to go beyond what the average user needs to know to use the stereomicroscope, however, it is provided to answer any queries that may arise.
- Page 4 Assembly All the steps described for the assembly of the stereomicroscope must be undertaken with extreme care, and without forcing the placement of the distinct parts and elements of the microscope. A. Place the base (13) in an upright position on a flat, Focus tension stable and clean surface.
- Page 5 Press the main switch (9) to position “I”. 4. Press the incident (21) or transmitted illumination switch (22), or both at once, to position “I” or “II”, according to necessities in examining the sample. NB: For models with 2LBB base, omit steps 5 and 6, passing directly to 7. 5.
- Page 6 D. Adjusting the diopter. 1. On the left hand eyepiece tube there is a diopter adjustment collar. Its normal position is when the lower part of the collar is aligned with the sign marked on the eyepiece tube. 2. In the case of differences in eyesight: 3.
- Page 7 Maintenance WARNING: FOR YOUR OWN SAFETY SWITCH OFF AND DISCONNECT THE MICROSCOPE FROM ANY ELECTRICAL SOURCE BEFORE ATTEMPTING ANY MAINTENANCE PROCEDURE TO AVOID THE RISK OF ELECTROCUTION. CONSULT YOUR DISTRIBUTOR IF ANY REPAIR OR MAINTENANCE PROCEDURE IS REQUIRED TO YOUR MICROSCOPE THAT DOES NOT APPEAR IN THIS INSTRUCTION MANUAL. Optical maintenance.
- Page 8 • Changing incident illumination bulb. a. Unscrew the illuminator protector tube (7), turning it anti-clockwise, and removing the tube from that of the lenses. b. With a cloth carefully pull out the bulb to disconnect it from the socket. Do not touch the new bulb with bare hands, use a clean cloth. Insert the pins of the bulb in the socket.
- Page 9 d. Insert the cover. e. Repeat step (a.) but turning 1/4 in the opposite direction to the arrow. The cover must be firmly closed. C. Mechanical maintenance. 1. Adjusting the tension of the focus. Tension comes pre-adjusted by the factory. The best point of tension is that which permits the focus knobs to move as loosely as possible, without the head sliding down with its own weight.
-
Page 10: Troubleshooting
Troubleshooting: ELECTRICAL PROBLEMS PROBLEM CAUSE SOLUTION The bulb does not work. Outlet inoperative. Have it repaired by a qualified specialised technician. Cable not connected. Connect the cable to the power source. Bulb burned out. Replace bulb. Fuse blown. Replace fuse. Wrong Bulb. - Page 11 Bulbs and fuses are not under warrantee. The warrantee service is provided by MOTIC, or its authorised distributors. Defective products will be repaired free of charge when returned to MOTIC, or one of its distributors. Transport costs will be covered by the purchaser.


Need help?
Do you have a question about the SFC-11 Series and is the answer not in the manual?
Questions and answers