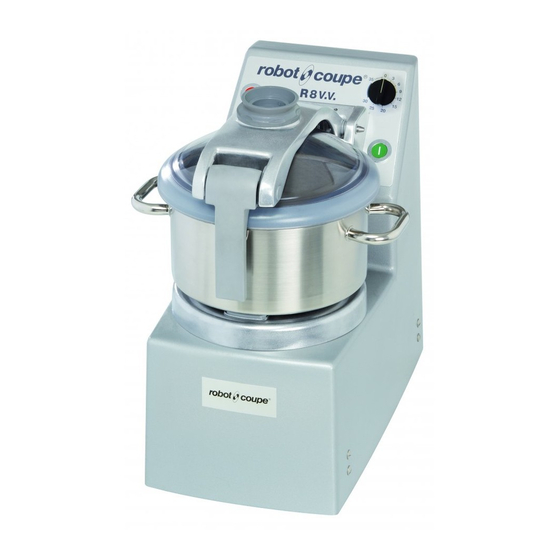
Robot Coupe R 8 Instructions Of Use
Hide thumbs
Also See for R 8:
- Manual (34 pages) ,
- Operating instructions manual (26 pages) ,
- Operation manual (13 pages)
Subscribe to Our Youtube Channel
Summary of Contents for Robot Coupe R 8
- Page 3 SUMMARY WARRANTY MAINTENANCE Dismantling the blade assembly Blade IMPORTANT WARNING Seal Lid seal INTRODUCTION TO YOUR NEW OPERATING INSTRUCTIONS FOR THE VACUUM KIT R-VAC ® CUTTER MIXER DIAGNOSTIC SYSTEM SWITCHING ON THE MACHINE FITTING AND USING THE BLADE ASSEMBLY 2-blade assembly Advice on electrical connections 3-blade assembly Control panel...
- Page 4 ROBOT-COUPE s.n.c., LIMITED WARRANTY Labour to sharpen and/ or replacements SHIPPING DAMAGES. Visible and latent Your new ROBOT-COUPE appliance is defects are the responsibility of the freight carrier. for blades which have become blunt, chipped or warranted to the original buyer for a The consignee must inform the carrier and consi- worn after a normal or excessive period of use.
- Page 5 Gauge (A) Threshold (mA) in the event of an earth contact, a continuous fault supply before any internal connection operations R 8 V.V. current may fail to trip a differential circuit breaker are carried out. single-phase that is only sensitive to alternating current (type AC).
-
Page 6: Important Warning
W A R N I N G IMPORTANT WARNING Keep these instructions in a safe place WARNING: In order to limit accidents such as electric shocks or personal injury, and in order to limit material damage due to misuse of the appliance, please read these instructions carefully and follow them strictly. Reading the operating instructions will help you get to know your appliance and enable you to use the equipment correctly. -
Page 7: Introduction To Your
INTRODUCTION TO YOUR After fitting the plug and before you use your appliance, switch it on to check that the blade Before plugging in, check that your power supply assembly rotates in an anticlockwise direction. corresponds to that indicated on the machine rating If this is not the case, contact your technical support plate. - Page 8 (rpm) before adding the ingre- USES The green indicator light dients to be processed. R 8 R 10 R 15 R 20 R 8 / R 10 summary should be on. R 15 / R 20 CHOP W A R N I N G...
- Page 9 (kg) (rpm) USES - for grinding. R 8 R 10 R 15 R 20 R 8 / R 10 summary R 15 / R 20 Optional extra: 3.5-litre mini bowl for the R 8 and The fine serrated blades are mainly used for: - chopping parsley Compotes / fruit purée...
- Page 10 To remove food residue from the blades, put the bowl MAINTENANCE back, slot the blade assembly back over the motor A special tool designed to shaft, and run the machine at high speed. Similarly, make it easier to remove for precleaning, pour a couple of litres of hot water the blade assembly from the into the bowl and run the machine for a few seconds mini bowl is supplied with...
- Page 11 OPERATING INSTRUCTIONS FOR THE VACUUM KIT R-VAC ® ® - Insert filter into body N° 3 - Screw part onto body N° 3 (the tube is fed through body N° 3). ® ON THE LID - Insert the vacuum kit into the cone section of the plastic part The latter should be screwed into the lid guide N°...
-
Page 12: Diagnostic System
DIAGNOSTIC SYSTEM R E M E M B E R I to test that it is working properly (as the buttons are the operational status of your machine: used to test the machine, it is only logical to check After switching your appliance on, open - no green light: see paragraph 1. - Page 13 Level 3: needs to be checked. If you have not been using your machine intensively, when it may be quite normal for the motor to overheat (ISBC) or the lid (ISCO) presence sensor is posing a and trigger the thermal relay and/or overload problem.
- Page 14 FITTING AND USING THE BLADE ASSEMBLY Plastic Narrow Blade Screw Blade Long ring ring spacer shaft We recommend you use the 3-blade assembly for processing large quantities of more than half the We recommend you use the two-blade assembly for processing small maximum limit indicated, with the exception of liquid or blended preparations for which we strongly recommend you use the 2-blade assembly.
-
Page 15: Technical Specifications
(rpm) (rpm) (Amp.) (rpm) (rpm) (Amp.) We recommend that you position the R 8 - R 8 V.V. - 230 V = 10 230 V = 16.3 230V / 50 Hz / 3 1500 230V / 50 Hz / 3... - Page 16 Three phase appliance R E M E M B E R Speed 1 Intensity Motor Never try to override the locking and safety (rpm) (Amp.) systems. 200 - 240 V / 24.8 Never insert an object into the container where 50-60 Hz / 3 the food is being processed.
- Page 33 Head Office, French, Service Clients Belgique Export and Marketing Department: 26, Rue des Hayettes 48, rue des Vignerons 6540 Mont Sainte-Geneviève 94305 Vincennes Cedex- France Tél. : (071) 59 32 62 Tel.: 01 43 98 88 15 - Fax: 01 43 74 36 26 Fax : (071) 59 36 04 Email: international@robot-coupe.com Email : info@robot-coupe.be...


Need help?
Do you have a question about the R 8 and is the answer not in the manual?
Questions and answers