TANDBERG 880 MXP Basic Use Manuallines
Hide thumbs
Also See for 880 MXP:
- User manual (31 pages) ,
- Administrator's manual (375 pages) ,
- User manual (154 pages)
Table of Contents
Advertisement
Quick Links
Advertisement
Table of Contents

Related Manuals for TANDBERG 880 MXP


Summary of Contents for TANDBERG 880 MXP
- Page 1 Basic Use guidelines TANDBERG 880 System...
- Page 2 Installing TANDBERG 880 Comes in 1 box Videoconferencing System with built-in Camera – Power supply – Table Microphone – Remote Control with Batteries – User manual on CD – Cables –...
-
Page 3: Network Types
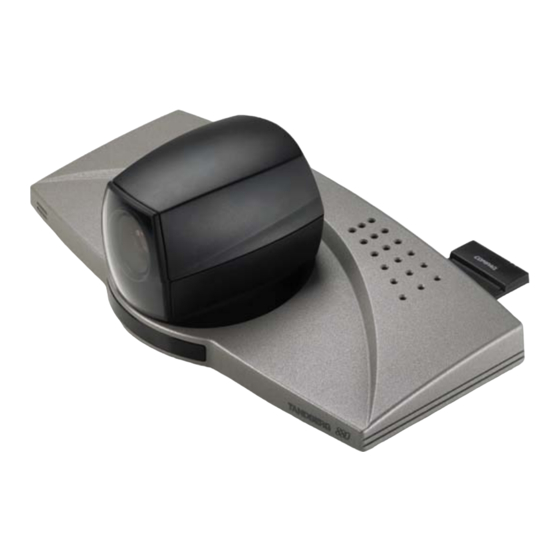
TANDBERG 880 Network types PC card slot Power On/Off RS 232 DC power USB Port Dataport ISDN 1-2-3-4... - Page 4 TANDBERG 880 Video Input & Output Video In 4 Video In 3 Doc cam /Aux Video In 2 VGA-DVI In Doc cam /Aux Video Out Video Out Video Out 1 Main 2 Main VGA-DVI Out 3 Dual Monitor Monitor Monitor...
- Page 5 TANDBERG 880 Audio Input & Output Audio In 3 Aux Audio In 4 VCR Audio Out 1 Main Monitor Audio Out Audio In 1-2 2 VCR (microphone)
-
Page 6: Welcome Screen / Main-Menu
Welcome Screen / Main-Menu When not in a call this “image” is local video or your own welcome logo... -
Page 7: Important Buttons
Important Buttons! OK / Menu Access the menu - Choose/ affirm options Cancel Back out of menus - Cancel actions... -
Page 8: Placing Video Calls
Placing Video Calls The bottom portion of the remote is (first) a dialing pad If H.320 ISDN: Dial Area Code + number, then Press ‘Connect’ If ISDN International: Dial 001 + County Code + Area Code + number, then Press ‘Connect’ * ‘Cancel’... -
Page 9: Video Calls : Settings
Video Calls : Settings When you place video call you can simply let the powerful TANDBERG ICM (Intelligent Call Management) set call- parameters automatically, Including: the call type (Video, Audio/telephone), the default call speed (Bandwidth), the network to be used (ISDN or IP) and ... -
Page 10: Call Settings
Call Settings : Press “Connect” then arrow over to Default Call Settings and select “OK”... - Page 11 Call Settings : Make your adjustments using the Arrow and OK keys, then select “OK” and continue your dialing..
- Page 12 Placing Video Calls Using the Directory: Press: the “Directory” Book Highlight Name using directional buttons Press “Connect” Press “Disconnect” to end a call - You will first be “Prompted” to either “Disconnect” or “Cannel” - Simply press Disconnect 2X to end call * To skip forward in the directory: - Hold “Down”...
-
Page 13: Call Status Information
Call Status Information From time to time you many want to view “Call Statistics” or “Channel Status” of your call. In this menu, you can view the speed of your call, the network you are calling on, the amount bandwidth committed to video, and other details simply by Pressing: - ‘Main Menu’, then the ‘Up’... - Page 14 Call Status Information...
-
Page 15: Moving The Camera
Moving the Camera When you have the main camera selection us your video source on-screen : The directional arrows will allow you to move the camera The Zoom button allows you to zoom in and out on people or objects... - Page 16 Presets Storing a presets: Choose(set) the camera position Pick a number to represent that preset hold Press and that number Accessing a preset: During a call - Press the corresponding number to access a know preset ...
-
Page 17: Audio Functions
Audio Functions Volume Adjustment: Press the “VOLUME + and -” keys to adjust volume level on-screen indicator will show the current level). - Page 18 Audio Functions Mute: To turn your microphone on/off during a call, press the “Mic Off” key. An on screen indicator will appear on both sides when the microphone is off. During a point-to-point call, far side will get a message “Microphone OFF at other side”...
-
Page 19: Far End Camera Operation
Far End Camera Operation “ Far End Camera Control” gives you the ability to access the remote camera and video source. In the Main Menu, Choose the ‘Move Camera’ icon Select the ‘Far End’ option - Use corresponding keys to access far-end presets - Press ‘Presentation’... - Page 20 ‘Self-view’, ‘Move PIP’ Self-view – Toggles between seeing the remote image during a call, to viewing your local image – Remote video will appear in a picture-in-picture on screen Move Picture-In-Picture (Layout) – toggle a self view picture to all four corners of the primary monitor and then turns it off *Wide screen format will allow you to choose between side-by-side, Picture-out-of-Picture and...
-
Page 21: "Layout" Possibilites
“Layout” Possibilites Using the new Advance Widescreen Layout for rigid displays and projectors, you can combine up-to three difference pictures in a call - Show remote site, Presentation and Selfview - Change your screen Layout by pressing the button... -
Page 22: Showing Presentations
Showing Presentations Automatically – Press the ‘Presentation’ button to launch an in-call view of your last selected source. – The video from this source will be displayed to the remote locations. – Press again to end presentation To “manually” select sources –... -
Page 23: Video Sources
Video Sources To toggle between sending difference source as your main video screen: In the Main Menu: Choose the ‘Presentation’ symbol Selected the ‘Main Video’ option and choose the appropriate video source, and then simply press ‘OK’ REMEMBER- go back to ‘Main Cam’ before exiting out of the menu... -
Page 24: Making Multisite Calls
- Highlight name of person you want to call - Press ‘Connect’ Manually placing additional calls/ connections - Press ‘Connect’ - Enter the number using the keypads - Press ‘Connect’ again *Bandwidth will be automatically adjusted as needed using the TANDBERG ICM... -
Page 25: Adding Or Placing Telephone Call
Adding or Placing Telephone Call Using the directory - Press ‘directory’ - Highlight name of person to call (network should read telephone call) - Press ‘Connect’ Manually - Press ‘Connect’ - Enter the number - Press ‘Down’ - Highlight ‘Place Telephone Call’ - Press ‘Connect’... -
Page 26: Multisite Function (During The Call)
Multisite Function (during the call) Request/ Release Floor: - Any participant is able ‘Request’ in order to be viewed by all locations in full screen mode and ‘Release’ floor when finished speaking Assign/ Release floor to site number: - Host of the call is able to force to give floor access to another site... - Page 27 Layout: what we ‘see’ on our screens - ‘Voice Switched’- The location that is speaking is the only site viewed by all participants (loudest and longest ‘wins’) ‘Auto Split’ - default system chooses best screen layout given the number sites, using TANDBERG ICM...
- Page 28 Multisite Function (during the call) Layout: (what we ‘see’...) - ‘4 Split’ – 4 participants are split into 4 equal corners of the display screen area - ‘5+1 Split’ – speaking participant is boxed in a larger screen with 5 other participant surrounding that screen...
-
Page 29: Ending Multisite Calls
Ending Multisite Calls To drop one participant Press the ‘Disconnect’ button Using the Directional Keys,highlight the desired site to disconnect Press OK To disconnect all participants Press the ‘Disconnect’ button twice (x2) -
Page 30: Receiving Inbound Calls
Receiving Inbound Calls When receiving a call, systems are normally set to ‘Auto-answer + Mic Off’. The system will automatically accept the call and by default, “Mic Off” = your mic will be turn ‘off’ at the start in order to to better protect your privacy until wish to be “heard”... - Page 31 “Standby” and “Do not disturb” * Access by pressing ‘Disconnect’ when not in a call Delay standby is used when you want to have your company logo present will not on a call - Standby will not activate when showing PC content while not in a call ...
-
Page 32: Modifying The 'Directory'
Modifying the ‘Directory’ Press the ‘Directory’ button , then... Use the arrow key to move to the left menu Arrow / Scroll down and select the third icon, labeled ‘New’ (press ‘OK’) Enter the Information specific to to that person or location ... -
Page 33: Text Chat
“Text Chat” Use the alpha-numeric keypad to type text messages / information: - In the menu, go to ‘Control Panel’ - Select the ‘Text Chat’ icon - Enter text using the keypad - Press ‘OK’ to close window Text is display on the local and far-end monitor (be careful what your type!!!) ... - Page 34 Help... To get At any time, you can always go form the main menu to TANDBERG’s User Guide and select form variety of topics to get explanations and other ‘How to’ descriptions Access the menu, and go to ‘Control Panel’...
- Page 35 ISDN and LAN settings menu Select Network from Administrator Settings menu The network menu contain : ISDN-BRI settings – LAN settings – Network Profiles – – Data Port...
- Page 36 PC Presenter Make presentations easy to hold – Connect the VGA-DVI cable to the PC Presenter (PC DVI-I in) connector on thecodec. – Connect the VGA-DVI cable to your PC (VGA Output). – Press the Presentation key. – Press the Presentation key again to end and go back to main camera.
- Page 37 Soft Presenter PC SoftPresenter is used to display PC images on your system The system and your PC must be connected to the same LAN. VNC server software must be installed on the PC. – Start the VNC software on your PC. –...
- Page 38 Virtual Network Computing – Able to access computers on the network (must have password) – Can scroll through a power point without having an end user by using the left and right arrow buttons – VNC software is downloaded from: –...
- Page 39 Adding Duo Video Automatically “Presentation Start” in the Presentations Settings menu should be “Auto” – Select Video Source from Presentation Source. – And press OK or Presentation key to connect Duo Video. – Press “Main Cam” when finished. – Manually ...
- Page 40 Configuration SnapShot & Duo Video...
- Page 41 Web Base Management...
-
Page 42: Start Streaming
Streaming Live videoconference on your PC Start Streaming – Open the Streaming menu from the Control Panel – Press Start Streaming. – Press Stop Streaming to end streaming. Quick Time View Streaming from a PC – Start your Web browser and enter the IP-address of the streaming system. -
Page 43: Contact Information
Contact information: MediaStream systems Co.,Ltd 51/3 Vibhavadi Tower 12B Fl. Ngam Wong Wan Road Ladyao, chatuchak, Bangkok 10900 Tel: 02-941-1530-2 Fax: 02-941-1001 ISDN: 02-941-4812-5 www.mstreamsystems.com...
Need help?
Do you have a question about the 880 MXP and is the answer not in the manual?
Questions and answers