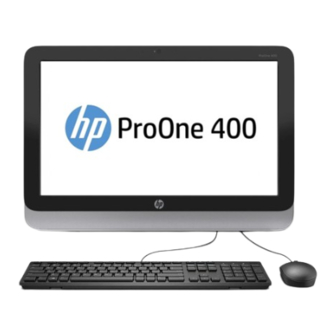
HP ProOne 400 G1 All-in-One Hardware Reference Manual
Hide thumbs
Also See for ProOne 400 G1 All-in-One:
- Maintenance & service manual (184 pages) ,
- Hardware reference manual (58 pages) ,
- Specification (47 pages)
Table of Contents
Advertisement
Quick Links
Advertisement
Table of Contents

Subscribe to Our Youtube Channel
Related Manuals for HP ProOne 400 G1 All-in-One


Summary of Contents for HP ProOne 400 G1 All-in-One
- Page 1 Hardware Reference Guide HP ProOne 400 G1 All-in-One...
- Page 2 Corporation in the U.S. and other countries. Bluetooth is a trademark owned by its proprietor and used by Hewlett-Packard Company under license. The only warranties for HP products and services are set forth in the express warranty statements accompanying such products and services. Nothing herein should be construed as constituting an additional warranty.
-
Page 3: About This Book
About This Book This guide provides basic information for upgrading this computer model. WARNING! Text set off in this manner indicates that failure to follow directions could result in bodily harm or loss of life. CAUTION: Text set off in this manner indicates that failure to follow directions could result in damage to equipment or loss of information. - Page 4 About This Book...
-
Page 5: Table Of Contents
Table of contents 1 Product features ............................. 1 Overview .............................. 1 Front components ..........................3 Side components ..........................4 Rear components ..........................5 Keyboard features ..........................6 Adjusting the stand ..........................7 Serial number location .......................... 7 2 Hardware repair and upgrade ........................8 Warnings and cautions ......................... - Page 6 Installing a 2.5-inch solid state drive (SSD), self-encrypting drive (SED), or solid state hybrid drive (SSHD) ........36 Replacing the optical disc drive ..................38 Appendix A Electrostatic discharge ......................43 Preventing electrostatic damage ......................43 Grounding methods ..........................43 Appendix B Computer operating guidelines, routine care, and shipping preparation ......
-
Page 7: Product Features
Up to 2 TB Hard Drive, 180 GB Solid State Drive, 256 GB Self-encrypting Solid State Drive, 500 GB Self-encrypting Drive, or 1 TB Solid State Hard Drive ● Optional Tray-load HP SuperMulti DVD+/-RW SATA Optical Disc Drive, DVD-ROM Disc Drive, or Slim BDXL Blu-ray Writer ●... - Page 8 6 USB ports: 1 USB 3.0, 1 USB 3.0 (fast-charging), 4 USB 2.0 ● Choice of wired or wireless keyboard and mouse ◦ Wired USB keyboard and mouse ◦ HP USB–PS/2 washable keyboard and mouse ◦ Wireless keyboard and mouse ● Windows ®...
-
Page 9: Front Components
Front components Figure 1-2 Front components Table 1-1 Front Components Component Component Dual microphone array (optional) Power button Webcam activity LED (with optional webcam) High-performance stereo speakers Webcam (optional) Front components... -
Page 10: Side Components
HP 5-in-1 media card reader (optional) Optical disc drive activity LED USB 3.0 port Tray-load optical disc drive USB 3.0 port, fast-charging Hard disc drive activity LED Microphone jack HP 5-in-1 medial card reader (optional) LED Headset jack Chapter 1 Product features... -
Page 11: Rear Components
Rear components Figure 1-4 Rear components Table 1-3 Rear components Component Component Access panel Cable lock slot Access panel security screw Power supply connector Security screw hole RJ-45 Gigabit Ethernet port DisplayPort port (4) USB 2.0 ports Serial port Stereo audio line out Rear components... -
Page 12: Keyboard Features
Keyboard features Figure 1-5 Keyboard features Table 1-4 Keyboard features Component Component Sleep Mute Volume Fast Reverse Decrease Volume Play/Pause Increase Volume Stop Function Fast Forward Chapter 1 Product features... -
Page 13: Adjusting The Stand
Adjusting the stand This stand allows you to tilt the computer backward from 10 degrees to 25 degrees to set it to a comfortable angle. Figure 1-6 Adjusting tilt Serial number location The computer has a unique serial number and a product ID number that are located on the exterior of the computer. -
Page 14: Hardware Repair And Upgrade
To reduce the risk of serious injury, read the Safety & Comfort Guide. It describes proper workstation, setup, posture, and health and work habits for computer users, and provides important electrical and mechanical safety information. This guide is located on the Web at http://www.hp.com/ergo. WARNING! Computers that are inappropriately situated on dressers, bookcases, shelves, desks, speakers, chests, or carts may fall over and cause personal injury. -
Page 15: Connecting And Disconnecting Power
Connecting and disconnecting power Connecting power Connect the peripheral cables to the appropriate ports. Plug the female end of the power cord into the power supply brick (1). Connect the other end of the power cord to an electrical outlet (2). Connect the round end of the power supply cord to the power supply connector on the rear of the computer (3). -
Page 16: Installing A Cable Lock
Installing a cable lock The cable lock slot enables you to secure your computer. A cable lock is a key lock device that has a wire cable attached. You attach one end of the cable to your desk (or other stationary object) and the other end of the cable to the cable lock slot on back of the computer. -
Page 17: Synchronizing The Optional Wireless Keyboard And Mouse
Synchronizing the optional wireless keyboard and mouse The optional wireless keyboard and mouse are easy to set up. Just remove the battery tabs on both the keyboard and the mouse to activate the preinstalled batteries. NOTE: For better mouse battery life and performance, avoid using your mouse on a dark or high- gloss surface, and turn mouse power off when not in use. -
Page 18: Removing Batteries From The Optional Wireless Keyboard Or Mouse
Removing batteries from the optional wireless keyboard or mouse NOTE: The wireless keyboard and mouse are optional components. To remove batteries from the wireless keyboard, remove the battery door on the underside of the keyboard (1) and lift the batteries out of the battery compartment (2). Figure 2-5 Removing batteries from the wireless keyboard To remove batteries from the wireless mouse, remove the battery door on the underside of the mouse... -
Page 19: Attaching The Computer To A Mounting Fixture
Remove/disengage any security devices that prohibit opening the computer. Place the computer face down on a soft flat surface. HP recommends that you set down a blanket, towel, or other soft cloth to protect the bezel and screen surface from scratches or other damage. - Page 20 Rotate the bottom edge of the access panel up (2), and then lift the access panel off of the computer (3). Figure 2-7 Removing the access panel Place the access panel down on a flat surface with the inside of the panel facing up. Remove the four screws securing the stand to the access panel.
-
Page 21: Connecting A Second Display
If you are adding a second display that does not have a DisplayPort connector, you can purchase a DisplayPort video adaptor from HP for your configuration. DisplayPort adapters and video cables are purchased separately. HP offers the following adapters: ●... - Page 22 If your second display has a DisplayPort connector, connect a DisplayPort cable directly between the DisplayPort connector on the rear of the computer and the DisplayPort connector on the second display. Figure 2-10 Connecting a second display using a DisplayPort cable If your second display does not have a DisplayPort connector, connect a DisplayPort video adapter to the DisplayPort connector of the computer.
-
Page 23: Locating Internal Components
Locating internal components The following sections contain procedures for removing and replacing these internal components: ● Optical disc drive ● Hard disc drive, solid state drive, or self-encrypting drive ● Battery ● Memory Figure 2-12 Locating internal components Component Component Optical disc drive Battery Hard disc drive... - Page 24 NOTE: The system will not operate properly if you install unsupported SODIMM memory. HP offers upgrade memory for this computer and advises that the consumer purchase it to avoid compatibility issues with unsupported third-party memory. Chapter 2 Hardware repair and upgrade...
-
Page 25: Populating Sodimm Sockets
Remove/disengage any security devices that prohibit opening the computer. Place the computer face down on a soft flat surface. HP recommends that you set down a blanket, towel, or other soft cloth to protect the bezel and screen surface from scratches or other damage. - Page 26 Rotate the bottom edge of the access panel up (2), and then lift the access panel off of the computer (3). Figure 2-13 Removing the access panel Remove the three screws securing the VESA panel to the chassis (1), and then lift the panel out of the chassis (2).
- Page 27 Remove the three screws securing the fire enclosure shield to the chassis, and then rotate the shield out of the chassis. Figure 2-15 Removing the fire enclosure shield The memory modules can now be seen in the right side of the chassis. Figure 2-16 Locating the memory modules Removing and installing memory...
- Page 28 To remove a memory module, press outward on the two latches on each side of the SODIMM (1), then pull the SODIMM out of the socket (2). Figure 2-17 Removing a memory module To install a memory module, slide the SODIMM into the socket at approximately a 30° angle (1), then press the SODIMM down (2) so that the latches lock it in place.
-
Page 29: Replacing The Battery
Do not expose to temperatures higher than 60 °C (140 ºF). Do not disassemble, crush, puncture, short external contacts, or dispose of in fire or water. Replace the battery only with the HP spare designated for this product. CAUTION: Before replacing the battery, it is important to back up the computer CMOS settings. - Page 30 Remove/disengage any security devices that prohibit opening the computer. Place the computer face down on a soft flat surface. HP recommends that you set down a blanket, towel, or other soft cloth to protect the bezel and screen surface from scratches or other damage.
- Page 31 Remove the three screws securing the VESA panel to the chassis (1), and then lift the panel out of the chassis (2). Figure 2-21 Removing the VESA panel Replacing the battery...
- Page 32 Remove the three screws securing the fire enclosure shield to the chassis, and then rotate the shield out of the chassis. Figure 2-22 Removing the fire enclosure shield The battery can now be seen to the right of the fan. Figure 2-23 Locating the battery To release the battery from its holder, squeeze the metal clamp that extends above one edge of...
- Page 33 To insert the new battery, slide one edge of the replacement battery under the holder’s lip with the positive side up. Push the other edge down until the clamp snaps over the other edge of the battery (2). Figure 2-24 Removing and replacing a coin cell battery Engage the four hooks on the right edge of the fire enclosure shield with the matching slots on the right side of the chassis and rotate the fire enclosure shield down onto the chassis.
-
Page 34: Replacing Drives
Remove/disengage any security devices that prohibit opening the computer. Place the computer face down on a soft flat surface. HP recommends that you set down a blanket, towel, or other soft cloth to protect the bezel and screen surface from scratches or other damage. - Page 35 Rotate the bottom edge of the access panel up (2), and then lift the access panel off of the computer (3). Figure 2-26 Removing the access panel The hard drive cage can now be seen in the lower left side of the chassis. Figure 2-27 Locating the hard drive cage Loosen the captive screw securing the hard drive cage in the chassis (1).
- Page 36 Slide the hard drive cage left, and then lift it out of the chassis (2). Figure 2-28 Removing the hard drive cage Remove the four mounting screws (1) securing the 3.5-inch hard drive in the hard drive cage. Be sure to keep the screws together with the blue rubber grommets to use to install a replacement drive.
-
Page 37: Removing A 2.5-Inch Solid State Drive (Ssd), Self-Encrypting Drive (Sed), Or Solid State Hybrid Drive (Sshd)
Remove/disengage any security devices that prohibit opening the computer. Place the computer face down on a soft flat surface. HP recommends that you set down a blanket, towel, or other soft cloth to protect the bezel and screen surface from scratches or other damage. - Page 38 Loosen the captive screw securing the hard drive cage in the chassis (1). Slide the hard drive cage left, and then lift it out of the chassis (2). Figure 2-32 Removing the hard drive cage Remove the four mounting screws (1) securing the 2.5-inch drive adapter in the hard drive cage. Be sure to keep the screws together with the blue rubber grommets to use to install a replacement drive.
- Page 39 Slide the 2.5-inch hard drive out of the drive adapter (2). Figure 2-34 Removing the 2.5-inch drive adapter from the drive cage For instructions on installing a hard drive, see Installing a hard drive on page Replacing drives...
-
Page 40: Installing A Hard Drive
Installing a hard drive ● Installing a 3.5-inch hard drive ● Installing a 2.5-inch solid state drive (SSD), self-encrypting drive (SED), or solid state hybrid drive (SSHD) Installing a 3.5-inch hard drive Slide the new 3.5-inch hard drive into the hard drive cage (1). Be sure that the hard drive connector is facing up at the open end of the drive. - Page 41 Set the top edge of the access panel down on the top edge of the computer chassis (1). Be sure to align the hooks on the underside of the top edge of the access panel with the top edge of the computer.
-
Page 42: Installing A 2.5-Inch Solid State Drive (Ssd), Self-Encrypting Drive (Sed), Or Solid State Hybrid Drive (Sshd)
Installing a 2.5-inch solid state drive (SSD), self-encrypting drive (SED), or solid state hybrid drive (SSHD) Insert the 2.5-inch solid state drive (SSD), self-encrypting drive (SED), or solid state hybrid drive (SSHD) into the 2.5-inch drive adapter (1). Be sure that the connector is at the opening of the adapter. - Page 43 Tighten the captive screw (2) to secure the hard drive cage in the chassis. Figure 2-40 Installing the hard drive cage Set the top edge of the access panel down on the top edge of the computer chassis (1). Be sure to align the hooks on the underside of the top edge of the access panel with the top edge of the computer.
-
Page 44: Replacing The Optical Disc Drive
Remove/disengage any security devices that prohibit opening the computer. Place the computer face down on a soft flat surface. HP recommends that you set down a blanket, towel, or other soft cloth to protect the bezel and screen surface from scratches or other damage. - Page 45 Rotate the bottom edge of the access panel up (2), and then lift the access panel off of the computer (3). Figure 2-42 Removing the access panel The optical disc drive can now be seen in the upper left side of the chassis. Figure 2-43 Locating the optical disc drive Remove the screw through the optical disc drive bracket that secures the optical disc drive to the...
- Page 46 Slide the optical disc drive left (2) to remove it from the chassis. Figure 2-44 Removing the optical disc drive Remove the two screws attaching the optical disc drive bracket to the optical disc drive. Figure 2-45 Removing the optical disc drive bracket Chapter 2 Hardware repair and upgrade...
- Page 47 Attach the optical disc drive bracket to the new optical disc drive by screwing the two screws through the bracket into the new drive. Figure 2-46 Installing the optical disc drive bracket Place the new optical disc drive into the chassis and push the drive in firmly until it snaps into place (1).
- Page 48 Rotate the bottom edge of the access panel down (2) and press it firmly onto the chassis until it locks into place. You will hear audible clicks as the latches click into place. Figure 2-48 Replacing the access panel Place the computer in the upright position. Reconnect the power cord and external devices.
-
Page 49: Appendix A Electrostatic Discharge
Use conductive field service tools. ● Use a portable field service kit with a folding static-dissipating work mat. If you do not have any of the suggested equipment for proper grounding, contact an HP authorized dealer, reseller, or service provider. NOTE: For more information on static electricity, contact an HP authorized dealer, reseller, or service provider. -
Page 50: Appendix B Computer Operating Guidelines, Routine Care, And Shipping Preparation
Computer operating guidelines, routine care, and shipping preparation Computer operating guidelines and routine care Follow these guidelines to properly set up and care for the computer: ● Keep the computer away from excessive moisture, direct sunlight, and extremes of heat and cold. -
Page 51: Optical Disc Drive Precautions
CAUTION: If any object or liquid falls into the drive, immediately unplug the computer and have it checked by an authorized HP service provider. Shipping preparation Follow these suggestions when preparing to ship the computer: Back up the hard drive files on optical media or external USB drives. -
Page 52: Index
Index replacing 28 additional information 8 self-encrypting drive (SED) 28 optical disc drive solid state drive (SSD) 28 precautions 45 solid state hybrid drive replacing 38 battery, replacing 23 (SSHD) 28 types 28 power components connecting 9 front 3 installation guidelines 8 disconnecting 9 internal 17 installing... - Page 53 solid state hybrid drive (SSHD) 2.5-inch, installing 36 2.5-inch, removing 31 specifications, memory 17 stand, removing 13 swivel adjustment 7 synchronizing wireless keyboard and mouse 11 tilt adjustment 7 ventilation guidelines 44 VESA mounting holes 13 warnings and cautions 8 Index...
Need help?
Do you have a question about the ProOne 400 G1 All-in-One and is the answer not in the manual?
Questions and answers