Table of Contents
Advertisement
Available languages
Available languages
OPERATOR'S MANUAL
United States Patent Pending
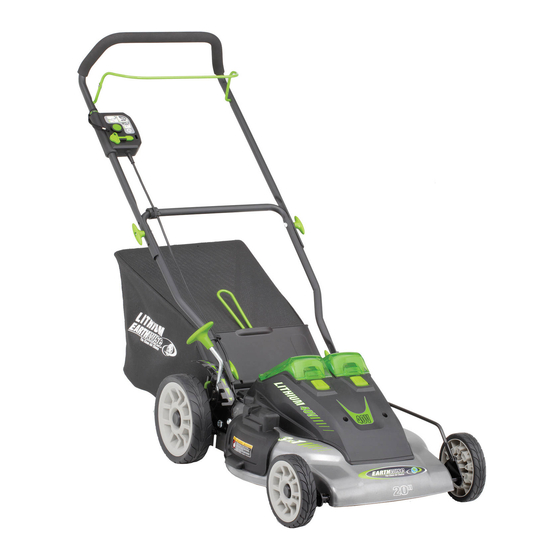
20 in. - 40 VOLT
LITHIUM-ION CORDLESS MOWER
2.0Ah and 4.0Ah Lithium Battery
60420
BATTERY MUST BE CHARGED BEFORE FIRST USE. SEE PAGE 12 FOR INSTRUCTIONS
Your lawn mower has been engineered and manufactured to our high standard for dependability, ease of operation,
and operator safety. Properly cared for, it will give you years of rugged, trouble-free performance.
WARNING: To reduce the risk of injury, the user must read and understand the operator's manual
before using this product.
Thank you for your purchase.
DO NOT RETURN THIS PRODUCT TO THE STORE. OPERATING, ASSEMBLY, PARTS, SERVICE QUESTIONS?
CALL 1-800-377-5888 (USA) / 1-800-561-0004 (CAN) BETWEEN 7:30AM—4:30PM EST FOR ASSISTANCE
SAVE THIS MANUAL FOR FUTURE REFERENCE
Advertisement
Chapters
Table of Contents

Subscribe to Our Youtube Channel
Related Manuals for EarthWise 60420


Summary of Contents for EarthWise 60420
- Page 1 20 in. - 40 VOLT LITHIUM-ION CORDLESS MOWER 2.0Ah and 4.0Ah Lithium Battery 60420 BATTERY MUST BE CHARGED BEFORE FIRST USE. SEE PAGE 12 FOR INSTRUCTIONS Your lawn mower has been engineered and manufactured to our high standard for dependability, ease of operation, and operator safety.
-
Page 2: Table Of Contents
TABLE OF CONTENTS Introduction…………………………………..…………………………………………...2 General Safety Rules……………………………………...…………………………….3 Specific Safety Rules………………………………………………………………… 3-4 Symbols……………………………………..………………………………………… 5-6 Features………………………………………………………………………………. 7-8 Assembly…………………………………………………………………...…………8-11 Operation…………………………………...……………………………...………..12-14 Maintenance………………………………..………………………………...……..15-17 Exploded View/Parts List………………………………….…………………….…18-19 Troubleshooting…………………………….…………………………………………..20 Warranty………………………………………..………………………...…………..21 Parts Ordering/Service..…………………………………………………Back Page INTRODUCTION This product has many features for making its use more pleasant and enjoyable. -
Page 3: General Safety Rules
GENERAL SAFETY RULES Do not operate the equipment while barefoot or when wearing WARNING: sandals or similar lightweight footwear. Wear protective footwear READ AND UNDERSTAND ALL INSTRUCTIONS that will protect your feet and improve your footing on slippery surfaces. Failure to follow all instructions listed below and on the machine ... - Page 4 SPECIFIC SAFETY RULES SAFETY RULES FOR CHARGER Clear the work area before each use. Remove all objects such as rocks, sticks, wire, bones, toys, or other objects which can be Do not abuse the cord. Never use the cord for carrying, pulling thrown by the blade.
-
Page 5: Symbols
SYMBOLS Some of the following symbols may be used on this product. Please study them and learn their mean- ing. Proper interpretation of these symbols will allow you to operate the product better and safer. SYMBOL NAME DESGNATION/EXPLANATION Volts Voltage Amperes Current Hertz... -
Page 6: Symbols
SERVICE CENTER for repair. When servicing, operator’s manual, do not use this product. Call use only identical replacement parts. Earthwise customer service for assistance. WARNING: The operation of any power tool can result in foreign objects being thrown into your eyes, which can result in severe eye damage. -
Page 7: Features
FEATURES PRODUCT SPECIFICATIONS Height Adjustments………………………1-1/2 in. to 4 in. *Battery……………..40V 2.0Ah & 4.0Ah Lithium Battery Wheel Size…………………………7 in. front, 9.5 in. rear Input………………………………………….. 40V DC only Weight…………………………………….23.7kg (52.2 lb) No-load Speed…………………………2,800 r/min (RPM) 40V 4.0 Ah 40V 2.0 Ah BATTERY BATTERY SWITCH MOTOR/BLADE... -
Page 8: Assembly
FEATURES KNOW YOUR LAWN MOWER MOTOR/BLADE CONTROL ASSEMBLY See figure 1 The motor/blade control, located on the upper handle of the mower, engages and disengages the motor and The safe use of this product requires an understanding blade. of the information on the product and in this operator’s manual as well as a knowledge of the project you are MULCHING PLUG attempting. - Page 9 ASSEMBLY ADJUSTING HANDLE See figure 2 Fully loosen the handle knobs on both sides of the HANDLE KNOBS handle. Pull up and back on the upper handle to raise the UPPER handle into operating position. Make certain the HANDLE handles snap into place securely.
- Page 10 ASSEMBLY ASSEMBLY OF BATTERY PORT COVERS Position the battery cover hinge hole over the post of Do not attempt to operate mower without battery the battery port bracket. port covers being assembled. Moisture, dust and dirt within the battery port can cause permanent damage to the batteries and will effect the performance of the mower.
-
Page 11: Operation
ASSEMBLY INSTALLING THE GRASS CATCHER See figure 5 NOTE: When using the grass catcher, do not install either the side discharge deflector or the mulching plug. Lift the rear discharge door. GRASS CATCHER Lift the grass catcher by its handle and place under HANDLE the rear discharge door so that the hooks on the grass catcher are seated on the hooks of the height... - Page 12 2 to 3 initial charging/discharging cycles may be light, this indicates that something is wrong with the required to achieve maximum run time/capacity. battery. Contact Earthwise customer service center at When fully charge, the battery can be safely stored in 1-800-377-5888 (USA)/ 1-800-561-0004 (CAN) for temperatures down to –68℉...
- Page 13 OPERATION REMOVING THE BATTERY PACK WINTER STORAGE To Remove the Battery Pack When fully charge, the battery can be safely stored Lift the battery port cover in temperatures down to –68℉ (-20℃) for a period Press and hold the battery latch button at the top of of up to one month before requiring charging.
- Page 14 OPERATION MOWING TIPS Make sure the lawn is clear of stones, sticks, wires and other objects that could damage the lawn mower blades or motor. Such objects could be accidentally thrown by the mower in any direction and cause serious personal injury to the operator and others.
-
Page 15: Maintenance
MAINTENANCE WARNING: WARNING: When servicing, use only identical replacement parts. Use Always protect hands by wearing heavy gloves and/or wrap- of any other parts may create a hazard or cause product ping the cutting edges of the blade with rags and other ma- damage. - Page 16 MAINTENANCE Place the new blade on the shaft against the fan FAN ASSEMBLY assembly. Make sure it is installed with the curved ends pointing up toward the mower deck and not down toward the ground. Replace the blade insulator and spacer, then thread the blade nut on the shaft and finger tighten.
- Page 17 MAINTENANCE REPLACING WHEELS See Figure 16 HUBCAP To Replace a wheel: Stop the motor and remove the switch key. Remove SELF-LOCKING NUT battery from the battery compartment. Turn the mower on its side. Using a flat blade screwdriver, pry off the hubcap. ...
-
Page 18: Exploded View/Parts List
EXPLODED VIEW PARTS LIST Part no. Description Qty. Part no. Description Qty. 8440-518504 upper handle assy. 1.11 8042-516201 switch 8331-510801 handle grip 1.12 8187-510801 trigger fixed plate 8440-518503 handle assy. 1.13 8NH-03D01 hex lock nut 03D 8312-510801 switch button 1.14 8370-510502 switch cable 8342-510505... -
Page 19: Parts List
PARTS LIST Part no. Description Qty. Part no. Description Qty. 1.21 8422-518501 wire 8006-517601 deck 1.22 8332-535101 cable sheath 8020-510406-01 mulching plug 1.23 8184-516201 cable pressing plate 8440-510409 side discharge door assy. 1.24 8045-516201 43.1 8081-516204 side discharge pin 1.25 8214-517201 key strap 43.2... -
Page 20: Troubleshooting
CALL US FIRST For any questions about operating or maintaining your product, call the Earthwise™ Help Line! 1-800-377-5888 (USA) 1-800-561-0004 (CAN) Your product has been fully tested prior to shipment to ensure your complete satisfaction. -
Page 21: Warranty
ANY NON-RESIDENTIAL USE OR COMMERCIAL USE VOIDS ALL WARRANTIES. CALL US FIRST!! Call us first with questions about operating or maintaining your lawn mower at 1-800-377-5888 (USA) 1-800-561-0004 (CAN) between 7:30 a.m.—4:30 p.m. Eastern Standard Time, or send emails to earthwise@reelin.com... - Page 22 2.0Ah & 4.0Ah LITHIUM BATTERY 60420 SERVICE For parts or service, contact your nearest EarthWise authorized service dealer. Be sure to provide all relevant information when you call or visit. For the location of the authorized service dealer nearest you, please call 1-800-377-5888 (USA) 1-800-561-0004 (CAN) or visit us online at www.americanlawnmower.com.
- Page 23 CORTADORA SIN CABLE CON BATERÍA DE IONES DE LITIO Batería de litio 2,0 Ah y 4,0 Ah 60420 DEBE CARGAR LA BATERÍA ANTES DE UTILIZARLA POR PRIMERA VEZ. CONSULTE LAS INSTRUCCIONES EN LA PÁGINA 12. Su cortadora fue diseñada y fabricada de acuerdo con nuestros altos estándares de confiabilidad, facilidad de operación y seguridad para el operario.
-
Page 24: Introducción
ÍNDICE Introducción ....................... 2 Normas generales de seguridad ................ 3 Normas específicas de seguridad ..............3-4 Símbolos ......................5-6 Características ....................7-8 Montaje ......................8-11 Funcionamiento ..................12-14 Mantenimiento ................... 15-17 Plano de despiece / Lista de piezas ............18-19 ... -
Page 25: Normas Generales De Seguridad
NORMAS GENERALES DE SEGURIDAD No opere el equipo descalzo o si tiene sandalias o calzado liviano similar. ADVERTENCIA: Use calzado de protección que cubra sus pies y le permita tener una base LEA Y COMPRENDA TODAS LAS INSTRUCCIONES de apoyo firme en superficies resbaladizas. ... - Page 26 NORMAS ESPECÍFICAS DE SEGURIDAD NORMAS DE SEGURIDAD PARA EL CARGADOR Despeje la zona de trabajo antes de cada uso. Retire todos los objetos, No haga un mal uso del cable. Nunca tire del cable para trasladar, como rocas, palos, alambres, huesos, juguetes, etc. que puedan ser lanzados por la cuchilla.
-
Page 27: Símbolos
SÍMBOLOS Algunos de los siguientes símbolos pueden aparecer en este producto. Tenga a bien estudiarlos y aprender su significado. La adecuada interpretación de estos símbolos le permitirá operar el producto mejor y de manera más segura. SÍMBOLO NOMBRE DESIGNACIÓN / EXPLICACIÓN Voltios Voltaje Amperios... - Page 28 Al efectuar el servicio técnico, use sólo Comuníquese con el centro de atención al cliente repuestos idénticos. de Earthwise para recibir asistencia. ADVERTENCIA: El uso de cualquier herramienta eléctrica puede hacer que objetos extraños sean arrojados hacia sus ojos, lo que provocaría una lesión seria. Antes de empezar a operar la herramienta, siempre colóquese gafas de seguridad con protectores laterales y, si fuera...
-
Page 29: Características
CARACTERÍSTICAS ESPECIFICACIONES DEL PRODUCTO Ajustes de altura ..de 3,8 a 10,1 cm (1 ½ a 4 pulg.) *Batería .... Batería de litio 2,0 Ah y 4,0 Ah de 40 V Tamaño de ruedas ..delanteras 17,7 cm (7 pulg.), Entrada ......... -
Page 30: Montaje
CARACTERÍSTICAS CONOZCA SU CORTADORA DE CÉSPED MONTAJE DEL MOTOR / CONTROL DE LA CUCHILLA Observe la figura 1 El control del motor / cuchilla, ubicado en el mango superior de la cortadora, permite activar y desactivar el motor y la Para utilizar este producto de manera segura, es necesario cuchilla. - Page 31 MONTAJE AJUSTE DEL MANGO Observe la figura 2 Afloje completamente las perillas que se encuentran a PERILLAS DEL MANGO ambos lados del mango. Tire del mango superior hacia arriba y hacia atrás para levantarlo a la posición de funcionamiento. Verifique que MANGO los mangos encajen de manera exacta y segura.
- Page 32 MONTAJE MONTAJE DE LAS CUBIERTAS DEL PUERTO DE El orificio de la bisagra de la cubierta de la batería debe LAS BATERÍAS colocarse encima del borne del soporte que aloja al puerto No ponga en funcionamiento la cortadora si las cubiertas de la batería.
-
Page 33: Funcionamiento
MONTAJE INSTALACIÓN DEL RECOLECTOR DE PASTO Observe la figura 5 NOTA: Al usar el recolector de pasto, no instale ni el deflector de descarga lateral ni el dispositivo de tritu- rado. MANGO DEL Levante la puerta de descarga posterior. RECOLECTOR DE PASTO ... - Page 34 Retire el paquete y vuelva a colocarlo. Si el problema persiste, verde comuníquese con el centro de atención al cliente de Earthwise al 1-800-377-5888 (EE. UU.) / 1-800-561-0004 (CANADÁ) para Encendido obtener asistencia.
- Page 35 FUNCIONAMIENTO EXTRACCIÓN DEL PAQUETE DE BATERÍAS ALMACENAMIENTO EN INVIERNO Para extraer el paquete de baterías Cuando la batería está cargada por completo, se Levante la cubierta del puerto de la batería. puede guardar de forma segura en temperaturas de ...
- Page 36 FUNCIONAMIENTO CONSEJOS PARA CORTAR EL CÉSPED Asegúrese de que en el área en la que trabajará no haya piedras, palos, alambres o cualquier otro objeto que pueda dañar las cuchillas o el motor de la cortadora. Estos objetos podrían ser lanzados accidentalmente por la cortadora en cualquier dirección, y provocar lesiones ORIFICIO PARA...
-
Page 37: Mantenimiento
MANTENIMIENTO ADVERTENCIA: ADVERTENCIA: Al efectuar el servicio técnico, use solo repuestos idénti- Siempre protéjase las manos usando guantes gruesos y/o cos. El uso de otros repuestos puede provocar riesgos o envolviendo los bordes de corte de la cuchilla con paños y dañar el producto. - Page 38 MANTENIMIENTO Coloque la cuchilla nueva en el eje contra el conjunto CONJUNTO DEL VENTILADOR del ventilador. Asegúrese de que esté instalada con los extremos curvos orientados hacia arriba, donde está la plataforma de la cortadora, y no hacia abajo, donde está el suelo.
- Page 39 MANTENIMIENTO REEMPLAZO DE RUEDAS Observe la figura 16 TAPA DEL Para reemplazar una rueda: CUBO Detenga el motor y extraiga la llave de seguridad. TUERCA Extraiga la batería de su compartimiento. AUTOBLOCANTE Gire la cortadora sobre su costado. ...
-
Page 40: Plano De Despiece / Lista De Piezas
PLANO DE DESPIECE LISTA DE PIEZAS N.° referencia N.º de pieza Descripción Cant. N.° referencia N.º de pieza Descripción Cant. 8440-518504 conjunto de mango superior 1.11 8042-516201 interruptor 8331-510801 mango anatómico 1.12 8187-510801 placa fija de gatillo 8440-518503 conjunto de mango 1.13 8NH-03D01 tuerca de seguridad hexagonal 03D... - Page 41 LISTA DE PIEZAS N.° referencia N.º de pieza Descripción Cant. N.° referencia N.º de pieza Descripción Cant. 1.21 8422-518501 alambre 8006-517601 plataforma 1.22 8332-535101 funda para cable 8020-510406-01 dispositivo de triturado 1.23 8184-516201 placa de prensado de cable 8440-510409 conjunto de puerta de descarga lateral 1.24 8045-516201 llave...
-
Page 42: Solución De Problemas
¡LLÁMENOS PRIMERO! Si tiene alguna pregunta sobre el funcionamiento o el mantenimiento del producto, llame a la línea de ayuda de Earthwise™. 1-800-377-5888 (EE. UU.) 1-800-561-0004 (CANADÁ). El producto ha pasado por todas las pruebas necesarias antes del envío, para garantizar... -
Page 43: Garantía
Llámenos primero si tiene preguntas sobre el funcionamiento o el mantenimiento de su cortadora de césped a los teléfonos 1-800-377-5888 (EE. UU.) 1-800-561-0004 (CANADÁ) entre las 7:30 y 16:30, hora estándar del este, o envíe un correo electrónico a earthwise@reelin.com. - Page 44 SERVICIO TÉCNICO Para solicitar repuestos o servicio técnico, comuníquese con el servicio técnico autorizado de EarthWise más cercano a su domicilio. Asegúrese de proporcionar toda la información relevante cuando nos llame o visite. Si desea saber cuál es el servicio técnico autorizado más cercano a su domicilio, llame al 1-800-377-5888 (EE.
- Page 45 50,8 cm (20 po) - 40 VOLTS TONDEUSE SANS FIL À BATTERIE LITHIUM-ION Batterie lithium de 2,0 et 4,0 Ah 60420 LA BATTERIE DOIT ÊTRE CHARGÉE AVANT LA PREMIÈRE UTILISATION. REPORTEZ-VOUS À LA PAGE 12 POUR LES INSTRUCTIONS. Votre tondeuse a été conçue et fabriquée selon nos normes élevées de fiabilité, de facilité d’utilisation et de sécurité...
- Page 46 TABLE DES MATIÈRES Introduction ......................2 Règles générales de sécurité ................3 Règles spécifiques de sécurité ..............3-4 Symboles ....................... 5-6 Options......................7-8 Assemblage ....................8-11 Utilisation ....................12-14 Maintenance ....................15-17 ...
-
Page 47: Règles Générales De Sécurité
RÈGLES GÉNÉRALES DE SÉCURITÉ N'utilisez pas la tondeuse lorsque vous êtes pieds nus ou si vous portez des AVERTISSEMENT : sandales ou des chaussures légères. Utilisez des chaussures de protection LISEZ ET COMPRENEZ TOUTES LES INSTRUCTIONS qui protégeront vos pieds et qui amélioreront votre prise de pied sur les surfaces glissantes. - Page 48 RÈGLES SPÉCIFIQUES DE SÉCURITÉ RÈGLES DE SÉCURITÉ DU CHARGEUR Dégagez l’espace de travail avant chaque utilisation. Retirez tous les N'utilisez pas incorrectement le cordon. N'utilisez jamais le cordon pour objets comme les roches, les bâtons, les fils, les os, les jouets et tout autre objet pouvant être projeté...
-
Page 49: Symboles
SYMBOLES Certains des symboles suivants peuvent apparaître sur ce produit. Examinez-les et apprenez leur signification. Une interprétation correcte des symboles vous permettra d’utiliser ce produit plus efficacement et de façon plus sécuritaire. SYMBOLE APPELLATION / EXPLICATION Volts Tension Ampères Courant Hertz Fréquence (cycles par seconde) Watt... - Page 50 à votre CENTRE dans le manuel de l'utilisateur, n'utilisez pas ce D'ENTRETIEN AUTORISÉ le plus près. produit. Appelez le service à la clientèle Earthwise N'utilisez que des pièces de rechange identiques pour obtenir de l'aide. lors de l'entretien.
- Page 51 CARACTÉRISTIQUES SPÉCIFICATIONS DU PRODUIT Réglages de la hauteur..3,8 à 10,1 cm (1,5 à 4 po) *Batterie ..batterie lithium de 40 volts, de 2,0 et 4,0 Ah Dimension de la roué ....17,7 cm (7 po) à l'avant, Entrée ........40 V, CC uniquement 24,1 cm (9,5 po) à...
-
Page 52: Assemblage
CARACTÉRISTIQUES CONNAÎTRE VOTRE TONDEUSE À GAZON ASSEMBLAGE DE COMMANDE DU MOTEUR / Reportez-vous à l’illustration 1 DE LA LAME La commande du moteur / de la lame, située sur la poignée L'utilisation sécuritaire de ce produit demande une supérieure de la tondeuse, met en marche et arrête le moteur compréhension des informations associées ainsi que celles et la lame. - Page 53 ASSEMBLAGE RÉGLER LA POIGNÉE Reportez-vous à l’illustration 2 Desserrez complètement les molettes de la poignée des MOLETTES DE LA POIGNÉE deux côtés de la poignée. Tirez vers le haut et l'arrière de la poignée supérieure pour la soulever en position d'utilisation. Assurez-vous que les POIGNÉE poignées s'enclenchent fermement en place.
- Page 54 ASSEMBLAGE ASSEMBLAGE DES COUVERCLES DU PORT DE Positionnez le trou de charnière du couvercle de batterie LA BATTERIE sur la tige du support du port de la batterie. N'essayez pas d'utiliser la tondeuse sans que les couvercles du port de la batterie ne soient assemblés. L'humidité, la poussière et la saleté...
-
Page 55: Utilisation
ASSEMBLAGE INSTALLER LE SAC À HERBE Reportez-vous à l’illustration 5. REMARQUE : Lors de l'utilisation du sac à herbe, n'installez pas le déflecteur d'éjection latérale ni l'insert broyeur. Soulevez la porte d'éjection arrière. POIGNÉE DU SAC Soulevez le collecteur d’herbe par sa poignée et placez-le À... - Page 56 Lorsqu’elles sont entièrement chargées, les batteries Contactez le service de service à la clientèle Earthwise au 1- peuvent être stockées de façon sûre à des températures 800-377-5888 (ÉTATS-UNIS) / 1-800-561-0004 (CANADA) pouvant atteindre –20 °C (-68 °F) pendant une période...
- Page 57 UTILISATION RETIRER LE BLOC-BATTERIE RANGEMENT POUR LA PÉRIODE HIVERNALE Pour retirer le bloc-batterie Lorsqu’elles sont entièrement chargées, les Soulevez le couvercle du port de la batterie. batteries peuvent être stockées de façon sûre à des températures pouvant atteindre –20 °C (-68 °F) Appuyez et maintenez le bouton du loquet de la pendant une période allant jusqu'à...
- Page 58 UTILISATION CONSEILS DE TONTE Assurez-vous que la pelouse soit libre de pierres, bâtons, fils et autres objets qui pourraient endommager le moteur ou les lames de la tondeuse. De tels objets pourraient accidentellement être projetés par l'utilisateur dans une direction quelconque et pourraient provoquer des TROU DE CLÉ...
-
Page 59: Maintenance
MAINTENANCE AVERTISSEMENT : AVERTISSEMENT : N'utilisez que des pièces de rechange identiques lors de Protégez toujours vos mains en portant des gants lourds et/ou en l'entretien. L'utilisation de toute autre pièce peut constituer un enveloppant les bords tranchants de la lame avec des chiffons et danger ou endommager le produit. - Page 60 MAINTENANCE ASSEMBLAGE DU Mettez la nouvelle lame sur l'axe contre l'assemblage du VENTILATEUR ventilateur. Assurez-vous qu'elle soit installée avec les bouts courbés orientés vers le bâti de la tondeuse et non orientés vers le sol. Remettez en place l'isolant de la lame et la rondelle d'espacement, puis enfilez l'écrou de la lame sur l'axe et serrez manuellement.
- Page 61 MAINTENANCE REMPLACER LES ROUES Reportez-vous à l’illustration 16 ENJOLIVEUR Pour remplacer une roue : Éteignez le moteur et retirez la clé de contact. Retirez la ÉCROU AUTOBLOQUANT batterie de son compartiment. Tournez la tondeuse sur le côté. À...
- Page 62 VUE ÉCLATÉE LISTE DES PIÈCES Clé no Pièce no Description Qté Clé Pièce no Description Qté 8440-518504 assemblage supérieur de la poignée 1.11 8042-516201 contacteur 8331-510801 poignée 1.12 8187-510801 plaque fixe de déclenchement 8440-518503 assemblage de la poignée 1.13 8NH-03D01 contre-écrou hexagonal 03D 8312-510801 interrupteur...
- Page 63 LISTE DES PIÈCES Clé Pièce no Description Qté Clé Pièce no Description Qté 1.21 8422-518501 8006-517601 bâti 1.22 8332-535101 revêtement de câble 8020-510406-01 insert broyeur 1.23 8184-516201 plaque de pressage de câbles 8440-510409 assemblage de la porte d'éjection latérale 1.24 8045-516201 clé...
-
Page 64: Dépannage
APPELEZ-NOUS D’ABORD Pour toute question sur l'utilisation ou l'entretien de votre produit, appelez la Ligne d'aide Earthwise™! 1-800-377-5888 (ÉTATS-UNIS) / 1-800-561-0004 (CANADA) Votre produit a été complètement testé avant son expédition pour s'assurer de votre totale satisfaction. -
Page 65: Garantie
UNE UTILISATION NON RÉSIDENTIELLE OU UNE UTILISATION COMMERCIALE ANNULE TOUTES LES GARANTIES. APPELEZ-NOUS D’ABORD!! Appelez-nous pour vos questions sur le fonctionnement ou l'entretien de votre tondeuse au 1-800-377-5888 (ÉTATS-UNIS) / 1-800-561-0004 (CANADA) entre 7h30 et 16h30 heure normale de l'Est, ou envoyez vos courriels à earthwise@reelin.com. - Page 66 RÉPARATION Pour les pièces ou la réparation, contactez votre fournisseur d'entretien autorisé EarthWise le plus près. Veillez fournir toute l'information pertinente lorsque vous nous appelez ou nous rendez visite. Pour l'emplacement du fournisseur d'entretien autorisé le plus près, veuillez appeler le 1-800-377-5888 (ÉTATS-UNIS) / 1-800-561-0004 (CANADA) ou visitez-nous en ligne au...
Need help?
Do you have a question about the 60420 and is the answer not in the manual?
Questions and answers
Earthwise model 60420 need PN 8149-517601