Table of Contents
Advertisement
Advertisement
Table of Contents

Related Manuals for ECOVACS DEEBOT M82


Summary of Contents for ECOVACS DEEBOT M82
- Page 1 Instruction Manual...
- Page 2 Congratulations on the purchase of your ECOVACS ROBOTICS DEEBOT! We hope it brings you many years of satisfaction. We trust the purchase of your new robot will help keep your home clean and provide you more quality time to do other things.
-
Page 3: Table Of Contents
Contents 1. Important Safety Instructions .......................2 2. Package Contents and Technical Specifications ..............5 2.1 Package Contents ........................5 2.2 Specifications ..........................5 2.3 Product Diagram ........................6 3. Operating and Programming ......................8 3.1 Notes Before Cleaning ......................8 3.2 Quick Start ............................9 3.3 Cleaning Mode Selection .....................11 3.4 Programming the Robot ......................13 3.5 Status Indicator Light and Alarm Sounds ..............15 4. -
Page 4: Important Safety Instructions
1. Important Safety Instructions When using an electrical appliance, basic precautions should always be followed, including the following: READ ALL INSTRUCTIONS BEFORE USING THIS APPLIANCE. SAVE THESE INSTRUCTIONS 1. This Appliance can be used by children aged from 8 years and above and person with reduced physical, sensory or mental capabilities or lack of experience and knowledge if they have been given supervision or instruction concerning use... - Page 5 29. When not using the Charging Dock for a long period of time, please unplug it. 30. The Appliance must be used in accordance with the directions in this Instruction Manual. ECOVACS ROBOTICS cannot be held liable or responsible for any damages or injuries caused by improper use.
- Page 6 1. Important Safety Instructions 31. The battery must be removed from the appliance before it is scrapped. 32. The appliance must be disconnected from the supply mains when removing the battery. 33. WARNING: For the purposes of recharging the battery, only use the detachable supply unit GSCV0600S019V12E provided with this Appliance.
-
Page 7: Package Contents And Technical Specifications
2. Package Contents and Technical Specifications 2.1 Package Contents (4) Side Brushes Robot Remote Control with Charging Dock with (2 pre-installed, Batteries Power Adapter 2 replacements) Cleaning Tool Instruction Manual High Efficiency Filter 2.2 Specifications Model DM82 Working Voltage 14.8V DC Rated Power Lithium battery Lithium 14.8V... -
Page 8: Product Diagram
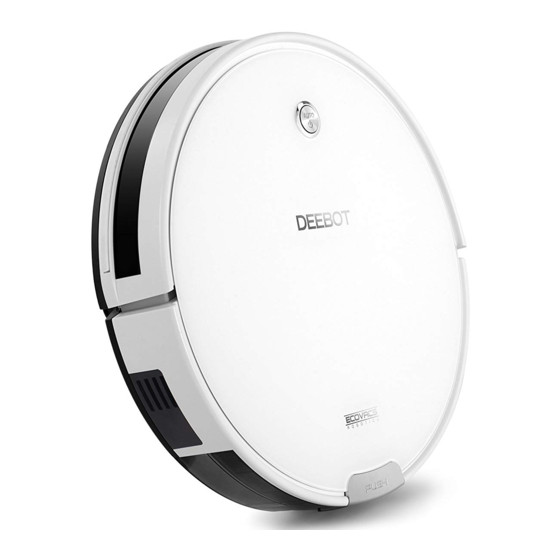
2. Package Contents and Technical Specifications 2.3 Product Diagram Robot 1. Anti-Collision Sensors 8. Anti-Drop Sensors 2. AUTO Mode Button 9. Universal Wheel 3. Dust Bin Release Button 10. Side Brushes 4. Charging Contacts 11. Main Brush 5. Battery Cover 12. -
Page 9: Remote Control
2. Package Contents and Technical Specifications Remote Control 1. Current Time Display 2. Scheduled Cleaning Time Display 3. Direction Control Buttons 4. START/PAUSE Button 5. Time Scheduling Button 6. MAX Button Press to: Adjust current time and scheduled cleaning time. Turn the robot around 180 degrees. -
Page 10: Operating And Programming
3. Operating and Programming 3.1 Notes Before Cleaning Before operating DEEBOT, take a few moments to survey the area to be cleaned and remove any obstacles. Remove power cords and small objects from The product is not suitable for use on long-pile the floor that could entangle the product. -
Page 11: Quick Start
3. Operating and Programming 3.2 Quick Start Charging Dock Placement Connect the Power Adapter to the Charging Dock. Place the Charging Dock on a level floor surface against the wall with the base perpendicular to the ground. Keep the immediate area 2m (6.6’) in front of the charger and 1 m (3.3’) on both sides of the charger clear of objects and reflective surfaces. - Page 12 3. Operating and Programming Start Press the AUTO Mode Button on DM82 or the START/PAUSE Button on the Remote Control.. DM82 starts to work immediately in AUTO Cleaning Mode. * To choose another Cleaning Mode, please refer to section 3.3 Cleaning Mode Selection for details. Pause Pause DM82 by pressing the AUTO Mode Button on DM82 or the START/PAUSE Button on the...
-
Page 13: Cleaning Mode Selection
3. Operating and Programming Power OFF Pause DM82. Move the Side Power Switch to the OFF position. * When DM82 is not cleaning, it is suggested to keep it powered ON and charging instead of powered OFF. 3.3 Cleaning Mode Selection DM82 has several cleaning modes to choose from to effectively clean different floors. - Page 14 3. Operating and Programming Edge Cleaning Mode MAX Cleaning Mode This mode is used to increase the suction This mode is good for cleaning the edges and power of any other cleaning mode already corners of a room. In Edge Cleaning Mode, in process.
-
Page 15: Programming The Robot
3. Operating and Programming 3.4 Programming the Robot DM82 has a Time Scheduling function. DM82 can be programmed to automatically clean once per day, at a specific time even if nobody is at home. The current time of day and the cleaning time are scheduled using the Remote Control. - Page 16 3. Operating and Programming Schedule the Cleaning Time Press the Time Scheduling Button on the Press the up Direction Control Button and Remote Control to schedule automatic cleaning. the MAX Button to adjust “hour” and “minute” The “hour” in the first line on the screen flashes. number.
-
Page 17: Status Indicator Light And Alarm Sounds
3. Operating and Programming 3.5 Indicator Light and Alarm Sounds Indicator Light AUTO Mode Button on DM82 Status Flashes ORANGE The robot is charging. Glows a continuous GREEN The robot is fully charged. Flashes GREEN The robot is powered ON and is awake. Glows a continuous RED The robot has a problem. -
Page 18: Maintenance
4. Maintenance Before performing cleaning and maintenance on DM82, power OFF the robot and unplug the Charging Dock. 4.1 Dust Bin and Filters Press the Dust Bin Release Button and remove the Dust Bin from the rear of DM82. Hold the Dust Bin level and open the Dust Bin Cover. -
Page 19: Main Brush And Side Brushes
4. Maintenance 4.2 Main Brush and Side Brushes Cleaning the Main Brush Turn the robot over. Push the two tabs on the Main Brush Cover to remove it. Remove the Main Brush. Use the provided Cleaning Tool to remove any hair tangled around the Main Brush. Cleaning the Side Brushes Remove the Side Brushes with a screwdriver. - Page 20 4. Maintenance Wipe the Charging Contacts and Charging Dock Pins with the brush side of the provided Cleaning Tool to maintain their effectiveness. Wipe the top cover of the robot with a soft dry or slightly damp cloth. Do not use cleaning solutions on the top cover as it could damage the surface.
-
Page 21: Troubleshooting
5. Troubleshooting Please use this chart to troubleshoot common problems using DM82. Malfunction Possible Cause Solutions Move DM82’s Side Power Button to DM82 is not powered ON. the ON position. Be sure that DM82’s Charging DM82 has not made Contacts have made a connection a connection with the with the Charging Dock Pins. - Page 22 5. Troubleshooting Malfunction Possible Cause Solutions Time Scheduling function is Set Time Scheduling function as cancelled. described in section 3.4. DM82 is powered OFF. Power ON DM82. DM82 will not clean automatically at Keep DM82 powered ON and on the scheduled time.
- Page 23 DM82-EU01-IM2014R04...
Need help?
Do you have a question about the DEEBOT M82 and is the answer not in the manual?
Questions and answers