Sebo AIRBELT E Owner's Manual
Hide thumbs
Also See for AIRBELT E:
- Owner's manual (18 pages) ,
- Instruction manual (13 pages) ,
- Owner's manual (16 pages)
Table of Contents
Advertisement
Advertisement
Table of Contents

Related Manuals for Sebo AIRBELT E


Summary of Contents for Sebo AIRBELT E
- Page 1 OWNER’S MANUAL For Household Use Only...
-
Page 2: Table Of Contents
To contact SEBO in Canada: SEBO America, LLC Floor Care Equipment, Ltd. Telephone: (800) 334-6614 Telephone: (800) 661-8687 Fax: (303) 792-9196 Fax: (800) 270-4807 Website: www.sebo.us Website: www.sebocanada.ca For Warranty coverage information please refer to your Warranty Card included with your SEBO vacuum cleaner. -
Page 3: Important Safety Instructions
15. Do not use vacuum without filter bag and/or filters in place. 31. Use a SEBO power head only in combination with a SEBO 16. Turn off all machine controls before unplugging. vacuum cleaner. -
Page 4: Special Airbelt E Product Features
AIRBELT E1 Kombi and E2 Turbo because it minimizes the number of electrical outlets needed during use. Quick-release Connections – The AIRBELT E models allow for The SEBO AIRBELT E1 Kombi and E2 Turbo are straight- quick and convenient connection of telescopic tubes, power suction vacuums. -
Page 5: Airbelt E3 Premium Features
OPTIONAL ATTACHMENTS, ACCESSORIES, BAGS & FILTERS In addition to the standard on-board tools, a variety of optional SEBO filter bags can be purchased in boxes of eight and filters attachments are available. The nine-foot extension hose are sold separately. Also, bags and filters can be purchased (extends suction hoses) and the 20-inch extension tube are very together in model-specific kits called “Service Boxes.”... -
Page 6: Standard Features Of All Sebo Vacuums
And they the machine. This is why all SEBO vacuums have tight seals can be sealed when full, so no dust can escape into the air during throughout. -
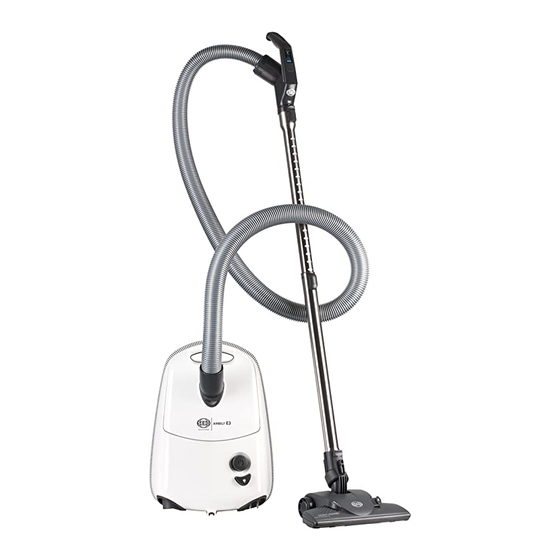
Page 7: Identification Of Parts
IDENTIFICATION OF PARTS 1. Handle grip 12. Filter bag cover 2. Power control slider (E3 only) 13. Carrying handle 3. Handle release button 14. Hose neck release buttons 4. Slide button 15. Warning indicator 5. Telescopic tube 16. Suction opening 6. -
Page 8: Operating Instructions
When possible, consult the materials supplied by your flooring manufacturer for infor- mation on proper upkeep and cleaning. To ensure that your new SEBO vacuum cleaner is compatible with your floor, please test the vacuum cleaner on each type of flooring surface in a small inconspicuous area to determine if any damage occurs. -
Page 9: Additional Operating Instructions For E3 Premium With Power Head
ADDITIONAL OPERATING INSTRUCTIONS FOR E3 WITH POWER HEAD Please refer to your ET-1 power head owner’s manual for more information Starting The E3 Premium and Suction Control - Figures 1, 2, 9 & 10 Before turning on your canister, make sure that the vacuum handle is in its upright locked position (figure 9). -
Page 10: Using The Telescopic Tube, Hose & Attachments
Using the Telescopic Tube, Hose & Attachments - Figures 13, 14, 15 & 16 The telescopic tube (5) is useful for vacuuming corners and hard-to-reach areas. You may use the tel- escopic tube without a brush, power head or attachment. To remove a brush or power head, switch off the power control knob (10) and unplug the vacuum. -
Page 11: Vacuum Maintenance
VACUUM MAINTENANCE Always unplug vacuum from outlet before dismantling any part of machine! Changing the Filter Bag - Figures 20, 21 & 22 To change the filter bag (40), lift the filter bag release catch (17, figure 20) then lift open 12 17 the filter bag cover (12). -
Page 12: Changing The Airbelt
Changing the AIRBELT - Figures 27-33 Your E-Series vacuum cleaner is fitted with the patented AIRBELT shock absorber system, which protects your walls and furniture and filters exhaust air. The AIRBELT shock absorber system consists of the foam bumper (52) and the AIRBELT fabric cover (25). If damage occurs to the AIRBELT cover, it will need to be replaced. -
Page 13: Clog Removal
CLOG REMOVAL Always unplug vacuum from outlet before removing any clogs! NOTE! E3 users with ET-1 power heads, please refer to your power head user’s manual for more detailed instructions for removing clogs in your power head. If the “bag full or clog” warning indicator (15) remains orange after the filter bag has been changed and the filters are in good condition, there is likely a clog in the system. -
Page 14: Trouble-Shooting Guide
TROUBLE-SHOOTING GUIDE Always unplug vacuum from outlet before dismantling any part of the machine! PROBLEM REASON SOLUTION Does not turn on 1. Telescopic tube not inserted properly. 1. See page 7. 2. Not plugged into working outlet. 2. Use another outlet. 3. -
Page 15: Airbelt E1 Kombi & E2 Turbo Schematic And Part Numbers
AIRBELT E1 KOMBI AND E2 TURBO SCHEMATIC AND PARTS LIST Canister with Handle/Hose #91602AM E1 Kombi Arctic White 90602AM E1 Kombi - Arctic White Machine #91620AM E2 Turbo Dark Blue Pos. Part # Description 8335WEER Bottom casing, white 8275GSER Castor front, gray-black 8276GSER Castor rear, gray-black 8249WEER... -
Page 16: Airbelt E3 Premium Schematic And Part Numbers
AIRBELT E3 PREMIUM SCHEMATIC AND PARTS LIST Canister with Handle/Hose #91640AM E3 Premium - Black #91640AM E3 Premium Black #91641AM E3 Premium - Arctic White 91640AM E3 Premium - Black Machine #91641AM E3 Premium Arctic White #91642AM E3 Premium - Red #91642AM E3 Premium Red Pos.
Need help?
Do you have a question about the AIRBELT E and is the answer not in the manual?
Questions and answers