MANUAL FOR ANNUAL MAINTENANCE
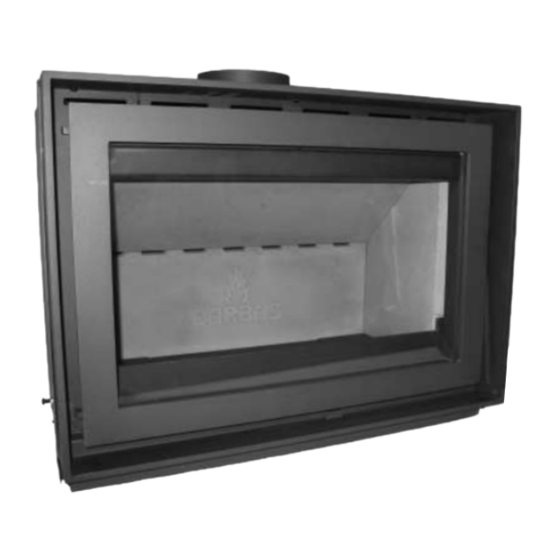
 UNILUX-6 52 Wood-burning insert appliance Barbas wishes you many cosy evenings with your new fi re This document is an essential part of your fi re. Read it carefully before installation and maintenance of the gas fi re and keep it in a safe place!
UNILUX-6 52 INTRODUCTION GENERAL Congratulations on your purchase of this modern Barbas appliance. This quality product will provide you with many years of enjoyment due to the fl ame effect and warmth that it provides. Study this manual carefully before using the fi replace. We recommend you keep this manual in a safe place for reference purposes.
Page 8
UNILUX-6 52 • It is essential that the appliance, the fl ue and combustion air supply are cleaned and inspected annually by a Barbas dealer/specialist. The safe operation of the appliance will thus remain guaranteed. • The appliance is suitable and approved for periodical use.
UNILUX-6 52 LOCATION INCLUDED Set documentation • Directions for use • Installation instructions Attributes • Glove (Heat resistant up to max. 95°C) • Operating hook / Poker N.B. If any part is missing, please contact your dealer. PREPARATION FOR POSITIONING Check all functions of the appliance before fi...
Page 10
UNILUX-6 52 Handle forwards: The door releases from its lock and can be opened forwards. For this, use the operating hook supplied. • Check whether the 2 baffl e plates are located correctly in the supports. • Check the operation of the slider for the regulation of the combustion air intake (middle below the window).
Page 11
UNILUX-6 52 • Check whether the ashtray is completely empty. • Report any defects immediately to your dealer. • Remove enclosed documents and components from the appliance. • Decide how to install the appliance. Important: There are many possibilities ! See also chapter 3.3 Fitting.
Page 12
UNILUX-6 52 Connection Possibilities: Attention! : If appliance is equipped with a horizontal or vertical chimney connection: connection possibilities I or II. If applaince is equipped with a 45 degrees chimney connection: conection possibility III. Appliance is equipped with a vertical or horizontal chimney connection Mounting as insert in an existing fi...
Page 13
UNILUX-6 52 C Insert, with open space of fi replace. Convection air through the chimney breast. Appliance is equipped with a vertical or horizontal chimney connection Installing as a build-in appliance in an existing or new fi replace. In this situation it is possible to fi t the appliance with a combustion air supply from the outside through the back or the underside of the appliance.
Page 14
UNILUX-6 52 B Build-in appliance, with convection set External combustion air supply through the back or the underside. If applaince is equipped with a 45 degrees chimney connection Appliance is equipped with a 45 degrees chimney connection No possibility for convection air. Ventilated chimney breast.
Page 15
UNILUX-6 52 B Build-in appliance. External combustion air supply through the back or underside of the appliance. = Closed (“break away” discs) = Open (“break away” discs) = Grate Ventilation openings chimney breast = Grate Combustion air supply via wall outlet...
Page 16
UNILUX-6 52 • Ventilation casing / chimney. Ensure that the casing/chimney has suffi cient ventilation openings (See Chapter 3 and 4). • Opening of 2 convection air outlets. *) Have the suitability of the area in which the fi re is to be fi tted (and the chimney) approved by a specialist.
UNILUX-6 52 ACCESSORIES The following accessories can be supplied by your dealer: Art. nr. Accessorie 338223 Convection set General: *) (for convection air extraction) 302188 • 1x Flexible aluminium pipe Ø125 mm, L= 3 m (max.) 310178 • 2x Fitting box...
Page 18
UNILUX-6 52 A = Superimposed hearth B = Constructional hearth Figure 1: Minimum dimensions appliance The minimum depth of the constructional hearth is 500 mm. A superimposed hearth on top of the constructional hearth must have a minimum depth of 225 mm and must be free of any combustible material.
UNILUX-6 52 INSTALLATION 3.1 INSTRUCTIONS When fi tting one of these appliances local and/or national regulations relating to fi re safety must be followed. In case of doubt, consult the fi re safety department of the local fi re brigade, particularly if the fi re is to be fi tted in a home with walls and/or fl oors containing fl...
UNILUX-6 52 3.3 FITTING The appliance can be fi tted in the newly-built or existing chimney breast of an open fi re. When fi tting, both fi re safety and operational safety must be safeguarded. The fi tter is responsible for this.
Page 21
UNILUX-6 52 The ventilation openings at the top should be at least 50 cm below the ceiling Ventilation openings Figure 3: Use of ventilation of chimney Installation instructions...
Page 22
UNILUX-6 52 Examples installation possibilities. Attention! : If appliance is equipped with a horizontal or verical chimney connection: installation possibility I or II. If appliance is equipped with a 45 degrees chimney connection: installation possibility III. A Appliance as an insert-appliance in an existing chimney.
Page 23
UNILUX-6 52 B Appliance as an insert-appliance in an existing chimney. Fitted with a convection set and ventilation of the chimney. C Appliance as an insert-appliance in an existing chimney. Convection air through the chimney breast. Fitted with ventilation of the chimney.
Page 24
UNILUX-6 52 II A Appliance as a build-in appliance in an existing or a new chimney. Fitted with ventilation of the chimney. External combustion air supply through the back or underside of the appliance. II B Appliance as a build-in appliance in an existing or a new chimney.
Page 25
UNILUX-6 52 II C Appliance as a build-in appliance in an existing or a new chimney. Convection air through the chimney breast. Fitted with ventilation of the chimney. External combustion air supply through the back or underside of the appliance.
Page 26
UNILUX-6 52 Appliance as a build-in appliance. Appliance is equipped with a 45 degrees chimney connection. No possibility for convection air. Ventilated chimney breast. A Build-in appliance. Combustion air supply via the front of the appliance. B Build-in appliance. External combustion air supply through the back or underside of the appliance.
Page 27
UNILUX-6 52 Appliance: Inlet opening combustion air (front of appliance) Inlet opening combustion air (bottom / rear of appliance, Ø80 mm) with the aid of the air supply adapter (pre-mounted) Inlet opening convection air (front of appliance) *) Flue connection (topside of appliance, Ø150 mm)
Page 28
UNILUX-6 52 3.3.2 Aeration / ventilation The appliance generates: - convection air - combustion air Convection air *) is devoted to the convection of heat from the appliance to the room. The source of heat is in the room and stays there.
Page 29
UNILUX-6 52 3.3.3 Fitting in an existing chimney • Remove the existing fi re basket or stoking stones and remove the shut-off fl ap. The chimney must be intact and must not be damaged during fi tting. The chimney breast opening must be big enough for a gap of 1 - 3 cm to be left all round the appliance.
Page 30
UNILUX-6 52 • Assembly convection set: *) ° Secure the 2 collar adaptors to the appliance. ° Now connect the fl exible hoses to the 2 collar adaptors (Ø125 mm) on the top of the fi re and to the metal fi tting box on the air exit grids that are being used (do not forget to fi...
Page 31
UNILUX-6 52 Figure 4: Use of convection set *) and ventilation of the chimney (diagram) • Close up the front. Available BARBAS grids (option) for ventilating the chimney: COLOUR DIMENSION (cm) CLEAR OPENING (cm Brass or white 13.5 x 13.5 (incl.
Page 32
UNILUX-6 52 • During installation of the appliance, a clearance of 3 mm should be maintained on all sides of the appliance to allow for expansion of the appliance during operation. • If the appliance is to be placed against a bearing wall or against a wall containing fl...
UNILUX-6 52 • Pull the pipe of the appliance or the stainless steel (fl exible) pipe downwards through the appliance and secure it to the smoke outlet connection. Fix with hose clamp (minimum 2 pieces per connection). • Push the smoke outlet connection back upwards and secure it in place.
UNILUX-6 52 OPERATION The appliance with convection set (option) built into chimney Figure 5: Operation Handle Ceramic heat-proof glass Convection air outlet opening front (when no convection set available) *) Natural convection air outlet opening (2x grate) (chimney) *) Convection air outlet opening (2x grate convection set) (chimney) *)
ANNUAL MAINTENANCE It is essential that the appliance, the chimney and the combustion air supply are cleaned and inspected annually, by a Barbas-dealer/expert. The safe operation of the appliance will thus remain guaranteed. Start with maintence 24 hours after the last burning period.
Page 36
Wait for the appliance to cool down suffi ciently before cleaning. Never use scouring powder, aggressive cleaners or fi re polish on the appliance. • Any lacquer damage can be repaired with a BARBAS heat resistant paint spray can. (Pay atention that the appliance is suffi ciently cooled down !) †...
UNILUX-6 52 REPLACEMENT PARTS Pos no Article no Description 340385 Baffl e plate stainless steel 339999 Stone baffl e plate 339921 Stone side left 339998 Stone rear 340378 Bottom 340377 Combustion grate 339920 Stone side right 340379 Wood rack 340432 Ceramic glass When ordering, please give the serial number.
Page 38
UNILUX-6 52 SEQUENCE FOR REPLACING THE INTERIOR OF THE APPLIANCE • Remove the grate and the ashtray. Although the heat resistant panels have been manufactured with the greatest care, there is the possibility that some sharp parts may stick out, possibly causing injuries. We therefore urgently recommend wearing safety gloves when handling the panels.
Page 39
UNILUX-6 52 • Unscrew the locking pin with the aid of an Allen key and a wrench. You can now remove the top baffl e plate by pulling it forward slightly and then tipping it downwards The baffl e plate can now be pulled forwards and out.
Page 40
UNILUX-6 52 • Remove the bottom baffl e plate by lifting it slightly and removing it sloping to one side. • Remove carefully the rear panel, by lifting it upwards and remove it diagonally forward. • Remove carefully the left-hand side panel.
Page 41
UNILUX-6 52 • Remove carefully the right-hand side panel. Make sure the rear panels do not fall forwards ! • Finally, remove the wood rack. The entire interior is now disassembled. The interior is reassembled in the reverse order. Make sure, when reassembling the interior to start with the wood rack.
UNILUX-6 52 TECHNICAL DATA Combustion: Measured in compliance with EN 13229 : 2001 and EN 13229 - A2 : 2004 Fuel Wood Nominal output 8 kW Effi ciency Emissions (dry, at 13% O , 273 K, 1013 hPa): Carbon monoxide (CO) 0.06%;...
Page 48
UNILUX-6 52 Combustion air supply: At least 150 cm opening in the room where the fi re is located or a outside air supply opening of Ø80 mm in wall/fl oor. Options: • Convection set *) *) Not available if the appliance is equipped with a 45 degrees chimney connection.
2.3. Complaints will only be accepted if they are reported to the Barbas dealer, together with the serial number of the Barbas appliance which is stated on the front of the instructions for use. 2.4. In addition, the original receipt (invoice, receipt, cash receipt) showing the date of purchase must also be submitted.
Page 50
Article 5: Warranty period 5.1. This warranty will only be granted during the warranty period. 5.2. The body of the Barbas appliance is guaranteed for a period of 10 years against construction and/or material faults, starting from the moment of purchase.
Page 52
Your Barbas dealer 01 - 080515 - 340447...
Need help?
Do you have a question about the UNILUX-6 52 and is the answer not in the manual?
Questions and answers