Crestron CEN-NVS200 Operations & Installation Manual
Network video streamer
Hide thumbs
Also See for CEN-NVS200:
- Operations & installation manual (88 pages) ,
- Quick start manual (2 pages)
Table of Contents
Advertisement
Quick Links
Advertisement
Table of Contents

Related Manuals for Crestron CEN-NVS200

Summary of Contents for Crestron CEN-NVS200
- Page 1 Crestron CEN-NVS200 Network Video Streamer Operations & Installation Guide...
-
Page 2: Regulatory Compliance
United States and/or other countries. Other trademarks, registered trademarks and trade names may be used in this document to refer to either the entities claiming the marks and names or their products. Crestron disclaims any proprietary interest in the marks and names of others. -
Page 3: Table Of Contents
Supplied Hardware ....................13 Installation ......................... 13 Hardware Hookup ..................... 16 User Interface Overview......................17 Accessing the CEN-NVS200 User Interface ............. 17 Navigating the Home Page ..................20 Configuration........................... 27 Configuring System Settings ..................28 Configuring Security Settings ................... 30 Configuring Network Settings................... - Page 4 Network Video Streamer Crestron CEN-NVS200 Return and Warranty Policies ....................87 Merchandise Returns / Repair Service ..............87 CRESTRON Limited Warranty................. 87 ii • Contents Operations & Installation Guide – DOC. 7111A...
-
Page 5: Network Video Streamer: Cen-Nvs200
Two-way SIP audio is also supported to enable intercom functionality. Supporting multiple streams with different formats and quality settings, the CEN-NVS200 is ideal for streaming video and audio simultaneously to a variety of Crestron touchpanels, computers and mobile devices. - Page 6 Video compression settings include frame rate, resolution and image quality, plus adjustable brightness, contrast, saturation and sharpness. The CEN-NVS200 supports very high quality video streaming up to 30 fps @ 720 x 480 (NTSC) or 25 fps @ 720 x 576 (PAL) resolutions.
-
Page 7: Security Features
Additionally, an external sensor can be connected to the CEN-NVS200 via its digital input port. Automated control signals can be triggered in response to any motion, tamper or external sensor event, enabling logging and notification over the network via Crestron touchpanels, mobile devices and third-party applications. -
Page 8: Applications
Network Video Streamer Crestron CEN-NVS200 Applications The following diagram shows a CEN-NVS200 in a typical application. CEN-NVS200 in a Typical Application 4 • Network Video Streamer: CEN-NVS200 Operations & Installation Guide – DOC. 7111A... -
Page 9: Internal Block Diagram
Internal Block Diagram The following diagram represents a use model for the digital output and input abilities of the CEN-NVS200. Digital Output and Input of the CEN-NVS200 Network Video Streamer: CEN-NVS200 • 5 Operations & Installation Guide – DOC. 7111A... -
Page 10: Specifications
Network Video Streamer Crestron CEN-NVS200 Specifications Specifications for the CEN-NVS200 are listed in the following table. CEN-NVS-200 Specifications SPECIFICATION DETAILS Video Input Signal Types NTSC or PAL composite Compression H.264 (MPEG-4 part 10 AVC), MPEG-4 (H.263/MPEG-4 part 2), MJPEG Streaming Up to four simultaneous streams (fourth stream limited to QCIF resolution);... - Page 11 24-Port Managed PoE Switch PWE-4803RU PoE Injector 1. The latest software versions can be obtained from the Crestron Web site. Refer to the NOTE following these footnotes. 2. Crestron 2-Series control systems include the AV2 and PRO2. Consult the latest Crestron Product Catalog for a complete list of 2-Series control systems.
-
Page 12: Physical Description
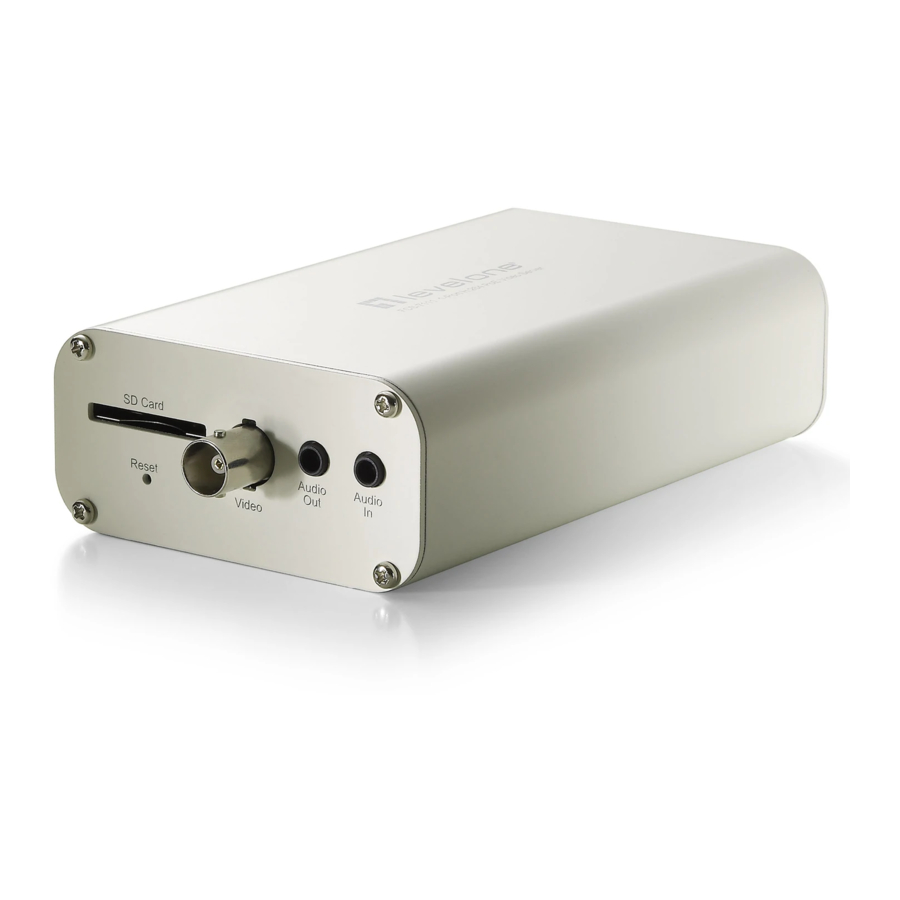
Network Video Streamer Crestron CEN-NVS200 Physical Description This section provides information on the connections, controls and indicators available on your CEN-NVS200. CEN-NVS200 Physical View (Top) CEN-NVS200 Physical View (Bottom) 8 • Network Video Streamer: CEN-NVS200 Operations & Installation Guide – DOC. 7111A... - Page 13 Crestron CEN-NVS200 Network Video Streamer CEN-NVS200 Overall Dimensions (Top, Front, Side and Bottom Views) 1.36 in (35 mm) 2.96 in (75 mm) 5.40 in (137 mm) Network Video Streamer: CEN-NVS200 • 9 Operations & Installation Guide – DOC. 7111A...
- Page 14 Network Video Streamer Crestron CEN-NVS200 CEN-NVS200 Overall Dimensions (Rear View with Mounting Bracket Attached) 1.25 in (32 mm) 3.95 in (101 mm) Connectors, Controls & Indicators CONNECTORS, DESCRIPTION CONTROLS & INDICATORS 1, 2 LAN PoE (1) 8-pin RJ-45 female; 10BASE-T/100BASE-TX Ethernet port;...
- Page 15 Pin 1 is on the far left. 2. The pin out table indicates signal connections. DC power applied by Ethernet power sourcing equipment (PSE) can connect to either signal pins or N/C pins. Network Video Streamer: CEN-NVS200 • 11 Operations & Installation Guide – DOC. 7111A...
- Page 16 Wire ends should be stripped 3/8” (~ 9 mm) and inserted completely. 6. To reset the CEN-NVS200, press and release the recessed HW RESET button with a paper clip or thin object. Wait for the video server to reboot. To restore the CEN-NVS200 to its factory default settings, press and hold the recessed button until the NET and PWR LEDs blink rapidly.
-
Page 17: Setup
Mounting The CEN-NVS200 can be mounted on a surface, a rack rail or stacked with other equipment. The included mounting bracket must be attached to the CEN-NVS200 before the device is mounted. - Page 18 (2022739) Screws (4) #M3 x 5 mm (2022785) Surface Mounting Using four screws (not included), mount the bracket and attached CEN-NVS200 to the surface as shown in the following illustration. CEN-NVS200 Surface Mounting 14 • Network Video Streamer: CEN-NVS200 Operations & Installation Guide – DOC. 7111A...
-
Page 19: Rack Mounting
Network Video Streamer Rack Mounting The CEN-NVS200 can be mounted on a front or rear rail of an equipment rack. Either the left or the right side of the attached mounting bracket can be used to mount the CEN-NVS200 on the rack. (Mounting the right side is shown in the following illustration.) -
Page 20: Hardware Hookup
Make the necessary connections as called out in the illustration that follows this paragraph. Apply power after all connections have been made. When making connections to the CEN-NVS200, use Crestron power supplies for Crestron equipment. Hardware Connections for the CEN-NVS200 (Top) -
Page 21: User Interface Overview
The CEN-NVS200 user interface can be accessed from a Web browser or from Crestron Toolbox: • You can access the CEN-NVS200 from a Web browser if you know the IP address or host name of the CEN-NVS200. NOTE: The default host name of the CEN-NVS200 is CEN-NVS200. - Page 22 Using Crestron ToolBox NOTE: To be able to use Crestron Toolbox to access the CEN-NVS200, the UPnP (Universal Plug and Play) Ethernet protocol configuration setting of the CEN-NVS200 must be enabled. The UPnP protocol is enabled by default. For additional information, refer to “Configuring Network Settings”...
- Page 23 CEN-NVS200. Refer to “Logging In to the CEN-NVS200” which starts below for log-in information. Logging In to the CEN-NVS200 The user name and password window allows you to log in to the CEN-NVS200. User Name and Password Window To log in to the CEN-NVS200: 1.
-
Page 24: Navigating The Home Page
Network Video Streamer Crestron CEN-NVS200 Navigating the Home Page The home page of the CEN-NVS200 allows access to configuration of the CEN-NVS200, control of basic camera functions and display of streaming video. The following screen illustrates the CEN-NVS200 home page. Graphical buttons, such as PTZ directional buttons, are displayed in the column on the left side. - Page 25 Video Window The video window displays MPEG-4 or MJPEG streaming video. For information about configuring video settings, refer to “Configuring Video Settings” which starts on page 47. Network Video Streamer: CEN-NVS200 • 21 Operations & Installation Guide – DOC. 7111A...
- Page 26 Video and Audio Control Buttons Video and audio control buttons are described in the following sections. NOTE: When Firefox or Safari is used as the Web browser and the CEN-NVS200 is in MPEG-4 or MJPEG streaming mode, video and audio control buttons are not supported.
- Page 27 Crestron CEN-NVS200 Network Video Streamer NOTE: When Internet Explorer is used as the Web browser and the CEN-NVS200 is in MJPEG streaming mode, only the Digital zoom and Record buttons discussed below are supported. Digital Zoom Clicking the Digital zoom button ( ) will open the digital zoom control panel.
- Page 28 NOTE: The “Client Settings” page can also be accessed by entering the following URL in your Web browser: http://Video Streamer/clientset.html Video Streamer is the host name or IP address of the CEN-NVS200. 24 • Network Video Streamer: CEN-NVS200 Operations & Installation Guide – DOC. 7111A...
- Page 29 NOTE: A minimal view of the video can be accessed at the following URL in your Web browser: http://Video Streamer/setup/viewer.html Video Streamer is the host name or IP address of the CEN-NVS200. H.264/MPEG-4 Media Options: (Internet Explorer only) Select the MPEG-4 media for playback: Video and Audio, Video Only or Audio Only.
- Page 30 Clicking the Configuration link allows configuration of various types of settings, such as system settings, security settings and so on. For additional information, refer to the “Configuration” section which starts on page 27. 26 • Network Video Streamer: CEN-NVS200 Operations & Installation Guide – DOC. 7111A...
-
Page 31: Configuration
Crestron CEN-NVS200 Network Video Streamer Configuration CEN-NVS200 configuration pages allow you to configure the following settings: • System settings (refer to “Configuring System Settings” which starts on page 28 for information) • Security settings (refer to “Configuring Security Settings” which starts on page 30 for information) •... -
Page 32: Configuring System Settings
URL in your Web browser: http://Video Streamer/setup/system.html Video Streamer is the host name or IP address of the CEN-NVS200. 28 • Network Video Streamer: CEN-NVS200 Operations & Installation Guide – DOC. 7111A... - Page 33 Disable Power and Network LEDs checkbox is deselected; the LEDs are enabled. System Time: Set system time parameters if the CEN-NVS200 is to be used without a Crestron control system: NOTE: System time control settings are not necessary when used with a Crestron control system.
-
Page 34: Configuring Security Settings
NOTE: The “Security” configuration page can also be accessed by entering the following URL in your Web browser: http://Video Streamer/setup/security.html Video Streamer is the host name or IP address of the CEN-NVS200. Refer to the following sections for security configuration guidelines. 30 • Network Video Streamer: CEN-NVS200... - Page 35 The user name for the administrator is permanently assigned as admin. The default administrator password is blank. Setting an administrator password is optional; however, doing so prevents unauthorized use of the CEN-NVS200 by providing password protection. It is recommended that the Administrator set an administrator password as a matter of prudent security practice.
-
Page 36: Configuring Network Settings
NOTE: The user name and password are case sensitive. NOTE: Setting a user password is optional; however, doing so prevents unauthorized use of the CEN-NVS200 by providing password protection. In the User Name: text box, enter a user name. b. In the User Password: text box, enter a password for the user. - Page 37 • • RTSP Streaming To configure network settings, click Configuration on the CEN-NVS200 home page and then click Network in the column on the left side of the page. The “Network” configuration page will open. “Network” Configuration Page (Top Half Shown) Network Video Streamer: CEN-NVS200 •...
- Page 38 Network Video Streamer Crestron CEN-NVS200 “Network” Configuration Page (Bottom Half Shown) 34 • Network Video Streamer: CEN-NVS200 Operations & Installation Guide – DOC. 7111A...
- Page 39 NOTE: The “Network” configuration page can also be accessed by entering the following URL in your Web browser: http://Video Streamer/setup/network.html Video Streamer is the host name or IP address of the CEN-NVS200. Refer to the following sections for network configuration guidelines. Configuring the Network Type Configure the network type in the Network Type pane of the “Network”...
- Page 40 IP address and related information that you enter manually: IP Address: Enter a unique IP address for the CEN-NVS200. If the device is on a network with a DHCP server, ensure that the IP address is not in the range of IP addresses that the DHCP server will be assigning.
- Page 41 NOTE: If you do not use the default number of 80, you must append the port number to the IP address of the CEN-NVS200 to be able to access the CEN-NVS200 from your Web browser. For example, if you set the HTTP port number to 8888, you must enter http://192.168.0.100:8888...
- Page 42 Network Video Streamer Crestron CEN-NVS200 Access name for stream 2: Enter the name to be used by the Crestron MJPEG Viewer application. For example, when using video2.mjpg (default setting), the HTTP command to be entered into the Crestron MJPEG Viewer is the following: /video2.mjpg?user=myuser&pw=secretpassword...
- Page 43 The default port number is 21. Configuring RTSP Streaming Configure RTSP (Real Time Streaming Protocol) in the RTSP Streaming pane of the “Network” configuration page. “Network” Configuration Page – RTSP Streaming Network Video Streamer: CEN-NVS200 • 39 Operations & Installation Guide – DOC. 7111A...
- Page 44 (default setting), the following URL connects directly to the MPEG-4 video: rtsp://ip address/live.sdp ip address is the IP address of the CEN-NVS200. live.sdp is the default access name. Access name for stream 2: Enter an access name for stream 2 for connections from client software when the codec type of the stream is MPEG-4.
-
Page 45: Configuring Ddns Settings
Valid values range from 1 to 255. Configuring DDNS Settings NOTE: The current version of the CEN-NVS200 is not compatible with the Crestron DDNS (Dynamic Domain Name Service). Network Video Streamer: CEN-NVS200 • 41... -
Page 46: Configuring Client Access Settings
Configuration of a client access list provides one or more IP address ranges that are allowed to access the CEN-NVS200. Ranges of addresses that are denied access to the CEN-NVS200 can also be configured. Addresses can also be deleted from the allowed or denied list of IP addresses. - Page 47 2. Select the appropriate Rule from the dropdown list. There are three types of rules: Single: This rule allows the user to add an IP address to the Allowed list or Denied list. Filter Address Example - Single Network Video Streamer: CEN-NVS200 • 43 Operations & Installation Guide – DOC. 7111A...
- Page 48 NOTE: Omitting starting and ending IP address entries will allow all IP addresses to connect. To delete an entry from the Allowed list or the Denied list, select the entry and click Delete. 44 • Network Video Streamer: CEN-NVS200 Operations & Installation Guide – DOC. 7111A...
-
Page 49: Configuring Audio And Video Settings
NOTE: The “Audio and Video” configuration page can also be accessed by entering the following URL in your Web browser: http://Video Streamer/setup/audiovideo.html Video Streamer is the host name or IP address of the CEN-NVS200. “Audio and Video” Configuration Page (Top Half Shown) Network Video Streamer: CEN-NVS200 • 45... - Page 50 Network Video Streamer Crestron CEN-NVS200 “Audio and Video” Configuration Page (Bottom Half Shown) Refer to the following sections for video and audio configuration guidelines. 46 • Network Video Streamer: CEN-NVS200 Operations & Installation Guide – DOC. 7111A...
- Page 51 3. From the Modulation drop-down list, select the video input modulation type: NTSC, PAL or Auto. NOTE: You must reboot the CEN-NVS200 to activate the change. 4. Choose the input from the Select Caching Stream drop down list. 5. Select one or both of the Video Orientation checkboxes: •...
- Page 52 URL in your Web browser: http://Video Streamer/setup/image.html Video Streamer is the host name or IP address of the CEN-NVS200. On the “Image Settings” configuration page, adjust the Brightness, Saturation, Contrast and Sharpness as desired. Values in the drop-down lists range from –5 to NOTE: A value of 0 for Brightness and Contrast auto tunes the video.
- Page 53 URL in your Web browser: http://Video Streamer/setup/privacy.html Video Streamer is the host name or IP address of the CEN-NVS200. 1. Select the Enable privacy mask checkbox to enable privacy mask window(s). A privacy mask window blocks viewing of an area on the video output as determined by the privacy mask window settings.
- Page 54 Configure video quality settings for Stream 1, Stream 2, Stream 3 and/or Stream 4 in Settings the Video Settings pane of the “Audio and Video” configuration page. “Audio and Video” Configuration Page – Video Quality Settings (Streams 1 and 2 Shown) 50 • Network Video Streamer: CEN-NVS200 Operations & Installation Guide – DOC. 7111A...
- Page 55 Intra frame period: (Applicable to MPEG-4 mode only) From the drop-down list, select the interval in seconds at which full frames are to be transmitted. A larger interval improves performance but takes longer for initial connection. Network Video Streamer: CEN-NVS200 • 51 Operations & Installation Guide – DOC. 7111A...
- Page 56 NOTE: Most cell phones support media streaming with GSM-AMR audio. AAC bit rate: If AAC is selected as the audio type, set the AAC bit rate based on available bandwidth. 52 • Network Video Streamer: CEN-NVS200 Operations & Installation Guide – DOC. 7111A...
-
Page 57: Configuring Motion Detection Settings
NOTE: The “Motion detection” configuration page can also be accessed by entering the following URL in your Web browser: http://Video Streamer/setup/motion.html Video Streamer is the host name or IP address of the CEN-NVS200. 1. Select the Enable motion detection checkbox to enable motion detection window(s). - Page 58 Motion Detection on Home Page NOTE: If the predefined motion detection is under privacy mask block, the monitoring window is not triggered. 54 • Network Video Streamer: CEN-NVS200 Operations & Installation Guide – DOC. 7111A...
-
Page 59: Configuring Camera Tampering Detection Settings
Configuring Camera Tampering Detection Settings To configure camera tampering detection settings, click Configuration on the CEN-NVS200 home page and then click Camera Tampering Detection in the column on the left side of the page. The “Camera tampering detection” configuration page will open. -
Page 60: Configuring Camera Control Settings
NOTE: The “Camera Control” configuration page can also be accessed by entering the following URL in your Web browser: http://Video Streamer/setup/camera_control.html Video Streamer is the host name or IP address of the CEN-NVS200. 1. Select one of the following radio buttons: •... - Page 61 Crestron CEN-NVS200 Network Video Streamer 3. (Applicable only when PTZ Camera is selected) From the PTZ Driver: drop-down list, select the desired PTZ driver. The CEN-NVS200 has five built-in PTZ camera drivers: DynaDome/SmartDome, Pelco D, Pelco P, LILIN and Samsung SCC-643.
- Page 62 In the Dwelling time (sec): text entry box, enter the desired number of seconds, and then click Save in the bottom of the page to save the setting. 58 • Network Video Streamer: CEN-NVS200 Operations & Installation Guide – DOC. 7111A...
- Page 63 NOTE: If you selected Custom camera as the PTZ driver on the “Camera Control” configuration page, you must configure pan, tilt, zoom and focus functions by setting custom commands. “Custom Command” Page (Not Applicable to Custom Camera) Network Video Streamer: CEN-NVS200 • 59 Operations & Installation Guide – DOC. 7111A...
- Page 64 1. Enter the camera control commands into the text entry boxes. Refer to your camera documentation to set up frequently used functions. 2. Click Save, and then click Close to close the page. 60 • Network Video Streamer: CEN-NVS200 Operations & Installation Guide – DOC. 7111A...
-
Page 65: Configuring Homepage Layout Settings
NOTE: The “Homepage Layout” configuration page can also be accessed by entering the following URL in your Web browser: http://Video Streamer/setup/layout.html Video Streamer is the host name or IP address of the CEN-NVS200. Network Video Streamer: CEN-NVS200 • 61 Operations & Installation Guide – DOC. 7111A... -
Page 66: Configuring Event, Server And Media Settings
Configuring Event, Server and Media Settings To configure event, server and media settings, click Configuration on the CEN-NVS200 home page, then click Events and Servers in the column on the left side of the page. The “Events and Servers” configuration page will open. - Page 67 NOTE: The “Events and Servers” configuration page can also be accessed by entering the following URL in your Web browser: http://Video Streamer/setup/application.html Video Streamer is the host name or IP address of the CEN-NVS200. NOTE: It is recommended that server and media settings be configured before event settings are configured.
- Page 68 Normal or Low. The event with the highest priority is executed first. 5. Enter the number of seconds to wait before detecting the next event (applicable to motion detection and digital input trigger types). 64 • Network Video Streamer: CEN-NVS200 Operations & Installation Guide – DOC. 7111A...
- Page 69 Camera Tampering Detection, which triggers the event when camera tampering is detected • Video Loss, which triggers the event when the CEN-NVS200 does not receive the video signal from the camera • Video Sync, which triggers the event when the CEN-NVS200 receives the video signal from the camera 7.
- Page 70 Up to five servers can be configured. To configure a server: 1. In the Action pane of the “Events and Servers” configuration page, click Add Server. The “Server Settings” page will open. “Server Settings” Page 66 • Network Video Streamer: CEN-NVS200 Operations & Installation Guide – DOC. 7111A...
- Page 71 NOTE: The folder privilege must be open for upload. Passive Mode: Select the checkbox to enable Passive mode transmission. Passive mode allows the flow of data to be set up and initiated by the CEN-NVS200 (FTP client) rather than by the FTP server. HTTP configuration URL: Enter the URL to upload the media.
- Page 72 User name: Enter the granted user name on the network storage. Password: Enter the granted password on the network storage. Crestron Control System configuration Server address: Enter the domain name or IP address of the Crestron control system. Server port: Enter the port number of the CEN-NVS200 module.
- Page 73 File name prefix: Enter the prefix to be added to the file name of the snapshot images. Add date and time suffix to file name: Select the checkbox to add time and date information to the file name. Network Video Streamer: CEN-NVS200 • 69 Operations & Installation Guide – DOC. 7111A...
- Page 74 To delete media listed in the Media Settings pane, select the media in the drop-down list and click Delete. 70 • Network Video Streamer: CEN-NVS200 Operations & Installation Guide – DOC. 7111A...
-
Page 75: Configuring Recording Settings
NOTE: The “Recording” configuration page can also be accessed by entering the following URL in your Web browser: http://Video Streamer/setup/recording.html Video Streamer is the host name or IP address of the CEN-NVS200. Network Video Streamer: CEN-NVS200 • 71 Operations & Installation Guide – DOC. 7111A... - Page 76 9. Click Save to save the settings. The recording name, status, weekly schedule, time schedule, source and destination are displayed in the Recording Settings pane of the “Recording” configuration page. 72 • Network Video Streamer: CEN-NVS200 Operations & Installation Guide – DOC. 7111A...
- Page 77 Destination column of the Recording Settings pane. You can then delete some or all files as desired. To delete a recording listed in the Recording Settings pane, select the recording in the drop-down list and click Delete. Network Video Streamer: CEN-NVS200 • 73 Operations & Installation Guide – DOC. 7111A...
-
Page 78: Configuring System Log Settings
Crestron CEN-NVS200 Configuring System Log Settings The CEN-NVS200 can log system messages on the remote server. The protocol is compliant with RFC 3164. For an external Linux server with syslogd service, use the “r” option to turn on the facility to receive a log from a remote machine. -
Page 79: Viewing System Parameters
NOTE: The “Parameter List” page can also be accessed by entering the following URL in your Web browser: http://Video Streamer/setup/parafile.html Video Streamer is the host name or IP address of the CEN-NVS200. “Parameter List” Page Network Video Streamer: CEN-NVS200 • 75... -
Page 80: Maintenance
• Exporting/uploading files • Upgrading firmware To perform maintenance, click Configuration on the CEN-NVS200 home page and then click Maintenance in the column on the left side of the page. The “Maintenance” page will open. “Maintenance” Page 76 • Network Video Streamer: CEN-NVS200... -
Page 81: Upgrading Firmware
NOTE: The “Maintenance” page can also be accessed by entering the following URL in your Web browser: http://Video Streamer/setup/maintain.html Video Streamer is the host name or IP address of the CEN-NVS200. Refer to the following sections for information about maintenance actions. Rebooting the CEN-NVS200 To reboot the CEN-NVS200, click Reboot below the Reboot pane of the “Maintenance”... -
Page 82: Programming Software
Have a question or comment about Crestron software? Answers to frequently asked questions (FAQs) can be viewed in the Online Help section of the Crestron Web site. To post a question or view questions you have submitted to Crestron’s True Blue Support, log in at www.crestron.com/support. - Page 83 IP ID as shown in the following illustration. C2ENET-2 Device, Slot 8 2. If additional CEN-NVS200 devices are to be added, repeat step 1 for each device. Each CEN-NVS200 is assigned a different IP ID number as it is added.
- Page 84 IP ID of each unit. Program Manager Program Manager is the view where programmers “program” a Crestron control system by assigning signals to symbols. The symbol can be viewed by double clicking on the icon or dragging it into Detail View.
-
Page 85: Uploading And Upgrading
Injector 120 V The CEN-NVS200 connects to PC via Ethernet: 1. Enter the IP address, IP mask and default router of the CEN-NVS200 via Crestron Toolbox (Functions | Ethernet Addressing); otherwise enable DHCP. NOTE: Use the Device Discovery Tool in Crestron Toolbox to detect all Ethernet devices on the network and their IP configuration. -
Page 86: Programs And Firmware
Edit the control system’s IP table to include an entry for the CEN-NVS200. The entry should list the CEN-NVS200’s IP ID (specified in the SIMPL program) and the actual IP address of the CEN-NVS-200. For example, IP ID = 05, IP Address = 192.168.1.101. -
Page 87: Problem Solving
Crestron CEN-NVS200 Network Video Streamer Problem Solving Troubleshooting The following table provides corrective action for possible trouble situations. If further assistance is required, please contact a Crestron customer service representative. CEN-NVS200 Troubleshooting TROUBLE POSSIBLE CAUSE(S) CORRECTIVE ACTION NET LED does... -
Page 88: Reference Documents
Crestron Web site (www.crestron.com) for a listing of Crestron worldwide offices. You can also log onto the online help section of the Crestron Web site (www.crestron.com/onlinehelp) to ask questions about Crestron products. First-time users will need to establish a user account to fully benefit from all available features. -
Page 89: Software License Agreement
This Agreement may only be modified by a writing signed by an authorized officer of Crestron. Updates may be licensed to You by Crestron with additional or different terms. This is the entire agreement between Crestron and You relating to the Software and it supersedes any prior representations, discussions, undertakings, communications or advertising relating to the Software. - Page 90 “applets” incorporated into the Software), the accompanying media and printed materials and any copies of the Software are owned by Crestron or its suppliers. The Software is protected by copyright laws and international treaty provisions. Therefore, you must treat the Software like any other copyrighted material, subject to the provisions of this Agreement.
-
Page 91: Return And Warranty Policies
Purchasers should inquire of the dealer regarding the nature and extent of the dealer's warranty, if any. CRESTRON shall not be liable to honor the terms of this warranty if the product has been used in any application other than that for which it was intended or if it has been subjected to misuse, accidental damage, modification or improper installation procedures. - Page 92 Crestron Electronics, Inc. Operations & Installation Guide – DOC. 7111A 15 Volvo Drive Rockleigh, NJ 07647 (2030033) Tel: 888.CRESTRON 04.11 Fax: 201.767.7576 Specifications subject to www.crestron.com change without notice.
Need help?
Do you have a question about the CEN-NVS200 and is the answer not in the manual?
Questions and answers