Table of Contents
Advertisement
Thank you for purchasing this appliance.
- For optimum performance and safety, please read these instructions
carefully.
- Before connecting, operating or adjusting this appliance, please read the
instructions completely. Please keep this manual for future reference.
NA-107VC5_English_Polish.indb 1
Operating Instructions
& Installation Instructions
Washing Machine
NA - 107VC5
Read Before Using
SAFETY PRECAUTIONS
Washing Instructions
Optional Functions
Troubleshooting
Installation Instructions
®
(Domestic use)
Model No.
02
04
18
26
Maintenance
27
31
35
E
NGLISH
2016-6-1 15:00:39
Advertisement
Table of Contents

Related Manuals for Panasonic NA-107VC5


Summary of Contents for Panasonic NA-107VC5
- Page 1 ® Operating Instructions & Installation Instructions Washing Machine (Domestic use) Model No. NA - 107VC5 Read Before Using SAFETY PRECAUTIONS Washing Instructions Optional Functions Maintenance Troubleshooting Installation Instructions Thank you for purchasing this appliance. - For optimum performance and safety, please read these instructions carefully.
-
Page 2: Read Before Using
Consider the Environment Disposing of packaging Information on disposal in other countries outside the European Union The packaging used to protect the This symbol is only valid in the European washing machine from damage during Union. transportation is all recyclable. For information on recycling, contact your local If you wish to discard this product, please authority. -
Page 3: Table Of Contents
Contents Read Before Using Maintenance Consider the Environment ..2 Maintenance ....27 Cleaning the outside of the SAFETY PRECAUTIONS . -
Page 4: Safety Precautions
SAFETY PRECAUTIONS Please read and follow these safety precautions. WARNING This describes issues which could cause death or serious injury. General Use This appliance can be used by children aged from 8 years and above and persons with reduced physical, sensory or mental capabilities or lack experience and knowledge if they have been given supervision or instruction concerning use of... - Page 5 SAFETY PRECAUTIONS Turn off the water supply to the appliance if it is not going to be used for a prolonged period, such as during a holiday. This is especially important if there is no drainage around the appliance. If the water supply is left on, the water pressure may unnecessarily increase and result in a leak.
- Page 6 SAFETY PRECAUTIONS WARNING Power source and cable Unplug the mains lead when cleaning the appliance. Check the mains lead and mains plug for any damage. If the mains lead is damaged, it must be replaced by the manufacturer, its service agent or similarly qualified persons to avoid a hazard.
- Page 7 SAFETY PRECAUTIONS Do NOT pull the mains lead but hold the mains plug to unplug the appliance. Otherwise, there is possibility of damage to the mains lead, which may lead to an electric shock or fire. To Prevent Injury The installation of the appliance should be done by the manufacturer’s dealer or service agent.
- Page 8 SAFETY PRECAUTIONS CAUTION This describes issues which could cause injury or damage your belongings. General Use Prior to use, turn on the tap and check the hose and connections for any leaks. Improper connection could cause leaks. The new hose-sets supplied with the appliance are to be used and that old hose- sets should not be reused.
- Page 9 SAFETY PRECAUTIONS Do NOT put any electrical equipment, for example, TVs, radios or battery chargers, on or near the appliance. Do NOT put too much laundry or detergent into the appliance. This may cause damage to the appliance. REMOVE the anchor bolts before installing the appliance using a spanner or similar tool.
- Page 10 SAFETY PRECAUTIONS CAUTION Check all washing and remove all objects such as nails, pins, coins, clips, metal wires, etc. They may cause damage to other laundry or the appliance. Do NOT use the appliance to wash waterproof sheets or clothing. There is a possibility of excessive vibration or failure during the spin cycle that may result in an injury, damage to the appliance or a water...
-
Page 11: Checking Your Washing Machine
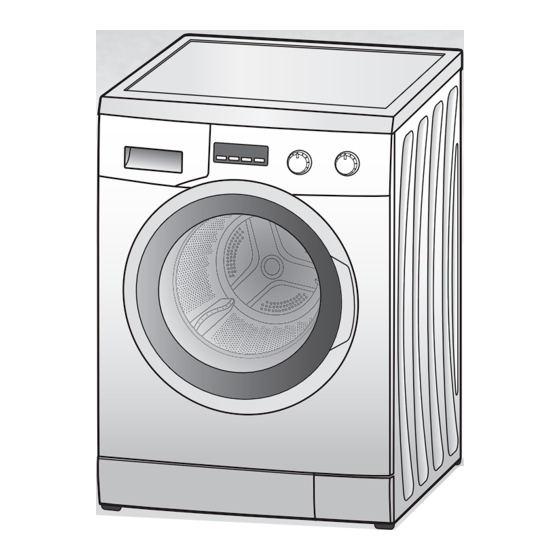
Checking Your Washing Machine Your washing machine Detergent drawer (see page 13) Drum (Washing/ spin-drying tub) Door seal Door Mains lead/ Mains plug Water-drain hose Drain filter cover Adjustable feet (see page 27) (see page 37) Caution Do NOT bend the mains lead when the appliance is running. Accessories Cover cap (x4) (see pages 36-37) Make sure that all the accessories are... -
Page 12: Before You Start Washing
Before You Start Washing Before use, check For the appliance’s initial operation or after a prolonged period of non-operation, perform the following procedures: Secure the water-supply hose. Caution Open the tap. Do NOT wash water-repellent clothing. Connect the power. Make sure that the water-drain hose There is a possibility of excessive is positioned towards a drain. -
Page 13: Adding Detergent And Other Chemicals
Adding Detergent and Other Chemicals Pull out the detergent drawer and add detergent or softener to the correct compartment. Check the packages for the appropriate recommended amounts. Caution Do NOT use the appliance when the detergent drawer is removed. This may result in a water leak. Prewashing compartment Softener compartment Detergent compartment... - Page 14 Adding Detergent and Other Chemicals Amount of Detergent The amount of detergent you should use depends on the following factors: How soiled the laundry is The amount of the laundry Water hardness Fit the liquid detergent level plate (included The amount of foam varies according to with the accessories) into the detergent the amount and type of detergent, how compartment and use it as a mark to set...
-
Page 15: Softener Compartment
Adding Detergent and Other Chemicals Softener compartment Laundry starch Simply add laundry starch to the softener The following additives may be added to compartment. It will be automatically added this compartment: to the clothing as part of the final rinsing Fabric softener process. -
Page 16: Using The Buttons And Dials
Using the Buttons and Dials Model NA-107VC5 Wył Pranie 20ºC Bawełna Szybki Bawełna Błyskawiczny Bawełna-eko Dodatkowe Start/Pauza 15 min. Czas płukanie Koszule Kolorowe 1000 Pościel Syntetyki Blokada przed dziećmi Odzież Wełna sportowa Wirowanie Płukanie Odprowadzenie wody Programme selection dial Czas (Time) button... -
Page 17: Unlocking The Door
Using the Buttons and Dials Unlocking the door Display on NA-107VC5 The door automatically locks while in use, and the symbol is shown while the door Dodatkowe Start/Pauza Czas is locked. A click will be heard when the płukanie door locks or unlocks. -
Page 18: 18 - Washing Instructions
Washing Setting washing Model NA-107VC5 Wył Pranie 20ºC Bawełna Szybki Bawełna Błyskawiczny Bawełna-eko Dodatkowe Start/Pauza 15 min. Czas płukanie Koszule Kolorowe 1000 Pościel Syntetyki Blokada przed dziećmi Odzież Wełna sportowa Wirowanie Płukanie Odprowadzenie wody Open the door and put the laundry Turn the programme selection dial into the drum. -
Page 19: Required Time
Washing Required time Press the Start button. The appliance starts supplying water Times depend on the programmes and after draining. temperature settings that have been Note selected. Actual times may differ slightly from Whenever you start washing, the those shown. process display flashes to show which function is in progress. -
Page 20: Selecting The Programme
Selecting the Programme 107VC5 Programme Description Max load Bawełna (Cotton) Daily wash for cotton, linen and cotton blends. 7 kg Bawełna (Pranie Bawełna (Cotton) programme with prewash wstępne) [Cotton 7 kg process for heavily soiled laundry (Prewash)] Bawełna-eco Washing takes longer but consumes less energy 7 kg (Cotton-Eco) and water than the Bawełna (Cotton) programme. -
Page 21: Power And Water Consumption
3) For the product fiche in accordance to EU Regulation 1061/2010, please check on http://www.panasonic.co.uk Washing Instructions - 21 NA-107VC5_English_Polish.indb 21... -
Page 22: Details Of Programmes
Details of Programmes Auto setting Programme Number Approximate Temperature Temperature of rinses time (min) Bawełna (Cotton) 40 °C Cold - 90 °C Bawełna (Pranie wstępne) [Cotton 40 °C Cold - 90 °C (Prewash)] Bawełna-eco 60 °C Cold - 60 °C (Cotton-Eco) Kolorowe (Colours) 40 °C... - Page 23 Details of Programmes 1 If you select a spin speed Manual setting which is higher than the speed available, then the Spin-dry revolutions max. speed is applied. (r/min) Classified maximum spin Preset Extra speed per page 16. Timer Rinse 107VC5 ...
-
Page 24: Washing Delicates
Washing Delicates Wełna (Wool) programme Hanging the laundry Hang out white or light-coloured wool The drum spins gently in the Wełna (Wool) and nylon items away from direct heat or programme. sunlight. For details about washing instructions, see pages 18-19. After washing, lay out wool and nylon clothes, and return them to their normal Wool laundry loads... -
Page 25: Washing Blankets And Bedspreads
Washing Blankets and Bedspreads Pościel (Bedding) Putting bedding into the programme drum Fold down blankets or bedspreads For details about washing instructions, see into a quarter of their original size. pages 18-19. Make sure that the label of each item to be washed shows either the wash or handwash symbol ( Wash only one blanket at a time. -
Page 26: Optional Functions
Optional Functions Dodatkowe płukanie (Extra Preset timer Rinse) function You can use the timer to preset the wash to start anywhere from 1 to 24 hours later. Note Note Dodatkowe płukanie (Extra Rinse) functions cannot be used with certain Do NOT use detergent which does not programmes. -
Page 27: Maintenance
Maintenance Cleaning the outside of the Carefully turn the drain filter appliance anticlockwise to unscrew it. Water may drain out. This is normal. Clean the outside of the appliance with a soft cloth and mild detergent, for example, kitchen detergent, and soapy water. Warning Do NOT splash water over the appliance. -
Page 28: Cleaning The Drum
Maintenance Cleaning the drum Cleaning the detergent drawer If you keep using cold water in the appliance, bacteria may build up inside the Detergent residue soon builds up if the drum and give off an odour. You can avoid detergent drawer is not cleaned regularly. this by running the 90 °C Bawełna (Cotton) Detergent build up may develop mould. - Page 29 Maintenance Pull your finger on the tab near the Move the detergent drawer up and front of the softener cover then pull down while pulling it out to remove it. it up to remove it from the detergent drawer. Pull your finger on the tab near the front of the softener cover then pull Wash out the old detergent with water.
-
Page 30: Cleaning The Water-Supply Filter
Maintenance Cleaning the water-supply Reconnect the water-supply hose. filter Tighten the plastic joint firmly. Clean the filter if water is not supplied Turn on the tap, then check for leaks. properly. Preventing a frozen Turn the tap off. water-supply hose Switch on the appliance. -
Page 31: Troubleshooting
Fault Checklist Problem Cause Buttons do not work. The programme, temperature, preset time, or Dodatkowe płukanie (Extra Rinse) function settings cannot be changed while washing is in progress. Child lock may be activated. (See page 26.) Door does not open. Door lock may be activated. - Page 32 Fault Checklist Problem Cause There is no foam or The amount of foam varies, depending on the hardly any foam. temperature, level and softness of the water. You may have put powdered detergent directly into the drum; you must put it in the detergent drawer. You may not be using enough detergent.
- Page 33 Fault Checklist Problem Cause The displayed The remaining time is estimated and corrected continually. remaining time Thus, the time displayed may change. changes. There is an unusual There may be metal items in the drum. noise or vibration. The anchor bolts may not have been removed. (See page 36.) The appliance may be on a sloping or unstable surface.
-
Page 34: Error Display
Error Display Error What to do Make sure that the door is shut properly. Door is open Check for any of following problems. The tap is closed. The water pipe or hose is frozen. Unable to supply The water supply has been disrupted. water The water-supply filter is clogged. -
Page 35: Installation Instructions
Choosing the Right Location Carrying the appliance Caution The appliance must be carried by 2 or Install the appliance on a flat, more people. stable surface to avoid excessive vibration and noise. If the floor is not flat and stable, contact your local Customer Service Centre. -
Page 36: Moving And Installing
Moving and Installing Removing the anchor bolts Push each cover cap (included with the accessories) over each bolt hole. Four anchor bolts keep the interior of the appliance in place while the appliance is being moved. Remove them before installation, using a spanner. Follow the following instructions. -
Page 37: Levelling The Appliance
Moving and Installing Levelling the appliance Installing the anchor bolts Remove the four cover caps. Plastic nut Foot Insert the anchor bolts into each anchor bolt hole. On each foot, loosen the plastic nut by turning it clockwise. Adjust each foot by turning it clockwise or anticlockwise. -
Page 38: Supply
Connecting Hoses and Power Supply Follow the instructions in this section to prevent water leaks. If you are unsure, ask a service agent to connect the hoses. Hoses and cable lengths Left side connections Right side connections ~ 95 cm ~ 140 cm ~ 145 cm ~ 95 cm... -
Page 39: Water-Drain Hose
Connecting Hoses and Power Supply Leak-proof System Caution The appliance is installed with the The water-drain hose must be system that is designed to prevent water removed from the hook on the leaks. The system includes the following rear side of the appliance before components. -
Page 40: Connecting To The Power Supply
Connecting Hoses and Power Supply Connecting to the power supply Name plate Caution The name plate indicates the rated power that the appliance needs. Make sure that the power supply specifications in your residence match the information mentioned here. The information on the power supply specifications are also mentioned on page 42 of these instructions. -
Page 41: Checking After Installation
Checking After Installation Installation checklist 5) Adjustable feet 1) Anchor bolts Have you removed them and attached Are they bolted securely to the the cover caps properly? appliance? 2) Location 6) Feet cushions Is the appliance on a flat, stable Are they standing flat? surface? If the appliance is not level, there may... -
Page 42: Specifications
Specifications NA - 107VC5 Rated voltage 220 - 240 V Rated frequency 50 Hz Maximum energy rated power input 2200 W Heating energy rated power input 2000 W Product weight 72 kg Maximum mass of dry cloth 7 kg Height 845 mm Product Width... -
Page 43: Washing Machine - Product Fiche
Washing machine - Product fiche (EU)Nr.1061/2010 Supplier’s name Panasonic Model identifier NA-107VC5 Capacity Energy efficiency class A+++ (most efficient) : EEI<46 A++ : 46≦EEI<52 Annual energy consumption kWh/year 60 °C at full load 1.05 Energy consumption (Bawełna-eco (Cotton 60 °C at partial load 0.72... - Page 44 Choose water temperature of 60 °C/40 °C. - The actual water temperature may differ from the declared cycle temperature. Web Site: http://panasonic.net Pursuant to the directive 2004/108/EC, article 9(2) Panasonic Marketing Europe GmbH Panasonic Testing Centre Printed in Turkey Winsbergring 15, 22525 Hamburg, Germany June 2016 ©...
Need help?
Do you have a question about the NA-107VC5 and is the answer not in the manual?
Questions and answers