Table of Contents
Advertisement
Specifications
Rated voltage
Rated frequency
Maximum energy
rated power input
Heating energy rated
power input
Dimension of the
product
Weight of the product
Maximam mass of dry
cloth
Water consumption
Pressure of tap water
Washing machine
dimensions in millimetres
582
596
Note
It's normal for a new washing machine to
contain a small amount of water, remaining
after factory inspection.
Web Site : http://panasonic.net
Pursuant to the directive 2004/108/EC, article 9(2)
Panasonic Testing Centre
Panasonic Marketing Europe GmbH
Winsbergring 15, 22525 Hamburg, Germany
© Panasonic Corporation 2009
NA-16VX1
596 mm (W) x 625 mm (D) x 845 mm (H)
Refer to "Power and water consumption".
240
516
38
594
625
NA-16VG1
220 - 240 V
50 Hz
2075 W - 2250 W
2000 W (230 V)
85 kg
7 kg
0.03 MPa - 1 MPa
Carrying the washing machine
Two or more people
must carry the
washing machine.
Start by tilting the washing
machine backwards.
One person should stand
behind it, holding the rear
of the top panel. The other
person should grip the
bottom stands at the front.
● D on't touch the door opening button
while holding.
● M ake sure of the needed accessories
for installation. (see page 6)
● E ntrust the installation of the product
to our dealer or service agent.
NA-14VA1
Printed in china
February 2009
W9901-7GX00
Advertisement
Table of Contents

Related Manuals for Panasonic NA-16VX1


Summary of Contents for Panasonic NA-16VX1
-
Page 1: Specifications
(see page 6) after factory inspection. ● E ntrust the installation of the product to our dealer or service agent. Web Site : http://panasonic.net Pursuant to the directive 2004/108/EC, article 9(2) Panasonic Testing Centre Panasonic Marketing Europe GmbH Winsbergring 15, 22525 Hamburg, Germany... -
Page 2: Operating Instructions
Washing Machine (Household use) NA-16VX1 Model No. NA-16VG1 NA-14VA1 Thank you for buying a Panasonic washing machine. ● T hese Operating Instructions will help you use it properly and safely. ● I n particular, make sure you read the Safety Precautions on pages 4 and 5 before you use your washing machine. -
Page 3: Consider The Environment
Consider the environment Disposing of packaging The packaging we use to protect the washing machine from damage during transportation is all recyclable. For information on recycling, contact your local authority. Disposing of Waste Electrical & Electronic Equipment Information on Disposal for Users of Waste Electrical & Electronic Equipment (private households) This symbol on the products and/or accompanying documents means that used electrical and electronic products should not be mixed with general... -
Page 4: Table Of Contents
Contents Read before using Maintenance Consider the environment ....2 Maintenance ........28 Safety precautions (Please observe these Cleaning your washing machine, fully.) ............. detergent drawer, the filter net of the water Know your washing machine ....6 supply valve, washing machine door seal Before you start washing ...... -
Page 5: Safety Precautions (Please Observe These Fully.)
Safety precautions (Please observe these fully.) Please read the following instructions to avoid danger to you or your property. We have split our safety precautions into two degrees of danger. WARNING This describes issues which could cause death or serious injury. This describes issues which could cause injury or CAUTION damage your belongings. - Page 6 WARNING ● T his appliance is not intended for use by persons (including children) with reduced physical, sensory or mental capabilities, or lack of experience and knowledge, unless they have been given supervision or instruction concerning use of the appliance by a person responsible for their safety. ● C hildren should be supervised to ensure that they do not play with the appliance. ● D o not touch the laundry inside the washing machine, until the drum has completely stopped.
-
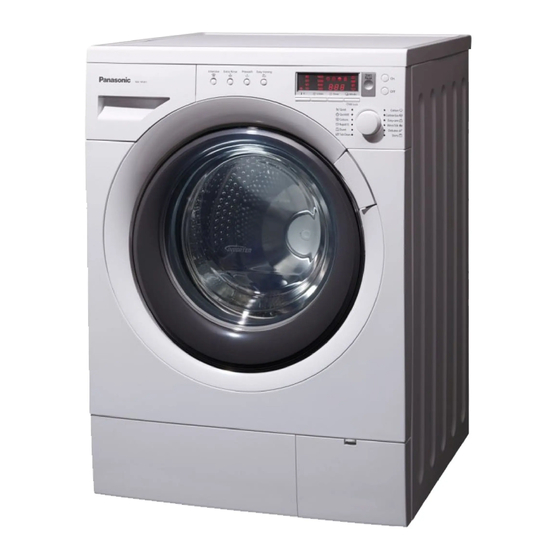
Page 7: Know Your Washing Machine
Know your washing machine Water-supply hose Water-supply valve ( applicable Detergent drawer products (see page 10) only) Door opening button (Push door opening button and open with the right end of a door.) Mains lead/ Mains plug Door Do not fold the mains lead when the washing machine is running. -
Page 8: Before You Start Washing
Before you start washing Water is poured into the Washing machine to perform an inspection at the time of shipment from the factory, so there may be drops of water or condensation in the Washing machine. This is not an indication of a malfunction. Before the first use Do not put anything into the washing machine. -
Page 9: Control Panel And The Buttons
● S ome functions don’t apply to cotton, or soiled laundry. * on model NA-16VX1 ● S ome temperatures can’t be used certain programmes. only. (see pages 14-15, 25) for certain wash programmes. -
Page 10: How To Lock Or Unlock The Door
● U se this to lock the door and prevent children climbing into the drum. ● I t also locks the controls to prevent children starting or stopping programmes * Example) Display on NA-16VX1 accidentally. (see page 26) How to lock or unlock the door The door is automatically locked To unlock the door while a while any programme is running. -
Page 11: How To Add Detergent And Softener
How to add detergent and softener Pull out the detergent drawer and add detergent or softener to the correct compartment. Only use detergents recommended for fully-automated washing machine. Refer to the instructions on the packaging for appropriate amounts to use for different wash programmes. Liquid detergent Add detergent to the relevant... -
Page 12: Detergent For Prewashing
Softener Add softener before you start the programme – the washing machine automatically adds it to the final rinse cycle. ● D ilute concentrated softeners before you add them. Only add up to 130 ml to the compartment to avoid over-flowing. Undiluted softener Water Softener should not exceed the MAX level in the compartment. -
Page 13: Selecting The Programme
Selecting the programme Programme Description Max load Daily washing for cotton, linen and cotton blend. Cotton 7 kg (e.g. T-shirts, underwear, towels, tablecloths) Cotton- Cotton, linen and cotton blend - takes longer but 7 kg uses less water and power than Cotton programme. Easy-Care Gentle on cotton, linen and man-made materials. -
Page 14: Power And Water Consumption
Power and water consumption Optional Power Water Programme Temperature Time function load consumption consumption 40 °C Intensive 7 kg 0.84 kWh 65.0 L 1:47 Cotton 40 °C ― 7 kg 0.80 kWh 65.0 L 1:27 60 °C ― 7 kg 1.57 kWh 75.0 L 1:32 90 °C ―... -
Page 15: Details Of Programmes
Details of programmes Auto setting Spin-dry revolutions Programme Number Approximate load Temperature of rinses time 16VX1, 16VG1, 14VA1 40°C Cotton 7 kg 1200 1:07 - 1:27 Cotton- 40°C 7 kg 1200 1:10 - 1:30 40°C Easy-Care 3.5 kg 0:56 - 1:00 30°C Wool/Silk 2 kg 0:40... - Page 16 ● T imes depend on programme and temperature settings selected. ● T imes may be longer if the laundry in the drum needs to be balanced. Switch setting Optional functions Spin-dry revolutions Extra Easy Temperature Intensive Prewash Rinse Ironing 16VG1 16VX1 14VA1 Cold - 90°C 400 - 1600 500 - 1600 500 - 1400 Cold - 60°C 400 - 1600 500 - 1600 500 - 1400 Cold - 60°C 400 - 1200 500 - 1200...
-
Page 17: Washing
Washing S ee pages 7, 12 for sorting Press the door opening button, and your laundry before it goes into the drum. put the laundry in the drum. Make sure no washing gets caught in the door. Close the door and push the ON button. Turn the programme selection dial either way to select your wash programme. -
Page 18: Add Detergent
If you select the Wool/Silk, Duvet, Rapid 15, Shirt or Tub Cleaning programme, the wash is not weighed. * Example) NA-16VX1 Cotton programme display The buzzer will sound when the programme is complete. W ith the Easy Ironing setting, the drum intermittently stirs laundry for up to 30 minutes or until the door is opened. -
Page 19: Washing Delicates
Washing delicates (Wool/Silk and Delicates programmes) * These programmes rock the drum gently for best results on delicate laundry. Delicate laundry loads: ● Wool/silk – 2kg or less : Delicates – 3.5kg or less Tips for Wool/Silk programme: ● Approximate weights: Wool sweater Si k blouse Trousers 400g 200g... - Page 20 (see pages 10-11) Press the START button. It starts water supplying. * Example) Display on NA-16VX1 The buzzer will sound when the programme is complete. ● R emove your laundry and rearrange its shape where necessary. Try not to leave it in the drum for long after the programme ends – colours may run. Caution ● I f your clothing floats in the Wool/Silk programme, press the PAUSE button to open the...
-
Page 21: Washing Blankets Or Bedspreads
Washing blankets or bedspreads (Duvet programme) Make sure the label of each Fold blanket or bedspread. item to be washed shows Fold into four, like so: either the wash or hand- wash symbol ( Blanket ● 1 00% synthetic fibre blanket – up to 3kg ● 1 00% cotton blanket – up to Put the blanket or bedspread 1.5kg (single bed size) Other to the drum. - Page 22 Close the door and press the power ON button. Turn the Programme Selection dial either way and select the Duvet programme. The display will tell you approximately how long the programme will take. Select any optional Process selection (see page 24) Optional functions functions.
-
Page 23: Cleaning The Drum
Cleaning the drum (Tub Clean programme) If you keep using cold water in your washing machine, this may cause a build-up of bacteria inside the drum, which can give off an odour. You can avoid this by running the Tub Clean programme once a month. (When you use a scale remover, follow the manufacturer’s instructions.) Important: don’t put laundry in the washing machine during ‘Tub Clean’. With no laundry in the drum, press the power ON button. Turn the programme selection dial either to select Tub Clean. The remaining time will be displayed. -
Page 24: Preset Timer
Preset timer Press the door opening button Preset timer to open the door. Put your You can use the timer to set the laundry in the drum. washing machine to finish running Close the door, and at a specific time. <Points to remember> press the power ON ● Y ou need to choose the programme button. -
Page 25: Individual Washing Functions
Individual washing functions (Process selection) Y ou can select either single function such as “Spin only,” “Rinse only” or “Drain only,” or more than one combined washing functions such as “Washing,” ”Rinse” and “Spin.” Please note: you can’t select individual functions on the Rapid 15 programme. Press the MODE button to select a function. Function Display When you want to: ● Rinse washed laundry Rinse only (Rinse water remains) ● Spin-dry washed laundry Spin only ● Wash and rinse laundry... -
Page 26: Optional Functions
Optional functions D epending on the programme you select, you can combine different optional functions. Press the function button(s) you want. Optional function When you want to: How it works Wash heavily soiled It increases washing time for 10 to Intensive laundry 20 minutes. Rinse your laundry more It adds an extra rinse cycle. Extra Rinse thoroughly Prewash heavily soiled... -
Page 27: Using Your Washing Machine
Using your washing machine How to set and reset the child safety lock The child safety lock prevents children climbing into the washing machine drum and getting trapped. It keeps the door closed and locked even when the washing machine is not in use. It also locks the control buttons. -
Page 28: How To Use Laundry Starch
How to use laundry starch Laundry starch makes your clothes crisp in texture. Synthetic laundry starch is a stiffening agent. ● T o use laundry starch, simply add it to the softener compartment, next to where you add detergent. It will automatically be applied to your clothes as part of the final rinsing cycle. (see pages 10-11) ● I f it’s hard to pour, you can dilute the starch slightly with water before adding it to the softener compartment. -
Page 29: Maintenance
Maintenance Cleaning your washing Cleaning the filter net of machine the water supply valve (applicable products only) ● C lean the outside of your washing machine with a soft cloth and mild If water isn’t draining properly detergent such as kitchen detergent (Depressurize the water-supply hose.) and soap water. -
Page 30: Preventing A Frozen Water Supply Hose
Preventing a frozen Cleaning the drain filter Take care not to burn water supply hose yourself while handling your clothes or touching the * If your washing machine is delivered inside of the drum after a in freezing weather conditions, leave it high temperature wash. -
Page 31: Troubleshooting
Troubleshooting Problem Cause ● W hile the washing machine is washing, you cannot change Buttons don’t work the programme, temperature and process settings (but you can change the rinse or spin settings). ● Door lock may be active. (see page 9) ● Child safety lock may be active.(see page 26) ● The water temperature or level could be too high. Door doesn’t open ● C lothing may be caught in the door. If so, press the door opening button while pushing the door. ● R ubber parts may give off a smell when you first start using the washing machine, but this goes away over time. - Page 32 Problem Cause ● T his can happen if you’ve put powder detergent directly into the drum – you must put it in the detergent drawer. ● T he amount of foam can vary, depending on the There’s not much temperature, level and softness of your water. ● You may not be using enough detergent. foam ● You may be using a reduced-foam type of detergent. ● Heavily soiled laundry can reduce the amount of foam. ● Larger loads of laundry can also reduce the amount of foam. ● T he amount of foam can vary, depending on the temperature, level and softness of your water. There’s a lot of foam ● Y ou may have used too much detergent.
-
Page 33: Error Display
Error display ( When the error display comes on, a buzzer sounds and U and a number appear alternatively.) What to do: Check the drain hose, making sure Correct any ● it isn’t clogged up of these ● its tip isn’t immersed in water problems, then ● it doesn’t extend further than 3 metres open the door, ● the water isn’t frozen. -
Page 34: Choosing The Right Location
Choosing the right location Entrust the installation of the product to our dealer or service agent. The right place for your washing machine ● M ake sure there’s enough space for your ● D on’t install your washing machine washing machine – see the dimensions on in direct sunlight or in a place where the back cover. -
Page 35: Moving And Installing
Moving and installing Removing the anchor bolts Four anchor bolts keep the interior of the washing machine in place while it’s being moved. They need to be removed before installation, using the spanner supplied and following the instructions below. Don’t run the washing machine without removing the bolts, as this can cause excessive vibration. -
Page 36: Moving The Washing Machine From One Location To Another
Moving and installing (continued) Moving the washing machine from one location to another Make sure to fix the anchor bolts for transportation to the washing machine. Before you move the washing machine ● S hut the tap and run the washing machine to drain the water. Drain any remaining water from the pump hose. (see page 29) ● D epressurise the water-supply hose and remove it. ● D isconnect the power cable. -
Page 37: Hose And Cable Lengths
Hose and cable lengths How to connect for the left side How to connect for the right side ~ 135 cm ~ 105 cm ~ 130 cm ~ 90 cm ~ 100 cm ~ 140 cm Levelling the washing machine ● U sing a level facilitates the adjustment. -
Page 38: Water-Supply Hose
Water-supply hose ● A void the risk of electric shock. Do not put the security device for the water-supply valve in water, as it contains an electric valve. ● F ollow the instructions in this section to avoid water leaks. ● D o not connect the hose to the combination tap. ● I f you’re unsure, ask a service agent to connect the hose. Points to remember: ● D on’t twist, squash, modify or cut the hose. ● Optimum water pressure in the main pipe is 0.03 MPa - 1.0 MPa. ● I f your pressure is set higher than this, you’ll need to install a depressurising valve. ● W ater-flow from the tap should be more than 5 litres per minute. -
Page 39: Water-Drain Hose
Water-drain hose Points to remember: Do not twist, pull out or bend the drain hose. Your washing machine should be no more than 100cm from the drain outlet. Draining to a sink or wash-basin: ● S ecure the drain hose in position, so it can’t drop out of the basin. ● D on’t block the basin’s drain outlet, and make sure the drainage through it is sufficient. ● D on’t let the tip of the drain hose dip into the drained water, as this can cause the water to flow back into the washing machine. E bow Draining to a wash-basin Draining to a drain hose Connecting to the power supply... -
Page 40: Installation Checklist
Installation checklist Anchor bolts – have you removed them, and attached the cover caps properly? Location – is your washing machine on a flat, stable surface? Does it run without vibrating? Water-supply hose – is it free from leaks, and is the water supply normal? ...
Need help?
Do you have a question about the NA-16VX1 and is the answer not in the manual?
Questions and answers