Advertisement
Advertisement
Table of Contents

Related Manuals for Raychem green leaf


Summary of Contents for Raychem green leaf
- Page 1 GREEN-LEAF-EU PROGRAMMABLE THERMOSTAT FOR ELECTRICAL FLOOR HEATING INSTALLATION INSTRUCTION pentairthermal.com/manuals/ Full EN Manual THERMAL BUILDING SOLUTIONS EN-RaychemGreenLeafEU-IM-EU0637 Rev0...
-
Page 2: Table Of Contents
CONTENTS 1. DESCRIPTION ..............................2. MOUNTING AND INSTALLATION ....................... Mounting the Thermostat ..........................3. USING THE THERMOSTAT ..........................The Display ................................Display in manual on/off programme ......................Display in timer programme ........................The manual on/off programme ........................The timer programme ............................ -
Page 3: Description
1. DESCRIPTION The Raychem Green Leaf Thermostat is a Programmable Thermostat designed for Electrical Floor Heating. The thermostat is designed to control your Electrical Floor Heating in order to give you the best possible comfort and the lowest possible energy usage. -
Page 4: Mounting And Installation
2. MOUNTING AND INSTALLATION Mounting the Thermostat The installation of the Green Leaf must be performed by a qualified installer. The Green Leaf is a thermostat with protection class IP20, make sure to comply with all local regulations when installing the thermostat. Green Leaf is intended for flush mounting in a wall box. It should be positioned approximately 1.5 meters above the floor, protected from direct sunlight and draughts. - Page 5 Step 5: Connect the electrical power supply, the sensor and the cold lead of the electrical floor heating system to the Green Leaf according to the electrical diagram. If you connect heating cables exceeding 13A for constant wattage or 10A for self-regulating cables you must use a contactor with an integrated suppression device.
- Page 6 * Max 13A for constant wattage cable, * Max 13A for constant wattage cable, Max 10A for self-regulating cables Max 10A for self-regulating cables Step 6: Click the Green Leaf into the metallic support frame. Step 7: Switch on the power again...
-
Page 7: Using The Thermostat
The thermostat is compatible with CeraPro, T2QuickNet, T2Blue, T2Green and T2Red heating solutions. T2QuickNet T2QuickNet heating mats are approved with the Green Leaf thermostat working in floor sensor mode. Be aware that the floor sensor must be installed and activated for any installation with T2QuickNet. -
Page 8: Display In Timer Programme
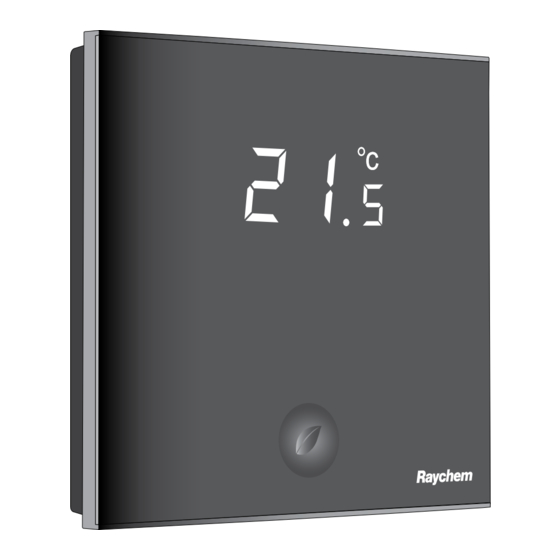
Heating display The heating display is flashing when the heating is on. Temperature The temperature on the display depends on the selected sensing mode. • Floor sensing mode => Actual floor temperature on the display • Room sensing mode => Actual room temperature on the display •... -
Page 9: The Manual On/Off Programme
Event 4 The manual on/off programme When switching on the thermostat for the first time (touching the Green Leaf button for 2 seconds), it will start in MANUAL ON/OFF programme using the floor sensing mode as a standard (see INSTALLER MENU to change the sensing mode). -
Page 10: The Timer Programme
The timer programme The Green Leaf can be programmed with 4 events per day. Different temperatures can be maintained for each event of the day. The days can be programmed independently or per cluster of days. The default Timer Programme is shown on the graph below. You can easily adapt the programme to your needs (see PROGRAMMING THE TIMER PROGRAMME) •... -
Page 11: Setting The Clock
4. SETTING THE CLOCK • Touch the “ ” button to set the clock and day of the week • Touch “ ” or “ ” to change the hours • Touch the “ ” button to validate • Touch “ ” or “ ” to change the minutes •... - Page 12 For Event 1 • Touch “ ” or “ ” to change hours of Event 1 • Touch the “ ” button to validate • Touch “ ” or “ ” to change the minutes of Event 1 • Touch the “ ”...
-
Page 13: Installer Menu
6. INSTALLER MENU Touch the “ ” button for 5 seconds to enter the installer Menu Description Range Default setting Sensing mode selection Floor sensing mode Floor Sensing mode Room sensing mode Room sensing mode with floor temperature limiter 12 vs 24 hours display 12 / 24 Motion sensor. - Page 14 Description Range Default setting Maximum temperature Floor sensing mode: Minimum 35°C temperature set point floor set point for the sensor (installer menu 6) Floor Sensor +5°C .. 35°C Room sensing mode: OF Room sensing mode with floor 27°C temperature limiter: 10 .. 35°C Minimum temperature Floor sensing mode: OF set point for the Room Sensor...
- Page 15 Floor sensor calibration The temperature of the floor surface can differ from the temperature measured by the floor sensor due to the floor construction, the floor type and the position of the floor sensor. In order to calibrate your thermostat to this difference you can use the floor sensor calibration OFFSET in installer Menu 4.
-
Page 16: Troubleshooting
7. TROUBLESHOOTING In the event of damage or malfunction of one of the temperature sensors, the heating output cuts off (fail safe) and an error code is displayed. Error Code Description Short circuit on floor sensor Open circuit on floor sensor / Missing floor sensor Short circuit on room sensor Open circuit on room sensor Check sensing mode... -
Page 17: Technical Specification
8. TECHNICAL SPECIFICATION Supply voltage 230VAC, +10%, –15%, 50Hz Power consumption (Stand-by) 3 VA Relay output 230V, maximum 13A resistive load (max. 3000W) Ambient temperature – operation 0 .. 40°C, 5-95% RH (non condensing) Ambient temperature – transport –10 .. +60°C Temperature range, floor sensor +5 .. - Page 19 Dimensions 41.0 86.3 86.3 16.5 86.3 79.8 60.0 48.0 49.0...
- Page 20 BELGIË / BELGIQUE ITALIA РОССИЯ Tel. +32 16 21 35 02 Tel. +39 02 577 61 51 Тел. +7 495 926 18 85 Fax +32 16 21 36 04 Fax +39 02 577 61 55 28 Факс +7 495 926 18 86 salesbelux@pentair.com salesit@pentair.com salesru@pentair.com...
Need help?
Do you have a question about the green leaf and is the answer not in the manual?
Questions and answers