Table of Contents
Advertisement
Advertisement
Table of Contents

Related Manuals for Cube ROAD BIKE


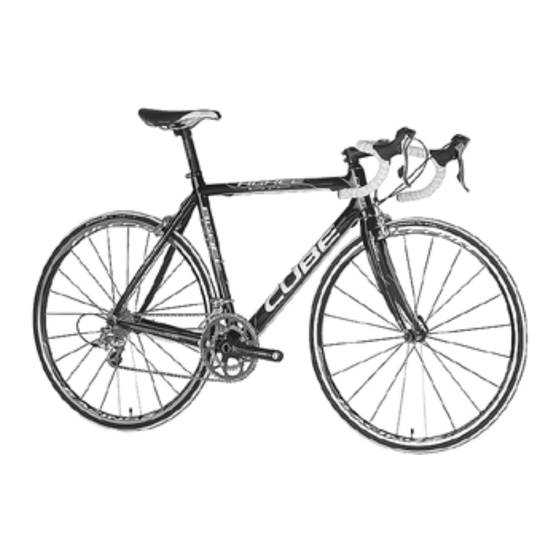
Summary of Contents for Cube ROAD BIKE
- Page 1 Handbook Road bike english...
-
Page 2: Table Of Contents
ROAD BIKE Content About this Owner’s Manual........................................4 1.1 Owner’s Manual ..............................................4 1.1.1 Scope of Application ...........................................4 1.1.2 Accompanying documentation ......................................4 1.2 Conventions ................................................5 1.2.1 Symbol ..................................................5 1.2.2 Location indications ............................................5 1.2.3 List of abbreviations .............................................5 1.2.4 Definition of Terms............................................5 For your safety ..............................................6 2.1 Use your bicycle as intended ......................................6 2.1.1 Who may use your bicycle? .........................................6 2.1.2... - Page 3 ROAD BIKE 6.6.4 Check hydraulic disc brakes ......................................22 6.7 Check crankset and chain ........................................23 Adjusting and Using your bike ......................................23 7.1 Adjusting the adjustable stem (optional) ................................23 7.2 Adjust saddle position ..........................................23 7.3 Adjust saddle height ..........................................24 7.4 Using the gears .............................................24 7.4.1 Shimano Rapidfire/ Shimano Rapidfire 2-Way-Release/Shimano EZ Fire ...................25 7.4.2 Shimano STI ...............................................26 7.4.3 Campagnolo Ergopower ......................................... 27 7.4.4 SRAM gear shift ............................................27 7.5...
-
Page 4: About This Owner's Manual
ROAD BIKE Dear Customer 1.1.1 scope of Application We would like to thank you for your choice of a This Owner’s Manual applies to: bike from our Company and thank you for your Please take information specific to your trust. bicycle from the Owner’s Manual for With this purchase you have a high-quality, your bicycle model. environmentally friendly means of travel which will RIsK Of PERsONAl INjuRy AND give you a lot of pleasure and at the same time MAtERIAl DAMAgE! promote your health. S This Owner‘s Manual is not suitable Your cycle dealer is also very important to you for learning to ride a bicycle. for advice and final assembly. He is your point of contact for servicing, inspections, modifications S This Owner‘s Manual is not suitable and all types of repairs. Should you have any for learning riding techniques. questions regarding our product please contact your cycle dealer. 1.1.2 Accompanying documentation About this S Owner’s Manual specific to your bicycle model. -
Page 5: Conventions
ABOut tHIs OWNER’s MANuAl ROAD BIKE Conventions 1.2.4 Definition of terms Specialist deal- In Germany: In this Owner‘s er /specialist Manual the term „specialist 1.2.1 symbol workshop dealer“ and/or „specialist work- shop“ indicates a dealer trained NOtE! as a bicycle mechanic and/ Draws your attention to items requiring or cycle mechanic authorised your particular attention. by the competent Chamber of Trade to operate a specialist WARNINg! workshop. Similarly the latter must be Points out to you the possibility of authorised by the manufactur- slight personal injury and possible ma- er of this cycle to check and terial damage. confirm correct assembly and roadworthiness of this cycle. DANgER! Correct tight- The term “correct tightening” in-... -
Page 6: For Your Safety
ROAD BIKE for your safety Incorrect tight- A loose screw can often be ening recognised by a projecting screw head. use your bicycle as intended 2.1.1 Who may use your bicycle? RIsK Of PERsONAl INjuRy AND MAtERIAl DAMAgE! rennrad002(Pfeil) The rider must be able to ride a bicycle, i.e. he must possess a basic knowledge of the use of a bicycle and have the necessary sense of balance required to control and steer a bicycle. S The rider must have be of the cor- Run-out A radial lack of true on the rect physical size for this bicycle rim is colloquially known as a (please consult your dealer). -
Page 7: Where May You Ride Your Bicycle
ROAD BIKE 2.1.3 Where may you ride your RIsK Of PERsONAl INjuRy AND bicycle? MAtERIAl DAMAgE! From a technical standpoint the manu- RIsK Of PERsONAl INjuRy AND facturer approves use up to the follow- MAtERIAl DAMAgE! ing categories of roads and paths. All bicycles by this manufacturer are In the case of jumps and high speed classified into Categories. You will find there is basically a risk of falling. Only your bicycle‘s Category in your Service jump and ride at high speed when you Card. This is entered by your dealer on have firmly mastered this riding tech- purchase (see also Chapter 4). nique. Roads and paths are classified as fol-... -
Page 8: In What Condition Must Your Bike Be When You Ride It
ROAD BIKE 2.1.4 In what condition must your 2.1.5 What you must not do bike be when you ride it? RIsK Of PERsONAl INjuRy AND Your new bike is an item of sports equipment and MAtERIAl DAMAgE! may not be used on public roads unless equipped Many cyclists like to modify their bikes to StVZO specification. In order to meet current and to custom them to their particu- StVZO requirements your bike must have the lar wishes. Saddles, handlebars, pedals, following equipment fit listed here in extract form. brakes, tyres and suspension elements -there are may possibilities for changing Please take the full wording of the reg- your bike subsequently. ulations for trips in Germany from the StVZO or consult your dealer. -
Page 9: Hazards Caused By Improper Use
ROAD BIKE 2.2.2 Hazards caused by improper S Do not exceed the permissible over- all weight limit – see Chapter 3.2. Determine the total weight by lifting RIsK Of PERsONAl INjuRy AND your bike and standing on a cali- MAtERIAl DAMAgE! brated scale in your complete riding clothing together with your bike. Failure to observe the instructions con- tained in this Owner‘s Manual may result S Please not the servicing and care in dangerous riding situations, falls, acci- instructions in Chapters 11 and 12. dents and material damage S Use a helmet when riding. Disposal S Ride anticipating situations and de- fensively. Dispose of your bike properly at the end of its life. S Do not ride under the influence of alcohol. -
Page 10: Included With Your Bike And Technical Details With Your Bike And Technical Details
ROAD BIKE Included with your bike Assembly and function and technical Details with This type of bike is available in the following versions. your bike and technical S Classic racing bike: Racing handlebars, two Details racing bike rim brakes S Racing bike triathlon version: Profile air wing handlebars, handlebar end gearshift technical data S Fitness bike: Straight handlebars, mountain bike Permissible Racing bicycle 115 kg or disk brake, gearshift as per mountain bike total weight MTB 115 kg All bikes by this manufacturer are basi- Trekking bicycle: 140 kg cally fitted with wire bead tyres. - Page 11 AssEMBly AND fuNCtION ROAD BIKE distance racing and sport touring riders S All Mountain: Fullsuspension bike 100 – 145 mm travel front and rear. Equally ridable uphill and downhill S Enduro: Fullsuspension from 140 – 170 mm suspension rennrad005, fitness bike travel front and rear. Emphasis here is downhill but still ridable uphill. PLEASE NOTE: Corresponding skill and experience are preconditions for use of this piece of sports equipment! S Freeride: Your bike has Fullsuspension from 150 mm suspension travel plus front and rear. S A derailleur gear, easily recognisable by a Emphasis here is primarily on downhill sprocket set on the rear hub and a crank and bike park suitability PLEASE NOTE: wheel set with several chain rings or Corresponding skill and experience are S a hub gear, recognisable by a “fat” rear wheel preconditions for use of this piece of sports hub. equipment! These gears provide you with the optimum gear for S Dirt bike/BMX: any speed and amongst other things make climbing Hardtail with or without suspension fork of up inclines easier.
-
Page 12: Before Using For The First Time
ROAD BIKE Before using for the first S If after purchasing you remove the saddle support and front and/ time or rear wheel for transportation please follow the appropriate in- RIsK Of PERsONAl INjuRy AND structions in Chapter 10.1 and 10.2. MAtERIAl DAMAgE! An unroadworthy bike can lead to dan- gerous riding situations, falling, accidents 1. Have your dealer confirm proper final and material damage This same danger assembly and the roadworthiness of your bike. exists if you are not yet familiar with 2. Have your dealer adjust the correct saddle your new bike and its controls. position. S Familiarise yourself with this bicycle You can make fine adjustments and mi- before you first ride it. In particu- nor changes yourself as described in lar check with brake lever operates Chapter 6.2.2 “Adjusting the saddle po- the front brake and which the rear –... -
Page 13: Before Every Trip
BEfORE EVERy tRIP ROAD BIKE Before every trip S Spokes S Rim and the RIsK Of PERsONAl INjuRy AND S Tyre equipment, which in turn consists of MAtERIAl DAMAgE! — Tyre casings, An unroadworthy bike can lead to dan- — Tube and gerous riding situations, falling, accidents and material damage — Rim tape insert. Also consider the possibility that your Many bikes are fitted with tubeless tyre road bike may have fallen over when unat- wheels. On these tyres with no tube are fitted on tended or that someone might have special rims. A tube can also be fitted however. tampered with it. On StVZO-equipped bikes rim reflectors may be S Check that your bike is roadworthy fitted. -
Page 14: Check Tyres
ROAD BIKE 2. Check rims for run-out: S Lift the bike up and spin first the front and then the rear wheel. Racingbike011, wear indicator () S Note the distance between the rim and the brake shoes and on disk brakes the distance between the rim and the frame strut or fork leg. Maximum permissible deviation per revolution is 1 mm. 3. Check your rims for dirt, especially oil and grease. Dirty rims must be cleaned immediately (see Chapter 11) 6.1.3 Check tyres Racing bike012, wear indicator () 1. Check the valve position: Does not apply to tubeless tyres. RIsK Of PERsONAl INjuRy AND MAtERIAl DAMAgE! In the event of angled valve the base of the valve can rip off when riding which causes sudden loss of tyre pressure. This can lead to hazardous riding situ- ations, falling, accidents and material Racing bike013, wear indicator () damage. - Page 15 BEfORE EVERy tRIP ROAD BIKE RIsK Of PERsONAl INjuRy AND MAtERIAl DAMAgE! Too low a tyre pressure leads to in- creased likelihood of punctures but Racing bike 015, valve pointing to wheel axis mostly dangerous handling. The tyre can come off the rim on bends and cause wandering of the tyre on the rim. This can lead to hazardous riding situations, falling, accidents and material damage. Inflate your tyres to the correct pres- sure. Many tyre pressures are given in “psi”. Convert the pressure using the follow- ing table. Racing bike014, valve not pointing directly to wheel psi 30 40 50 60 70 80 90 100 110 120 130 140 axis...
-
Page 16: Other Checks
ROAD BIKE S Try to push the inflated tyre to the side There are various types of valve. All away from the rim at several positions valves can be fitted with a dust cap. around the tyre diameter. After removing the cap you can place the pump head directly on the valve in S The tyre must remain bonded to the rim the case of either a Schrader valve or S If the tyre can be pushed away from the the so-called Presta valve. On a racing rim you must not use the bike bike valve you must first screw the little S Have the tyre re-bonded in a specialist locking screw out of the valve until the ship. stop and tighten it again after inflat- S A newly bonded tyre must be allowed ing the tyre. Get your dealer to demon- to dry. Please observe the tyre adhesive strate operation of the valves to you. manufacturer’s instructions. 6.1.4 Other checks Racing bike 016 1. Check your wheels for loose items such as, for example, pieces of branches, residues, loose spoke reflectors etc. S Remove these if this is possible without 3. Checking your tyres for external damage and applying any great force. -
Page 17: Handlebars, Check Stem
BEfORE EVERy tRIP ROAD BIKE 1. Check the saddle and seat post for tightness: Handlebars, check stem S Try to twist the saddle and seat post by RIsK Of PERsONAl INjuRy AND hand. MAtERIAl DAMAgE! It should not be possible to twist the Handlebars and stem are very impor- saddle and/or seat post. tant components in terms of your riding safety. Damage to them and mistakes during assembly can lead to very se- vere falls. If you discover any faults with these parts or have doubts about them you must under no circumstances contin- Racing bike 017 (arrow) ue to use your bike. Contact a specialist workshop immediately. 1. Check the handlebar and stem assembly. S The stem must be parallel to the front wheel rim, S Try to move the saddle in its clamp with S and the handlebars must be at right alternate up and down movements. -
Page 18: Check Handlebar-Mounted Parts
ROAD BIKE Check the headset 1. Check your headset. The front wheel must swivel easily in both directions with no play: S Stand beside your bike and hold it with both hands by the handlebar grips. Racing bike 020 (arrows) S Pull the front brake lever and keep the brake applied. S Push your bike forward and backward in short, jerky movements. S There should be no play in the headset: No clicking should be hear or felt. Creaking noises are also impermissible. S It must not be possible to twist or slide any of the parts. S Lift the hold bike up so that the rear wheel is higher than the front wheel. S There must be no audible creaking or rattling sounds. Check handlebar-mounted parts 1. Check the gearshift/brake levers, grips (straight Racing bike 022 handlebars only) and triathlon rest (triathlon bikes only) for correct fit: S Move the front wheel by steering to the side and let it go again. -
Page 19: Check The Brakes
BEfORE EVERy tRIP ROAD BIKE Check the brakes 6.6.1 Check rim brakes and cable (racing bike version). RIsK Of PERsONAl INjuRy AND MAtERIAl DAMAgE! Brake malfunctioning is a danger to life. Check your brake system particularly carefully. When touring for several days brake disk, brake blocks and brake pads can Racing bike rim brake wear a lot. When touring like this carry spare brake blocks and replacement pads with you. Only replace them yourself if you are familiar with this job. Please consult your dealer. 1. Check the brake cables and their clips: If you cannot replace them yourself S The brake cables must not be damaged have them done by a trained specialist. -
Page 20: Check Rim Brakes And Cable (Mountain Bike Version)
ROAD BIKE Racing bike 025 (arrow) Racing bike 028 (arrow) S It must not be possible to pull the brakes off and there must be no play in the fixing bolts. 5. Check centring of the brake shoes. 3. Check operation of the brake shoes. The brake shoes must be equidistant from the S With the brake applied the brake shoes rim on both sides. must be in contact with the rim shoulder along their entire length. 6.6.2 Check rim brakes and cable (mountain bike version). Racing bike 027 mtb024 S Under no circumstances must the brake shoes touch the tyre even when the brake is not applied. 1. Check the brake cables and their clips: 4. Check the brake block wear. S The brake cables must not be damaged S The brake blocks must not be worn down or corroded. -
Page 21: Check Hydraulic Rim Brakes
BEfORE EVERy tRIP ROAD BIKE S Under no circumstances must the brake shoes touch the tyre even when the brake is not applied. 4. Check the brake block wear. S Unhinge the brakes (see Chapter 10.1) S The brake blocks must not be worn down mtb023 beyond the wear indicator. 2. Check correct fixing and screw connections of the entire brake system: mtb027 (arrow to wear indicator) S Try to pull the brakes out of the sockets by hand. 5. Check centring of the brake shoes. S The brake shoes must be equidistant from the rim on both sides. mtb022 (arrow) 6.6.3 Check hydraulic rim brakes S It should not be possible to loosen the brakes from the sockets by hand. A small amount of play is normal. mtb029 3. Check operation of the brake shoes. -
Page 22: Check Hydraulic Disc Brakes
ROAD BIKE 2. Check your brake system seals: S Operate each brake lever in a static position and hold the brake lever in that position. S Check the brake system from the brake mtb030 lever along the lines to the brakes. S There must be no egress of hydraulic fluid at any point. 3. Check operation of the brake shoes: S With the brake applied the brake shoes must be in contact with the rim shoulder 1. Pull the brake calliper alternately in all along their entire length. directions. S The brake shoe must never touch the tyre S It should not be possible to move the – even if the brake is not applied. caliper. 4. Check the brake block wear. 2. Check your brake system seals: S The brake blocks must not be worn down S Operate each brake lever in a static beyond the wear indicator. position and hold it, S Check the brake system from the brake lever along the lines to the brakes. -
Page 23: Check Crankset And Chain
ADjustINg AND usINg yOuR BIKE ROAD BIKE of the chain at the gear change rollers on the When touring for several days brake change mechanism. disk, brake blocks and brake pads can 5. The chain must run smoothly over the change wear a lot. rollers and must not jump. When touring like this carry spare brake blocks and replacement pads with you. Only replace them yourself if you are Adjusting and using your familiar with this job. Please consult bike your dealer. If you cannot replace them yourself You can perform some adjustments to your bike have them done by a trained specialist. yourself. Only do these jobs yourself if you have the appropriate technical knowledge and experience and the right tools for the job. Check crankset and chain Adjusting the adjustable stem 1. Turn the right hand crank counter clockwise... -
Page 24: Adjust Saddle Height
ROAD BIKE position. Please note the instructions regarding seat post insertion distance in Chapter 10.2. 3. Clamp the seat post as described in Chapter 10.2. mtb033 (arrows) using the gears Racing bike 036, Shimano STI racingbike032 (arrows) Shimano STI S Move the saddle to the desired position. Racing bike 043, Campagnolo Ergopower S On saddle clamps with one bolt: Re- tighten the clamp bolt to a torque of 8– 10 nm. When tightening please ensure that all loosened parts are positively Campagnolo Ergopower interlocked. S On saddle clamps with two bolts turn these alternately by one quarter to half a turn until the prescribed 5 – 6 nm torque is reached Racing bike 050 Sram force S On many seat posts stems other tightening torques are prescribed. This can be read on the seat post. Please consult your dealer. Sram Adjust saddle height 1. Please determine on the basis of the... -
Page 25: Shimano Rapidfire/ Shimano Rapidfire 2-Way-Release/Shimano Ez Fire
ADjustINg AND usINg yOuR BIKE ROAD BIKE instructions and/or consult your dealer. On derailleur systems the gear is shift- ed by switching the chain to anoth- er sprocket. On the crank set these sprockets are called “chain rings” and on the rear sprocket cassette they are Rapidfire 2-way 1, Lever A (arrow to lever) called “pinions”. chain rings Insert Shimano illustration! sprocket Rapidfire 2-way 5, Lever B (arrow to lever) 3. Please observe the chain position prescribed Shimano STI as shown above. S To be avoided: Largest chain ring + largest pinion S Smallest chain ring + smallest pinion 1. Here is how you shift to a larger sprocket: The left-hand lever operates the chain S In order to shift you must be pedalling. ring derailleur and the right-hand lever S Press the lever down with your thumb operates the gear shift. beyond the first stop and keep it DANgER Of MAtERIAl DAMAgE! -
Page 26: Shimano Sti
ROAD BIKE 2. Here is how you shift to a smaller sprocket: 1. Here is how you shift to a larger sprocket: S In order to shift you must be pedalling. S In order to shift you must be pedalling. S Depress (2-Way-Release only) or pull S Press Lever A down with your thumb Lever B until you feel it engage and then beyond the first stop and keep it release it again straight away. depressed until the desired gear is engaged. Rapidfire 2-way 3, (arrow in direction of operation) Racing bike 039 S For rapid shifting through several sprockets press Lever A right down and keep it depressed until the desired gear is engaged. Rapidfire 2-way 5, (arrow in direction of operation) Racing bike 041 7.4.2 shimano stI On your gear-shift there are two levers. Lever A – this is also the brake lever - is for shifting to a larger chain ring or sprocket and Lever B for 2. Here is how you shift to a smaller sprocket: shifting to a smaller one. S In order to shift you must be pedalling. S Depress Lever B until you feel it engage and then let it go again straight away. -
Page 27: Campagnolo Ergopower
ADjustINg AND usINg yOuR BIKE ROAD BIKE S For rapid shifting through several sprockets press Lever A right down and keep it depressed until the desired gear is engaged. Racing bike 040 2. Here is how you shift to a smaller sprocket: S In order to shift you must be pedalling. S Press Lever B down until you feel it engage and then let it go again straight away. 7.4.3 Campagnolo Ergopower On your gear-shift there are two levers. Lever A is for shifting to a larger chain ring or sprocket and Lever B for shifting to a smaller one. Racing bike 046 S For shifting through several sprockets Racing bike 047, (arrows to Levers A and B and press Lever A right down and keep it parts named) depressed until the desired gear is engaged. and let it go again straight away. 7.4.4 sRAM gear shift On your gearshift/brake lever there is a lever with 1. Here is how you shift to a larger sprocket:... -
Page 28: Using The Brakes
ROAD BIKE S For shifting through several sprockets press the lever right down and keep it depressed until the desired gear is selected. 2. Here is how you shift to a smaller sprocket: S In order to shift you must be pedalling. Racing bike 051 (arrow) S Depress the lever until you feel it engage and then let it go again straight away. You will obtain the best braking effect if you operate both brake levers in a co- Racing bike 050 (directional arrow) ordinated and balanced manner. Operate the quick-release action RIsK Of BuRNs! Quick-release levers on disk brakes can using the brakes become hot during riding. RIsK Of PERsONAl INjuRy AND Touch the quick-release lever very MAtERIAl DAMAgE! briefly with the bare finger. - Page 29 ADjustINg AND usINg yOuR BIKE ROAD BIKE — long threaded axle on one side of which is — a nut, and on the other side — An eccentric lever. — There is a little spring between the nut and Racing bike 055 (arrow) hub and between the hub and the lever. — The ends of the springs with the smaller dia- meter always face the hub. — On saddle stem locking quick-releases instead of the nut there is a bolt head with an Allen key hexagon insert head. To open the quick release a 1. Push the eccentric lever away from the hub. It an now be rotated 180° around its axis. Racing bike 060 Racing bike 053 racing bike 054 (arrow)Racing bike 056 (arrow) 3. On saddle stem quick release levers: To loosen instead of the nut turn the bolt with the Allen key head itself counter-clockwise. Tightening: Reverse the procedure 4. If the quick release lever was completely removed then push it from the left (in the direction of travel) through the hub.
- Page 30 ROAD BIKE Racing bike 053 racing/mountainbike 054 Racing bike 061 (arrow in direction of rotation) Racing bike 064 6. On seat post quick release levers: Instead of the nut turn the bolt with the Allen key head itself clockwise. 7. Tilt the eccentric lever so that it approximately forms the extension of the hub axis Hold the lever in this position. Racing bike 066 Racing bike 056 racing bike o67 8. Now turn the nut or the Allen key bolt head until the eccentric lever, when turned around its bearing more than 90° to meet slight resistance (it now forms an approximately straight line extension of the hub axis. 9. Now press the level through a further 90° until it reaches its end stop.
-
Page 31: Using Click-In Pedals (Optional)
ADjustINg AND usINg yOuR BIKE ROAD BIKE using click-in pedals (optional) RIsK Of PERsONAl INjuRy AND MAtERIAl DAMAgE! RIsK Of PERsONAl INjuRy AND Incorrect operation of the brakes can MAtERIAl DAMAgE! lead to hazardous riding situations, fall- Click-in pedals are not safety pedals. ing, accidents and material damage. If an excessive release force is set it If the lever is pressed into its stop po- is possible not to be able to twist the sition the wheel is not secured tightly shoes out of the pedal quick enough in enough and can become displaced dur- an emergency situation. ing riding or loosen. If too soft a release force is set the There is a danger of falling. shoe may possibly release from the pedal unintentionally when riding. - Page 32 ROAD BIKE c) When the tip of the hook is positioned correct- ly in the pedal push the whole surface of the foot sharply downwards until the clamping mechanism clearly and audibly engages. Racing bike 068 Racing bike 072 With click-in pedals the shoe and pedal are firmly connected in a vertical direction. When pedalling you can not only push the pedal down but also pull it upwards. To be able to used a click-in pedal to the full you need shoes specially designed The shoe is now firmly vertically connected with for the pedal system concerned and to which the pedal. Depending on the pedal system the the pedal hooks supplied with the pedal can be shoe has sidewards freedom of movement. affixed. 3. To loosen your shoe from the pedal: Twist your heel sharply away from the bike. Racing bike 069 Racing bike 073 (arrow in direction of release) 1. Have this fitting work done by your dealer. 2. To step into the pedal: a) Bring the pedal to its lowest position. b) Position yourself with the toe of the shoe pointing downwards and with the tip of the hook on the shoe in the front pedal insertion point. Racing bike 074 (arrow in direction of release) Racing bike 071...
-
Page 33: During Riding
DuRINg RIDINg ROAD BIKE During riding troubleshooting RIsK Of PERsONAl INjuRy AND MAtERIAl DAMAgE! If you carry out maintenance procedures for which you are not authorised this may result in dan- gerous riding situations, falls, accidents and material damage. Have all maintenance procedures not listed in the table below carried out only by the dealer. RIsK Of PERsONAl INjuRy AND MAtERIAl DAMAgE! If you notice any unusual handling, unusual noises or faults no listed in this Chapter this can lease to dangerous riding situations, falls, accidents and material damage. Have anything you notice which is not listed in the following table checked immediately by your dealer and if necessary rectified. 8.1.1 gears and crankset Problem Possible causes Corrective action Gear does not shift or not cor- Shift lever not operated correctly Operate again... -
Page 34: Brakes
ROAD BIKE Problem Possible causes Corrective action Chain off Incorrect shift operation (see Stop, Chapter 6.4) Lift the chain by hand onto the Gear out of adjustment or dam- next sprocket, aged lift the rear wheel, Possible under unfavourable con- operate the crank in the direction ditions of drive (only if possible with ease). If repair is not possible in this way contact a specialist workshop im- mediately. Chain comes off after or during Incorrect shift operation (see Stop, shifting Chapter 7.6) Operate the shift lever in the op- Gear out of adjustment or dam- posite direction, aged Lift the chain by hand onto the Possible under unfavourable con- next sprocket, ditions lift the rear wheel, operate the crank in the direction of drive (only if possible with ease). If repair is not possible in this way contact a specialist workshop im- mediately. -
Page 35: Frame And Suspension
DuRINg RIDINg ROAD BIKE Problem Possible causes Corrective action Brakes do not function Brake not correctly assembled Correct assembly as per Chapter 10.1 Brake damaged Contact a specialist workshop im- mediately. Reduced braking effect, brake le- Worn brake blocks or brake pads Have brake blocks or brake pads vers have to be pulled too far. replaced immediately in a special- ist workshop. Brake cable stretched, worn or Contact a specialist workshop im- clamp/s damaged mediately. On hydraulic brakes Brake system Contact a specialist workshop im- leaking mediately. 8.1.3 frame and suspension RIsK Of PERsONAl INjuRy AND MAtERIAl DAMAgE! Frame and suspension faults may lead to hazardous riding situations, falling, accidents and material damage. - Page 36 ROAD BIKE Problem Possible causes Corrective action Wheels “hopping” up and down Tyre damage Contact a specialist workshop im- mediately. Defective spokes Noises: Creaking, knocking, grind- Debris caught in wheel Remove debris Afterwards use ing or other. your bike particularly carefully Have your bike checked by a spe- cialist workshop for any conse- quential damage. Damage to wheel Contact a specialist workshop im- mediately. Spongy handling Air pressure too low Increase air pressure (see Chapter 6.1.3) If the same handling occurs again shortly after there is a slow puncture (see next line) Increasingly spongly handling Flat tyre Replace tube and if necessary tyre and tape on tubeless systems Very unusual rolling characteristics (you can feel every stone) Replacing tyres Contact a specialist workshop (*) immediately. The bike must not be used until then. (*): Changing the tube, tyre and rim tape can only be undertaken given the required experience. Have your...
-
Page 37: After Falls Or Accidents
AftER fAlls OR ACCIDENts ROAD BIKE After falls or accidents S After damage and falls you must consult your dealer. RIsK Of PERsONAl INjuRy AND S Only use your bike again after he MAtERIAl DAMAgE! has replaced the damaged parts or Damage after a fall or accident may assured you that you can continue lead to hazardous riding situations, fall- to use the bike without any worries. ing, accidents and material damage. S After a fall or accident contact your dealer immediately. transporting your bike S Only ride the bike again after it has been properly readjusted by the RIsK Of PERsONAl INjuRy AND dealer. -
Page 38: Fit And Remove Wheels
ROAD BIKE 10.1 fit and remove wheels If your bike has rim brakes please note that you do not change the position RIsK Of PERsONAl INjuRy AND of the brake blocks with the tyre. This MAtERIAl DAMAgE! could happen especially in the case of Incorrectly fitted wheels can lead to large-volume tyres. If the tyre do not dangerous riding situations, falling, acci- easily pass easily between the brake dents and material damage. caliper blocks let a sufficient amount of air out of them. Then inflate the tyres S You must have your dealer dem- afterwards to the correct pressure. onstrate fitting and removing your wheels. To remove your wheels. First remove the front S Practice this job at least once under wheel: his supervision and control. 1. Open rim brake. S Only remove and fit the wheels if you are sure you have mastered On racing bike brakes: this job. - Page 39 BIKE ROAD BIKE S Press the brake shoes together with one hand and remove the cable guide from the yoke. Racing bike 078 (movement arrow) mtb100mtb101mtb102mtb103mtb104 b) Campagnolo: S There is no lever on the brake: S To release press the pin on the brake lever from inwards to outwards. At the same time pull on the brake lever slightly. b) On Magura:hydraulic rim brakes: S Move the fixing lever over and remove the entire brake assembly including brake booster from the brake sockets. Please Racing bike 075 Racing bike 087 (arrow to pin) make sure not to lose any distance washers that may come loose. mtb088mtb089mtb090mtb091mtb092mtb093, (Pfeil, Legende: Brake booster) Racing bike 086 On other brake types: a) Cable-operated rim brake (e.g. Shimano):...
- Page 40 ROAD BIKE S Front wheel: Lift the bike up by the handlebars and withdraw the wheel from the front fork dropouts. S Rear wheel: Lift the bike up slightly at the back and press the gear mechanism backwards. In this position push the rear mtb094 wheel gently in the direction of the dropout openings. 2. Shift the chain to the smallest sprocket on the rear wheel cassette (see Chapter 7.4 ) Racing bike 082 (arrow in direction of turn)renn- S Raise the rear of the bike, operate the rad084 shift lever concerned and turn the crank in the drive direction until the chain lies correctly on the smallest sprocket. 6. After removing place the bike carefully on its left hand side. DANgER Of MAtERIAl DAMAgE! Racing bike 079 With no rear wheel the frame and/or the gear mechanism can become damaged. After removing the rear wheel lie the bike on its left side or use a suitable assembly stand. 3. On front wheel with hub dynamo (if fitted): 7. To fit your wheels. Fit the rear wheel first.
- Page 41 BIKE ROAD BIKE Racing bike 079 mtb082 a) Inserting the front wheel: S Lift up the bike by the handlebars, S Placing the front wheel under the front forks dropouts and S Carefully lower the forks until the axle racing bike 080 is flush at the dropout stops on the right and left sides. 9. Tighten the wheel hubs. When tightening with quick releases: see • Chapter 7.6. S Carefully lower the rear of the bike until the axle is at the dropout stop on the right and left sides. mtb085mtb086mtb087 Racing bike 079 S With other types of clamping: Tighten the hubs as per the accompanying component instruction. 10. Close rim brakes S Disk brakes: Insert the wheel so that the On racing bike brakes: brake disk can be easily pushed between a) Shimano und Sram: the brake pads.
- Page 42 ROAD BIKE S Insert any distance washers in the correct position and place the brake on the brake bosses. Racing bike 076 (arrow to lever)Racing bike 090 (movement arrow)Racing bike 091 mtb096 b) Campagnolo: S There is no lever on the brake: S Follow the reverse procedure to opening S Swivel the locking lever so that the brake and press the pin on the brake lever from is fixed in place again. outwards to inwards. S At the same time pull the brake lever. On other brake types: a) on cable brakes: S Press the brake shoes together. mtb097(Pfeil) mtb098 mtb101 11. Please ensure that the brake blocks correctly cover the rim shoulder when operated. S Insert the cable in the yoke. mtb108mtb099 mtb105mtb106 b) Hydraulic rim brakes:: S Fitting is as removal only in reverse 12. On front wheel with hub dynamo (if fitted): sequence.
-
Page 43: Remove And Replace Seat Post And Saddle
BIKE ROAD BIKE 13. Check installation: S Operate the brakes. S If the brake block or brake touches the rim or the brake disks this can indicate incorrect seating of the hub in the Racing bike 030 (with arrow to bolts); if applicable dropouts. also illustrations from 2008 triathlon bike) S In that case release the quick release, check and correct the hub seat and close the quick release again. S The brake (on rim brakes) must not be opened during this procedure. If there is no improvement after this please contact For clamping without a quick release a hexagon your dealer immediately. socket and a torque wrench of the appropriate size S Check that the lighting (if fitted) is working. are required. Please also consult your dealer. S Ensure that the road wheels do not come To remove your seat post: into contact with either mudguards or 1. Release the saddle clamp at the quick carrier (if fitted). release as per Chapter 7.6 or by loosening the Allen screw with an Allen key. 10.2... - Page 44 ROAD BIKE To replace your seat post: 3. a) for metal seat post and seat tube: S Grease the seat post insertion area. mtb116mtb115mtb114 Racing bike 092Racing bike 093Racing bike 094 6. Turn the saddle so that the saddle points in the direction of travel. 7. Ensure that the clamp is flush in the frame and that the seat tube slots and the clamp 4. b) on carbon seat post and/or seat tube: are covered. S The clamp are must be free of grease 8. Close the quick release as per Chapter 7.6 or or use an assembly paste suitable for tighten the Allen screw with a torque wrench. carbon fibre components. Specified torque is 5 – 6 Nm 5. Push the saddle complete with seat post into the frame seat tube until the desired saddle height is obtained. In this position the lower end of the seat post must be a minimum of 3 cm below the lower edge of the top tube. Do not rely on the marking on the sad- mtb120mtb118road100 (Legende: Torque wrench) dle post. To check the correct insertion distance: S Hold a finger tip against the seat post when fitted directly above the clamp.
-
Page 45: Cleaning And Caring For Your Bike
ClEANINg AND CARINg fOR yOuR BIKE ROAD BIKE Cleaning and caring for With many detergents and given a low level of soiling simply spraying and rins- your bike ing off after the specified time for them to work is sufficient. RIsK Of PERsONAl INjuRy AND You can remove stubborn dirt after the MAtERIAl DAMAgE! working time for example with a radiator Corrosion can damage components of paintbrush before rinsing off. your bike which are important for safe- DANgER Of MAtERIAl DAMAgE! ty so that they are no longer secure. Cleaning, lubrication and preserving These components may then brake dur- agents are chemical products. ing riding and thus lead to serious falls. Incorrect use can damage your bike. - Page 46 ROAD BIKE Clean and lubricate your chain as de- DANgER Of MAtERIAl DAMAgE! scribed after Greases for motor cycle chains will gum up your bike chain and the drive chain every ride in the wet and components. Every prolonged ride on a sandy sub- Only use lubricants expressly approved surface and for use with bike chains. at least every 200 km. RIsK Of PERsONAl INjuRy AND MAtERIAl DAMAgE! If too much lubricant is used it can drip onto the rim and brake disk and con- taminate them. This will reduce the ef- fectiveness of the brakes S Remove excessive lubricant on the chain using a clean, dry and spirit- free cotton cloth. S Clean the rim and brake disk with a suitable degreasing agent. Please consult your dealer. RIsK Of PERsONAl INjuRy AND...
- Page 47 ClEANINg AND CARINg fOR yOuR BIKE ROAD BIKE Servicing schedule: 10. Have servicing carried out at intervals prescribed only in a specialist workshop authorised by the manufacturer. Nature of inspection Normal use frequent sport, competition or use of a competitive nature 1. Inspection after 200 km or 2 months which- after 100 km or 1 month whichever ever is sooner is sooner Subsequent inspections every 2000 km or 1 x per annum every 500 km or every 2 months Check brake pads/brake blocks every 400 km every 100 km Check brake disks every 400 km...
-
Page 48: Storing Your Bike For A Lengthy Period
ROAD BIKE storing your bike for a Instructions by lengthy period Manufacturer: Pending System GmbH&Co. KG DANgER Of MAtERIAl DAMAgE! Ludwig-Hüttner-Str. 5-7 Incorrect storage of a bike can damage D-95679 Waldershof bearings and tyres and promote cor- Consultancy: rosion. Andreas Zauhar, Dipl.-Ing. FH, Please observe the following instruc- Officially approved for Munich and tions. Upper Bavaria Chamber of Trade and Industry and Official expert in matters of bicycle damage 1. Clean and maintain your bike as described in and evalution Chapter 11. Horner Straße 12d 2. Only store your bike in dry and dust-free 83329 Waging – Tettenhausen premises. Fon: + 49 8681 4779284 Fax: + 49 8681 4779285 3. Use suitable bike stands (e.g. tripod, wall...
Need help?
Do you have a question about the ROAD BIKE and is the answer not in the manual?
Questions and answers