Table of Contents
Advertisement
Copyright Notice
Warnings, Cautions and Notes
Safety Information
Apeks WTX Harness
Apeks WTX Buoyancy Cells
Attaching the MP Hose to the First Stage
Mounting a WTX Buoyancy Cell
Using Universal Cylinder Bands
Mounting a WTX Buoyancy Cell
Using GripLock™ Cylinder Bands
TABLE OF CONTENTS
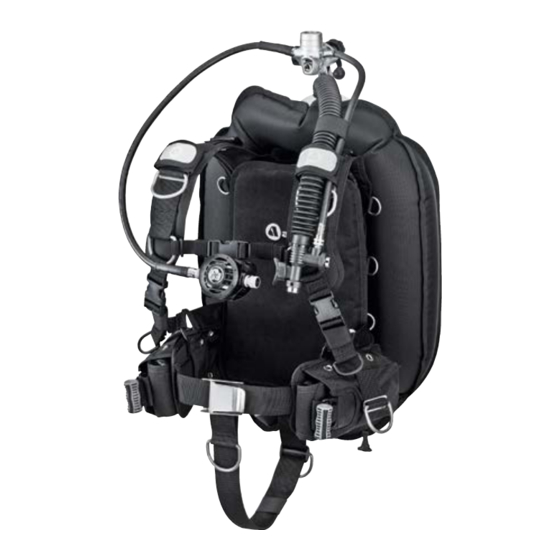
WTX Buoyancy System
© 2014 Apeks
Mounting a Single or Twin Cylinder(s)
Using Nuts and Bolts
Inflation Methods
Deflation Methods
Donning and Adjustment
Pre-Dive Inspection
Post-Dive Care and Maintenance
Storage
Dealer Inspection and Service
Warranty Information
Advertisement
Table of Contents

Related Manuals for Apeks WTX


Summary of Contents for Apeks WTX
- Page 1 Donning and Adjustment Apeks WTX Buoyancy Cells Pre-Dive Inspection Attaching the MP Hose to the First Stage Post-Dive Care and Maintenance Mounting a WTX Buoyancy Cell Using Universal Cylinder Bands Storage Mounting a WTX Buoyancy Cell Dealer Inspection and Service Using GripLock™...
-
Page 2: Copyright Notice
This manual is copyrighted, all rights reserved. It may not, in whole or in part, be copied, photocopied, reproduced, translated or reduced to any electronic medium or machine-readable form without prior consent in writing from Apeks. It may not be distributed through the internet or computer bulletin board systems without prior consent in writing from Apeks. -
Page 3: Safety Information
This manual provides essential instruction for the proper fitting, adjustment, inspection and care of your new BC. Because Apeks is utilizing patented technology, it is very important to take the time to read these instructions in order to understand and fully enjoy the features that are unique to your specific model. - Page 4 U.S. Coast Guard regulations for a life preserver or personal flotation device (PFD). If you become unconscious in the water without a buddy present to immediately give assistance, you may suffer serious injury or death from drowning. © 2014 Apeks...
- Page 5 Do not depend on any flotation device to hold your face above the surface in the event that you are rendered unconscious in the water while diving. If you have any questions regarding your Buoyancy Compensator or these instructions, please contact your regional Apeks Dealer or Distributor. Distributor information is available on the Apeks website at: www.apeks.co.uk...
- Page 6 Whether you want a travel friendly rig to dive in the tropics or a solid technical rig to dive deep, Apeks has the right buoyancy configuration for you.
- Page 7 Located alongside each of the waistbands is a set of accessory mounting grommets. The most common use for these is to mount the optional SureLock™ weight pouches. Apeks SureLock™ weight pouches may be ordered separately from your Authorized Apeks Dealer (p/n 388020). Instructions for mounting the weight pockets are included in the weight pocket kit.
- Page 8 Heavy Duty Metal Waist Buckle The waistband on the WTX Harness is secured in front with a heavy-duty metal waist buckle. The metal buckle can be positioned on either side of the waistband allowing for either a left hand or a right hand release.
- Page 9 Table of Contents APEKS WTX BUOYANCY CELLS To complement your choice of harness, Apeks manufacturers a selection of single cylinder and twin cylinder buoyancy cells in assorted sizes and configurations. SINGLE CYLINDER BUOYANCY CELL Oval Grommets for Dual Cylinder Bands Each single cylinder buoyancy cell incorporates four oval slots.
- Page 10 This allows for a lower profile, which reduces drag and lays cleanly over the shoulder. Safety Cable in the Airway A safety cable can be found in the corrugated hose of each Apeks technical airway. This safety cable protects the corrugated hose from hyper-extension and tearing that can be caused by any undue stresses such as snags.
- Page 11 Narrow at Top for Full Access to Valves and Regulators Apeks buoyancy cells are designed to be slim at the top to allow the diver’s head to tilt back, encourage proper hose placement and to assure that the diver has easy access to the manifold valves.
- Page 12 This allows for a lower profile, which reduces drag and lays cleanly over the shoulder. Safety Cable in the Airway A safety cable can be found in the corrugated hose of each Apeks technical airway. This safety cable protects the corrugated hose from hyper-extension and tearing that can be caused by any undue stresses such as snags.
- Page 13 Narrow at Top for Full Access to Valves and Regulators Apeks buoyancy cells are designed to be slim at the top to allow the diver’s head to tilt back, encourage proper hose placement and to assure that the diver has easy access to the manifold valves.
- Page 14 This allows for a lower profile, which reduces drag and lays cleanly over the shoulder. Safety Cable in the Airway A safety cable can be found in the corrugated hose of each Apeks technical airway. This safety cable protects the corrugated hose from hyper-extension and tearing that can be caused by any undue stresses such as snags.
-
Page 15: Attaching The Mp Hose To The First Stage
Table of Contents ATTACHING THE MP HOSE TO THE FIRST STAGE Apeks recommends that you bring your buoyancy compensator, together with your regulator, to your authorized dealer for the installation of the MP inflator hose and other accessories. The retailer can also answer any questions you may have pertaining to the information in this manual. - Page 16 BC’s components have hook & loop attachments, including the waistband, cylinder bands, and weight pouch flaps. A single cylinder buoyancy cell may be attached directly to an Apeks back plate or the WTX harness using dual universal cylinder bands. Mounting Directly to the Back Plate 1.
- Page 17 4. After exiting slot 4, the last slot in the series, direct the cylinder band out the remaining slot of the buoyancy cell. 5. Slide a gripper pad onto the cylinder band with the ribbed side facing toward the cylinder. 6. Repeat the process for the lower cylinder band. © 2014 Apeks...
- Page 18 1. Insert the cylinder bands through the left slots in the buoyancy cell and on through corresponding web loops in the WTX harness. Make sure that the hook and loop of the cylinder bands are facing outward. 2. After exiting the second webbed loop, direct the cylinder band out the remaining slot of the buoyancy cell.
- Page 19 Table of Contents 3. Insert band through the metal D-ring, then through the middle slot of the buckle. 4. Weave band through the inside slot of the buckle. © 2014 Apeks...
- Page 20 Make sure the cylinder valve air outlet is facing the back of the BC. 3. While holding the cylinder secure, pull the free end of the upper cylinder band webbing until there is a very tight fit between the pack and the cylinder. © 2014 Apeks...
- Page 21 Repeat steps 1-5. WARNING: Verify the tension of the cylinder band prior to every dive. Failure to do so may result in the cylinder slipping during the course of a dive. © 2014 Apeks...
- Page 22 Table of Contents MOUNTING A WTX BUOYANCY CELL USING GRIPLOCK™ CYLINDER BANDS A single cylinder buoyancy cell may be attached directly to an Apeks back plate or the WTX harness using dual GripLock™ cylinder bands. GripLock™ Components MICRO BAIL ADJUSTMENT...
- Page 23 GripLock™ band through the upper right slot in the buoyancy cell and on through slot 1 in the back plate. Make sure that the GripLock™ patch is facing outward. GripLock Patch 3. Weave the cylinder band through the three remaining upper slots in the back plate. © 2014 Apeks...
- Page 24 1. Insert the cylinder bands through the right slots in the buoyancy cell and on through corresponding web loops in the WTX harness. Make sure that the GripLock™ patch is facing outward. 2. After exiting the second webbed loop, direct the cylinder bands out the remaining slot of the buoyancy cell.
-
Page 25: Threading The Griplock™ Cylinder Band
1. There are three diameter settings for cylinder size A. large cylinder B. AL 80 cf (7.25 in / 184 mm) C. smaller cylinder. Adjust the macro adjustment for the proper size cylinder. Secure hook and loop on the band to retain macro preset. Macro Presets © 2014 Apeks... - Page 26 GripLock™ buckle assembly on the curve of the cylinder. Connect the bail into the bail slot of the lever. Hold the lever and pull the GripLock™ patch end of the webbing to tighten the micro adjustment. Secure the hook and loop webbing on the micro adjustment. © 2014 Apeks...
- Page 27 Repeat steps 1-3 of Securing Your Buoyancy System To The Cylinder Using GripLock™ Cylinder Bands to tighten and secure the cylinder band. WARNING: Verify the tension of the cylinder band prior to every dive. Failure to do so may result in the cylinder slipping during the course of a dive. © 2014 Apeks...
- Page 28 MOUNTING SINGLE OR TWIN CYLINDERS USING NUTS AND BOLTS Inserting a backplate into the WTX Harness will allow divers to set up a single or twin cylinder system using nuts and bolts. Single or twin cylinder(s) can also be bolted directly to the Apeks backplate. Ideally, the bolts on a single tank adapter or a set of twin bands should be 11 inches (28 cm) apart on center.
- Page 29 BC Buoyancy BC Single BC Double Cylinder Capacity Cylinder Capacity NOTE: The BC tag above is an example only. Reference the specific tag located on your model BC. WTX Buoyancy System WTX Buoyancy Cell Cylinder Capacity WTX-3 WTX-4 WTX-6 WTX-6R WTX-8...
- Page 30 Cylinder Capabilities section of this manual prior to attaching double cylinders to confirm the approved double cylinders for your particular BC. Select BC’s can accommodate an Apeks Twin Tank Kit. Consult your local Apeks Dealer or Distributor for more information. Dealer or Distributor and product information can be found on the Apeks website www.apeks.co.uk...
-
Page 31: Donning And Adjustment Procedures
1. If you have the optional SureLock weight system on your WTX harness, remove the weight pouches from their holsters. - Page 32 3-bar slide as shown below. Loop Seam Retainer Loop 2. Place the WTX harness with the Apeks logo (on the Crotch Strap backpad) face up on a flat surface. Feed the webbing Retainer bottom to top through the plastic sewn in crotch strap retainer on the bottom of the WTX harness.
-
Page 33: Adjusting The Crotch Strap
The metal waist buckle can be mounted on either side of the waistband. If you would like to switch the buckle to the other side, weave the buckle as shown. Don the WTX harness with cylinder(s) and your normal exposure suit. Run the 2-inch waistband through the buckle so that the buckle will be positioned where you like. - Page 34 0.5 inches of excess webbing extending past the 3-bar plastic slide. CAUTION: Failure to correctly reassemble the shoulder strap could cause strap assembly to come undone during a dive, resulting in loss of equipment. © 2014 Apeks...
-
Page 35: Inflation Methods
You may otherwise be unable to achieve positive buoyancy in an emergency, which could lead to serious injury or death. © 2014 Apeks... -
Page 36: Deflation Methods
Each buoyancy cell is equipped with an over-pressure relief (OPR) / dump valve. Their primary function is to relieve excess pressure inside the cell but they can also be opened manually by pulling on the ball and cord assembly. © 2014 Apeks... - Page 37 Most training agencies recommend that you should descend in an upright, feet-first position, in order to maintain a slower and more controlled descent. This is especially true if you experience difficulty equalizing your ears, or if you are descending in low visibility conditions. © 2014 Apeks...
-
Page 38: Pre-Dive Inspection
4. Make a final check of the cylinder band’s tension to ensure that it has not loosened due to stretching. Retighten if necessary. 5. If you have the optional SureLock weight system on your WTX harness, check both weight pouches to ensure that they are correctly fastened before entering the water. -
Page 39: Post-Dive Care & Maintenance
Inflate the BC, and allow it to dry inside and out. 6. If you have the optional SureLock weight system on your WTX harness, thoroughly rinse the SureLock weight release mechanism, including the female receptacle and male insert. Visually inspect both parts of the mechanism to make sure they are free of any debris (sand, salt, silt, rocks, etc.) that could hinder the smooth operation of the SureLock. -
Page 40: Dealer Inspection And Service
DO NOT attempt to perform any disassembly or service of your BC. Service requiring disassembly must only be performed by a factory-trained Apeks technician. To obtain service or repair, such as power inflator service or replacement of the bladder, see an Authorized Apeks Dealer or Distributor. -
Page 41: Annual Service & Inspection Record
Serial # Purchase Date Store Name WTX Harness: serial # is WTX 3: Serial # is located WTX 6: Serial # is located on located under lower plate under inflator warning tags. upper inside of outer bag. pouch tab. Date... -
Page 42: Warranty Information
Apeks warrants to the original purchaser for the useful life of the product, from the date of purchase, that the product will be free from defects in materials and workmanship, provided that it receives normal use, proper care and prescribed dealer service subject to the limitations listed below. -
Page 43: Warranty Limitations
This warranty gives you specific legal rights. You may have rights which vary from state to state and country to country. APEKS DISCLAIMS AND EXCLUDES ANY LIABILITY FOR INCIDENTAL OR CONSEQUENTIAL DAMAGES. SOME STATES IN THE U.S. AND CERTAIN FOREIGN COUNTRIES DO NOT ALLOW EXCLUSIONS OR LIMITATIONS OF LIABILITY FOR INCIDENTAL OR CONSEQUENTIAL DAMAGES, SO THIS MAY NOT APPLY TO YOU.
Need help?
Do you have a question about the WTX and is the answer not in the manual?
Questions and answers