Table of Contents
Advertisement
Advertisement
Table of Contents

Related Manuals for Planet WNAP-6315


Summary of Contents for Planet WNAP-6315
-
Page 2: Federal Communication Commission Interference Statement
Copyright Copyright 2015 by PLANET Technology Corp. All rights reserved. No part of this publication may be reproduced, transmitted, transcribed, stored in a retrieval system, or translated into any language or computer language, in any form or by any means, electronic, mechanical, magnetic, optical, chemical, manual or otherwise, without the prior written permission of PLANET. -
Page 3: National Restrictions
Federal Communication Commission (FCC) Radiation Exposure Statement This equipment complies with FCC radiation exposure set forth for an uncontrolled environment. In order to avoid the possibility of exceeding the FCC radio frequency exposure limits, human proximity to the antenna shall not be less than 20 cm (8 inches) during normal operation. R&TTE Compliance Statement This equipment complies with all the requirements of DIRECTIVE 1999/5/CE OF THE EUROPEAN PARLIAMENT AND THE COUNCIL OF 9 March 1999 on radio equipment and telecommunication... - Page 4 Revision User Manual of PLANET 2.4GHz 802.11n Wireless Outdoor CPE AP/ Router Model: WNAP-6315 Rev: 1.0 (May, 2015) Part No. EM-WNAP-6315_v1.0 (2081- E10620-000)
-
Page 5: Table Of Contents
CONTENTS Chapter 1. Product Introduction......................1 Package Contents .......................1 Product Description......................2 Product Features......................... 4 Product Specifications ....................... 5 Chapter 2. Hardware Installation ......................8 Hardware Description ......................8 2.1.1 The Bottom Panel – Port ..................9 Chapter 3. Connecting to the AP ......................12 Preparation before Installation ..................12 3.1.1 Professional Installation Required ................12... - Page 6 Windows 7 (WLAN AutoConfig)..................98 Mac OS X 10.x........................101 iPhone / iPod Touch / iPad .....................105 Appendix A: Planet Smart Discovery Utility...................108 Appendix B: Troubleshooting......................109 Appendix C: Frequently Asked Questions ..................111 Q1: How to set up the AP Client Connection................. 111...
- Page 7 FIGURE 2-1 T ..........................8 IGURE HREE 2-2 LED..............................8 IGURE 2-3 P WNAP-6315 ..................... 9 IGURE ORT AND ONNECTOR OF 2-4 P ..................10 IGURE ORT AND ONNECTOR ESCRIPTION ABEL 2-5 P WNAP-6315......................10 IGURE NJECTOR OF 2-6 L ........................
- Page 8 5-26 C – S ..........................44 IGURE LIENT URVEY 5-27 C – AP L ..........................45 IGURE LIENT 5-28 C – S ......................... 46 IGURE LIENT ECURITY 5-29 C – S ..........................46 IGURE LIENT TATUS 5-30 T – WDS P ......................
- Page 9 6-4 C -- C ................. 97 IGURE HOOSE A WIRELESS NETWORK ONNECTED 6-5 N ..........................98 IGURE ETWORK ICON 6-6 WLAN A ........................98 IGURE ONFIG 6-7 T ........................99 IGURE YPE THE NETWORK KEY 6-8 C ......................99 IGURE ONNECTING TO A ETWORK 6-9 C...
-
Page 10: Chapter 1. Product Introduction
User Manual of WNAP-6315 Chapter 1. Product Introduction 1.1 Package Contents Thank you for choosing PLANET WNAP-6315. Before installing the AP, please verify the contents inside the package box. WNAP-6315 Quick Guide Plastic Strap PoE Injector Power Adapter If there is any item missing or damaged, please contact the seller immediately. -
Page 11: Product Description
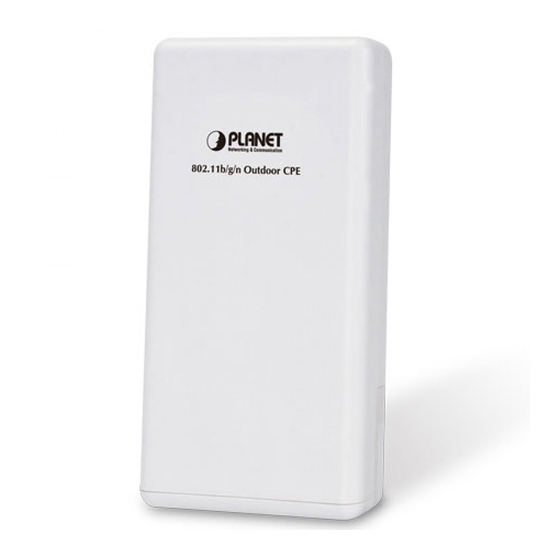
PLANET WNAP-6315 is compatible with IEEE 802.11b/g/n standard and supports a data rate of up to 150Mbps in 802.11n mode. The WNAP-6315 not only has a built-in 12dBi panel antenna but also reserves one RP-SMA type antenna connector to allow versatile antenna installations including omnidirectional, yagi, sector, flat-panel and grid antennas. -
Page 12: Easy Deployment And Management
Besides, with its UV-resistant feature, the surface of the WNAP-6315's lightweight plastic housing does not yield to brittle fracture easily. Thus, it is as reliable as the metal case but more economical. With the proprietary Power over Ethernet (PoE) design, the WNAP-6315 can be easily installed in the areas where power outlets are not available. -
Page 13: Product Features
Supports IP / Protocol-based access control and MAC filtering Easy Installation and Management Web-based UI and Quick Setup Wizard for easy configuration Planet Smart Discovery Utility allows administrator to discover and locate each AP System status monitoring includes DHCP Client and System Log... -
Page 14: Product Specifications
User Manual of WNAP-6315 1.4 Product Specifications WNAP-6315 Product 2.4GHz 802.11n Wireless Outdoor CPE AP/ Router Hardware IEEE 802.11b/g/n IEEE 802.3 Standard Support IEEE 802.3u IEEE 802.3x 32 Mbytes DDR SDRAM Memory 4 Mbytes Flash Passive PoE Wireless IEEE 802.11b/g/n, 1T1R... - Page 15 User Manual of WNAP-6315 Supports UPnP Supports IGMP Proxy Supports 802.1d STP (Spanning Tree) Static IP DHCP (Dynamic IP) PPPoE PPTP L2TP PPTP L2TP VPN Passthrough IPSec IPv6 Gateway Operation Mode ...
- Page 16 User Manual of WNAP-6315 Management Web UI, DHCP Client, Configuration Backup and Restore, Dynamic DNS Diagnostic Tool System Log Mechanical and Power IP Level IP55 Material Outdoor UV-resistant enclosure Dimensions (W x D x H) 127 x 63 x 254 mm...
-
Page 17: Chapter 2. Hardware Installation
User Manual of WNAP-6315 Chapter 2. Hardware Installation Please follow the instructions below to connect WNAP-6315 to the existing network devices and your computers. 2.1 Hardware Description Dimensions: 127 x 63 x 254 mm (W x D x H) Figure 2-1 Three-way View Rear Panel –... -
Page 18: The Bottom Panel - Port
2.1.1 The Bottom Panel – Port The bottom panel provides the physical connectors connected to the power adapter and any other network device. Figure 2-3 shows the bottom panel of the WNAP-6315. Bottom Panel Figure 2-3 Port and Connector of WNAP-6315... - Page 19 User Manual of WNAP-6315 Figure 2-4 Port and Connector Description Label PoE Injector Reset Button Figure 2-5 PoE Injector of WNAP-6315 Figure 2-6 Label of PoE Injector -10-...
- Page 20 Push continually the reset button on the PoE injector about 10 seconds to reset the configuration parameters to factory defaults. ※ If you have connected with the thunder protector like PLANET Reset ELA-100, please DO NOT press the reset button on the PoE injector to prevent the ELA-100 from being damaged.
-
Page 21: Chapter 3. Connecting To The Ap
To keep you safe and install the hardware properly, please read and follow these safety precautions. If you are installing the WNAP-6315 for the first time, for your safety as well as others’, please seek assistance from a professional installer who has received safety training on the hazards involved. - Page 22 User Manual of WNAP-6315 OUTDOOR INSTALLATION WARNING IMPORTANT SAFETY PRECAUTIONS: LIVES MAY BE AT RISK! Carefully observe these instructions and any special instructions that are included with the equipment you are installing. CONTACTING POWER LINES CAN BE LETHAL. Make sure no power lines are anywhere where possible contact can be made.
-
Page 23: Installing The Ap
Step 1. Push the latch on the bottom of the WNAP-6315 to remove the sliding cover. Figure 3-1 Connect the Antenna Step 2. Plug the RJ45 Ethernet cable into the PoE LAN Port of the WNAP-6315. Then, slide back the cover of the WNAP-6315 to finish the installation. - Page 24 Step 4. Successful installation. Figure 3-4 Connect the PoE injector Step 5. Pole Mounting: Place the strap through the slot on the back of the WNAP-6315 and then around the pole. Tighten the strap to secure the WNAP-6315. Figure 3-5 Pole Mounting...
-
Page 25: Chapter 4. Quick Installation Guide
These values can be changed as you want. In this guide, we use all the default values for description. Connect the WNAP-6315 with your PC by an Ethernet cable plugging in LAN port on one side and in LAN port of PC on the other side. - Page 26 User Manual of WNAP-6315 Figure 4-1 TCP/IP Setting Now click OK to save your settings. Now, you can run the Ping command in the command prompt to verify the network connection between your PC and the AP. The following example is in Windows 7 OS. Please follow the steps below: Click on Start >...
- Page 27 User Manual of WNAP-6315 Figure 4-2 Windows Start Menu Open a command prompt, type ping 192.168.1.253 and then press Enter. If the result displayed is similar to Figure 4-3, it means the connection between your PC and the AP has been established well.
- Page 28 User Manual of WNAP-6315 If the result displayed is similar to Figure 4-4, it means the connection between your PC and the AP has failed. Figure 4-4 Failed Result of Ping Command If the address is 0.0.0.0, check your adapter installation, security settings, and the settings on your AP. Some firewall software programs may block a DHCP request on newly installed adapters.
-
Page 29: Starting Setup In The Web Ui
User Manual of WNAP-6315 4.2 Starting Setup in the Web UI It is easy to configure and manage the AP with the web browser. Step 1. To access the configuration utility, open a web-browser and enter the default IP address http://192.168.1.253... -
Page 30: Chapter 5. Configuring The Ap
5.1 Setup Wizard The Setup Wizard will guide the user to configure the WNAP-6315 easily and quickly. Select the Setup Wizard on the left side of the screen and by clicking on Next on the Setup Wizard screen shown below, you will then name your WNAP-6315 and set up its security. - Page 31 User Manual of WNAP-6315 Step 1: Setup Operation Mode The AP supports three operation modes, Gateway, Bridge and Wireless ISP. -22-...
- Page 32 User Manual of WNAP-6315 Each mode is suitable for different uses. Please choose the correct mode. Figure 5-3 Wizard –Setup Operation Mode Step 2: Time Zone Setting The Time Configuration option allows you to configure, update, and maintain the correct time on the internal system clock.
- Page 33 User Manual of WNAP-6315 Step 3: Setup LAN Interface Figure 5-5 Wizard – Setup LAN Interface Step 4: Setup WAN Interface The Wireless AP supports five access modes in the WAN side. Please choose the correct mode according to your ISP Service.
- Page 34 User Manual of WNAP-6315 Step 5: Wireless LAN Setting Configure the wireless parameters according to your application. For this section you can set AP, Client, WDS and AP+WDS (Repeater) mode. Figure 5-7 Wizard - Wireless LAN Setting Step 6: Wireless Security Setting Secure your wireless network by turning on the WPA or WEP security feature on the AP.
-
Page 35: Operation Mode
User Manual of WNAP-6315 5.2 Operation Mode This page shows the current operation mode, and users can set different modes to LAN and WLAN interface for NAT and bridging function on the WNAP-6315. Figure 5-9 Operation Mode The page includes the following fields:... - Page 36 User Manual of WNAP-6315 with a cable. In this mode, the device enables multi-user to share Internet from WISP. Wireless ISP The LAN port devices share the same IP from WISP through Wireless port. While connecting to WISP, the Wireless port works as a WAN port at Client Router mode.
-
Page 37: Tcp/Ip Settings
The page includes the following fields: Object Description IP Address The default LAN IP address of the WNAP-6315 is 192.168.1.253. You can change it according to your request. Subnet Mask Default is 255.255.255.0. You can change it according to your request. -
Page 38: Wan Interface
If you change the IP address of LAN, you must use the new IP address to login the When the IP address of the WNAP-6315 is changed, the clients on the network often need to wait for a while or even reboot before they can access the new IP address. - Page 39 User Manual of WNAP-6315 Figure 5-11 WAN Setting The page includes the following fields: Object Description Please select the corresponding WAN Access Type for the Internet, and fill the WAN Access Type correct parameters from your local ISP in the fields which appear below.
- Page 40 User Manual of WNAP-6315 address provided to you by your ISP. Each IP address entered in the fields must be in the appropriate IP form, which are four octets separated by a dot (x.x.x.x). The Router will not accept the IP address if it is not in this format.
- Page 41 User Manual of WNAP-6315 Enter the Subnet Mask. Server IP Address Enter the L2TP Server IP address provided by your ISP. User Name Enter your L2TP user name. Password Enter your L2TP password. Host Name This option specifies the Host Name of the Wireless AP.
- Page 42 User Manual of WNAP-6315 If you get Address not found error when you access a Web site, it is likely that your DNS servers are set up improperly. You should contact your ISP to get DNS server addresses. WAN IP, whether obtained automatically or specified manually, should NOT be on the same IP net segment as the LAN IP;...
-
Page 43: Wireless
Client AP+WDS It is so easy to combine the WNAP-6315 with the existing wired network. The WNAP-6315 definitely provides a total network solution for the home and the SOHO users. Standard Access Point Figure 5-13 Topology – AP Bridge Mode... - Page 44 User Manual of WNAP-6315 Figure 5-14 Wireless Basic Settings of AP The page includes the following fields: Object Description Disable Wireless LAN Check the box to disable the wireless function. Interface Band Select the desired mode. Default is “2.4GHz (B+G+N)”. It is strongly recommended that you set the Band to “2.4GHz (B+G+N)”, and all of...
- Page 45 User Manual of WNAP-6315 2.4 GHz (B): 802.11b mode, rate is up to 11Mbps 2.4 GHz (G): 802.11g mode, rate is up to 54Mbps 2.4 GHz (N): 802.11n mode, rate is up to 150Mbps(1T1R) 2.4 GHz (B+G): 802.11b/g mode, rate is up to 11Mbps or 54Mbps ...
- Page 46 The device supports up to four multiple Service Set Identifiers. You can back to the Basic Settings page to set the Primary SSID. The SSID’s factory default setting is WNAP-6315 VAP1~4 (Multiple-SSID 1~4). The SSID can be easily changed to connect to an existing wireless network or to establish a new wireless network.
- Page 47 User Manual of WNAP-6315 Figure 5-17 Multiple-SSID Once you have applied and saved those settings, you can then go to the “Wireless → Security” page on the AP to set up security settings for each of the SSIDs. Universal Repeater ...
- Page 48 User Manual of WNAP-6315 Figure 5-19 Universal Repeater-1 Step 2. Go to Site Survey page to find the root AP. Select the root AP that you want to repeat the signal and then click “Next”. -39-...
- Page 49 User Manual of WNAP-6315 Figure 5-20 Universal Repeater-2 Step 3. Select the correct encryption method and enter the security key. Then, click “Connect”. Figure 5-21 Universal Repeater-3 -40-...
- Page 50 User Manual of WNAP-6315 Step 4. Check “Add to Wireless Profile” and click “Reboot Now”. Figure 5-22 Universal Repeater-4 Step 5. Go to “Management-> Status” page to check whether the state of Repeater interface should be “Connected”. Figure 5-23 Universal Repeater-5 Client (Infrastructure) ...
- Page 51 User Manual of WNAP-6315 Figure 5-25 Wireless Basic Settings – Client -42-...
- Page 52 Network Type In Infrastructure, the wireless LAN serves as a wireless station. And the user can use the PC equipped with the WNAP-6315 to access the wireless network via other access points. In Ad hoc, the wireless LAN will use the Ad-hoc mode to operate.
- Page 53 User Manual of WNAP-6315 Default is “Enabled”. Data Rate Set the wireless data transfer rate to a certain value. Since most of wireless devices will negotiate with each other and pick a proper data transfer rate automatically, it’s not necessary to change this value unless you know what will happen after modification.
- Page 54 User Manual of WNAP-6315 Step 2. Choose the root AP from the list. If the root AP is not listed in the table, re-click “Site Survey” to update the list. Figure 5-27 Client – AP List -45-...
- Page 55 User Manual of WNAP-6315 Step 3. Enter the Security Key of the root AP and then click “Connect”. Figure 5-28 Client – Security Step 4. Wait until the connection established. Check the “Add to Wireless Profile” option and then reboot it.
- Page 56 User Manual of WNAP-6315 Figure 5-31 Topology – WDS PtMP Mode -47-...
- Page 57 User Manual of WNAP-6315 Figure 5-32 Wireless Basic Settings – WDS The page includes the following fields: Object Description Disable Wireless LAN Check the box to disable the wireless function. Interface Band Select the desired mode. Default is “2.4GHz (B+G+N)”. It is strongly recommended that you set the Band to “2.4GHz (B+G+N)”, and all of...
- Page 58 User Manual of WNAP-6315 WNAP-6315. 2.4 GHz (B): 802.11b mode, rate is up to 11Mbps 2.4 GHz (G): 802.11g mode, rate is up to 54Mbps 2.4 GHz (N): 802.11n mode, rate is up to 150Mbps(1T1R) 2.4 GHz (B+G): 802.11b/g mode, rate is up to 11Mbps or 54Mbps ...
- Page 59 User Manual of WNAP-6315 Figure 5-34 Wireless Basic Settings – WDS+AP The page includes the following fields: Object Description Disable Wireless LAN Check the box to disable the wireless function. Interface Country Select your region from the pull-down list. This field specifies the region where the wireless function of the Router can be used.
- Page 60 Broadcast SSID If you enable “Broadcast SSID”, every wireless station located within the coverage of the WNAP-6315 can discover its signal easily. If you are building a public wireless network, enabling this feature is recommended. In private network, disabling “Broadcast SSID” can provide better wireless network security.
-
Page 61: Advanced Settings
User Manual of WNAP-6315 Associated Clients Click the “Show Active Clients” button to show the status table of active wireless clients. Enable Universal Universal Repeater is a technology used to extend wireless coverage. Repeater Mode To enable Universal Repeater Mode, check the box and enter the (Acting as AP and client SSID you want to broadcast in the field below. - Page 62 User Manual of WNAP-6315 The page includes the following fields: Object Description Fragment Threshold You can specify the maximum size of packet during the fragmentation of data to be transmitted. If you set this value too low, it will result in bad performance.
-
Page 63: Security
User Manual of WNAP-6315 Default Setting: "Disabled" Multicast to Unicast: Enables multicast traffic streams to be converted to unicast traffic before delivery to wireless clients. Converting multicast traffic to unicast before sending to wireless clients allows a longer DTIM (Data Beacon Rate) interval to be set. - Page 64 User Manual of WNAP-6315 WEP: It is based on the IEEE 802.11 standard. And the default setting of authentication is Automatic, which can select Open System or Shared Key authentication type automatically based on the wireless station's capability and request. Furthermore, you can select Key Length and enter 10 and 26 Hexadecimal digits (any combination of 0-9, a-f, A-F, zero key is not promoted) or 5 and 13 ASCII characters in the Encryption Key field.
- Page 65 User Manual of WNAP-6315 Figure 5-37 Security Settings – WEP The page includes the following fields: Object Description You can disable the encryption or select WEP, WPA2, and WPA-Mixed Encryption as the encryption method to your wireless network. Enable 802.1x authentication function and then enter the IP Address, 802.1x...
- Page 66 User Manual of WNAP-6315 128-bit keys. WPA2: Wi-Fi Protected Access (WPA) was introduced as an interim solution for the vulnerability of WEP pending the adoption of a more robust wireless security standard. WPA2 includes the complete wireless security standard, but also offers backward compatibility with WPA.
- Page 67 User Manual of WNAP-6315 Selects the data encryption type to use. (Default is determined by the Encryption Mode selected.) TKIP — Uses Temporal Key Integrity Protocol (TKIP) keys for encryption. WPA specifies TKIP as the data encryption method to replace WEP. TKIP avoids the problems of WEP static keys by dynamically changing data encryption keys.
- Page 68 User Manual of WNAP-6315 Figure 5-39 Security Settings – WPA2 Enterprise The page includes the following fields: Object Description You can disable the encryption or select WEP, WPA2, and WPA-Mixed as the Encryption encryption method to your wireless network. Select “Enterprise (RADIUS)” for user authentication and you will require a RADIUS authentication server to be configured on the wired network.
- Page 69 User Manual of WNAP-6315 AES — Uses Advanced Encryption Standard (AES) keys for encryption. WPA2 uses AES Counter-Mode encryption with Cipher Block Chaining Message Authentication Code (CBC-MAC) for message integrity. The AES Counter-Mode/CBCMAC Protocol (AESCCMP) provides extremely robust data confidentiality using a 128- bit key. Use of AES-CCMP encryption is specified as a standard requirement for WPA2.
- Page 70 User Manual of WNAP-6315 Figure 5-41 Security Settings – WPA-Mixed Enterprise 802.1x Authentication: IEEE 802.1X is a standard framework for network access control that uses a central RADIUS server for user authentication. This control feature prevents unauthorized access to the network by requiring an 802.1X client application to submit user credentials for authentication.
-
Page 71: Access Control
5.4.4 Access Control Choose menu “Wireless Access Control” to allow or deny the computer of specified MAC address to connect with the WNAP-6315 on this page. After the configuration, please click the “Apply Changes” button to save the settings. - Page 72 User Manual of WNAP-6315 The page includes the following fields: Object Description Wireless Access You can choose to set the Allowed-List, Denied-List, or disable this function. Control Mode MAC Address Enter the MAC address you want to allow or deny connection to the WNAP-6315 in the field.
-
Page 73: Wds
User Manual of WNAP-6315 5.4.5 WDS WDS (Wireless Distribution System) feature can be used to extend your existing wireless network coverage. Before configuring the WDS Setting page, you have to select the wireless mode to “WDS” on the Wireless ->... - Page 74 User Manual of WNAP-6315 Figure 5-45 WDS Mode Choose menu “Wireless WDS Settings” to configure WDS to connect the WNAP-6315 with another AP on this page. After the configuration, please click the “Apply Changes” button to save the settings.
- Page 75 User Manual of WNAP-6315 The page includes the following fields: Object Description Enable WDS Check the box to enable the WDS function. Please select WDS or AP+WDS in the Mode of Wireless Basic Settings before you enable WDS on this page.
-
Page 76: Site Survey
User Manual of WNAP-6315 To encrypt your wireless network, click “Set Security”. For the detail of wireless security, section 5.5.4. Do remember to reboot the device after you save your wireless security settings; otherwise, the WDS feature may not function. - Page 77 Here you can check if the connection via WPS is established or not. WPS Status Self-PIN Number It is the PIN number of the WNAP-6315 here. Push Button Click the “Start PBC” to activate WPS as well in the client device within Configuration 2 minutes.
- Page 78 User Manual of WNAP-6315 By Push Button Configuration (PBC) Click the “Start PBC” Button on the WPS page of the AP. Figure 5-49 WPS-PBC Figure 5-50 WPS-PBC Press and hold the WPS Button equipped on the adapter directly for 2 or 3 seconds. Or you can click the WPS button with the same function in the configuration utility of the adapter.
- Page 79 User Manual of WNAP-6315 Figure 5-51 WPS-PIN Figure 5-52 WPS-PIN For the configuration of the wireless adapter, please choose the option that you want to enter PIN into the AP (Enrollee) in the configuration utility of the WPS and click Next until the process finishes.
-
Page 80: Schedule
User Manual of WNAP-6315 5.4.8 Schedule Wireless Schedules will enable or disable your wireless access at a set time based on your predefined schedule. This feature is often used for restricting access to all users (such as children, employees and guests) during specific times of the day for parental control or security reasons. -
Page 81: Firewall
User Manual of WNAP-6315 5.5 Firewall This section contains firewall settings include Port/IP/MAC/URL Filtering/Forwarding and DMZ which are only functioning when the AP configured to “Gateway” mode. Please refer to the following sections for the details. Figure 5-55 Firewall – Main Menu 5.5.1 Port Filtering... -
Page 82: Ip Filtering
User Manual of WNAP-6315 Comment The description of this setting Check the “Select” box of which rule you want to delete, and then click the “Delete Selected” button to delete it. 5.5.2 IP Filtering IP Filtering is used to block internet or network access to specific IP addresses on your local network. The restricted user may still be able to login to the network but will not be able to access the internet. -
Page 83: Mac Filtering
User Manual of WNAP-6315 5.5.3 MAC Filtering Entries in this table are used to restrict certain types of data packets from your local network to Internet through the Wireless Router. Use of such filters can be helpful in securing or restricting your local network. -
Page 84: Port Forwarding
User Manual of WNAP-6315 5.5.4 Port Forwarding Choose menu “Firewall Port Forwarding”, and you can configure to re-direct a particular range of service port numbers from the Internet network to a particular LAN IP address. It helps users to host some servers behind the firewall. -
Page 85: Url Filtering
User Manual of WNAP-6315 5.5.5 URL Filtering URL filter is used to deny LAN users from accessing the internet. Block those URLs which contain keywords listed below. Choose menu “Firewall URL Filtering”, and you can configure which URL addresses to be blocked. After the configuration, please click the “Apply Changes”... -
Page 86: Dmz
User Manual of WNAP-6315 5.5.6 DMZ This page allows you to set a De-militarized Zone (DMZ) to separate internal network and Internet. Choose menu “Firewall DMZ”, and you can configure the private IP address of DMZ. The DMZ feature allows one local host to be exposed to the Internet for a special-purpose service such as Internet gaming or video conferencing. - Page 87 Check the box to enable the QoS function. Enable QoS Automatic Uplink Speed Check the box to adjust the uplink speed automatically by the WNAP-6315. Or enter the uplink data rate manually in the field below. Automatic Downlink Check the box to adjust the downlink speed automatically by the Speed WNAP-6315.
-
Page 88: Management
You can use this function to realize the instantaneous information of the Wireless AP. The Information displayed here may vary on different configurations. Choose menu “Management Status” to show the current status and some basic settings of the WNAP-6315. -79-... -
Page 89: Statistics
User Manual of WNAP-6315 Figure 5-57 Status 5.7.2 Statistics Choose menu “Management Statistics” to show the packet counters for transmission and reception regarding wireless and Ethernet network. -80-... -
Page 90: Ddns (Dynamic Dns Settings)
User Manual of WNAP-6315 Figure 5-58 Statistics The page includes the following fields: Object Description It shows the statistic count of sent packets on the wireless LAN interface. Wireless LAN Sent Packets It shows the statistic count of received packets on the wireless LAN interface. - Page 91 User Manual of WNAP-6315 Figure 5-59 Dynamic DNS Settings Object Description Disable: Disable DDNS function Enable Easy DDNS: Enable PLANET Easy DDNS Enable DDNS Enable Dynamic DDNS: You are allowed to modify the DDNS settings. Service Provider Select a server provider or disable the existing server.
- Page 92 Select “Enable Dynamic DDNS” and “PlanetDDNS.com” from the list of Dynamic DNS Provider to use the Planet DDNS service. Step 2. Configure the DDNS account that has been registered in Planet DDNS website. Domain Name: Enter your DDNS host (format: xxx.planetddns.com, is the registered domain name) User Name/Email: Enter your registered DDNS user name.
- Page 93 User Manual of WNAP-6315 Step 3. Go to “TCP/IP Settings WAN Interface Setup” to enable Web Server Access on WAN port and configure WAN connection to Static IP (fixed IP). Step 4. Save the setting and connect your WAN port of the Wireless AP to the internet via Ethernet cable.
- Page 94 Example of Easy DDNS Settings: This service is not required to register any DDNS account. Please refer to the procedure listed as follows to configure using Planet Easy DDNS service. Step 1. Select “Enable Easy DDNS” to use the Planet Easy DDNS service.
-
Page 95: Time Zone Setting
User Manual of WNAP-6315 Step 3. Save the setting and connect your WAN port of the Wireless AP to the internet via Ethernet cable. In a remote computer, enter the Easy Domain Name displayed in Step 1. Then, you should be able to login the WNAP-6315 remotely. - Page 96 User Manual of WNAP-6315 The configured time and date settings are lost when the Wireless AP is powered off. Figure 5-60 Time Zone Settings The page includes the following fields: Object Description Input current time manually. Current Time You can click “Copy Computer Time” button to copy the PC’s current time to the AP.
-
Page 97: Schedule Reboot
User Manual of WNAP-6315 5.7.5 Schedule Reboot This page allows you to enable and configure system reboot schedule. The device can regularly reboot according to the reserved time when connecting to the Internet. Figure 5-61 Schedule Reboot The page includes the following fields:... -
Page 98: Denial Of Service (Dos)
User Manual of WNAP-6315 Before configured schedule reboots, please ensure the Internet connection is accessible and the GMT time is configured correctly according to NTP Settings page. Step 1. Select the Schedule Reboot Setting checkbox. Step 2. Enter the Reboot Time (24-hour format) to enable this function to take effect. For example, if you want this function to work at 23:00 every Sunday, choose "Weekday"... - Page 99 User Manual of WNAP-6315 Figure 5-7-6 Denial of Service The page includes the following fields: Object Description Check to enable DoS function. Enable DoS Prevention User may set other related configurations about DoS below -90-...
-
Page 100: Log
User Manual of WNAP-6315 5.7.7 LOG Choose menu “Management Log” to configure the settings of system log. You can check the box of the items you want to record it in the log. After the configuration, please click the “Apply” button to save the settings. -
Page 101: Upgrade Firmware
5.7.9 Save/Load Setting Choose menu “Management Save/Load Setting” to back up or reset the configuration of the WNAP-6315. Once you have configured the Wireless AP the way you want it, you can save these settings to a configuration file on your local hard drive that can later be imported to your Wireless AP in case the device is restored to factory default settings. - Page 102 Select the configuration file of the WNAP-6315 and then click the “Upload” button to reload the configuration back into the WNAP-6315. Reset Settings to Click the “Reset” button to reset all settings of the WNAP-6315 to factory Default default. Factory Default Settings:...
-
Page 103: Password
Web-based Utility. The default user name and password are “admin”. This page will allow you to add or modify the user name and password. Choose menu “Management Password” to change the user name and password which is inputted to access the web UI of the WNAP-6315. Figure 5-66 Password Setup he page includes the following fields:... -
Page 104: Logout
User Manual of WNAP-6315 5.7.11 Logout To logout the WNAP-6315, please select “Logout” from the left-side menu. Then, click “OK” to logout. Figure 5-67 Logout -95-... -
Page 105: Chapter 6. Quick Connection To A Wireless Network
User Manual of WNAP-6315 Chapter 6. Quick Connection to a Wireless Network In the following sections, the default SSID of the WNAP-6315 is configured to “default”. 6.1 Windows XP (Wireless Zero Configuration) Step 1: Right-click on the wireless network icon displayed in the system tray Figure 6-1 System Tray –... - Page 106 User Manual of WNAP-6315 Step 4: Enter the encryption key of the Wireless AP (1) The Wireless Network Connection box will appear (2) Enter the encryption key that is configured in section 5.4.3 (3) Click the [Connect] button Figure 6-3 Enter the network key Step 5: Check if “Connected”...
-
Page 107: Windows 7 (Wlan Autoconfig)
User Manual of WNAP-6315 6.2 Windows 7 (WLAN AutoConfig) WLAN AutoConfig service is built-in in Windows 7 that can be used to detect and connect to wireless network. This built-in wireless network connection tool is similar to wireless zero configuration tool in Windows XP. - Page 108 User Manual of WNAP-6315 Step 4: Enter the encryption key of the Wireless AP (1) The Connect to a Network box will appear (2) Enter the encryption key that is configured in section 5.4.3 (3) Click the [OK] button Figure 6-7 Type the network key...
- Page 109 User Manual of WNAP-6315 Step 5: Check if “Connected” is displayed Figure 6-9 Connected to a Network -100-...
-
Page 110: Mac Os X 10.X
6.3 Mac OS X 10.x .3 Mac OS X 10.x In the following sections, the default SSID of the WNAP-6315 is configured to “default”. In the following sections, the default SSID of the WNAP-6315 is configured to “default”. Step 1: Right-click on the network icon displayed in the system tray The AirPort Network Connection menu will appear Figure 6-10 Mac OS –... - Page 111 User Manual of WNAP-6315 Step 4: Enter the encryption key of the Wireless AP (1) Enter the encryption key that is configured in section 5.4.3 (2) Click the [OK] button Figure 6-12 Enter the Password If you will be connecting to this Wireless AP in the future, check [Remember this network].
- Page 112 User Manual of WNAP-6315 There is another way to configure the MAC OS X Wireless settings: Step 1: Click and open the [System Preferences] by going to Apple > System Preference or Applications Figure 6-14 System Preferences Step 2: Open Network Preference by clicking on the [Network] icon...
- Page 113 User Manual of WNAP-6315 Step 3: Check Wi-Fi setting and select the available wireless network (1) Choose the AirPort on the left-menu (make sure it is ON) (2) Select Network Name [default] here If this is the first time to connect to the Wireless AP, it should show “Not network selected”.
-
Page 114: Iphone / Ipod Touch / Ipad
6.4 iPhone / iPod Touch / iPad .4 iPhone / iPod Touch / iPad In the following sections, the default SSID of the WNAP-6315 is configured to “default”. In the following sections, the default SSID of the WNAP-6315 is configured to “default”. - Page 115 User Manual of WNAP-6315 Figure 6-19 Wi-Fi Setting – Not Connected Step 3: Tap the target wireless network (SSID) in “Choose a Network…” (1) Turn on Wi-Fi by tapping “Wi-Fi” (2) Select SSID [default] Figure 6-20 Turn on Wi-Fi Step 4: Enter the encryption key of the Wireless AP...
- Page 116 User Manual of WNAP-6315 Figure 6-21 iPhone -- Enter the Password Step 5: Check if the device is connected to the selected wireless network. If “Yes”, then there will be a “check” symbol in the front of the SSID. Figure 6-22 iPhone -- Connected to the Network...
-
Page 117: Appendix A: Planet Smart Discovery Utility
User Manual of WNAP-6315 Appendix A: Planet Smart Discovery Utility To easily list the WNAP-6315 in your Ethernet environment, the Planet Smart Discovery Utility is an ideal solution. To get the Planet Smart Discovery Utility, please contact support@planet.com.tw. The following installation instructions guide you to running the Planet Smart Discovery Utility. -
Page 118: Appendix B: Troubleshooting
User Manual of WNAP-6315 Appendix B: Troubleshooting If you find the AP is working improperly or stop responding to you, please read this troubleshooting first before contacting the dealer for help. Some problems can be solved by yourself within a very short time. - Page 119 User Manual of WNAP-6315 Try to use IP address instead of host name. If you can use IP address to communicate with a remote server, but can’t use host name, please check DNS setting. a. ‘Broadcast ESSID’ set to off? I can’t locate my AP by my...
-
Page 120: Appendix C: Frequently Asked Questions
Appendix C: Frequently Asked Questions Q1: How to set up the AP Client Connection Topology: Step 1. Use static IP in the PCs that are connected with AP-1(WNAP-6315, Site-1) and AP-2 (Client, Site-2). In this case, Site-1 is “192.168.1.100”, and Site-2 is “192.168.1.200”. -111-... - Page 121 User Manual of WNAP-6315 Step 2. In AP-1, go to “Wireless Basic Settings” to configure it to AP Mode. Then, configure the following wireless parameters for your wireless network. : set to a unique value Network ID (SSID) 2) Channel: set to a fixed one or auto (suggested set to fixed channel).
- Page 122 User Manual of WNAP-6315 Step 3. Go to “Wireless Security” to configure the security setting. Step 4. In AP-2, modify the default IP to the same IP range but different from AP-1. In this case, the IP is changed to 192.168.1.252.
- Page 123 User Manual of WNAP-6315 Step 5. In AP-2, configure it in “Client” mode. -114-...
- Page 124 User Manual of WNAP-6315 Step 6. Go to “Wireless Site Survey” to find the AP-1. Then, select it and click “Next”. Step 7. Configure the Encryption and Pre-Shared Key which must be the same as AP-1. Then click “Connect”. -115-...
- Page 125 User Manual of WNAP-6315 Step 8. Check “Add to Wireless Profile” and click “Reboot Now” to apply the setting. Step 9. Go to “Management Status” to check the connection state should be “Connected”. -116-...
- Page 126 User Manual of WNAP-6315 Step 10. Use command line tool to ping each other to ensure the link is successfully established. From Site-1, ping 192.168.1.200; and in Site-2, ping 192.168.1.100. Step 11. Configure the TCP/IP settings of Site-2 to “Obtain an IP address automatically”.
- Page 127 User Manual of WNAP-6315 Step 12. Use command line tool to ping the DNS (e.g. Google) to ensure the Site-2 can access internet through the wireless connection. The attention of the following hints should be paid: The encryption method must be the same as that of both sites if configured.
-
Page 128: Q2: How To Setup The Wds Connection
User Manual of WNAP-6315 Q2: How to setup the WDS Connection Topology: Step 1. Use static IP in the PCs that are connected with WNAP-6315-1(Site-1) and WNAP-6315-2(Site-2), in this case, Site-1 is “192.168.1.100”, and Site-2 is “192.168.1.200”. -119-... - Page 129 User Manual of WNAP-6315 Step 2. In AP-1, go to “Wireless Basic Settings” to configure it to “WDS” Mode. Then, set the channel number to a fixed one. -120-...
- Page 130 User Manual of WNAP-6315 Step 3. Go to “Wireless WDS Settings” to configure the AP-2’s MAC address. In AP-1’s WDS Setting, configure AP-2’s MAC address. Step 4. If you select “Reboot Later”, you can click “Set Security” to continue to configure the encryption and security key of the WDS connection.
- Page 131 User Manual of WNAP-6315 Step 5. In AP-2, modify the default IP to the same IP range but different from AP-1. In this case, the IP is changed to 192.168.1.252. -122-...
- Page 132 User Manual of WNAP-6315 Step 6. In AP-2, configure it to “WDS” mode and set the channel to the fixed one which is the same as AP-1. -123-...
- Page 133 User Manual of WNAP-6315 Step 7. Go to “Wireless WDS Settings” to configure the AP-1’s MAC address. In AP-1’s WDS Setting, configure AP-2’s MAC address. Step 8. If you select “Reboot Later”, you can click “Set Security” to continue to configure the encryption and security key of the WDS connection.
- Page 134 User Manual of WNAP-6315 Step 9. Click “Apply Changes” to apply the settings. Step 10. Use command line tool to ping each other to ensure the link is successfully established. From Site-1, ping 192.168.1.200; and in Site-2, ping 192.168.1.100. The attention of the following hints should be paid: The encryption method and channel must be the same for both sites.
- Page 135 WNAP-6315 *Model Number * Produced by: Manufacturer’s Name : Planet Technology Corp. Manufacturer’s Address: 10F., No.96, Minquan Rd., Xindian Dist., New Taipei City 231, Taiwan (R.O.C.) is herewith confirmed to comply with the requirements set out in the Council Directive on the 1999/5/EC R&TTE,...
- Page 136 Wireless APΣΥΜΜΟΡΦΩΝΕΤΑΙ ΠΡΟΣ ΤΙΣ requisitos essenciais e outras disposições da ΟΥΣΙΩΔΕΙΣ ΑΠΑΙΤΗΣΕΙΣ ΚΑΙ ΤΙΣ ΛΟΙΠΕΣ Directiva 1999/5/CE. ΣΧΕΤΙΚΕΣ ΔΙΑΤΑΞΕΙΣ ΤΗΣ ΟΔΗΓΙΑΣ 1999/5/ΕΚ Por medio de la presente, PLANET Technology Español Slovensky Corporation, declara que Outdoor Wireless AP Výrobca PLANET Technology Corporation, týmto cumple con los requisitos esenciales y deklaruje, že táto Outdoor Wireless AP je v súlade...
Need help?
Do you have a question about the WNAP-6315 and is the answer not in the manual?
Questions and answers