Table of Contents
Advertisement
Available languages
Available languages
DANBY PRODUCTS LIMITED, ONTARIO, CANADA N1H 6Z9
DANBY PRODUCTS INC., FINDLAY, OHIO, USA 45840
OWNER'S USE AND CARE GUIDE
GUIDE D'UTILISATION ET D'ENTRETIEN
GUÍA DE UTILIZACIÓN Y CUIDADO PARA EL PROPIETARIO
DISHWASHER
LAVE-VAISSELLE
LAVAPLATOS
MODEL • MODÈLE • MODELO
DDW621WDB
2016.03.03
Advertisement
Table of Contents

Subscribe to Our Youtube Channel
Related Manuals for Danby DDW621WDB


Summary of Contents for Danby DDW621WDB
- Page 1 OWNER’S USE AND CARE GUIDE GUIDE D’UTILISATION ET D'ENTRETIEN GUÍA DE UTILIZACIÓN Y CUIDADO PARA EL PROPIETARIO DISHWASHER LAVE-VAISSELLE LAVAPLATOS MODEL • MODÈLE • MODELO DDW621WDB DANBY PRODUCTS LIMITED, ONTARIO, CANADA N1H 6Z9 DANBY PRODUCTS INC., FINDLAY, OHIO, USA 45840 2016.03.03...
- Page 2 DO NOT RETURN THIS UNIT TO THE RETAILER WITHOUT FURTHER INSTRUCTIONS Dear valued customer, we hope your Danby product purchase fulfills all your requirements. Your satisfaction is our priority! Please contact us at our toll free consumer service number for any inquiries you may have about your new unit.
- Page 3 Guía de utilización y cuidado para el propietario.....42-61 • Bienvenido Nunca deje el aparato sin vigilancia. • Información importante sobre seguridad • Características • Instrucciones de instalación • Instrucciones de funcionamiento • Cuidado y mantenimiento • Solución sugerida • Garantía Model • Modèle • Modelo • DDW621WDB...
- Page 4 . It contains important operational information that will help you make full use of the technical features available in your Danby appliance. The important operational information that will help you make full use of the technical features available in your Danby appliance.
-
Page 5: Important Safety Information
Important Safety Information READ AND FOLLOW ALL SAFETY INSTRUCTIONS When using your dishwasher, follow the precautions listed below: This appliance must be grounded. In the event of a malfunction or break- GROUNDING down, grounding will reduce the risk of electric shock by providing a path of least resistant electric current. -
Page 6: Operating Instructions
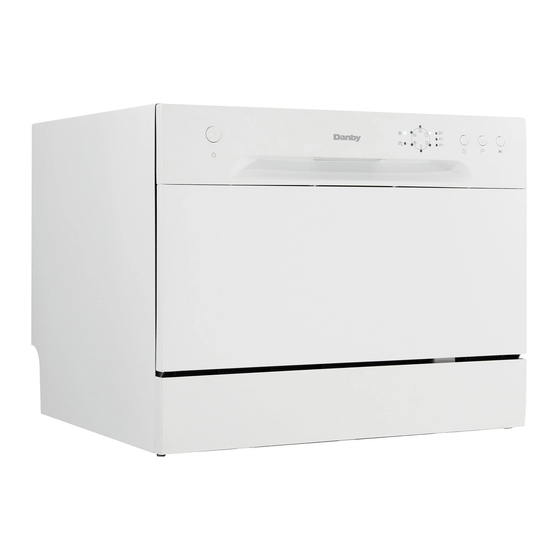
Operating Instructions READ AND FOLLOW ALL OPERATING INSTRUCTIONS To get the best performance from your dishwasher, read all operating instructions before using it for the first time. CONTROL PANEL 1) Power Button: To turn on/off the power supply. 7) Washing Program Selector: Press this button to select wash cycles. - Page 7 Operating Instructions PRIOR TO USING FOR THE FIRST TIME RINSE AID DISPENSER A. FILL THE RINSE The rinse aid is released during the final rinse to prevent water from form- ing droplets on your dishes that can leave spots and streaks. It also AID DISPENSER improves drying by allowing water to sheet off the dishes. Your dishwash- er is designed to use liquid rinse aids.
- Page 8 Operating Instructions PRIOR USING FOR THE FIRST TIME ADJUSTING RINSE AID DISPENSER A. FILL THE RINSE The rinse aid dispenser has four settings. The recommended setting is on "3". If the dishes still are not drying properly or are spotted, adjust the dial AID DISPENSER to the next higher number on "4". (cont.) NOTE: Increase the dose if there are drops of water or lime spots on the dishes after washing.
- Page 9 Operating Instructions PRIOR TO USING FOR THE FIRST TIME DETERGENT DISPENSER B. FUNCTION OF The dispenser must be refilled before the start of each wash cycle follow- ing the instructions provided in the Wash Cycle Table . Your dishwasher DETERGENT uses less detergent and rinse aid than a conventional dishwasher. (cont.) Generally, only one tablespoon of detergent is needed for a normal wash load.
- Page 10 Operating Instructions PRIOR TO USING FOR THE FIRST TIME ADD DETERGENT B. FUNCTION OF Fill the detergent dispenser with detergent. The marking indicates the dos- ing levels, as illustrated below: DETERGENT Can hold 15g of detergent. (cont.) Can hold 25g of detergent. Pre-wash Compartment Please see the manufacturers recommendations for the amount of deter- gent to use as stated on the detergent packaging.
- Page 11 Operating Instructions LOADING THE DISHWASHER BASKETS • Consider buying utensils which are identified as dishwasher-proof. RECOMMENDATION • For particular items, select a program with a low temperature. • Do not take glass and cutlery out of the dishwasher immediately after the program (wash cycle) has ended as they may be hot. ARE NOT SUITABLE ARE OF LIMITED SUITABILITY WASHING CUTLERY/...
- Page 12 Operating Instructions LOADING THE DISHWASHER BASKETS Position the dishes and cookware so that they will not get moved by LOADING THE the spraying water. BASKET Cups Serving bowl Saucers Glasses Fruit bowl Oval platter Bread and Dinner plates butter plates Cutlery basket Plate racks in basket The basket is fitted with plate racks which can be stowed horizontal if required.
- Page 13 Operating Instructions LOADING THE DISHWASHER BASKETS Cutlery should be placed in the cutlery basket with handles at the bottom. CUTLERY BASKET If the rack has side baskets, spoons should be loaded individually into the appropriate slots, especially long utensils should be placed in the horizon- tal position at the front of the upper basket as shown.
- Page 14 Operating Instructions STARTING A WASHING PROGRAM • ( ) Means: Need to fill rinse in the Rinse-Aid Dispenser. WASH CYCLE TABLE • AHAM DW-1-2005 : This program is the test cycle. The rinse aid dispenser position 6 is recommended. Detergent Energy Rinse Cycle selection Description Running Water Program...
- Page 15 Operating Instructions STARTING A WASHING PROGRAM You can modify the washing program when the dishwasher just runs for a CHANGING THE short time. Otherwise, the detergent may have already been released, and the appliance may have already drained the wash water. If this is the PROGRAM case, the detergent dispenser must be refilled.
-
Page 16: Installation Instructions
Installation Instructions The installation position of the dishwasher should be near the exist- INSTALLATION ing inlet and drain hoses and power cord. One side of the cabinet sink should be chosen to facilitate the connection of drain hoses to PREPARATION the dishwasher. -
Page 17: Water Connection
Installation Instructions Rear of dishwasher: Back View WATER 1. Drain Port CONNECTION 2. Power Cord 3. Inlet Port Your dishwasher comes equipped with a 'quick connect' assembly (includes inlet and drain hose). The faucet adapter must be installed on the faucet before you can connect the dishwasher. This adapter is includ- ed inside your dishwasher. - Page 18 Installation Instructions 1. Screw the faucet adapter onto (or into) the faucet tap. Check for leaks WATER (use Teflon tape to eliminate if necessary). 2. Connect the six-sided connection of the drain hose to the drain port CONNECTION connection on the back of the dishwasher cabinet. Do not over-tighten (to avoid damage to threads).
-
Page 19: Care And Maintenance
Installation Instructions The following things should be checked before starting the STARTING THE dishwasher: DISHWASHER The dishwasher is level and fixed properly There is no leakage at the connections of the conducts. The wires are tightly connected The power is turned on Make sure the inlet and drain hoses are not twisted All packing materials and removable printings should be taken out from the dishwasher... - Page 20 Care and Maintenance WARNING FILTERING • Never run the dishwasher without the filters in place. SYSTEM (cont) • The dishwasher must never be used without the filters. • Improper replacement of the filter may reduce the performance level of the appliance and damage dishes and utensils. Step 1.
- Page 21 Care and maintenance CLEANING THE SPRAY ARMS CARING FOR THE The spray arms can be easily removed for periodic cleaning of the noz- zles, to prevent possible clogging. Wash them under running water and DISHWASHER carefully replace them in their proper position, checking that their rotary movement is in no way impeded.
-
Page 22: Troubleshooting
Occasionally a problem may arise that is minor in nature, and a service call may not be neccessary. Use this trou- bleshooting guide for a possible solution. If the unit continues to operate improperly, call an authorized service depot or Danby’s Toll Free Number 1-800-263-2629 for assistance. PROBLEM POSSIBLE CAUSE... - Page 23 Danby or its authorized distributors and all other warranties, conditions, representations or Nothing within this warranty shall imply that Danby will be responsible or liable for any spoilage or damage to food or other c...
- Page 24 Se il vous plaît visitez www.danby.com pour accéder les outils libre-service, FAQ et plus encore. Si jamais vous avez besoin d'aide supplémentaire, s’il vous plaît appelez 1-800-26-Danby (1-800-263-2629). S’il vous plaît ayez votre facture d’achat, le numéro de modèle, et le numéro de série près durant l'appel.
- Page 25 Renseignements importants relatifs à la sécurité LISEZ ET RESPECTEZ TOUTES LES CONSIGNES RELATIVES À LA SÉCURITÉ Lors de l’utilisation de votre lave-vaisselle, prenez toutes les précautions indiquées ci-dessous : Cet appareil doit être mis à la terre. En cas de défaillance ou de panne, la mise à...
-
Page 26: Panneau De Commande
Mode d’emploi LISEZ ET RESPECTEZ ENTIÈREMENT LE MODE D’EMPLOI Pour obtenir les meilleurs résultats avec votre lave-vaisselle, lisez le mode d’emploi d’un bout à l’autre avant d’utiliser l’appareil pour la première fois. PANNEAU DE COMMANDE 1) Bouton ON/OFF (marche/arrêt) : contrôle l’alimentation 6) Bouton de délai : Appuyez sur ce bouton pour définir un en électricité... - Page 27 Mode d’emploi AVANT D’UTILISER L’APPAREIL POUR LA PREMIÈRE FOIS DISTRIBUTEUR D’AGENT DE RINÇAGE A. REMPLISSEZ LE L’agent de rinçage est libéré pendant le rinçage final afin d’empêcher que l’eau ne forme des gouttelettes qui peuvent créer des taches et des traînées sur DISTRIBUTEUR votre vaisselle.
- Page 28 Mode d’emploi AVANT D’UTILISER L’APPAREIL POUR LA PREMIÈRE FOIS RÉGLAGE DU DISTRIBUTEUR D’AGENT DE RINÇAGE A. REMPLISSEZ LE Le distributeur d’agent de rinçage a quatre réglages. Le réglage recom- mandé est « 3 ». Si la vaisselle ne sèche pas correctement ou est tachée, DISTRIBUTEUR ajustez le cadran au numéro suivant, soit «...
- Page 29 Mode d’emploi AVANT D’UTILISER L’APPAREIL POUR LA PREMIÈRE FOIS DISTRIBUTEUR DE DÉTERGENT B. FONCTION DU Le distributeur doit être rempli avant le début de chaque cycle de lavage en suiv- ant les instructions qui se trouvent dans le tableau des cycles de lavage. Votre DÉTERGENT lave-vaisselle consomme moins de détergent et d’agent de rinçage qu’un lave- (suite)
- Page 30 Mode d’emploi AVANT D’UTILISER L’APPAREIL POUR LA PREMIÈRE FOIS REMPLISSEZ LE DÉTERGENT B. FONCTION DU Remplissez le distributeur de détergent. Le repère indique la quantité de détergent à utiliser, tel qu’illustré ci-dessous : DÉTERGENT Peut contenir 15 g de détergent. (suite) Peut contenir 25 g de détergent.
- Page 31 Mode d’emploi CHARGEMENT DES PANIERS DU LAVE-VAISSELLE • Songez à acheter des ustensiles sur lesquels il est indiqué qu’ils vont au RECOMMANDATION lave-vaisselle. • Pour des articles spécifiques, sélectionnez un programme à basse tem- pérature. • Ne retirez pas les verres et la coutellerie du lave-vaisselle immédiate- ment après le programme de lavage, car ils pourraient être chauds.
-
Page 32: Chargement Du Panier
Mode d’emploi CHARGEMENT DES PANIERS DU LAVE-VAISSELLE Positionnez la vaisselle et la batterie de cuisine de façon telle que CHARGEMENT DU les jets d’eau ne les déplaceront pas. PANIER Tasses Bol à servir Soucoupes Verres Bol à fruits Plateau ovale Assiettes à... - Page 33 Mode d’emploi CHARGEMENT DES PANIERS DU LAVE-VAISSELLE La coutellerie doit être placée dans le panier à ustensiles les manches vers le PANIER À USTEN- bas. Si le panier est équipé de paniers latéraux, les cuillers doivent être placées individuellement dans les fentes appropriées, et les ustensiles très SILES longs doivent être placés horizontalement à...
-
Page 34: Tableau Des Cycles De Lavage
Mode d’emploi COMMENT LANCER UN PROGRAMME DE LAVAGE • ( * ) Signifie que le distributeur d’agent de rinçage doit être rempli. TABLEAU DES • AHAM DW-1-2005 : ce programme est le cycle de test, il est recom- CYCLES DE LAVAGE mandé... - Page 35 Mode d’emploi COMMENT LANCER UN PROGRAMME DE LAVAGE Vous pouvez changer le programme de lavage si le lave-vaisselle ne CHANGEMENT DU fonctionne que depuis quelques minutes. Autrement, il est possible que le détergent ait été libéré et que l’appareil ait drainé l’eau de lavage. Dans PROGRAMME ce cas, il faudrait remplir de nouveau le distributeur de détergent.
- Page 36 Notice d’installation Le lave-vaisselle devrait être installé à proximité des tuyaux d’ad- PRÉPARATION mission et de drainage existants et du cordon d’alimentation. Le côté de l’armoire de l’évier qui facilite le raccordement des tuyaux EN VUE DE L’IN- de drainage du lave-vaisselle doit être choisi. STALLATION Positionnez l’appareil à...
- Page 37 Notice d’installation Arrière du lave-vaisselle : Vue arrière RACCORDEMENT 1. Orifice de drainage ÉLECTRIQUE 2. Cordon d’alimentation 3. Orifice d’admission Votre lave-vaisselle est doté d’un raccord à branchement rapide (com- prend l’admission et le tuyau de drainage). L’adaptateur de robinet doit être installé...
- Page 38 Notice d’installation 1. Vissez l’adaptateur de robinet sur (ou dans) le robinet. Vérifiez la présence RACCORDEMENT de fuites (au besoin, utilisez du ruban de téflon pour les éliminer). 2. Branchez le raccord à six côtés du tuyau de drainage au connecteur de ÉLECTRIQUE l’orifice de drainage, qui se trouve à...
- Page 39 Notice d’installation Les éléments suivants doivent être vérifiés avant de démarrer le DÉMARRAGE DU lave-vaisselle : LAVE-VAISSELLE Le lave-vaisselle est de niveau et fixé correctement Y a-t-il une fuite au niveau du raccordement des conduites? Les fils sont bien serrés L’appareil est allumé...
- Page 40 Entretien AVERTISSEMENT SYSTÈME DE • Ne faites jamais fonctionner le lave-vaisselle si les filtres ne sont pas FILTRATION en place. • Le lave-vaisselle ne doit jamais être utilisé sans les filtres. • Si les filtres sont mal replacés, cela pourrait réduire la performance de (suite) l’appareil et endommager la vaisselle et les ustensiles.
- Page 41 Entretien NETTOYAGE DES GICLEURS ENTRETIEN DU Les gicleurs peuvent être enlevés facilement pour un nettoyage péri- odique des bases, afin d’empêcher le blocage possible. Lavez-les à l’eau LAVE-VAISSELLE courante et remettez-les prudemment en place à la bonne position, en vous assurant que leur mouvement rotatif n’est pas bloqué. (suite) Prenez le gicleur au centre et tirez vers le haut pour l’enlever.
- Page 42 Il peut arriver qu’un problème mineur se produise qui ne nécessite pas d’appel de service. Consultez ce guide de dépannage pour trouver une solution possible. Si l’appareil continue de mal fonctionner, appelez un atelier de répara- tion autorisé ou le numéro sans frais de Danby, au 1-800-263-2629, pour obtenir de l’assistance. PROBLÈME...
- Page 43 En vertu de la présente, il n’existe aucune autre garantie, condition ou représentation, qu’elle soit exprimée ou tacite, de façon Nothing within this warranty shall imply that Danby will be responsible or liable for any spoilage or damage to food or other c ontents of this appliance, whether due manifeste ou intentionnelle, par Danby ou ses distributeurs agréés.
- Page 44 Por favor, visite www.danby.com para acceder a herramientas de autoservicio, preguntas frecuentes y más. En caso de necesitar asistencia adicional, por favor llame al 1-800-26-DANBY (1-800-263-2629). Por favor tenga disponible su recibo de compra y número de modelo cuando llame.
-
Page 45: Instrucciones De Seguridad Importantes
Instrucciones de seguridad importantes LEA TODA LA INFORMACIÓN SOBRE SEGURIDAD ANTES DE UTI- LIZAR EL EQUIPO Tome las siguientes precauciones al usar su lavavajillas : Este artefacto debe ser conectado a tierra. En caso de falla o avería, la conexión a LA CONEXIÓN A tierra reducirá... -
Page 46: Panel De Control
Instrucciones operadoras LEA Y SEGUIR TODAS LAS INSTRUCCIONES DE OPERADORAS Para obtener el mejor rendimiento, lea todas las instrucciones de uso antes de usarlo por primera vez. PANEL DE CONTROL 1) Botón de encendido: Enciende y apaga el suministro de 6) Botón de retardo: Pulse este botón para ajustar la hora energía. - Page 47 Instrucciones operadoras ANTES DE USARLO POR PRIMERA VEZ SURTIDOR DE AGENTE DE ENJUAGUE A. LLENE EL SURTI- El agente de enjuague se libera durante el último enjuague para evitar que la formación de gotas de agua deje manchas y vetas en la vajilla. También DOR DE AGENTE DE ayuda al secado porque permite que el agua no se adhiera a la vajilla.
- Page 48 Instrucciones operadoras ANTES DE USARLO POR PRIMERA VEZ A. LLENE EL SURT- AJUSTE DEL DISTRIBUIDOR ABRILLANTADOR El surtidor de agente de enjuague tiene cuatro ajustes. El ajuste recomenda- IDOR DE AGENTE DE do es "3". Si la vajilla todavía no se seca correctamente o sale manchada, ajuste el dial a la posición superior siguiente, si está...
- Page 49 Instrucciones operadoras ANTES DE USARLO POR PRIMERA VEZ CAJÓN DE DETERGENTES B. FUNCIÓN DE El surtidor debe llenarse antes de comenzar cada ciclo de lavado siguien- do las instrucciones de la Tabla de Ciclos de Lavado. Este lavavajillas usa DETERGENTE menos detergente y agente de enjuague que un lavavajillas convencional.
- Page 50 Instrucciones operadoras ANTES DE USARLO POR PRIMERA VEZ AGREGUE EL DETERGENTE B. FUNCIÓN DE Llene el surtidor de detergente con detergente. Las marcas indican los niveles de dosificación, como se ilustra a continuación: DETERGENTE Puede contener 15 g de detergente. Puede contener 25 g de detergente Compartimiento de prelavado...
- Page 51 Instrucciones operadoras Carga del canasto del lavavajillas • Compre utensilios identificados como especiales para lavavajillas. • Para artículos especiales, seleccione un programa con una temperatura RECOMENDACIÓN baja. • No saque la cristalería ni los cubiertos del lavavajillas inmediatamente después de concluido el programa (ciclo de lavado) porque pueden estar calientes.
- Page 52 Instrucciones operadoras Carga del canasto del lavavajillas Coloque la vajilla y ollas de modo que los chorros de agua no los CARGA DE LA muevan. CESTA Tazas Tazón Vasos Platillos Frutero Plato ovalado Pan y mante- Platos de la cena quilla platos Cesto de los cubiertos Portavajillas del canasto...
- Page 53 Instrucciones operadoras Carga del canasto del lavavajillas Los cubiertos deben colocarse en el canasto para cubiertos con los mangos CESTO DE LOS hacia abajo. Si el portavajillas tiene canastos laterales, las cucharas deben colo- CUBIERTOS carse separadas en las ranuras adecuadas, especialmente los utensilios largos deben colocarse en posición horizontal en la parte delantera de la canasta supe- rior como se muestra.
- Page 54 Instrucciones operadoras Comienzo de un programa de lavado • ( * ) Significa: El ciclo necesita un agente de enjuague. TABLA DE CICLOS • AHAM DW-1-2005 : Este programa es el ciclo de prueba. Se DE LAVADO recomienda colocar el surtidor de agente de enjuague en la posición Tiempo de Energía Abrillanta...
- Page 55 Instrucciones operadoras Comienzo de un programa de lavado Puede modificar el programa de lavado si el lavavajillas ha estado funcionando por CAMBIO DEL poco tiempo. De otro modo puede que ya se haya vertido el detergente y que ya se haya expulsado el agua de lavado.
- Page 56 Instrucciones de instalación La posición de instalación del lavavajillas debe estar cerca de una PREPARACIÓN DE toma de agua, de las mangueras de drenaje y del cable de ali- mentación. Debe elegirse un lado de la pileta del gabinete para facili- LA INSTALACIÓN tar la conexión de las mangueras de drenaje al lavavajillas.
- Page 57 Instrucciones de instalación Parte posterior del lavavajillas: Vista posterior CONEXIÓN DE 1. Puerto de drenaje AGUA 2. Cable de alimentación 3. Puerto de entrada Su lavavajillas viene equipado con un "conector rápido" (incluye las mangueras de entrada y salida). Debe instalar el adaptador de grifo en el grifo antes de conectar el lavavajillas.
- Page 58 Instrucciones de instalación 1. Atornille el adaptador de grifo en el grifo de la pileta. Verifique que no CONEXIÓN DE haya pérdidas (si es necesario, use cinta de Teflón.) 2. Conecte el conector hexagonal de la manguera de drenaje al puerto de AGUA drenaje en la parte posterior del lavavajillas.
-
Page 59: Cuidado Y Mantenimiento
Instrucciones de instalación Antes de encender el lavavajillas, debe revisar los siguientes ele- PONER EN mentos: MARCHA EL El lavavajillas está nivelado y fijado adecuadamente LAVAVAJILLAS No hay pérdidas en las conexiones Los cables/tapones están bien conectados El lavavajillas está encendido Asegúrese de que las mangueras de entrada y drenaje no estén torcidas Todos los materiales de empaque e información impresa removible deben quitarse del lavavajillas... -
Page 60: Cuidado Del Lavavajillas
Cuidado y mantenimiento ADVERTENCIA SISTEMA DE • Nunca use el lavavajillas sin los filtros. FILTRADO • El lavavajillas nunca debe usarse sin los filtros. • La colocación incorrecta del filtro puede reducir el rendimiento abierto del artefacto y dañar la vajilla y los utensilios. Paso 1. - Page 62 A menudo, los problemas son sencillos y no es necesario hacer una llamada de reparación, use esta guía de resolución de problemas para encontrar una posible solución. Si la unidad sigue funcionando mal, llame a los números gratuitos 1-800-263-2629 de un centro Danby de servicio autorizado. PROBLEM POSSIBLE CAUSE...
- Page 63 Danby under this warranty shall be void. Nada de lo indicado en esta garantía debe implicar que Danby se hará responsable por el deterioro de los alimentos o el daño a otros componentes de este electrodoméstico, ya sea debido a defectos del aparato, o al uso que se le dé, sea éste adec-...
- Page 64 • Número de modelo • Número de pieza • Descripción de la parte MODEL • MODÈLE • MODELO DDW621WDB Printed in China Imprimé en Chine Danby Products Limited, Guelph, ON, Canada N1H 6Z9 Impreso en China Danby Products Inc., Findlay, Ohio, USA 45840...
Need help?
Do you have a question about the DDW621WDB and is the answer not in the manual?
Questions and answers
What types of faucets does the adapter for the Danby DDW621WDB countertop dishwasher not fit?