
Related Manuals for Kärcher WD 5


Summary of Contents for Kärcher WD 5
- Page 1 WD 5 English..2 Español..20 Français..38 59656200 (07/15)
-
Page 2: Table Of Contents
MULTI-PURPOSE VACUUM CLEANER OPERATOR MANUAL MULTI-PURPOSE VACUUM Specifications CLEANER OPERATOR MANU- AL ..... . Voltage 120 V IMPORTANT SAFETY IN- ~60 Hz STRUCTIONS . -
Page 3: Proper Use
Owner/User Responsibility Customer Support Mexico The owner and/or user must have an Call: 01-800-024-13-13 for help or visit understanding of the manufacturer’s our website: www.karcher.com.mx operating instructions and warnings before using this appliance. Warning information should be empha- sized and understood. -
Page 4: Important Safety Instructions
IMPORTANT SAFETY INSTRUCTIONS When using this product basic precau- Use extra care when cleaning on – tions should always be followed, in- stairs. cluding the following: Turn off all controls before unplug- – ging. READ ALL Never immerse the appliance in –... -
Page 5: Save These Instructions
Do not use without filter and/or dust – bag in proper place. SAVE THESE INSTRUCTIONS English 5... -
Page 6: Model Overview
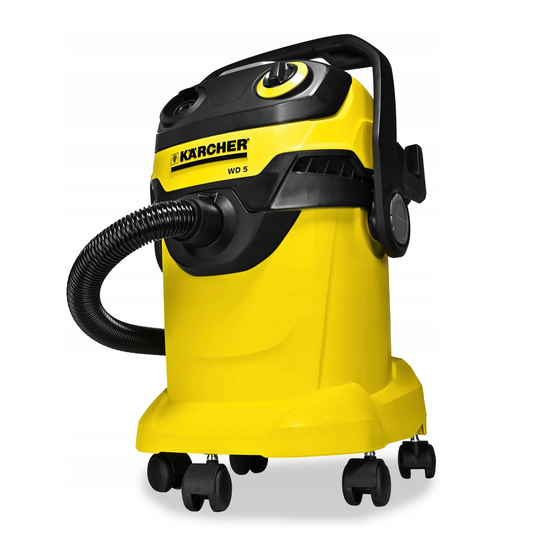
MODEL OVERVIEW Suction hose connection Filter box and release key ON/OFF switch for appliance Accessory mount Blowing connection Cable hook Filter cleaning button Parking position Recessed grip Steering roller Carry handle 6 English... - Page 7 Accessories 12 Filter bag 17 Floor nozzle (with switching lever) 13 Flat fold filter 18 Crevice nozzle 14 Suction hose with connecting piece 15 Removable handle 16 Suction tubes 2 x 0.5 m English 7...
-
Page 8: Operating Instructions
OPERATING INSTRUCTIONS Turn the container, press in the ASSEMBLY INSTRUCTIONS steering roller in the openings at the Note base of the container till the end- The carrying handle is also used to point. – lock the appliance head and the container. - Page 9 Clip the holder for the accessory Put both suction tubes together and compartment onto the rear side of connect them with the handle. the appliance. Connect the floor nozzle with the suction tubes. Push the suction hose into the con- ...
-
Page 10: Dry Vacuum Cleaning
For convenient switching between dry For vacuuming dry dirt an additional and wet dirt: filter bag can be inserted if neces- For vacuuming dry dirt off the floor, sary. use position with extended brush strips. ATTENTION Only operate the filter cleaning without For vacuuming water off the floor, ... - Page 11 Turning on the Appliance Removing the Accessories ATTENTION In order to disconnect it, push down Always work with an inserted flat fold with your thumb and pull the suction filter - during wet as well as dry vacuum hose out. cleaning! Insert the mains plug into a socket.
- Page 12 Blowing function Integrated filter cleaning system Connect the suction hose to the ATTENTION blower connection, this will activate Only operate the filter cleaning without the blower function. a filter bag inserted, otherwise the filter bag can get damaged. The filter cleaning system is intended for vacuuming up large volumes of fine dust without an inserted filter bag.
- Page 13 Interrupting operation Finish operation Turn off the appliance. Turn off the appliance. Position 0: Appliance is switched Position 0: Appliance is switched Disconnect the mains plug from the Hook the floor nozzle into the park- socket. ing position.
- Page 14 Empty the container Storing the appliance Remove the appliance head and Store the accessories and the empty the reservoir filled with wet or mains cable on the appliance and dry dirt. store the appliance in dry rooms. 14 English...
-
Page 15: Using The Accessories
USING THE ACCESSORIES Suction hose with connecting piece Filter bag Note: Accessories, such as suction Note: Do not use a filter bag for wet brushes (optional) can be directly at- vacuuming! tached to the connecting piece and Recommendation: To vacuum fine thus connected to the suction hose. -
Page 16: Care And Maintenance Instructions
CARE AND MAINTENANCE INSTRUCTIONS Cord storage DANGER Wind the cord around the cable Turn off the appliance and remove the hook. mains plug prior to any care and main- tenance work. Repair works may only be performed by the authorised customer service. WARNING Do not use abrasives, glass or univer- sal cleaners! Never immerse the appli-... - Page 17 In order to clean the inserted flat Clean flat fold filter fold filter, knock the filter box Recommendation: Clean the filter against the edge of the waste bin. It box after every use. is not necessary to remove the flat Unlock, fold out and remove the fil- ...
- Page 18 Allow to dry completely prior to use. Finally, reinstall the dry flat fold filter into the appliance. Insert the filter cartridge into the appliance. 18 English...
-
Page 19: Troubleshooting
TROUBLESHOOTING Often, failures have simple causes and you can do the troubleshooting your- self using the following overview. If you are in doubt or if the failure is not listed here please contact the authorized customer service. Decreasing cleaning power If the suction power becomes less, check the following points: Accessories, suction hose or suc-...
Need help?
Do you have a question about the WD 5 and is the answer not in the manual?
Questions and answers