Table of Contents
Advertisement
Available languages
Available languages
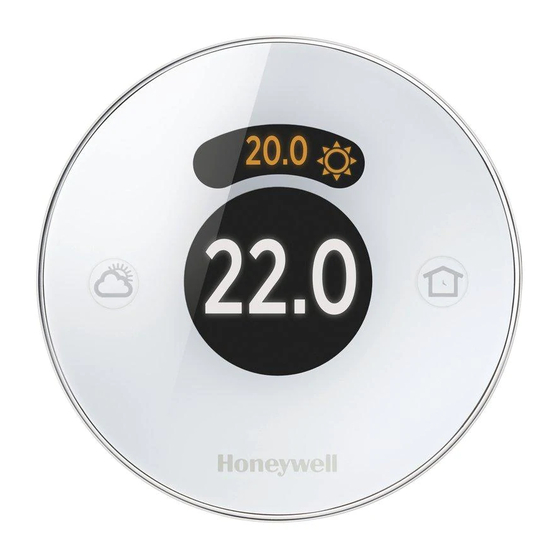
Lyric Round™ Wi-Fi Thermostat
Professional Install Guide
Must be installed by a trained, experienced technician
Read these instructions carefully. Failure to follow these instructions can
damage the product or cause a hazardous condition.
System Types
Compatible with 24-volt systems such as
forced air, hydronic, heat pump, oil, gas
and electric.
Does not work with electric baseboard
heat (120/240V).
Mercury Notice:
If this product is replacing a control that
contains mercury in a sealed tube, do
not place the old control in the trash.
Contact the Thermostat Recycling
Corporation at 1-800-238-8192 or
thermostat-recycle.org for information
on how and where to properly and
safely dispose an old thermostat.
Disconnect power before installation.
Can cause electrical shock or
equipment damage.
Advertisement
Table of Contents

Related Manuals for Honeywell Lyric Round


Summary of Contents for Honeywell Lyric Round
- Page 1 Lyric Round™ Wi-Fi Thermostat Professional Install Guide System Types Compatible with 24-volt systems such as forced air, hydronic, heat pump, oil, gas and electric. Does not work with electric baseboard heat (120/240V). Mercury Notice: If this product is replacing a control that contains mercury in a sealed tube, do not place the old control in the trash.
- Page 3 Included in your box: Thermostat Wall plate Screws Anchors Also included: “Getting Started” homeowner guide Optional wall cover...
- Page 4 Installation Insert the recommended wall anchors It is recommended that you use the provided anchors when mounting your thermostat. Recommended drill bit size is 7/32 – 1/4-inch. Optional: Attach the optional wall cover to the wall plate If you choose to use the optional wall cover to hide blemishes, snap the wall plate to the optional wall cover before continuing.
- Page 5 Set Jumper Switches R Jumper Switch: For single transformer For dual transformer systems, move switch up. systems, move switch down. Set the R Jumper Switch Insert Wire(s) into Terminal(s) R wire R (only) Rc wire (only) R & RC RH wire (only) R wire Rc wire...
- Page 6 Connect all wires Push each wire into its corresponding terminal until it is firmly in place. Gently tug on wires to verify they are secure. If you misplace a wire, use a ballpoint pen to push down on the terminals and release the wire. Refer to page 8 for wiring options, configurations, and notes.
- Page 7 Firmly snap the thermostat into place The thermostat will glow and display the Lyric screen for up to three minutes while it starts up.
-
Page 8: Terminal Designations
Wiring Terminal Designations Heat pump system monitor Optional wire saver module Common wire from secondary side of Fan relay cooling transformer, if 2 transformers 2nd stage heat relay (heat pump 2nd stage compressor contactor (AUX) auxiliary, emergency heat) 1st stage heat relay (changeover valve 1st stage compressor contactor (O/B) for heat pumps) - Page 9 Separate heating and cooling transformers Notes Common wire (optional) Heat relay • Thermostat C wire Fan relay is optional for this Compressor contactor (stage 1) application Power • Set the R Jumper Power Switch on the wall plate to R & Rc Single stage heat pump with auxiliary electric heat Notes Common wire (optional)
- Page 10 Power open hot water zone valve Notes Common wire (optional) Heat relay • Thermostat C wire Power is optional for this application • Set the R Jumper Switch on the wall plate to R Two wire powered humidifier, dehumidifier, ventilator Notes Universal relay Universal relay...
- Page 11 Setup Use one of the following options to setup the Lyric thermostat: Honeywell Lyric app On-screen menus Download and login Use instructions on the to complete the setup. following pages to complete the setup.
- Page 12 Setup: On-screen menus _ _ _ _ Using t, highlight Device Press and hold (Weather Details and press OK. Using t, button) for 5 seconds to access find the 4-digit password (date the Main Menu. code) and record it above. Press OK to exit.
- Page 13 Enter the password by pressing Highlight Set Up and or t to select the first digit press OK. and press OK. Continue for all four digits. Press s or t to highlight the setting When all settings are and press OK. Continue until all configured, save changes.
-
Page 14: Setup Options
Setup options From the Contractor Menu, highlight Set Up and press OK. Press s or t to highlight the setting and press OK. Continue until all settings have been configured. When all settings are configured, you will be prompted to save changes. Highlight Yes and press OK to save and exit. - Page 15 ISU # Description Setting 2160 Reversing valve 0 = O (O/B on cool) 1 = B (O/B on heat) 2180 Cool stages / 0, 1, 2 compressor stages 2200 Heat stages / Heat stages: 0, 1, 2 backup heat stages Backup heat stages: 0, 1 2220 Fan operation in...
- Page 16 ISU # Description Setting 3180 Backup heat lockout 5°F to 65°F (in 5°F increments) -15.0°C to 18.5°C (in 2.5°C or 3.0°C increments) 3200 Cool cycles per 1 - 6 hour 3220 Cool cycles per 1 - 6 hour - stage 2 3240 Heat cycles per 1 - 12...
- Page 17 ISU # Description Setting 8140 Humidification 0 = Humidify only when heat is On control 1 = Humidify only when fan is On 2 = Humidify on demand: Thermostat controls 3 = Humidify on demand: Humidifier controls fan 9100 Dehumidification 0 = None equipment 1 = A/C with low speed fan...
- Page 18 ISU # Description Setting 10300 Ventilation high temperature 80°F to 110°F (in 5°F increments) lockout 26.5°C to 43.5°C (in 2.5°C or 3.0°C increments) 10320 Ventilation high dew point lockout 65°F to 85°F (in 5°F increments) 18.5°C to 29.5°C (in 2.5°C or 3.0°C increments) 11100 Home heat setpoint 40°F to 90°F...
-
Page 19: Advanced Setup
Advanced Setup Change Language To change the language to either English, French, or Spanish: From the Main Menu, press t to highlight Language and press OK. 2 Press t to highlight the desired language and press OK. 3 To save and confirm the changes, highlight Yes and press OK. To exit without saving, press t to highlight No and press OK. -
Page 20: Frequently Asked Questions
Frequently Asked Questions Will Lyric still work if Wi-Fi connection is lost? Yes, some features, including shortcuts and geofencing, are managed only through the Lyric app and will not function while the connection is down. The temperature can be adjusted directly at the thermostat. Lyric will automatically reconnect to Wi-Fi once the network is restored. -
Page 21: Troubleshooting
Troubleshooting Installation is complete but the screen just says Lyric with circles lighting up around it. What should be done? When power is first restored to the Lyric thermostat, it takes up to three minutes to start up. The display will light up in circles as it advances through its initial power up. - Page 22 Can there be multiple users for geofencing? Yes, there can be multiple users. Geofencing will trigger based on the last person to leave and the first person to return. To properly use geofencing with multiple users: • Each user needs to create their own Lyric account. •...
- Page 23 There is a message that says Wi-Fi Signal Lost. What does that mean? The Wi-Fi signal to the Lyric thermostat has been lost. Wait for the thermostat to reconnect or select a new network from the connection menu. If the thermostat is unable to reconnect, you will need to troubleshoot the router to determine the cause.
-
Page 24: Specifications
Specifications Electrical Ratings: Voltage Terminal (50/60 Hz) Max. Current Rating W - O/B (Heating) 18 to 30 VAC 1.00 A W2 - Aux/E (Heating) 18 to 30 VAC 0.60 A Y (Cooling) 18 to 30 VAC 1.00 A Y2 (Cooling) 18 to 30 VAC 0.60 A 18 to 30 VAC... - Page 25 Basic Operations Turn to set desired temperature Turn on/off Turn on/off Cooling Heating Weather Home/Away View 6 and Set to Home/Away 12 hour forecasts...
- Page 26 Set away View weather forecast Set desired temperature Interested in more Lyric products? Visit lyric.honeywell.com to learn about all available products connected by the Lyric app. App is regularly enhanced and may change.
-
Page 27: Adaptive Recovery
Get the most from Lyric Location Based Temperature Control Lyric thermostat uses your smartphone’s location to know when you’re away, and saves you energy. Through geofence technology, it senses your return and helps make you comfortable upon arrival. You can also manually override your current setting when you’ll be out for a few hours by using the Away button on the thermostat or in the app. - Page 28 Lyric Round™ Wi-Fi Thermostat Automation and Control Solutions Wi-Fi® is a registered trademark of Wi-Fi Alliance® Honeywell International Inc. 1985 Douglas Drive North Golden Valley, MN 55422 lyric.honeywell.com ® U.S. Registered Trademark © 2015 Honeywell International Inc. 33-00068EFS-01 12-15 Printed in U.S.A.
- Page 29 Thermostat Wi-Fi Lyric Round™ Guide d’installation professionnelle Types de système Compatible avec les systèmes de 24 V tels que les systèmes à air pulsé, eau chaude, thermopompe, mazout, gaz et électriques. Non compatible avec les chauffages de plinthes électriques (120/240 V).
- Page 31 Inclus dans cette boîte : Thermostat Plaque murale Ancres Comprend également : Guide du propriétaire « Pour commencer » Couvercle mural facultatif...
- Page 32 Installation Insérez les ancres murales recommandées Il est recommandé d’utiliser les ancres fournies pour monter le thermostat. La taille de mèche recommandée est 7/32 - 1/4 po. Facultatif : Fixez le couvercle mural en option à la plaque murale Si vous choisissez d’utiliser le couvercle mural optionnel pour couvrir des marques inesthétiques, enclenchez la plaque murale sur le couvercle mural optionnel avant de continuer.
- Page 33 Réglez les commutateurs de liaison Commutateur de liaison R : Pour les systèmes à Pour les systèmes à transformateur unique, deux transformateurs, réglez le commutateur réglez le commutateur vers le haut. vers le bas. Réglez le commutateur de liaison R Insérez le(s) fil(s) dans la/les bornes(s) R fil R (seulement)
- Page 34 4 Branchez tous les fils Poussez chaque fil dans sa borne correspondante jusqu’à ce qu’il soit fermement en place. Tirez délicatement sur les fils pour vérifier qu’ils sont bien fixés. Si un fil a été mal placé, utilisez un stylo à bille pour appuyer sur la borne et libérer le fil.
- Page 35 Enclenchez fermement le thermostat en position Le thermostat s’allume et affiche l’écran Lyric pendant jusqu’à 3 minutes pendant qu’il démarre.
- Page 36 Câblage Désignations des bornes Moniteur du système à thermopompe Module économiseur de fils en option Fil commun du côté secondaire du Relais de ventilateur transformateur de refroidissement (pour 2 transformateurs) Relais de chauffage 2e étage (pompe Contacteur de compresseur 2e étage (AUX) de chauffage auxiliaire, chauffage d’urgence)
- Page 37 Transformateurs de refroidissement et de chauffage séparés Fil commun (en option) Remarques • Le fil C du thermostat Relais de chauffage Relais de ventilateur est facultatif pour Contacteur de compresseur (étage 1) cette application Alimentation • Réglez le Alimentation commutateur de liaison R sur la plaque murale sur R &...
- Page 38 Vanne de zone eau chaude à ouverture électrique Remarques Fil commun (en option) Relais de chauffage • Le fil C du thermostat Alimentation est facultatif pour cette application • Réglez le commutateur de liaison R sur la plaque murale sur R Humidificateur, déshumidificateur, ventilateur électrique à...
- Page 39 Configuration Utilisez l’une des options suivantes pour configurer le thermostat Lyric : Application Lyric Menus affichés Honeywell Téléchargez et Suivez les instructions fournies connectez-vous pour sur les pages suivantes pour réaliser la configuration. réaliser la configuration.
- Page 40 Configuration : Menus affichés _ _ _ _ En utilisant t, sélectionnez Device Appuyez sur (bouton Météo) Details (Informations sur l’appareil) pendant 5 secondes pour accéder et appuyez sur OK. En utilisant au Menu principal. t, trouvez le mot de passe à 4 chiffres (code de date) et notez-le ci-dessus.
- Page 41 Sélectionnez Set Up Entrez le mot de passe en appuyant sur ou t pour sélectionner le premier (Configuration) et chiffre puis appuyez sur OK. Procédez de appuyez sur OK. même pour tous les autres chiffres. Appuyez sur s ou t pour sélectionner le Une fois tous les paramètres réglage puis appuyez sur OK.
- Page 42 Options de configuration Dans le menu Contractor (Entrepreneur), sélectionnez Set Up (Configuration) et appuyez sur OK. Appuyez sur s ou t pour sélectionner le réglage puis appuyez sur OK. Continuez jusqu’à ce que tous les réglages aient été configurés. Une fois tous les réglages configurés, une invite s’affiche pour sauvegarder toutes les modifications.
- Page 43 N° ISU Description Réglage 2160 Robinet inverseur O/B 0 = O (O/B sur refroidissement) 1 = B (O/B sur chauffage) 2180 Étages de refroidissement/ 0, 1, 2 Étages du compresseur 2200 Étages de chauffage/ Étages de chauffage : 0, 1, 2 Étages de chauffage de Étages de chauffage de secours : 0, 1 secours...
- Page 44 N° ISU Description Réglage 3160 Verrouillage du Arrêt compresseur / Point 5 °F à 60 °F (par incréments de 5 °F) d’équilibre -15,0 °C à 15,5 °C (par incréments de 2,5 °C ou 3,0 °C) 3180 Verrouillage du chauffage Arrêt de secours 5 °F à 65 °F (par incréments de 5 °F) -15,0 °C à...
- Page 45 N° ISU Description Réglage 8120 Humidification - Protection 0 = Arrêt des fenêtres 1 = Marche 8140 Régulation de 0 = Humidification seulement lorsque le l’humidification chauffage est en marche 1 = Humidification seulement lorsque le ventilateur est en marche 2 = Humidification à...
- Page 46 N° ISU Description Réglage 10240 Pourcentage de durée de 10 % à 100 % (par incréments de 10 %) marche de la ventilation 10280 Verrouillage basse Arrêt température de la -20 °F à 40 °F (par incréments de 5 °F) ventilation -29,0 °C à...
- Page 47 Réglage avancé Sélection de la langue Pour sélectionner le français, l’anglais ou l’espagnol : Dans le menu principal, appuyez sur t pour sélectionner Language (Langue) et appuyez sur OK. 2 Appuyez sur t pour sélectionner la langue désirée puis appuyez sur OK. 3 Pour sauvegarder et confirmer les modifications, sélectionnez Yes (Oui) et appuyez sur OK.
-
Page 48: Foire Aux Questions
Foire aux questions Le thermostat Lyric continuera-t-il de fonctionner si la connexion Wi-Fi est perdue? Oui. Certaines fonctions, telles que les raccourcis et le gardiennage virtuel, sont gérées via l’application Lyric uniquement et ne seront pas actives lorsque la connexion est perdue. La température peut être directement ajustée au niveau du thermostat. - Page 49 Dépannage L’installation est terminée et l’écran indique juste Lyric avec des cercles lumineux autour. Que faire? Lorsque l’alimentation est initialement rétablie vers le thermostat Lyric, le démarrage peut prendre jusqu’à 3 minutes. L’affichage s’illumine avec des cercles au fur et à mesure de la progression du démarrage initial. Il affiche ensuite un nom de réseau unique, tel que Lyric Stat 03.
- Page 50 Le gardiennage virtuel est-il compatible avec plusieurs utilisateurs? Oui, il peut y avoir plusieurs utilisateurs. Le gardiennage virtuel se déclenche en fonction de la dernière personne à partir et de la première personne à revenir. Pour correctement utiliser le gardiennage virtuel avec plusieurs utilisateurs : •...
- Page 51 thermostat se reconnecte ou sélectionnez un nouveau réseau dans le menu de connexion. Si le thermostat ne peut pas être reconnecté, vous devrez dépanner le routeur pour en déterminer la cause. Les réglages de mon thermostat sont-ils perdus si l’alimentation est coupée dans l’habitation? Tous les réglages et les raccourcis sont enregistrés et gérés via l’application Lyric.
- Page 52 Spécifications Caractéristiques électriques : Tension Borne (50/60 Hz) Courant nominal max. W - O/B (chauffage) 18 à 30 V c.a. 1,00 A W2 - Aux/E (chauffage) 18 à 30 V c.a. 0,60 A Y (refroidissement) 18 à 30 V c.a. 1,00 A Y2 (refroidissement) 18 à...
- Page 53 Fonctionnement de base Tourner pour régler la température désirée. Mise en Mise en marche/arrêt marche/arrêt Refroidissement Chauffage Météo À la maison/ Absent Afficher les prévisions sur Réglez sur À la 6 et 12 heures maison/Absent...
- Page 54 Régler sur Absent Afficher les prévisions météo Régler la température désirée Vous souhaitez découvrir d’autres produits Lyric? Visitez lyric.honeywell.com pour découvrir tous les produits disponibles connectés avec l’application Lyric. L’application est constamment améliorée et peut être modifiée.
-
Page 55: Commutation Automatique
Obtenez tous les avantages de Lyric Contrôle de la température en fonction de l’emplacement Le thermostat Lyric vous permet de réaliser des économies d’énergie en surveillant vos allées et venues en utilisant l’emplacement de votre téléphone intelligent. Par le gardiennage virtuel, il détecte votre retour et est en mesure d’assurer votre confort lorsque vous rentrez chez vous. - Page 56 Thermostat Wi-Fi Lyric Round™ Automation and Control Solutions Wi-Fi® est une marque déposée de Wi-Fi Alliance®. Honeywell International Inc. 1985 Douglas Drive North Golden Valley, MN 55422 lyric.honeywell.com ® Marque déposée aux États-Unis© 2015 Honeywell International Inc. 33-00068EFS-01 12-15 Imprimé aux États-Unis.
- Page 57 Termostato WiFi Lyric Round™ Guía de instalación profesional Tipos de sistemas Compatible con sistemas comunes de 24 voltios tales como los de aire forzado, hidrónicos, de bombas de calor, de aceite, de gas y eléctricos. No trabaja con calefacción eléctrica de zócalo (120/240 V).
- Page 59 Esta caja incluye: Termostato Placa de pared Tornillos Tarugos También incluye: “Cómo comenzar” - Guía para Placa de pared opcional el propietario residencial...
- Page 60 Instalación Inserte los tarugos de pared recomendados Se recomienda que utilice los tarugos que se suministran cuando monte el termostato. El tamaño de broca recomendado es 7/32 a 1/4 de pulgada. Opcional: Fije la cubierta de pared opcional a la placa de pared Si elige utilizar la cubierta de pared opcional para cubrir imperfecciones, coloque a presión la placa de...
- Page 61 Configure los interruptores de puente R Interruptor de puente: Para sistemas de un solo Para sistemas de dos transformador, mueva el transformadores, interruptor hacia arriba. mueva el interruptor hacia abajo. Configure el interruptor R del puente Inserte el(los) cable(s) en el(los) terminal(es) R cable R (únicamente) Rc cable...
- Page 62 Conecte todos los cables Inserte cada cable restante en su terminal correspondiente hasta que esté firmemente en su lugar. Hale suavemente los cables para verificar que estén seguros. Si coloca incorrectamente un cable, use el bolígrafo para presionar hacia abajo los terminales y liberar el cable.
- Page 63 Coloque a presión el termostato firmemente en su lugar El termostato brillará y mostrará la pantalla Lyric hasta durante tres minutos mientras se activa.
- Page 64 Cableado Designación de los terminales Monitor del sistema de bomba de calor Módulo economizador de cable opcional Cable común procedente del lateral Relé del ventilador secundario del transformador de refrigeración, si tiene 2 transformadores Relé de calefacción de la 2. etapa (bomba Contactor del compresor de la (AUX)
- Page 65 Separe los transformadores de calefacción y refrigeración Notas Cable común (opcional) Relé de calefacción • El cable del termostato C es opcional para esta Relé del ventilador Contactor del compresor (etapa 1) aplicación Energía • Configure el interruptor Energía R del puente en la placa de pared a R &...
- Page 66 Válvula de zona de agua caliente accionada por electricidad Notas Cable común (opcional) Relé de calefacción • El cable del termostato C es opcional para esta Electricidad aplicación • Configure el interruptor R del puente en la placa de pared a R Humidificador, deshumidificador, ventilador alimentado por dos cables Notas Relé...
- Page 67 Configuración Utilice una de las siguientes opciones para configurar el termostato Lyric: Aplicación Lyric de Menús en pantalla Honeywell Descargue e ingrese para Utilice las instrucciones de finalizar la configuración. las siguientes páginas para finalizar la configuración.
- Page 68 Setup (configurar): Menús en pantalla _ _ _ _ Utilizando t, marque Device Presione y sostenga (botón del Details (detalles del dispositivo) clima) durante 5 segundos para y presione OK (aceptar). acceder al Menú principal. Utilizando t, encuentre la contraseña de 4 dígitos (código de fecha) y regístrela.
- Page 69 Marque Set up Ingrese la contraseña presionando o t para seleccionar el primer dígito (configurar) y presione OK (aceptar). y presione OK (aceptar). Continúe con todos los cuatro dígitos Presione s o t para marcar la configuración Cuando todas las y presione OK (aceptar).
- Page 70 Opciones de configuración Desde el menú del contratista, marque Set up (configurar) y presione OK (aceptar). Presione s o t para marcar la configuración y presione OK (aceptar). Continúe hasta que todas las configuraciones se hayan efectuado. Cuando todas las configuraciones se hayan efectuado, se le indicará que guarde los cambios.
- Page 71 ISU N° Descripción Configuración 2160 Válvula de inversión 0 = O (O/B en refrigeración) 1 = B (O/B en calefacción) 2180 Etapas de 0, 1, 2 refrigeración/etapas del compresor 2200 Etapas de calefacción/ Etapas de calefacción 0, 1, 2 etapas de calefacción Etapas de calefacción de reserva: 0, 1 de reserva 2220...
- Page 72 ISU N° Descripción Configuración 3180 Bloqueo de calefacción Apagado de reserva De 5 °F a 65 °F (en incrementos de 5 °F) De -15.0 °C a 18.5°C (en incrementos de 2.5 °C o 3.0 °C) 3200 Ciclos de refrigeración 1 - 6 por hora 3220 Ciclos de refrigeración...
- Page 73 ISU N° Descripción Configuración 8140 Control de 0 = Humidificar solo cuando la calefacción esté humidificación activada 1 = Humidificar solo cuando el ventilador esté activado 2 = Humidificar por demanda: El termostato controla el ventilador 3 = Humidificar por demanda: El humidificador controla el ventilador 9100 Equipo de...
- Page 74 ISU N° Descripción Configuración 10280 Bloqueo de ventilación Apagado por temperatura baja De -20°F a 40°F (en incrementos de 5°F) De -29.0 °C a 4.5 °C (en incrementos de 2.5 °C o 3.0 °C) 10300 Bloqueo de ventilación Apagado por temperatura alta De 80 °F a 110 °F (en incrementos de 5 °F) De 26.5 °C a 43.5 °C (en incrementos de 2.5 °C o 3.0 °C)
- Page 75 Configuración avanzada Cambio de idioma Para cambiar el idioma a inglés, francés o español: Desde el Menú principal, presione t para marcar Language (Idioma) y presione OK (aceptar). 2 Presione t para marcar el idioma deseado y presione OK (aceptar). 3 Para guardar y confirmar los cambios, marque Yes (Sí) y presione OK (aceptar).
-
Page 76: Preguntas Frecuentes
Preguntas frecuentes ¿Funcionará Lyric aunque se pierda la conexión con WiFi? Sí, algunas funciones, incluyendo los accesos directos y Geofence se manejan únicamente a través de la aplicación Lyric y no funcionarán mientras la conexión esté desactivada. La temperatura se puede ajustar directamente en el termostato. Lyric se reconectará... - Page 77 Localización y solución de problemas La instalación está finalizada pero la pantalla solo indica Lyric con círculos iluminados alrededor. ¿Qué se debe hacer? Cuando se restituye la electricidad al termostato Lyric, puede tomarle hasta tres minutos activarse. La pantalla se iluminará en círculos a medida que avanza hacia su activación inicial.
- Page 78 ¿Puede haber múltiples usuarios para Geofencing? Sí, puede haber usuarios múltiples. Geofencing se disparará en función de la última persona que salga y la primera que regrese. Para utilizar Geofencing adecuadamente con usuarios múltiples: • Cada usuario debe crear su propia cuenta Lyric. •...
- Page 79 Hay un mensaje que dice Wi-Fi Signal Lost (pérdida de señal de WiFi). ¿Qué significa eso? Se ha perdido la señal WiFi al termostato Lyric. Espere hasta que el termostato vuelva a conectarse o seleccione una nueva red del menú de conexión. Si el termostato no puede reconectarse, debe solucionar el problema con el enrutador para determinar la causa.
- Page 80 Especificaciones Clasificaciones eléctricas: Voltaje Clasificación actual Terminal (50/60 Hz) máxima W - O/B (Calefacción) De 18 a 30 V CA 1.00 A W2 - Aux/E (Calefacción) De 18 a 30 V CA 0.60 A Y (Refrigeración) De 18 a 30 V CA 1.00 A Y2 (Refrigeración) De 18 a 30 V CA...
- Page 81 Funcionamiento básico Gire para configurar la temperatura deseada. Encienda/Apague Encienda/Apague Refrigeración Calefacción Clima En casa/ Fuera de casa Vea la predicción del tiempo para Configure para En 6 y 12 horas casa/Fuera de casa...
- Page 82 Configurar fuera de casa Ver la predicción del tiempo Configurar la temperatura deseada ¿Está interesado en más productos Lyric? Visite lyric.honeywell.com para conocer sobre todos los productos disponibles conectados por la aplicación Lyric. La aplicación se mejora periódicamente y puede cambiar.
- Page 83 Obtenga el máximo de Lyric Control de temperatura basado en la ubicación El termostato Lyric utiliza la ubicación de su teléfono inteligente para saber cuándo usted no está en casa y ahorrarle energía. A través de la tecnología Geofence, este detecta su regreso y le ayuda a que se sienta confortable al llegar.
- Page 84 Termostato WiFi Lyric Round™ Automation and Control Solutions Wi-Fi® es una marca comercial registrada de Wi-Fi Alliance®. Honeywell International Inc. 1985 Douglas Drive North Golden Valley, MN 55422 lyric.honeywell.com ® Marca registrada de los EE.UU. © 2015 Honeywell International Inc.
Need help?
Do you have a question about the Lyric Round and is the answer not in the manual?
Questions and answers