Table of Contents
Advertisement
Quick Links
Always there to help you
1
Register your product and get support at
www.philips.com/welcome
HD3139
Question?
Contact
Philips
EN
User manual
LV
Lietotāja rokasgrāmata
BG
Ръководство за потребителя
PL
Instrukcja obsługi
CS
Příručka pro uživatele
RO
Manual de utilizare
ET
Kasutusjuhend
RU
Руководство пользователя
HR
Korisnički priručnik
SK
Príručka užívateľa
http://www.philips.com/welcome
http://www.philips.com/welcome
HU
Felhasználói kézikönyv
SL
Uporabniški priročnik
LT
Vartotojo vadovas
SR
Korisnički priručnik
User manual
Recipe
4
Using the multicooker
Before first use
1 Take out all the accessories from the inner pot. Remove the
packaging material of the inner pot.
2 Clean the parts of the multicooker thoroughly before using it for
Specifications are subject to change without notice
the first time (see chapter 'Cleaning and Maintenance').
© 2015 Koninklijke Philips N.V.
All rights reserved.
Note
•
Make sure all parts are completely dry before you start using the
English
multicooker.
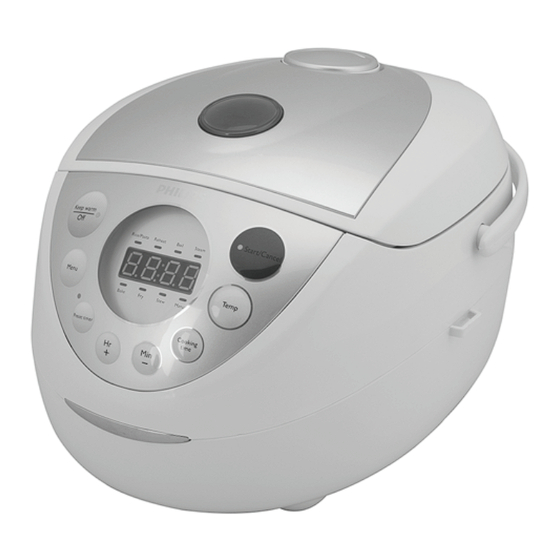
1
Your multicooker
Preparations before cooking
Congratulations on your purchase, and welcome to Philips!
Before using the multicooker, you need to do the following steps:
To fully benefit from the support that Philips offers, register your
Rice:
product at www.philips.com/welcome.
1 Measure the rice using the measuring cup provided.
2
What's in the box (fig.1)
2 Wash the rice thoroughly.
3 Put the pre-washed rice in the inner pot.
4 Add water to the level indicated on the scale inside the inner pot
Multicooker main unit
Power cord
and smooth the rice surface.
Steam basket
Measuring cup
Different dishes:
Spatula
Soup ladle
5 Press the lid release button to open the lid (fig.4).
User manual
Recipe
6 Wipe the outside of the inner pot dry (fig.5), then put the inner
Safety leaflet
Warranty card
pot in the multicooker (fig.6). Check if the inner pot is in proper
contact with the heating element.
3
Overview (fig.2)
7 Close the lid of the multicooker (fig.7), and put the plug in the
power socket (fig.8).
Detachable steam vent cap
Heating element
a
g
Lid release button
Power socket
b
h
Note
Top lid
Cooker handle
c
i
•
Make sure that the inner pot is proper contact with the heating element.
Inner pot
Water level indications
d
j
•
For details about the ratio of rice and water, see the recipe.
•
The level marked inside the inner pot is just an indication. You can always
Control panel
Sealing ring
e
k
adjust the water level for different types of rice and your own preference.
Main body
•
f
Make sure that the outside of the inner pot is clean and dry, and that
there is no foreign residue on the heating element or the magnetic switch.
Controls overview (fig.3)
l
Cooking functions
q
Minute/Decrease button
Cooking rice/pasta
m
Keep-warm/Off button
r
Cooking time button
1 Follow the steps in "Preparations before cooking".
2 Press the menu button (Menu) until the rice/pasta cooking
Menu button
Temperature button
n
s
function (Rice/Pasta) is selected (fig.9).
Preset timer button
Start/Cancel button
o
t
3 Press the start button (Start/Cancel) to start cooking (fig.10).
4 When the cooking is finished, you will hear 4 beeps and the
Hour/Increase button
Display screen
p
u
selected cooking function light will be off.
5 The multicooker will be in keep-warm mode automatically.
Functions overview
» The keep-warm (Keep warm/Off) indicator lights up (fig.11).
Default
Preset time
Default
Adjustable
Functions
cooking
cooking
Note
cooking time
time
temperature
Rice/Pasta
40 min
/
1-24 hr
130-140°C
•
If the voltage is unstable at the area you live, it is possible that the
Reheat
10 min
5 min-2 hr
1-24 hr
95-100°C
multicooker overflows.
•
After the cooking is finished, stir the rice and loosen it immediately to
Boil
1 hr
20 min-4 hr
1-24 hr
90-100°C
release excessive moisture for fluffy rice.
•
Steam
45 min
5 min-2 hr
1-24 hr
90-100°C
Depending on the cooking conditions, the bottom portion of the rice may
become slightly browned.
Bake
45 min
20 min-2 hr
1-24 hr
100°C
Fry
15 min
5-60 min
/
145-150°C
Stew
1 hr
20 min-10 hr
1-24 hr
85-90°C
Reheating
Manual
2 hr
5 min-10 hr
1-24 hr
100°C
1 Loosen the cooled food and evenly distribute it in the inner pot
(fig.12).
Note
2 Pour some water onto the food to prevent it from becoming too
dry (fig.13). The quantity of the water depends on the amount of
•
The cooking temperature for the baking and manual functions is
food.
adjustable. You can select temperature for both the baking and manual
3 Follow steps 6 and 7 in "Preparations before cooking".
functions between 40°C to 160°C. The step is 10°C.
•
4 Press the menu button (Menu) until the reheating function
After the cooking has started, you can press the cancel button (Start/
Cancel) to deactivate the cooking process and the multicooker will enter
(Reheat) is selected (fig.14).
the standby mode.
» To set a different cooking time, refer to chapter "Adjusting the
•
The cooking time does not display straight from the beginning for some
cooking time and temperature".
functions, such as rice/pasta (Rice/Pasta), reheat (Reheat), boil (Boil), and
5 Press the start button (Start/Cancel) to start cooking (fig.10).
steam (Steam).
displays on the screen during most of the cooking
time as the multicooker detects water/liquid and ingredient volume in the
6 When the cooking is finished, you will hear 4 beeps and the
initial preparation period. Once the multicooker detects the actual cooking
selected cooking function light will be off.
time needed, the timer shows the remaining cooking time.
7 The multicooker will be in keep warm mode automatically.
1/4
2
a
b
c
k
j
d
i
e
http://www.philips.com/welcome
http://www.philips.com/welcome
h
Safety leaflet
Warranty
g
f
» The keep-warm indicator (Keep warm/Off) lights up (fig.11).
Boiling
1 Put the food and ingredients in the inner pot.
2 Follow steps 6 and 7 in "Preparations before cooking".
3 Press the menu button (Menu) until the boiling function (Boil) is
selected (fig.15).
» To set a different cooking time, refer to chapter "Adjusting the
cooking time and temperature".
4 Press the start button (Start/Cancel) to start cooking (fig.10).
5 When the cooking is finished, you will hear a few beeps and the
selected cooking function light will be off.
6 The multicooker will be in keep-warm mode automatically.
» The keep-warm indicator (Keep warm/Off) lights up (fig.11).
Steaming
1 Pour some water into the inner pot.
2 Put the food to be steamed on a plate or in the steam tray.
3 If you are using a separate plate, put it into the steam tray (fig.16).
4 Put the steam tray into the inner pot (fig.17).
5 Follow steps 6 and 7 in "Preparations before cooking".
6 Press the menu button (Menu) until the steaming function (Steam)
is selected (fig.18).
» To set a different cooking time, refer to chapter "Adjusting the
cooking time and temperature".
7 Press the start button (Start/Cancel) to start cooking (fig.10).
8 When the cooking is finished, you will hear 4 beeps and the
selected cooking function light will be off.
9 The multicooker will be in keep warm mode automatically.
» The keep-warm indicator (Keep warm/Off) lights up (fig.11).
10 Open the lid and carefully take out the steamed food from the
plate or steam basket.
Note
•
The quantity of water depends on the amount of food in the steam tray.
Do not immerse the steam tray in water.
•
Use a kitchen glove or a cloth, as the plate and steam tray will be very hot.
1 Put the food and ingredients in the inner pot.
2 Follow step 6 in "Preparations before cooking".
3 Put the plug in the power socket.
Note
•
When baking cake, keep the lid closed during cooking. Baking cake at
130°C and by 45 minutes usually delivers best cooking result.
•
When baking food other than cake, the lid must be opened during cooking.
•
It's recommended to open lid during cooking when the temperature is
above 130°C.
4 Press the menu button (Menu) until the baking function (Bake) is
selected (fig.19).
» To set a different cooking time, refer to chapter "Adjusting the
cooking time and temperature".
5 Press the start button (Start/Cancel) to start cooking (fig.10).
6 When the baking is finished, you will hear 4 beeps and the selected
function light will be off.
7 The multicooker will be in keep-warm mode automatically.
» The keep-warm indicator (Keep warm/Off) lights up (fig.11).
Note
•
When removing the inner pot from the multicooker, use a kitchen glove
or a cloth, as the inner pot will be very hot.
Frying
1 Put food and ingredients into the inner pot.
2 Follow step 6 in "Preparations before cooking".
3 Put the plug in the power socket.
4 Press the menu button (Menu) until the fry function (Fry) is
selected (fig.20).
3
l
u
m
t
n
s
o
r
p
q
» To set a different cooking time, refer to chapter "Adjusting the
manual functions. Refer to the "Functions overview" table for the time
cooking time and temperature".
regulation of each function.
After you have selected the desired cooking function using the menu
5 Press the start button (Start/Cancel) to start cooking (fig.10).
button, the default cooking time will be displayed on the screen.
6 When the cooking is finished, you will hear 4 beeps and the
1 To set a different cooking time, press the cooking time button
selected cooking function light will be off.
(Cooking time) (fig.23), and the default cooking time starts
7 The multicooker will be in keep-warm mode automatically.
flashing on the display.
» The keep-warm indicator (Keep warm/Off) lights up (fig.11).
2 Press the hour button (Hr +) to set the hour unit (fig.24).
3 Press the minute button (Min -) to set the minute unit (fig.24).
Note
4 To set a different cooking temperature, press the temperature
button (Temp) (fig.25), and the default temperature starts flashing
•
Do not close the top lid when cooking in the fry mode.
on the display.
•
It's recommended to open lid during cooking when the temperature is
5 Press the increase (Hr +) or the decrease (Min -) button to set
above 130°C.
the desired cooking temperature (fig.26).
Preset time for delayed cooking
Stewing
You can preset the delayed cooking time for all cooking modes
1 Put the food and ingredients in the inner pot.
except the frying mode.
1 Follow steps 6 and 7 in "Preparations before cooking".
2 Follow steps 6 and 7 in "Preparations before cooking".
2 Press the menu button (Menu) until your preferred cooking
3 Press the menu button (Menu) until the stewing function (Stew) is
function is selected (fig.27).
selected (fig.21).
3 Press the preset time button (Preset timer), and the default preset
» To set a different cooking time, refer to chapter "Adjusting the
cooking time and temperature".
time starts flashing on the display.
4 Preset the hour button (Hr +) and the minute button (Min -) to
4 Press the start button (Start/Cancel) to start cooking (fig.10).
set the desired preset time.
5 When the cooking is finished, you will hear 4 beeps and the
5 Press the start button (Start/Cancel) to confirm the preset timer
selected cooking function light will be off.
(fig.10).
6 The multicooker will be in keep-warm mode automatically.
6 The cooking will be finished when the preset time has elapsed. You
» The keep-warm indicator (Keep warm/Off) lights up (fig.11).
will hear 4 beeps and the selected cooking function light will be off.
Manual
7 The multicooker will be in keep-warm mode automatically.
» The keep- warm (Keep warm/Off) indicator lights up (fig.11).
You may use the manual mode to cook food with more control over
the cooking time and temperature.
1 Put the food and ingredients in the inner pot.
Note
1 Follow steps 6 and 7 in "Preparations before cooking".
•
2 Press the menu button (Menu) until the manual function (Manual)
The preset function is not available in fry mode.
•
is selected (fig.22).
The preset button is not responsive in standby mode.
» To set a different cooking time, refer to chapter "Adjusting the
cooking time and temperature".
3 Press the start button (Start/Cancel) to start cooking (fig.10).
5
Cleaning and Maintenance
4 When the cooking is finished, you will hear 4 beeps and the
selected cooking function light will be off.
5 The multicooker will be in keep-warm mode automatically.
Note
» The keep-warm indicator (Keep warm/Off) lights up (fig.11).
•
Unplug the multicooker before starting to clean it.
•
Note
Wait until the multicooker has cooled down sufficiently before cleaning it.
•
If you cook food at a temperature below 70°C, please turn off the keep-
warm mode before start cooking.
•
Interior
In manual mode, when cooking at a temperature higher than 130°C, the
top lid must be opened during cooking.
Inside of the top lid and the main body:
•
Wipe with wrung out and damp cloth.
•
Make sure to remove all the food residues stuck to the
multicooker.
Keep-warm mode
Heating element:
The multicooker provides you with easy control over the keep-warm
•
Wipe with wrung out and damp cloth.
•
mode.
Remove food residues with wrung out and damp cloth.
•
After you have selected the cooking function using the menu
button (Menu), if you press the start button (Start/Cancel) directly,
Exterior
the keep-warm indicator will light up. After the cooking is finished,
Surface of the top lid and outside of the main body:
the multicooker will switch to keep-warm mode directly.
•
Wipe with a cloth damped with soap water.
•
After you have selected the cooking function using the menu
•
Only use soft and dry cloth to wipe the control panel.
button (Menu), if you press the keep-warm button first, and then
•
Make sure to remove all the food residues around the control
the start button (Start/Cancel), the keep-warm indicator will be
panel.
off. After the cooking is finished, the multicooker will enter the
standby mode.
Accessories
Rice scoop, soup ladle, inner pot, steamer, and steam vent cap:
Note
•
Soak in hot water and clean with sponge.
•
In standby mode, you can press the keep-warm button (Keep warm/Off)
6
to enter keep-warm mode.
•
In keep-warm mode, you can press the keep-warm button (Keep warm/
This symbol means that this product shall not be disposed of
Off) to enter standby mode.
with normal household waste (2012/19/EU).
Follow your country's rules for the separate collection of
electrical and electronic products. Correct disposal helps
prevent negative consequences for the environment and
Adjusting the cooking time and temperature
human health.
You can adjust the cooking time for all functions except the rice/pasta
function; and you can adjust the cooking temperature for baking and
7
Guarantee and service
Общ преглед на функциите
If you need service or information, or if you have a problem, visit the
Philips website at www.philips.com or contact the Philips Customer
Време за
Care Center in your country. You can find its phone number in the
Функции
приготвяне по
worldwide guarantee leaflet. If there is no Customer Care Center in
подразбиране
your country, go to your local Philips dealer.
Ориз/паста
40 мин.
(Rice/Pasta )
8
Specifications
Претопляне
10 мин.
(Reheat)
Model Number
HD3139
Варене (Boil)
1 час
Rated power output
980W
На пара
45 мин
Rated capacity
4.0L
(Steam)
Печене (Bake)
45 мин
Пържене
15 мин
9
Troubleshooting
(Fry)
Задушаване
1 час
If you encounter problems when using this multicooker, check the
(Stew)
following points before requesting service. If you cannot solve the
Ръчен
problem, contact the Philips Consumer Care Center in your country.
2 ч.
(Manual)
Problem
Solution
The light on the button
There is a connection problem. Check
Забележка
does not go on.
if the power cord is connected to the
multicooker properly and if the plug is
•
Времето за приготвяне за функциите печене и ръчните функции е
inserted firmly into the power outlet.
регулируемо. Можете да изберете температура както за функциите
печене, така и за ръчните функции между 40 °C и 160 °C. Стъпката
The light is defective. Take the appliance
е 10 °C.
to your Philips dealer or a service center
•
След като започне готвенето можете да натиснете бутона за
authorized by Philips.
отмяна (Start/Cancel) (старт/отмяна), за да деактивирате процеса на
The display does not
The multicooker is not connected to
приготвяне и многофункционалният уред за готвене ще премине в
режим на готовност.
function.
the power supply. If there is no power
•
Времето за печене не се показва директно от началото на някои
supply, the power failure backup function
функции, като например за ориз/паста (Rice/Pasta) (ориз/паста), за
does not work and the display does not
претопляне (Reheat) (претопляне), за варене (Boil) (варене), и на пара
function.
(Steam) (на пара).
The battery for the display runs out of
от времето за готвене, докато многофункционалният уред за готвене
power. Take the appliance to your Philips
изчислява обема на водата/течността и съставките в началния период
на подготовка. След като многофункционалният уред за готвене
dealer or a service center authorized by
отчете действителното необходимо време за готвене, таймерът
Philips to have the battery replaced.
показва оставащото време за готвене.
The rice is not cooked.
There is not enough water. Add water
according to the scale on the inside of the
inner pot.
4
Използване на
You did not press the start button (Start/
Cancel).
многофункционалния уред за
Make sure that there is no foreign residue
готвене
on the heating element and the outside
of the inner pot before switching the
multicooker on.
Преди първата употреба
The heating element is damaged, or
1 Извадете всички аксесоари от вътрешния съд. Махнете
the inner pot is deformed. Take the
опаковъчния материал на вътрешния съд.
multicooker to your Philips dealer or a
2 Почистете основно всички части на многофункционалния уред
service center authorized by Philips.
за готвене, преди да го използвате за първи път (вижте глава
The rice is too dry and
Add more water to the rice, and cook for
„Почистване и поддръжка").
not well cooked.
a bit longer.
The multicooker does
You might have pressed the keep-warm
Забележка
not switch to the
button (Keep warm/Off) before pressing
keep-warm mode
the start button (Start/Cancel). In this case
•
Уверете се, че всички части са напълно сухи, преди да започнете да
automatically.
the multicooker will be in standby mode
използвате многофункционалния уред за готвене.
after the cooking is finished.
The temperature control is defective. Take
the appliance to your Philips dealer or a
service center authorized by Philips.
Подготовка преди готвене
The rice is scorched.
You have not rinse the rice properly. Rinse
Преди да използвате многофункционалния уред за готвене,
the rice until the water runs clear.
трябва да изпълните следните стъпки:
Water spills out of the
Make sure that you add water to the level
Ориз:
multicooker during
indicated on the scale inside the inner pot
1 Отмерете ориза с помощта на предоставената за целта
cooking.
that corresponds to the number of cups
мерителна чаша.
of rice used.
2 Измийте ориза добре.
I cannot get to the
Press the menu button (Menu) repeatedly
3 Поставете измития ориз във вътрешния съд.
desired cooking
to select the desired function as shown by
4 Добавете вода до обозначеното ниво на скалата във
function.
the indicator.
вътрешния съд и подравнете повърхността на ориза.
Различни ястия:
Rice smells bad after
Clean the inner pot with some washing
cooking
detergent and warm water.
5 Натиснете бутона за освобождаване на капака, за да го
отворите (фиг. 4).
After cooking, make sure the steam vent
cap, inner lid and inner pot is cleaned
6 Избършете добре външната повърхност на вътрешния
thoroughly.
съд (фиг. 5), след което поставете вътрешния съд в
многофункционалния съд за готвене (фиг. 6). Проверете дали
Error message (E1, E2,
There has been a power failure during
вътрешният съд контактува добре с нагревателния елемент.
E3, or E4) appears on
cooking. Take the appliance to your Philips
7 Затворете капака на многофункционалния уред за готвене
the display.
dealer or a service center authorized by
(фиг. 7) и включете щепсела в контакта (фиг. 8).
Philips.
Забележка
Български
•
Уверете се, че вътрешният съд контактува добре с нагревателния
елемент.
•
За подробности относно съотношението ориз – вода вижте
рецептата.
1
Вашият многофункционален уред
•
Обозначеното ниво на вътрешната страна на вътрешния съд е само
за готвене
една индикация. Вие винаги можете да регулирате нивото на водата
според различните видове ориз и личните ви предпочитания.
•
Уверете се, че външната повърхност на вътрешния съд е чиста и суха
Поздравяваме ви за покупката и добре дошли във Philips!
и че върху нагревателния елемент или магнитния превключвател няма
За да се възползвате изцяло от предлаганата от Philips
остатъци.
поддръжка, регистрирайте продукта си на адрес
www.philips.com/welcome.
2
Какво има в кутията (фиг. 1)
Готвене на ориз/паста
1 Следвайте стъпките от "Подготовка преди готвене".
Главно устройство на
Захранващ кабел
2 Натиснете бутона за меню (Menu), докато изберете
многофункционалния уред за
функцията за готвене на ориз/паста (Rice/Pasta) (ориз/паста)
готвене
(фиг. 9).
Кошница за готвене на пара
Мерителна чаша
3 Натиснете стартовия бутон (Start/Cancel) (старт/отмяна) за
Лопатка
Черпак за супа
начало на готвенето (фиг. 10).
Ръководство за потребителя
Рецепта
4 След като готвенето приключи, ще чуете 4 звукови сигнала и
светлинният индикатор на избраната функция за готвене ще
Брошура за безопасност
Гаранционна карта
изгасне.
3
Общ преглед (фиг. 2)
5 Многофункционалният уред за готвене автоматично ще се
включи в режим на поддържане на топлината.
Подвижна капачка на
» Светва светлинният индикатор за поддържане на
Нагревателен елемент
a
g
отвора за пара
топлината (Keep warm/Off) (поддържане на топлината/
изкл.) (фиг.11).
Бутон за освобождаване
Електрически контакт
b
h
на капака
Забележка
Капак
Дръжка на съда за готвене
c
i
Индикации за нивото на
•
Ако напрежението е нестабилно в района, в който живеете, е
Вътрешен съд
d
j
водата
възможно многофункционалният уред за готвене да прелее.
•
След като готвенето приключи, разбъркайте ориза, за да излезе
Контролен панел
Уплътнителен пръстен
e
k
излишната влага и оризът да се получи пухкав.
•
Основно тяло
В зависимост от условията на готвене долната част на ориза може
f
леко да покафенее.
Общ преглед на контролите (фиг. 3)
Претопляне
l
Функции за готвене
q
Бутон за минута/намаляване
1 Разбъркайте охладената храна и я разпределете равномерно
Бутон за поддържане на
Бутон за време за приготвяне
m
r
във вътрешния съд (фиг. 12).
топлината/изкл.
2 Сипете малко вода върху храната, за да не стане твърде суха
Бутон за меню
Бутон за температурата
n
s
(фиг. 13). Количеството вода зависи от количеството храна.
3 Следвайте стъпки 6 и 7 от "Подготовка преди готвене".
Бутон за настройка на
Бутон Start/Cancel (старт/
o
t
таймера
отмяна)
4 Натиснете бутона за меню (Menu), докато изберете
функцията за претопляне (Reheat) (претопляне) (фиг. 14).
Бутон за час/увеличаване
Дисплей
p
u
» За да зададете различно време на приготвяне, вижте глава
„Регулиране на времето и температурата на приготвяне".
5 Натиснете стартовия бутон (Start/Cancel) (старт/отмяна) за
начало на готвенето (фиг. 10).
6 След като готвенето приключи, ще чуете 4 звукови сигнала и
светлинният индикатор на избраната функция за готвене ще
изгасне.
Регулируемо
Зададено
Време по
време за
време
подразбиране
приготвяне
температура
/
1 – 24 ч.
130 – 140 °C
5 мин. – 2 ч.
1 – 24 ч.
95 – 100 °C
20 мин. – 4 ч.
1 – 24 ч.
90 – 100 °C
5 мин. – 2 ч.
1 – 24 ч.
90 – 100 °C
20 мин. – 2 ч.
1 – 24 ч.
100 °C
5 – 60 мин.
/
145 – 150 °C
20 мин. –
1 – 24 ч.
85 – 90 °C
10 ч.
5 мин. – 10 ч.
1 – 24 ч.
100 °C
се показва на екрана през по-голямата част
Advertisement
Table of Contents

Related Manuals for Philips HD3139


Summary of Contents for Philips HD3139
- Page 1 Before using the multicooker, you need to do the following steps: To fully benefit from the support that Philips offers, register your 2 Put the food to be steamed on a plate or in the steam tray.
- Page 2 5 Po dokončení vaření se ozvou 4 pípnutí a kontrolka zvolené funkce vody závisí na množství pokrmu. готвене на пара (фиг.16). Режим за поддържане на топлината на клиенти на Philips във вашата страна. Телефонния му номер otvoru pro výstup páry: vaření zhasne. Hlavní část 4 Поставете...
- Page 3 Sisemise nõu seadmest väljavõtmisel kasutage pajakinnast või rätikut, kuna poklopca funkcije kuhanja isključit će se. problem, obratite se centru za potrošače tvrtke Philips u svojoj državi. 6 Pühkige sisemise nõu väliskülg kuivaks (joonis 5), seejärel pange sisemine nõu on väga kuum.
- Page 4 • A hálózati feszültség ingadozása túlcsordulást okozhat a többfunkciós išjungimo mygtukas (Boil) (15 pav.). informacija. Köszönjük, hogy Philips terméket vásárolt, és üdvözöljük a Philips lépését. főzőeszközben. » Norėdami nustatyti kitą ruošimo trukmę, vadovaukitės sk. Tartozékok 4 Paspauskite paleidimo mygtuką (Start/Cancel), kad prasidėtų...
- Page 5 (Cooking time) (23. att.), un displejā sāk mirgot noklusējuma Bojāta temperatūras kontrolierīce. Nogādājiet » Informacje dotyczące wyboru innego czasu gotowania znajdują jūsų šalyje nėra klientų aptarnavimo centro, kreipkitės į vietinį „Philips“ tvaicēšanas groza. Inne potrawy: Manuāla gatavošanas laiks.
- Page 6 5 Aparatul multicooker va rămâne în modul de păstrare la cald, în • Element de încălzire: Nu închideţi capacul superior când gătiţi în modul de prăjire. Разъем кабеля питания Pentru a beneficia pe deplin de asistenţa oferită de Philips, înregistraţi- • • крышки mod automat.
- Page 7 • 3 С помощью кнопки Menu (Меню) выберите режим тушения • Multifunkčné zariadenie na varenie Če želite popolnoma izkoristiti podporo, ki jo nudi Philips, izdelek Удалите остатки пищи слегка влажной тканью. Pred čistením odpojte zariadenie MultiCooker od elektrickej zásuvky. •...
- Page 8 » Prižgal se bo indikator za način ohranjanja toplote (Keep warm/ Zunanjost temperature/isključivanje posetite Philips Web lokaciju na adresi www.philips.com ili se obratite funkcije za pripremu će se isključiti. kuhanjem (slika 10). » Da biste podesili drugo vreme pripreme, pogledajte poglavlje Off) (slika 11).
Need help?
Do you have a question about the HD3139 and is the answer not in the manual?
Questions and answers