Table of Contents
Advertisement
Quick Links
Operation
Manual
for CLI
Thank you for purchasing our product.
This manual provides important information about safe and proper operations
of this Switching Hub.
Please read "Important Safety Instructions" on pages 1 to 4 before use.
For target model names and numbers, refer to the next page.
Under all circumstances, customer disassembling of this Switching Hub voids
the warranty.
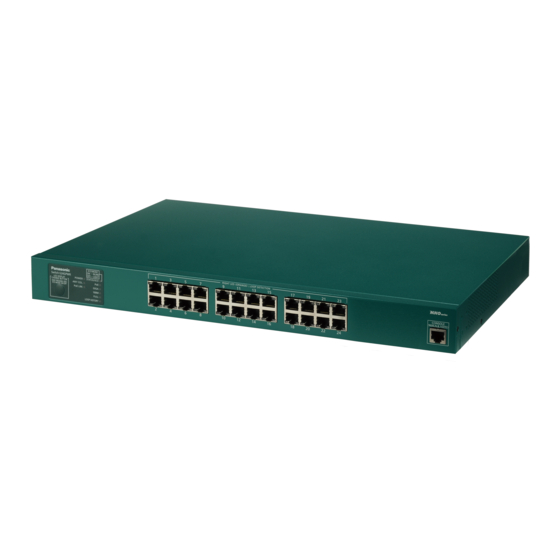
Switch-S24GPWR
Model Number: PN25249
Advertisement
Table of Contents

Related Manuals for Panasonic S24GPWR


Summary of Contents for Panasonic S24GPWR
- Page 1 Switch-S24GPWR Operation Manual Model Number: PN25249 for CLI Thank you for purchasing our product. This manual provides important information about safe and proper operations of this Switching Hub. Please read "Important Safety Instructions" on pages 1 to 4 before use.
- Page 2 The target model for this Operation Manual is as follows. Model name Model number Firmware version Switch-S24GPWR PN25249-ID 1.0.0.07 or higher PN25249-TH PN25249-MY PN25249-SG...
-
Page 3: Important Safety Instructions
Important Safety Instructions Please Follow the Instructions This chapter contains important safety instructions for preventing bodily injury and/or property damage. You are required to follow them. ■Severity of bodily injury and/or property damage, which could result from incor- rect use of the Switching Hub, are explained below. This symbol indicates a potential hazard that could result in serious injury or death. - Page 4 ●Do not please this Switching Hub in harsh environment(such as near water, high humid, and/or high dust). Deviation could lead to fire, electric shock, and/or equipment failure. ●Do not place this Switching Hub under direct sunlight and/or high tem- perature. Deviation could lead to high internal temperature and fire.
- Page 5 ●Connect the power cord firmly to the power port. Deviation could lead to electric fire, shock, and/or malfunction. ●Unplug the power cord if the Status/ECO LED (Status/ECO mode), blinks in orange (system fault). Deviation, such as keeping connected for a long time, could lead to fire.
-
Page 6: Basic Instructions For The Use Of This Product
Basic Instructions for the Use of This Product ●For inspection and/or repair, consult the retailer. ●Use commercial power supply from a wall socket, which is close and easily accessible to this Switching Hub. ●Unplug the power cord when installing or moving this Switching Hub. ●Unplug the power cord when cleaning this Switching Hub. - Page 7 ●When mounting Switching Hubs in a rack, leave a minimum of 20 mm space between them. 1. Panasonic will not be liable for any damage resulting from the operation not in accordance with this operation manual, or loss of communications, which may or may not be caused by failure and/or malfunction of this device.
-
Page 8: Table Of Contents
Table of Contents Important Safety Instructions ................3 Basic Instructions for the Use of This Product ............. 6 Command Hierarchy ................... 9 Displaying Basic Information ..............12 Basic Switch Configuration ............... 13 3.1. System Administration Configuration ........... 13 3.2. IP Address Configuration ..............15 3.3. -
Page 9: Command Hierarchy
・ The enable command enables to move from User mode to Privileged mode. S24GPWR> ・・・・・・・・・・・・・・・・・・・・・・・・・ User mode S24GPWR> enable ・・・・・・・・・・・・・・・・・・ User mode ⇒ Privileged mode S24GPWR# ・・・・・・・・・・・・・・・・・・・・・・・・・ Privileged mode S24GPWR# disable ・・・・・・・・・・・・・・・・・・ Privileged mode ⇒ User mode S24GPWR> ・・・・・・・・・・・・・・・・・・・・・・・・・ User mode disable command ・... - Page 10 S24GPWR(config-if)# exit ・・・・・・・・・・・ Interface configuration mode ⇒ Global configuration mode S24GPWR(config)# exit ・・・・・・・・・・・・・ Global configuration mode ⇒ Privileged mode S24GPWR# exit ・・・・・・・・・・・・・・・・・・・・・ Privileged mode ⇒ User mode S24GPWR> ・・・・・・・・・・・・・・・・・・・・・・・・・ User mode end command ・ The end command enables to move from configuration modes to Privileged mode.
- Page 11 Candidate assist command ・ Entering a command followed by a question mark (?) displays candidates of suc- ceeding arguments. S24GPWR# configure S24GPWR(config)# ip address A.B.C.D - IP address (e.g. 10.0.0.1) S24GPWR(config)# ip address Fig. 1-3 Candidate assist command Command autocomplete For command and argument entries, when a word can be uniquely identified after typing the first few letters, you can omit the remaining letters.
-
Page 12: Displaying Basic Information
2. Displaying Basic Information Use the following commands in the "Privileged mode" to display basic information of the Switching Hub. Basic information display command Privileged mode show sys-info PN25249 Local Management System Main Menu -> General Information System up for: xxxday(s), xxhr(s), xxmin(s), xxsec(s) Boot / Runtime Code Version: xx.xx.xx.xx/ xx.xx.xx.xx Hardware Information... -
Page 13: Basic Switch Configuration
Configure the host name, installation location and contact information in "Global configuration mode." Confirm the configuration information by entering "show sys-info" in "Privileged mode." System information display command S24GPWR# show sys-info Host name configuration command Global configuration mode hostname <hostname>... - Page 14 Example: Configuration example of the host name as PoESW-1, installation loca- tion as Office-2F, and contact information as Manager S24GPWR> S24GPWR> enable S24GPWR# configure S24GPWR(config)# hostname PoESW-1 PoESW-1(config)# end PoESW-1# show sys-info System up for : 000day(s), 00hr(s), 00min(s), 00sec(s) Boot / Runtime Code Version: x.x.x.xx / x.x.x.xx...
-
Page 15: Ip Address Configuration
Example 1: Configuration example of IP address as 192.168.0.1, subnet mask as 255.255.255.0, and default gateway as 192.168.0.254 S24GPWR> enable S24GPWR# configure S24GPWR(config)# ip address 192.168.0.1 255.255.255.0 S24GPWR(config)# ip default-gateway 192.168.0.254 S24GPWR(config)# end S24GPWR# show ip conf MAC Address... -
Page 16: Port Configuration
3.3. Port Configuration Configure port settings in "Interface configuration mode." Confirm the configura- tion information by entering "show interface info" in "Privileged mode." Port status enable command Interface configuration mode no shutdown Port status disable command Interface configuration mode shutdown Port mode configuration command Interface configuration mode speed-duplex... - Page 17 Example 1: Configuration example of port speed and flow control S24GPWR> enable S24GPWR# configure S24GPWR(config)# interface GigabitEthernet0/1 S24GPWR(config-if)# speed-duplex 100-full S24GPWR(config-if)# flow-control S24GPWR(config-if)# end S24GPWR# show interface info Port Trunk Type Admin Link Mode Flow Ctrl Auto-MDI ---- ----- ----------- --------...
- Page 18 Example 2: Configuration example of port name S24GPWR> enable S24GPWR# configure S24GPWR(config)# interface GigabitEthernet0/1 S24GPWR(config-if)# name gi0/1 S24GPWR(config-if)# eap-forward S24GPWR(config-if)# end S24GPWR# show interface name Port Trunk Type Link Port Name ---- ----- ----------- ---- --------------- 1000T Down Port_1 1000T...
- Page 19 Example 3: Configuration example of MNO series power saving mode S24GPWR> enable S24GPWR# configure S24GPWR(config)# interface GigabitEthernet0/1 S24GPWR(config-if)# line power-saving disable S24GPWR(config-if)# end S24GPWR# show line configuration Port Link Trunk Type Mode Power-Saving EEE(802.3az) ---- ------ ----- ------ ----------- ------------...
-
Page 20: Access Condition (Console And Telnet) Configuration
3.4. Access Condition (Console and Telnet) Configuration Configure access conditions to the Switching Hub in "Global configuration mode." Confirm the configuration information by entering "show terminal length" in "Privi- leged mode." Console timeout configuration command Global configuration mode console inactivity-timer <minute> Console configuration display command Privileged mode show console... -
Page 21: Show Console
S24GPWR# show console Console UI Idle Timeout: 10 Min. Console --------- Active S24GPWR# configure S24GPWR(config)# telnet-server inactivity-timer 10 S24GPWR(config)# telnet-server 1 192.168.0.100 255.255.255.255 S24GPWR(config)# telnet-server access-limitation enable S24GPWR(config)# end S24GPWR# show telnet-server Telnet UI Idle Timeout: 10 Min. Telnet Server ---------------... - Page 22 Example: Set Terminal Length to 0 (the number of lines to be displayed on a screen at once is set to unlimited) S24GPWR> enable S24GPWR# configure S24GPWR(config)# terminal length 0 S24GPWR(config)# end S24GPWR# show terminal length Terminal Length: none S24GPWR# Fig.
-
Page 23: Configuration Of Easy Ip Address Setup Function
<Setting display example> The following is an execution example of the IP address easy setup function display command. S24GPWR> enable S24GPWR# show ip setup interface IP Setup Interface ------------------------- Enabled S24GPWR# Fig. 3-12 Execution example of the IP address easy setup function display command... -
Page 24: Mac Address Table Display And Registration Configuration
3.5. MAC Address Table Display and Registra- tion Configuration Configuration of the forwarding database (FDB: a list where MAC addresses required for FDB packet translation are memorized/recorded is done in "Global Configuration Mode." The content of FDB is displayed in "Privileged Mode." In addi- tion, static MAC addresses can be added or deleted. - Page 25 ----------------- ------ ------- 00:00:00:00:00:01 S24GPWR# show mac-address-table mac MAC Address Port ----------------- ---- 00:00:00:00:00:01 xx:xx:xx:xx:xx:xx S24GPWR# S24GPWR# show mac-address-table interface gi0/1 MAC Address Port ----------------- ---- 00:00:00:00:00:01 S24GPWR# show mac-address-table vlan 1 MAC Address Port ----------------- ---- S24GPWR# Fig. 3-13 Reference to MAC Address Table...
- Page 26 <Setting display example> The following is an execution example of the MAC address automatic learn- ing status display command. S24GPWR> enable S24GPWR# show mac-learning Interface MAC Learning MAC Learning Limit --------- ------------ ------------------ gi0/1 Auto Disabled gi0/2 Auto Disabled gi0/3...
-
Page 27: Time Configuration
Privileged mode show sntp <Setting display example> The following is an execution example of the SNTP configuration information display command. S24GPWR> enable S24GPWR# show sntp Clock Time : Wed, 21 Jul 2010 12:00:00 SNTP : Enabled SNTP Server : 192.168.1.1... -
Page 28: Arp Table Display And Registration Configuration
Privileged mode show arp sort type-static ARP (dynamic) display command Privileged mode show arp sort type-dynamic S24GPWR> enable S24GPWR# show arp sort ip Sorting Method : By IP ARP Age Timeout : 7200 seconds IP Address Hardware Address Type ---------------... -
Page 29: Advanced Switch Configuration
4. Advanced Switch Configuration 4.1. VLAN Configuration Configure VLAN in "Global configuration mode" or "Interface configuration mode." Confirm the configuration information by entering "show vlan all" in "Privileged mode." VLAN creation configuration command Global configuration mode interface vlan<vlan-id> VLAN delete command Global configuration mode no interface vlan<vlan-id>... - Page 30 S24GPWR> enable S24GPWR# show vlan all Total VLANs : 3 VLAN Name Type Mgmt Ports ---- ------------------------------ --------- ---- -------------------------- Permanent UP Gi1, Gi2, Gi3, Gi4, Gi5 Gi6, Gi7, Gi8, Gi9, Gi10 Gi11, Gi12, Gi13, Gi14, Gi15 Gi16, Gi17, Gi18, Gi19, Gi20...
-
Page 31: Link Aggregation Configuration
Link aggregation configuration delete command Global configuration mode no lacp <LACP-key> LACP configuration information display command Privileged mode show lacp S24GPWR> enable S24GPWR# show lacp System Priority : 1 Mode Member Port List ----- -------- --------------------------------------------------------------- 1 Manual 1-2 S24GPWR Fig. -
Page 32: Port Monitoring Configuration
Monitoring configuration information display command Privileged mode show monitor S24GPWR> enable S24GPWR# configure S24GPWR(config)# int gi0/9 S24GPWR(config-if)# port monitor 1-8 direction both S24GPWR(config-if)# end S24GPWR# show monitor Port monitor status : Enabled Monitoring direction : Both Monitoring port Monitored port... -
Page 33: Qos (Quality Of Service) Configuration
DiffServ configuration display command Privileged mode show priority-queue diffserv-map S24GPWR> enable S24GPWR# configure S24GPWR(config)# mls qos S24GPWR(config)# end S24GPWR# show mls qos Quality of Service Status: Enabled S24GPWR# show priority-queue cos-map Priority Traffic Class -------- ------------- 0: Lowest... -
Page 34: Show Mls Qos
Fig. 4-5 Display of the QoS configuration (show mls qos) (show priority-queue cos-map) S24GPWR> enable S24GPWR# configure S24GPWR(config)# priority-queue diffserv-map 63 3 S24GPWR(config)# priority-queue diffserv-map 62 3 S24GPWR(config)# priority-queue diffserv-map 0 1 S24GPWR(config)# mls diffserv S24GPWR(config)# end S24GPWR# show mls diffServ... -
Page 35: Poe Power Supply Function Configuration
PoE configuration display command Privileged mode show peth-conf PoE port configuration display command Privileged mode show peth-port S24GPWR> enable S24GPWR# show peth-conf Power Budget : 124W Power Consumption : S24GPWR# show peth-port No. Admin Sche. Status Class Limit(mW) Pow.(mW) Vol.(V) -
Page 36: Poe Scheduler Configuration
4.4.1. PoE Scheduler Configuration Configure PoE scheduler settings in "Global configuration mode." PoE scheduler enable command Global configuration mode peth schedule enable PoE scheduler disable command Global configuration mode no peth schedule enable Port list configuration command Global configuration mode peth schedule portlist <Index>... - Page 37 Enabled 2014/07/21 00:00 6 Holiday-ON DateList 1 OFF/ON Enabled 2014/07/21 23:59 Fig. 4-8 Display of PoE schedule configuration (show peth schedule) S24GPWR# show peth schedule information 1 Detailed Schedule Information : ----------------------------------------------- Schedule Index Schedule Name : Daily-OFF Schedule Classifier...
- Page 38 S24GPWR# show peth schedule configuration-by-port 1 Selected Port Number : 1 PoE Schedule: Total Entries : 6 Index Class. Date Time Action Status ----- ------- ------------------------------------ ----- ------ -------- 1 Daily 20:00 Enabled 2 Daily 07:00 Enabled 3 Weekly Sat, Sun...
- Page 39 S24GPWR# show peth schedule datelist 1 Date List Index : 1 Year : 2014 Date: Month ------ ------------------------------------------------------------------- 1,13 15,23 3,24 Fig. 4-12 Display of the date list configuration (show peth schedule datelist 1) S24GPWR# show peth schedule datelist configuration...
-
Page 40: Line Configuration
4.5. Line Configuration Configure the Loop detection and blocking function and MNO series power saving mode settings in "Interface configuration mode." 4.5.1. Loop Detection and Blocking Configuration Enable or disable the Loop detection and blocking function and configure the auto-recovery setting in "Interface configuration mode." Confirm the loop history by entering "show line loopback history"... - Page 41 S24GPWR> enable S24GPWR# configuration S24GPWR(config)# line loopback enable S24GPWR(config)# interface gi0/1 S24GPWR(config-if)# line loopback S24GPWR(config-if)# end S24GPWR# show line loopback configuration Global Loop Detection Status: Enabled Port Trunk Link State Loop Detect Recovery Recovery Time ---- ----- ---- ----------- ------------- ----------- --------------...
-
Page 42: Displaying Statistic Information
Good Broadcast Good Multicast 438319 64-Byte Pkts 65-127 Pkts 128-255 Pkts 256-511 Pkts 512-1023 Pkts Over 1024 Pkts S24GPWR# show interface counters errors gi0/1 Elapsed Time Since System Reset: 000:01:51:11 CRC/Align Errors Undersize Pkts Oversize Pkts Fragments Jabbers Collisions S24GPWR# Fig. -
Page 43: Transferring Configuration Files
<ip-address> <filename> Configuration file download command Privileged mode copy tftp <ip-address> <filename> running-config S24GPWR# copy running-config tftp 192.168.1.1 S24GPWR.cfg Please wait a minute. 510 bytes data transferred! Fig. 6-1 Uploading a configuration file (copy tftp 192.168.1.2 S24GPWR.cfg) -
Page 44: Firmware Upgrade
You can upgrade the firmware version of the Switching Hub in "Privileged mode." Firmware upgrade execution command Privileged mode copy tftp <ip-address> <filename> image S24GPWR> enable S24GPWR# copy tftp 192.168.1.1 PN25249_NEW.rom image Downloading Image From Remote Server. (Press CTRL-C to quit downloading) Receive 134233 bytes Fig. 7-1 Firmware upgrade... -
Page 45: Reboot
{normal | default | default-except-IP} Reboot timer configuration command Privileged mode reboot timer <time> S24GPWR> enable S24GPWR# reboot normal Are you sure to reboot the system? (Y/N) y Memory test..OK Decompressing...OK System database initialization ... OK MAC unit 0: SOC registers test ... Passed MAC unit 0: PHY registers test ... -
Page 46: Reboot Timer Function Configuration
8.1. Reboot Timer Function Configuration By setting the reboot timer in advance in "Global configuration mode", you can reboot the Switching Hub after a specified time from the execution of the reboot command. Reboot timer configuration command Privileged mode reboot timer <time>... -
Page 47: Exception Handler
{ debug-message | system-reboot | both } Exception handler configuration display command Privileged mode show exception-handler S24GPWR> enable S24GPWR# configure S24GPWR(config)# exception-handler enable S24GPWR(config)# exception-handler mode both S24GPWR(config)# end S24GPWR# show exception-handler Exception Handler: Enabled Exception Handler Mode: Debug Message & System Reboot S24GPWR# Fig. -
Page 48: Ping Execution
All modes ping <ip-address> [-n <count>] Ping (timeout) command All modes ping <ip-address> [-w <timeout(sec)>] S24GPWR> ping 192.168.1.1 Type Ctrl-C to abort. Reply Received From : 192.168.1.1, TimeTaken : 8 ms Reply Received From : 192.168.1.1, TimeTaken : 9 ms Reply Received From : 192.168.1.1, TimeTaken : 7 ms... -
Page 49: Displaying And Configuring The System Log
View the system log in "Privileged mode" and configure the system log setting in "Global configuration mode." System log display command Privileged mode show syslog [conf] System log clear command Global configuration mode syslog clear S24GPWR# show syslog Entry Time(YYYY/MM/DD HH:MM:SS) Event ----- ------------------------- ------------------------------------------- 2001/01/01 00:00:29 Reboot: Factory Default 2001/01/01 00:05:47... -
Page 50: Saving Configuration Information
Save the configuration information in "Privileged mode." Configuration save command Privileged mode copy running-config startup-config S24GPWR> enable S24GPWR# copy running-config startup-config Please wait a minute. Save current state to startup config successfully!! S24GPWR# Fig. 12-1 Saving the configuration information (copy running-config startup-config) -
Page 51: Displaying Configuration Information
Configuration information display command Privileged mode show running-config Saved configuration information display command Privileged mode show startup-config S24GPWR> enable S24GPWR# show running-config Building Configuration... Current Configuration: ! -- start of configuration -- ! -- Software Version : x.x.x.xx -- enable config ip address 192.168.0.1 255.255.255.0... -
Page 52: Obtaining Technical Support Information
14. Obtaining Technical Support Infor- mation Technical support information can be obtained in the "Privileged mode." This infor- mation is useful if obtained in advance before inquiry. Because the display content is very long, we recommend to set console length to "0"... -
Page 53: Appendix
15. Appendix 15.1. Specifications Refer to "Operation Manual for Menu Screens" for your switching Hub to read the specifications. - Page 54 The following are points to note when using the easy IP address setup function. [Known compatible software] Panasonic Eco Solutions Networks Co., Ltd. " ZEQUOassistPlus" Ver1.1.1.0 Panasonic Corporation "Easy IP Setup" V3.01/V4.00/V4.24R00 Panasonic System Networks Co., Ltd. "Easy Config" Ver3.10R00...
-
Page 55: Troubleshooting
15. Troubleshooting If you find any problems, please take the following steps to check. ◆ LED indicators ■ The power LED (POWER) is not lit. ● Is the power cord connected? → Check that the power plug is firmly connected, so the connection is not loose at the power port. - Page 56 16. After-sales Service 1. Warranty card A warranty card is included in the operating instructions (paper) provided with this Switching Hub. Be sure to confirm that the date of purchase, shop (com- pany) name, etc., have been entered in the warranty card and then receive it from the shop.
-
Page 57: After-Sales Service
Store/dealer Tel Customer service contact Tel (* Check screen is described in Chapter 3 of this document.) © Panasonic Eco Solutions Networks Co., Ltd. 2014-2016 Panasonic Eco Solutions Networks Co., Ltd. 2-12-7, Higashi-Shimbashi, Minato-ku, Tokyo Japan, 105-0021 URL: http://panasonic.co.jp/es/pesnw/english/ P1014-1086...
Need help?
Do you have a question about the S24GPWR and is the answer not in the manual?
Questions and answers