
Subscribe to Our Youtube Channel
Related Manuals for Planet NVT-401


Summary of Contents for Planet NVT-401
- Page 1 4/8/16/32-Ch Network Video Recorder NVR-401 / NVR-810 / NVR-1610 / NVR-3210 Quick Installation Guide...
-
Page 2: Table Of Contents
Table of Contents Chapter 1. Introduction ..................3 1.1 Before Installation ................3 Chapter 2. Physical Description and Installation ..........4 2.1 4-Ch Network Video Recorder ............... 4 2.1.1 NVR-401 Package Content ............4 2.1.2 NVR-401 Physical Details ............4 2.1.3 NVR-401 Installation .............. -
Page 3: Chapter 1. Introduction
Chapter 1. Introduction Thank you for purchasing the PLANET 4/8/16/32-Ch Network Video Recorder. The Network Video Recorder is designed for use within a surveillance system, and performs recordings and playbacks pictures from network cameras in the system. It is a recording device using a hard disk drive to record camera pictures instead of using video tapes so that pictures recorded by repeated overwriting will not experience deterioration of the recorded picture quality. -
Page 4: Chapter 2. Physical Description And Installation
Chapter 2. Physical Description and Installation 2.1 4-Ch Network Video Recorder 2.1.1 NVR-401 Package Content 1 x NVR 1 x Power Cord 1 x Power Adapter 1 x RJ-45 Cable 1 x CD-ROM 8 x HDD Screw 1 x Quick Installation Guide 2.1.2 NVR-401 Physical Details Front Panel LEDs... -
Page 5: Nvr-401 Installation
Rear Panel Connector Description DC Connector Connect the bundled power adapter. Ethernet Supports 10/100/1000Base-T interface. Connect your USB flash disk for firmware upgrade. Button Description Reset Press to reset NVR to factory default. 2.1.3 NVR-401 Installation 2.1.3.1 Installing the Hard Disk Drive 1. - Page 6 2. Pull out the HDD tray. 3. Place the HDD on the tray and secure the HDD with the screws at the bottom (as illustrate). 4. Push the tray back in the unit and press down the black bar to secure the tray.
-
Page 7: 8/16-Ch Network Video Recorder
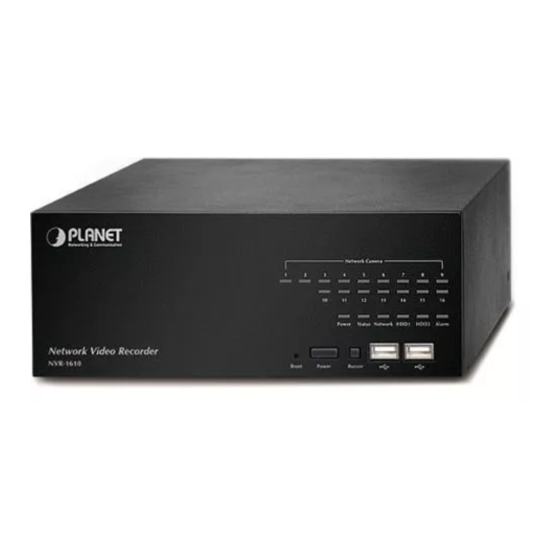
2.2 8/16-Ch Network Video Recorder 2.2.1 NVR-810 / NVR-1610 Package Content 1 x NVR 1 x Power Cord 1 x RJ-45 Cable 1 x CD-ROM 2 x HDD Screw 1 x Quick Installation Guide 2.2.2 NVR-810 / NVR-1610 Physical Details Front Panel Description NVR-1610 Network Video Recorder... -
Page 8: Nvr-810 / Nvr-1610 Installation
2.2.3 NVR-810 / NVR-1610 Installation 2.2.3.1 Installing the Hard Disk Drive 1. Removing the screws on the side. 2. Push the top housing forward, then lift it up. 3. Removing the screws on the HDD Tray left and right side. Tray... - Page 9 4. Insert the HDD to HDD tray. Please push the HDD until the SATA connect is connected properly, and lock the HDD Screw on left and right side. 5. If there is a second HDD, please repeat the step 4 to install it. 6.
-
Page 10: 32-Ch Network Video Recorder
2.3 32-Ch Network Video Recorder 2.3.1 NVR-3210 Package Content 1 x NVR 1 x Power Cord 1 x RJ-45 Cable 1 x CD-ROM 12 x HDD Screw 1 x Quick Installation Guide 2.3.2 NVR-3210 Physical Details Front Panel Reset/Restart button Power LED Power Button System LED... -
Page 11: Nvr-3210 Installation
2.3.3 NVR-3210 Installation 2.3.3.1 Installing the Hard Disk Drive 1. Release the HDD tray by pulling the lock to the right. 2. Pull the HDD tray out of the case. - Page 12 3. Place the HDD in the tray and the bottom of the tray. 4. Put the HDD tray back to the case. 5. Push the tray door back to the case to secure it.
-
Page 13: Web Management
2.4 Web Management Install “Device Search” utility from the CD 1. Please go to Start => Programs => NVR => Search NVR to run the search tool. Then you will see the utility start search the network. 2. The NVR should be located and its IP address should be displayed: Double-click on it and the program should automatically access the NVR’s web administration page from your default browser. - Page 14 Further configurations and information can be found in the user’s manual CD. Please check the user’s manual for more understanding.
- Page 15 This page is intentionally left blank...
- Page 16 This page is intentionally left blank...
Need help?
Do you have a question about the NVT-401 and is the answer not in the manual?
Questions and answers