ubbink Rolux Installation Instructions Manual
Vent system
Hide thumbs
Also See for Rolux:
- Installation instructions manual (15 pages) ,
- Installation instructions manual (32 pages)
Table of Contents
Advertisement
Quick Links
- 1 Recommended Venting Air Intake Terminal Position
- 2 General Installation Instructions
- 3 Joint Connection
- 4 Installation Instructions Horizontal Discharge Vent System
- 5 Installation Instructions Vertical Discharge Vent System
- 6 Parts & Dimentions
- 7 Vertical Discharge Vent System Installation Examples
- Download this manual
See also:
Instruction and Installation Manual
US
p. 1/16
ES
p. 17/32
F
Ubbink bv
Verhuellweg 9
NL – 6984 AA Doesburg
T + 31 (0) 313 480 200
F + 31 (0) 313 473 942
rolux@ubbink.nl
www.ubbink.nl
1
Installation instructions \ Instrucciones de
instalación
Rolux
Vent System
®
The installation instructions should be kept with the appliance for maintenance.
Sistema de ventilación Rolux
Las instrucciones de instalación deben guardarse con el aparato para su mantenimiento.
Rolux
Vent system
®
Pour une traduction complète du manuel en français, vous pouvez le télécharger du site Web
de www.rinnai.us.
WARNING
Improper installation of vent system and components, or failure to follow
all installation instructions, can result in property damage or serious injury.
®
Advertisement
Table of Contents

Related Manuals for ubbink Rolux


Summary of Contents for ubbink Rolux
- Page 1 Rolux Vent System ® The installation instructions should be kept with the appliance for maintenance. p. 1/16 Sistema de ventilación Rolux ® Las instrucciones de instalación deben guardarse con el aparato para su mantenimiento. p. 17/32 Rolux Vent system ®...
-
Page 2: Table Of Contents
Vertical Discharge Vent System Installation Examples Instrucciones de instalación Introduction The Ubbink Rolux® concentric vent system is considered part of the direct vent tankless water heater. The Ubbink Rolux® concentric vent system was tested and approved with the appliance by a third party testing agency. Check the manufacturer’s installation instructions or certificate of compliance to confirm that the Ubbink Rolux®... -
Page 3: Installation Requirements
Do not use with other vent products Ubbink Rolux® vent systems must be used throughout the entire vent system. Do not use vent components from other vent manufacturers when using the Ubbink Rolux® vent system. -
Page 4: Recommended Venting Air Intake Terminal Position
Terminals should be so positioned as to avoid products of combustion entering openings into buildings or other flues or vents. The Ubbink Rolux White Vent extension material is primarily designed for indoor use. If used outdoors the material should be protected for UV-radiation (direct sunlight). -
Page 5: General Installation Instructions
General Installation Instructions Joint connection Vent connections must be firmly pressed together so that the gaskets form an airtight seal. To ensure optimum joint con- nection, it is recommended to secure with three #8x1/2” self tapping screws. Secure the vent to the wall or ceiling with pipe clamps or perforated hanger iron. -
Page 6: Shortening Of Vent Extensions
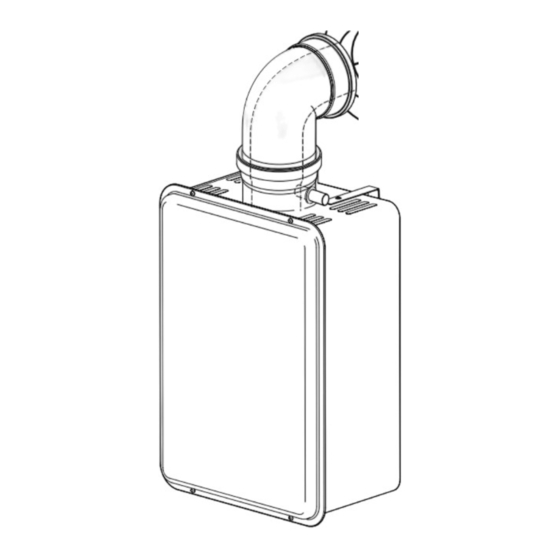
Improper installation of vent system and components, or failure to follow all installation instructions, can result in property damage or serious injury. Installation Instructions ® Rolux Horizontal Discharge Vent System Identify the vent location Steps: - Place the 90° Vent Pipe Elbow on the appliance. -
Page 7: Measure Dimension To Fit
Measure dimension to fit (30 mm) White Outer Pipe 1.15 (30 mm) (whiter outer) x = A + 2.5 (65 mm) minimum Metal Inner Pipe Reference page 4 of these installation instructions for the acceptable pitch direction. Final installation of the vent system - After cutting the appropriate length slide the horizontal through the hole in the wall. -
Page 8: Installation Instructions Vertical Discharge Vent System
Installation Instructions ® Rolux Vertical Discharge Vent System Identify the vent location Determine the location where the roof dis- charge terminal will be installed. Taking into account the angle of the roof, cut the hole with a dimension that allows the... -
Page 9: Mounting The Vent System
Installation Instructions Mounting the vent system Vent connections must be firmly pressed together so that the gaskets form an airtight seal. Secure the system with the supplied vent pipe clamp or perforated hanger iron. NOTE Condensate can damage the water heater, please read carefully page 3 in this installation manual. -
Page 10: Installation Instructions Raised Horizontal Discharge Vent System
Installation Instructions Ubbink Rolux® concentric vent system Raised Horizontal Termination Kit Description A 90* elbow B 14.2" (360 mm) vent extension C 30" (750 mm) vent extension D Vent pipe clamp E Horizontal termination F Enclosure Screws/Anchors 3pc. #8x1/2" screws... -
Page 11: Correct Installation Location
Installation of the Raised Horizontal Termination Kit Correct Installation Location Note: Refer to the illustration below and the information on page 4 for correct vent and termination locations. Min.2” Above Grade Identify the vent location - Mount and install the appliance as indicated in the water heater instructions. -
Page 12: Measure Dimension To Fit
Measure dimension to fit - Using the instruction on page 6 cut the vent piece B, to the appropriate length. Note: the outer edge of the extension A should be cut so that it protrudes max. 0.5inch (10 mm) through the outside of the wall. - Slide the cut vent extension through the wall and assemble it to the 90°... -
Page 13: Parts & Dimentions
Parts & Dimensions ® For all Rolux vent system components pitch roof flashing vertical discharge roof terminal wall-thimble flat roof flashing condensate trap kit water heater guard pass through plate bugguard outdoor vent extension cover flashing for metal roof... -
Page 14: Horizontal Discharge Vent System Installation Examples
Horizontal Vent System Installation examples condensate direction min. 1 ˚ (= 0.25 inch/ft) (= 19 mm/m) condensate direction min. 1˚ (= 0.25 inch/ft) (= 19 mm/m) condensate direction condensate direction min. 1 ˚ (= 0.25 inch/ft) (= 19 mm/m) condensate direction min. -
Page 15: Vertical Discharge Vent System Installation Examples
Vertical Vent System Installation examples...
Need help?
Do you have a question about the Rolux and is the answer not in the manual?
Questions and answers