Table of Contents
Advertisement
Quick Links
Advertisement
Table of Contents

Related Manuals for ubbink Ubiflux Vigor W225


Summary of Contents for ubbink Ubiflux Vigor W225
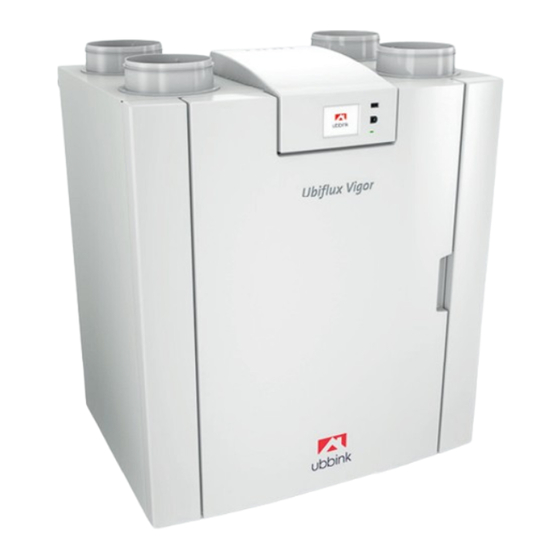
- Page 1 INSTALLATION REGULATIONS Ubiflux Vigor W225 English...
- Page 2 Children may not play with the appliance. If you need a new power cable, always order the replacement from Ubbink NV To prevent dangerous situations, a damaged mains connection must only be replaced by a qualified expert! Country: GB 2 | Art.-nr.: 616711-A...
-
Page 3: Table Of Contents
Contents 1 Delivery 1.1 Delivery size 1 Delivery 10 Electrical diagram Delivery size 11 Electrical connections accessories 2 General 11.1 Connecting position switch Before installation of the heat recovery appliance is started, check that it has been supplied in 11.1.1 Connecting position switch with complete and undamaged condition. -
Page 4: General
2 General 3 Version The Ubifl ux Vigor W225 and the Ubifl ux Vigor W225 Plus is a ventilation unit for the balanced ven- 3.1 Technical information tilation of dwellings with heat recovery. Features: Ubifl ux Vigor W225 (Plus) Supply voltage [V/Hz] 230V/50Hz Maximum capacity 225 m³/h Dimensions (w x h x d) [mm]... -
Page 5: Connections And Dimensions
3.2 Connections and dimensions The Ubifl ux Vigor appliance is available in a left-hand and right-hand version. With a left-hand version the “warm” connections (from dwelling 3 and to dwelling 1) are on the left-hand side of the appliance; the condensate discharge is then mounted at the right-hand opening below the appliance. With a right-hand version the “warm”... -
Page 6: Exploded View Of Appliance
4 Operation 3.3 Exploded view of appliance 4.1 Description The appliance is supplied ready for plugging in and works automatically according to the standard settings. The discharged dirty indoor air warms up the fresh clean outdoor air. That saves energy while fresh air is supplied to the desired rooms. -
Page 7: Frost Protection
5 Installation 4.3 Frost protection To prevent freezing of the heat exchanger at low outdoor temperatures, the appliance features a frost control. 5.1 Installation general Temperature sensors measure the temperatures in the appliance, when required a preheater is switched on. If in the event of very low temperatures the preheater has insuffi cient capacity, stepless unbalance is created in the appliance. -
Page 8: Connecting The Condensate Discharge
5.3 Connecting the condensate discharge The condensate discharge line for the Ubifl ux Vigor appliance is located in the lower panel. The condensate is discharged through the drainpipe. The siphon (with built-in aerator) is supplied separately with the appliance and must be fi tted by the installer below the appliance (bayonet connection). -
Page 9: Connecting Air Ducts
5.4 Connecting air ducts All air ducts must be installed airtight. The collars on the Ubifl ux Vigor appliance are provided as standard with sealing rings. In order to prevent condensation on the outside of the outdoor air supply duct and the air exhaust duct from the Ubifl ux Vigor appliance, these ducts have to be provided with an external vapor barrier as far as the appliance. -
Page 10: Connecting The Ebus Connector
5.5.3 Connecting the eBus connector 5.5.9 Coupling appliances using external Bus For connecting an eBus connector, the 2-pole detachable (green) connector X17 is located at the rear of the display cap ( Exploded view of appliance page 10). The eBus protocol may for instance be used to connect the Air Control ( Connecting Air Control page 42). -
Page 11: Display
6 Display 6.2 Display layout The screen is divided up into 6 zones where various symbols/displays can be shown per zone. 6.1 General explanation of control panel Layout of main screen A display with touchscreen is located at the front of the appliance. This display is used to operate the appliance and to provide the user with information about the status of the appliance. - Page 12 Zone Symbol on Zone Symbol on Description Description display display Control using multiple switch Internet connection/Network connection Control by means of Home. Signal strength Control using touchscreen on appliance; this setting is active for half an hour. USB connection active. Control using touchscreen on appliance;...
-
Page 13: Display Information
7 Starting appliance 6.3 Display information When no keys are operated or when no deviating situation has developed (such as fault message or fi lter message) 7.1 Switching appliance on and off then the light will go out two minutes after the last key has been operated. When there is a fi lter message or a fault in the appliance, then the light of the display will be on permanently until Switching on: the fault has been solved or the fi lter message has been reset. -
Page 14: Other Settings For Installer
As changes in the settings menu can disrupt the proper functioning of the appliance, Non-locking fault changes of settings not described here require consultation with Ubbink NV Incorrect settings may seriously aff ect the proper performance of the appliance! When the appliance detects a non-locking fault, it will keep running (limitedly). The (permanently lighted) display shows the fault symbol. - Page 15 Warning! When working on the appliance, always fi rst take the voltage from the appliance by pulling the power plug. In the table below the locking faults are marked with an * after the fault number. The display shows a brief expla- nation of this fault code.
-
Page 16: Maintenance
9 Maintenance 9.1 Cleaning filter 9.2 Maintenance siphon Cleaning the siphon The maintenance for the user is limited to the periodic cleaning or replacement of the fi lters. The fi lter only has to be cleaned if this is indicated on the display (the fi lter symbol is shown here) if a multiple switch with fi lter indication Every year the siphon must be disconnected and cleaned. -
Page 17: Maintenance Installer
9.3 Maintenance installer Installer maintenance includes cleaning the heat exchanger, internal preheater and fans. Dependent on the conditions, this must done about once every three years. Remove the power supply by pulling out the plug. 4. Remove the heat exchanger. Be careful not to damage the foam Open the fi lter door. -
Page 18: Electrical Diagram
10 Electrical diagram 7. Now remove the fan from the unit; disconnect both fan cables. 8. Repeat steps 6 & 7 for the other fan in the appliance. 9. Carefully clean both fans with a soft brush; do not use any water or cleaning agent. 10. -
Page 19: Electrical Connections Accessories
11 Electrical connections accessories Basic pcb Basic print 2 = Multiple switch (option) X15 = externalBus/ModBus 11.1 Connecting position switch 3 = Humidity sensor (option) X16 = 24V 4 = USB connector X17 = eBus A multiple switch must be connected to the modular connector type X14. This modular connector X14 is accessible from the rear of the control. -
Page 20: Connecting Position Switch With Filter Indication
11.1.1 Connecting position switch with filter indication 11.1.2 Connecting wireless remote control (without filter indication) A = Ubifl ux Vigor appliance (For example a Ubifl ux Vigor appliance type 4-0) B = 4-way switch with fi lter indication C = Modular cable: Note: For the modular cable that is used, the “tab”... -
Page 21: Connecting Extra Multiple Switch With Filter Indication
11.1.3 Connecting extra multiple switch with filter indication 11.1.4 Connecting extra multiple switch with filter indication A = Ubifl ux Vigor appliance(For example a Ubifl ux Vigor appliance type 4-0) B1 = Multiple switch with fi lter indication A = Ubifl ux Vigor appliance (For example a Ubifl ux Vigor appliance type 4-0) B2 = Extra multi switch with fi lter indication B = Multiple switch with fi lter indication C = Splitter... -
Page 22: Connecting Air Control
11.2 Connecting Air Control 11.3 Connecting humidity sensor 1 = Ubifl ux Vigor appliance 2 = Basis pcb A = Ubifl ux Vigor appliance A = Ubifl ux Vigor appliance 3 = Cover B = Air Control (option) 4 = The cable that comes with RH cable C = Two-core control cables 5 = RH (humidity) sensor D = Green two-pole screw connector... -
Page 23: Connecting Co₂ Sensor(S)
11.4 Connecting CO₂ sensor(s) 11.5 Demand-driven ventilation 2.0 Demand-driven ventilation allows the ventilation need to be matched to the air quality. Matching the ventilation need with demand-driven ventilation can be done in two diff erent ways, namely based on CO measurements or based on a time program. -
Page 24: Connecting Postheater
11.6 Connecting postheater 11.7 Connecting preheater Heating coil C1 = brown Heating coil C1 = brown Maximum safety with manual reset C2 = blue Maximum safety with manual reset C2 = blue 2-pole eBus connection X17 on appliance C3 = green/yellow 2-pole eBus connection X17 on appliance 4 = Temperature sensor C3 = green/yellow Temperature sensor... -
Page 25: Connecting Geo-Heat Exchanger
12 Service 11.8 Connecting Geo-heat exchanger 12.1 Exploded view A geo heat exchanger can be connected to the appliance with Plus PCB. When ordering parts, in addition to the article code number (see exploded view), please state Depending on the type of valve the geo heat ex- the heat recovery appliance type, the serial number, the year of production and the name of changer can be connected to diff erent connection the part:... -
Page 26: Service Articles
Side panel (1 item, universal left/right) * The power cable is fi tted with a circuit board connector. When replacing it, always order a replacement mains cable from Ubbink NV. To prevent dangerous situations, a damaged mains connection can only be replaced by a qualifi ed expert. -
Page 27: Setting Values
13 Setting values 13.1 Setting values standard appliance The below setting values are for a Ubiflux Vigor W225-appliance without Plus pcb. Step no. Description Factory settings Setting range Comment Step no. Description Factory settings Setting range Comment Flow rate Filter message... -
Page 28: Setting Values Appliance With Plus Pcb
13.2 Setting values appliance with Plus pcb The below setting values are for a Ubiflux Vigor W225-appliance with Plus pcb. Step no. Description Factory settings Setting range Comment Step no. Description Factory settings Setting range Comment Communication Switch contacts 14.1... -
Page 29: Conformity Declaration
14 Conformity declaration Conformity declaration Manufacturer: Ubbink NV Step no. Description Factory settings Setting range Comment 0 - 10 V. Address: Jan Samijnstraat 9 BE-9050, Gentbrugge, Belgium 10.1 Mode input 1 Aan/ Uit 10.2 Minimum voltage input 1 0V - 10V... -
Page 30: Erp Values
15 ERP values Technical information sheet Ubiflux Vigor W225 (Plus) in accordance with Ecodesign (ErP), no. 1254/2014 (Annex IV) Classification from 1 January 2016 SEC class ("Average climate zone") SEC in kWh/m²/a Manufacturer: Ubbink NV Model: Ubiflux Vigor W225 (Plus) A+ (Most efficient) SEC <... -
Page 31: Recycling
16 Recycling Recycling Sustainable materials are used in the manufacture of this appliance. The packaging should be disposed of in a responsible manner and in accordance with governmental regulations. 60 | Art.-nr.: 616711-A Ubifl ux Vigor W225 | 61... - Page 32 Ubbink NV/SA - Jan Samijnstraat 9, B – 9050 Gentbrugge Tel. +32 (0)9 237 11 00 - www.ubbink.be - info@ubbink.be Ubbink (UK) Ltd. - Unit 2, Redbourne Park, Liliput Road Brackmills Ind. Est., Northampton, NN4 7DT - T +44 (0)1604 433000, F. +44 (0)1604 433001...
Need help?
Do you have a question about the Ubiflux Vigor W225 and is the answer not in the manual?
Questions and answers