Advertisement
Table of Contents
- 1 Table of Contents
- 2 Selecting Installation Site
- 3 Preparations before Installation
- 4 Refrigerant Piping Work
- 5 Drain Piping Work
- 6 Electric Wiring Work
- 7 Wiring Example and How to Set the Remote Controller
- 8 Wiring Example
- 9 Test Operation
- 10 Disposal Requirements
- 11 Wiring Diagram
- Download this manual
Advertisement
Table of Contents

Related Manuals for Daikin FXZQ15A2VEB


Summary of Contents for Daikin FXZQ15A2VEB
- Page 1 INSTALLATION AND OPERATION MANUAL System air conditioners FXZQ15A2VEB FXZQ20A2VEB FXZQ25A2VEB FXZQ32A2VEB FXZQ40A2VEB FXZQ50A2VEB...
- Page 2 10 5...
- Page 3 3P323721–5C...
-
Page 4: Table Of Contents
EQUIPMENT OR ACCESSORIES COULD RESULT IN ELECTRIC SHOCK, SHORT-CIRCUIT, LEAKS, FIRE OR OTHER DAMAGE TO THE EQUIPMENT. BE SURE ONLY TO USE ACCESSORIES MADE BY DAIKIN WHICH ARE SPECIFICALLY DESIGNED FOR USE WITH THE EQUIPMENT AND HAVE THEM INSTALLED BY A PROFESSIONAL. -
Page 5: Selecting Installation Site
For the following items, take special care during Select an installation site where the following conditions are fulfilled and that meets your customer's approval. construction and check after installation is finished • Where optimum air distribution can be ensured. • Where nothing blocks air passage. -
Page 6: Preparations Before Installation
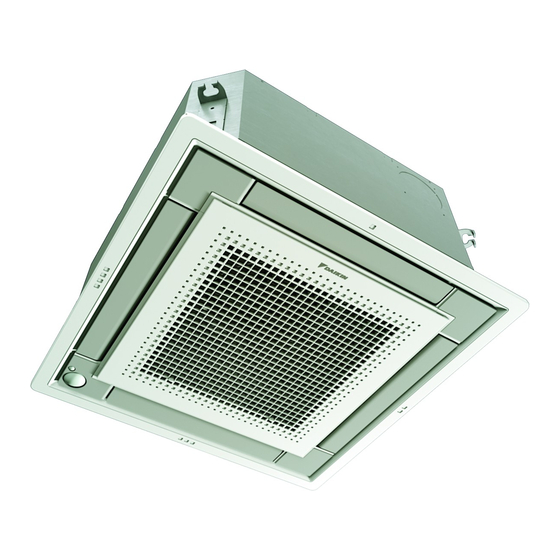
Preparations before installation Indoor unit installation Relation of ceiling opening to unit and suspension bolt position. When installing optional accessories (except for the decoration In case of decoration panel panel), read also the installation manual of the optional accessories. BYFQ60C: See figure 3.1 Depending on the field conditions, it may be easier to install optional BYFQ60B: See... -
Page 7: Refrigerant Piping Work
Refrigerant piping work Finally, insulate as shown in the figure below (use the supplied accessory parts) For refrigerant piping of outdoor unit, refer to the installation manual Liquid pipe supplied with the outdoor unit. Gas pipe Execute heat insulation work completely on both sides of the gas Insulation for fitting for liquid piping and liquid piping. -
Page 8: Drain Piping Work
Cautions for brazing After the testing of drain piping is finished, attach the drain sealing pad (4) supplied with the unit over the uncovered part Be sure to carry out a nitrogen blow when brazing. of the drain socket (= between drain hose and unit body). Brazing without carrying out nitrogen replacement or releasing nitrogen into the piping will create large quantities of oxidized A-A'... -
Page 9: Electric Wiring Work
Electric wiring work Testing of drain piping After the piping work is finished, check if drainage flows smoothly. Add approximately 1 l of water gradually through the air General instructions discharge outlet. All field wiring and components must be installed by a licensed ... -
Page 10: Wiring Example And How To Set The Remote Controller
Electrical characteristics Precautions Observe the notes mentioned below when wiring to the power Model Volts Voltage range supply terminal block. FXZQ15~50 220-240 min. 198-max. 264 Use a round crimp-style terminal for insulation sleeve for connection to the terminal block for wiring the units. When none are available, follow the instructions below. -
Page 11: Wiring Example
Wiring example Summary of field settings Fit the power supply wiring of each unit with a switch and fuse as Mode First Second code No. (Note 2) shown in figure code (Note 1) No. Description of setting Filter contamination Power supply - Heavy/Light = Setting to define Main switch... -
Page 12: Test Operation
Test operation Control by 2 Remote Controllers (Controlling 1 indoor unit by 2 remote controllers) Refer to the installation manual of the outdoor unit. When using 2 remote controllers, one must be set to "MAIN" and the other to "SUB". When performing field settings or test operation NOTE without attaching the decoration panel, do not touch... -
Page 13: Disposal Requirements
In case of decoration panel BYFQ60C see figures marked A How to clean the air outlet and outside panels BYFQ60B see figures marked B Clean with a soft cloth. Open the suction grille (See figure 20) (action When it is difficult to remove stains, use water or neutral ... -
Page 14: Wiring Diagram
Wiring diagram Indoor unit Wireless remote controller (receiver/display unit) A1P ..... Printed circuit board A2P...... Printed circuit board C105....Capacitor (M1F) A3P...... Printed circuit board F1U ..... Fuse (T, 3.15 A, 250 V) BS1...... Push button switch on PCB HAP..... Flashing lamp (service monitor green) H1P ..... - Page 15 Control box Control box Control box IN/D OUT/D IN/D OUT/D OUT/D IN/D Control box IN/D OUT/D SETTING FORCED...
- Page 16 4P341102-1B 2013.06...
Need help?
Do you have a question about the FXZQ15A2VEB and is the answer not in the manual?
Questions and answers