Table of Contents
Advertisement
Quick Links
Download this manual
See also:
User Manual
Advertisement
Table of Contents

Related Manuals for Edimax IC-1510


Summary of Contents for Edimax IC-1510
- Page 2 Multi-Languages QIG in Driver CD ================================================== Český: Českého průvodce rychlou instalací naleznete na přiloženém CD s ovladači Deutsch: Finden Sie bitte das deutsche QIG beiliegend in der Treiber CD Español: Incluido en el CD el QIG en Español Français: Veuillez trouver l‟français QIG ci-joint dans le CD Italiano: Incluso nel CD il QIG in Italiano Magyar: A magyar telepí...
- Page 3 Copyright by Edimax Technology Co, LTD. all rights reserved. No part of this publication may be reproduced, transmitted, transcribed, stored in a retrieval system, or translated into any language or computer language, in any form or by any means, electronic, mechanical, magnetic, optical, chemical, manual or otherwise, without the prior written permission of this Company.
-
Page 4: Table Of Contents
Content Product Information ................1 Check your package contents ............1 System Requirement ................. 1 Hardware Installation ................. 2 4.1. LED and Focusing ............... 2 4.2. Camera Ports ................3 4.3. Installation Procedure ..............4 Locate the IP Address ................ 5 Web Management Interface............... -
Page 5: Product Information
Product Information Complies with IEEE802.3, 802.3u standards Complies with Wireless 802.11b/g standards with WEP, WPA and WPA2 encryption (IC-1510Wg only) Supports high speed hardware-based Motion-JPEG compression Supports video resolution :640x480 (VGA), 320x240 (CIF) and 160x120(QCIF) Supports Snapshot-to-Email on events and predetermined schedule recordings in AVI format ... -
Page 6: Hardware Installation
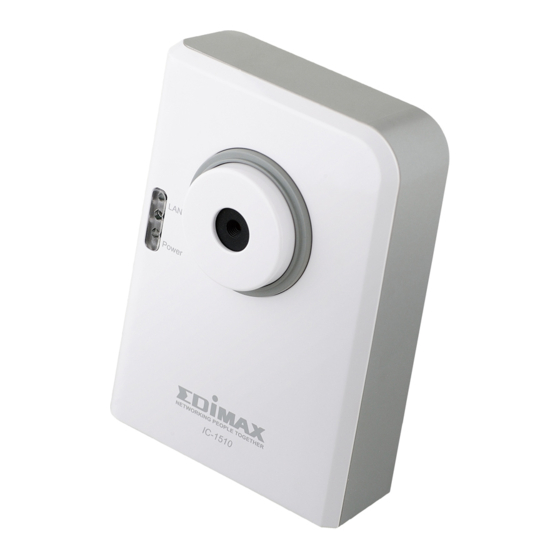
Hardware Installation 4.1. LED and Focusing The Camera head and its focus ring allow you to modify the aim and focus of the Camera. To adjust the Camera‟s focus, rotate the dark focus ring. There are three LEDs indicating the camera status and networking status. Power ... -
Page 7: Camera Ports
4.2. Camera Ports The Camera features two ports and a Reset button. Antenna connector The Standard reverse SMA connector is for any antennas with reverse SMA connector can connect to the Internet Camera. Antenna connector Power The Power port is where you can connect the power adapter. ... -
Page 8: Installation Procedure
4.3. Installation Procedure 1. Unpack the Internet Camera package and verify that all the items listed in the Chapter 1 are provided. 2. Connect the Internet Camera to your network by attached the network cable from the switch/router to the LAN port of the Internet Camera. 3. -
Page 9: Locate The Ip Address
Locate the IP Address Default IP address of this IP camera is 192.168.2.3. If you wish to assign another IP address to this IP camera, you have to log onto the web configuration interface of the camera first. If the left three fields of the IP address of your computer is not 192.168.2.XXX , you‟ll have to change the IP address of your computer first: 1. - Page 10 2. Double-click „Network Connections‟ icon. 3. Right-click „Local Area Connection‟, and click „Properties‟.
- Page 11 4. Select „Internet Protocol (TCP/IP)‟, and then click „Properties‟. 5. In „IP address‟ field, please fill in any IP address begins with „192.168.2‟, and ends with a value greater than 2 and less than 254 (You can use the example in the picture „192.168.2.239‟). In Subnet mask field, please fill „255.255.255.0‟.
- Page 12 If you changed the IP address of this IP camera and you forget it, there‟re 2 methods to recover it: a. Press and hold the „Reset‟ button located at the bottom of this IP camera, to clear all settings of the IP camera and reset the IP address back to 192.168.2.3.
-
Page 13: Web Management Interface
Web Management Interface Make sure the IP camera is correctly powered (Power LED is on), and then launch Internet Explorer and type the IP address of the IP camera in address bar of Internet Explorer. You should be prompted to input the user name and password: Default user name is „admin‟... - Page 14 This IP camera requires a special ActiveX control (A.K.A. „Plugin‟) to work. Please click on the message, and select „Install ActiveX Control…‟: When you‟re prompted, click „Install‟ to continue. You should be able to see the image from camera now: Note: If you see one of these messages (or both):...
- Page 15 Your computer may not have the display capability that this IP camera requires, or you don’t have Microsoft DirectX® installed. Please download Microsoft DirectX® from Microsoft’s website (http://www.microsoft.com), and try again. In some cases, your computer is able to display the image from IP camera correctly, but you’ll still see these messages.
-
Page 16: Software Installation
Software Installation Follow the simple steps below to run the Install Wizard to guide you quickly through the Installation process. The following installation is implemented in Windows XP. The installation procedures in Windows 2000/XP/Server 2003 /Vista are similar. 1. Insert the CD shipped along with the Internet Camera into your CD-ROM drive. - Page 17 3. The system will start the installation procedures. Click “Next” to continue installation. 4. If you wish to install the software program in an alternate location, click “Change”; otherwise click “Next” to move on to the next step.
- Page 18 5. Click “Install” to start installing the program. 6. The system will install the program automatically.
- Page 19 7. Click “Finish” to complete the software installation. 8. When the installation is completed. The system will auto run ”Administrator Utility“. On the Internet Camera first page, the cameras found in the network are listed in the left window. Choose the one you want to configure and click “Setting Wizard”...
- Page 20 9. Please enter the default password “1234” and click “OK” to login to the IP setup page. 10. Internet Camera is working through the network (TCP/IP Protocol). The IP address setting must be correct, or you cannot access to the camera. The wizard program will detect the IP address status of your network automatically and suggest a free IP address for the Camera.
- Page 21 11. This wizard will pop up a window to ask you if you want to run the “Camera Viewer” and see the video of the Camera immediately. Select “OK” to run “Camera Viewer”. 12. The “Camera Viewer” will show the video automatically. Congratulations, you can use the camera through the network to view the video from now...
-
Page 22: Network Configuration
Network Configurations When you click the “Detail Setting”, a screen will pop up for you to enter the “Administrator Name” and “Password”. The default value is as follows. Name: “Admin” Password: “1234” If the name and password you enter are correct, you can start to setup the network configuration of this IP camera. -
Page 23: Network Setting
8.1.1. Network Setting Network Setting The default camera name is “IC1500WG”. It is Internet Camera recommended to name a meaningful name for the Name camera. Enter an unused IP Address within the IP address range used on your LAN. If the IP Address of your IP Address LAN is from the 192.168.2.1 to 192.168.2.254, you can set an unused IP Address from the range for... - Page 24 The Gateway is used to forward frames to destinations in a different subnet on the Internet. Gateway The Gateway setting must be the same with the gateway used by the PCs on your LAN. DNS Server (Domain Name Server) that translates DNS Server names to IP addresses.
-
Page 25: Wireless Settings (Ic-1510Wg Only)
8.1.2. Wireless Settings (IC-1510Wg Only) You must configure the wireless settings from wired environment. Then you can remove the wired cable and start wireless connection. Utility will site survey automatically or you can press “Refresh” button to survey the AP router manually. - Page 26 After site survey procedure, there will show existing AP SSID. Then press “Connect” to connect AP router or press “Add to Profile” to configure the Wireless WEP and WPA encryption.
- Page 27 There are WEP (Open System/Shared Key) ,WPA-PSK,WPA2-PSK and WPANone encryption settings. You can choose one to match AP router wireless settings. After set the profile, Please remove the LAN cable then IP Camera will connect to AP router automatically. LED Status Diagram Wired Setting Environment Wireless Setting Environment...
-
Page 28: Firmware Upgrade
Firmware Upgrade Here provides several tools to upgrade the firmware of this IP camera, clear all settings, or switch LED notification off. The descriptions of every setting in this menu will be given below:... - Page 29 Item Description Upgrade If you downloaded latest firmware file from our Firmware website, you can click this button to start to upload the firmware file to the IP camera, and you‟ll be prompted to provide the location of firmware file. Click „Open‟...
- Page 30 Portugal, Spain, Sweden, and the United Kingdom. The ETSI version of this device is also authorized for use in EFTA member states: Iceland, Liechtenstein, Norway, and Switzerland. EU Countries not intended for use None Please check the declaration of conformity on www.edimax.com...
Need help?
Do you have a question about the IC-1510 and is the answer not in the manual?
Questions and answers