Table of Contents
Advertisement
Advertisement
Table of Contents

Related Manuals for XTM Racing RAIL


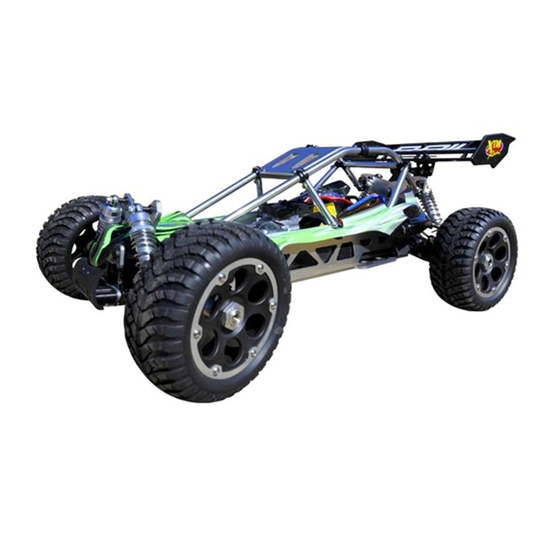
Summary of Contents for XTM Racing RAIL
- Page 1 Page 1...
- Page 2 This combination of power and cooling has solved the issue of thermal shutdowns to allow you to enjoy the Rail each and every run, whether using a simple 6 Cell Ni-MH battery pack, or a 4S Li-Po battery pack.
- Page 3 In that XTM Racing has no control over the final assembly or material used for final assembly, no liability shall be assumed for any damage resulting from the use by the user of the final user-assembled product. By the act of using the final user-assembled product, the user accepts all resulting liability.
- Page 4 KIT CONTENTS After opening your Rail Brushless Off-Road Buggy, remove all of the parts from the box and double-check that you have all of the items listed below. If you find a part is missing or damaged, please contact your regional distributor, using the Customer Service Information on page 3.
- Page 5 ESC programming card. n Battery Requirements The Rail Brushless Off-Road Buggy can be powered using either one battery pack or two battery packs wired in series. You can use either Ni-Cd, Ni-MH, or Li-Po battery packs.
- Page 6 ESC Battery Leads: The ESC battery leads are where you plug your battery pack in to power your Rail. The ESC battery leads feature high-quality 12 AWG silicone wire and gold-plated 4mm male Bullet connectors.
- Page 7 For more information, see page 10. The motor used in the Rail is a sensorless brushless motor. Therefore, the Sensor input on the ESC is not utilised. The motor leads from the ESC can be plugged into any of the motor leads from the motor without issue. If the motor runs backwards, swap two of the motor leads and the motor will run in the correct direction (counter-clockwise).
- Page 8 If you prefer to change the connectors, make sure to observe correct polarity and use heat-shrink tubing to insulate the solder joints. Before checking the steering and throttle controls, we recommend placing the Rail on a car stand so that the wheels are off the ground.
- Page 9 PREPARING TO RUN YOUR RAIL bRUShLESS Off-ROAD bUGGY n Battery Pack Installation and Power Connections q Verify that the ESC On/Off switch is turned 'OFF'. To ensure your safety, it's important that the ESC be turned 'OFF' when connecting your battery pack(s).
- Page 10 Checking the Steering and Throttle Controls IMPORTANT: Before checking the steering and throttle controls, we recommend placing the Rail on a car stand so that the wheels are off the ground. This will ensure your safety and the safety of your model while testing the throttle control.
- Page 11 As a safety precaution to prevent damage to the drivetrain, the Rail must be stopped before going into reverse. When the Rail is moving forward and you push the throttle trigger to go into reverse, the Rail will begin to brake and come to a stop. To go into reverse, release the throttle trigger momentarily, then push the throttle trigger forward again.
- Page 12 The ESC programming card can be powered by separate battery pack, or by the Rail's motor batteries for use at the track. In addition, all of the programming information is printed on the ESC programming card for the utmost in convenience.
- Page 13 PREPARING TO RUN YOUR RAIL bRUShLESS Off-ROAD bUGGY Powering the ESC Programming Card from the Motor Battery, Continued..q Turn the ESC 'OFF'. The new settings will be saved in the ESC's memory. q Apply threadlock to the grub screw, then reinstall the pinion gear, making sure to tighten the grub screw against the flat spot on the motor shaft.
- Page 14 The Rail features a 14T pinion gear that provides the highest top speed. If driving on a track or in smaller areas, we recommend using an XTM Racing 13T pinion gear. This will cut down slightly on the top speed, but acceleration will be better and you will get a little longer run-time.
- Page 15 How you drive your Rail will dictate what settings you should be using. As an example, if you're driving your Rail off-road and going over lots of jumps, you may want to increase the spring tension of the front shocks to help prevent the front of the Rail from bottoming out.
- Page 16 Changing Shock Springs - Front and Rear Shock springs are easy to change and can make a difference in the way your Rail handles relative to the type of terrain you're driving on. If you drive your Rail off-road, in a smooth, high-traction area, use stiffer springs to reduce body roll and weight shift. If the area where you drive your Rail is very bumpy, you might consider using softer springs to help absorb the bumps.
- Page 17 Adjusting Steering Sensitivity - Front You can adjust your Rail's steering sensitivity by tightening or loosening the servo saver spring. In general, tightening the servo saver spring will cause the steering to be more responsive, and loosening the servo saver spring will cause the steering to be less responsive.
- Page 18 Using a heavier weight oil will provide a more even amount of power to the front and rear. On loose tracks, this can cause the Rail to be too 'squirrely' (uncontrollable) or cause the rear end to slide out. For this reason, we only suggest using heavier oil if you're driving on a high-traction surface.
- Page 19 The gear mesh should be set so that there is very slight play between the pinion gear and the spur gear. If you're using either of the XTM Racing 12T, 13T, or 14T pinion gears, the gear mesh is set correctly based on the particular motor mounting holes you install the motor into.
- Page 20 Quick Break Down Guide This Quick Break Down Guide is provided to show how to break down the main component parts of the Rail for maintenance or for repair. For more detailed Assembly Drawings, refer to the Exploded View Assembly Drawings section on pages 28 ~ 58.
- Page 21 mAINTENANCE AND qUICK bREAK DOWN GUIDE n Quick Break Down Guide, Continued..2: removing the motor and centre differential Assembly Unplug the motors wires from the ESC, then unplug the two motor heat-sink fans from the Y-Harness adapter. Unplug the throttle channel lead from the receiver, then pull it out from below the motor heat-sink fans.
- Page 22 mAINTENANCE AND qUICK bREAK DOWN GUIDE n Quick Break Down Guide, Continued..3: removing the Electronic speed controller (Esc) Unplug the motor wires from the ESC, then unplug the Y-Harness from the motor heat-sink fans. Next, unplug the throttle channel lead from the receiver. Pull the ESC up and out of the chassis.
- Page 23 mAINTENANCE AND qUICK bREAK DOWN GUIDE n Quick Break Down Guide, Continued..4: removing the Battery holder Pull the battery holder up and out of the chassis. Remove the four 3 x 10mm self-tapping screws from the bottom of the chassis that hold the battery holder in place.
- Page 24 mAINTENANCE AND qUICK bREAK DOWN GUIDE n Quick Break Down Guide, Continued..5: removing the receiver mounting Box Remove the receiver box lid, then unplug the steering servo and throttle channel leads from the receiver. Pull the receiver mounting box up and out of the chassis. Remove the two 3 x 8mm machine screws from the bottom of the chassis that hold the receiver mounting box in place.
- Page 25 mAINTENANCE AND qUICK bREAK DOWN GUIDE n Quick Break Down Guide, Continued..6: removing the rear suspension Assembly Remove the 3 x 20mm machine screw and the lock nut that hold the front of the rear suspension mounting brace in place. Pull the rear suspension assembly, along with the rear centre dog bone, up and off the chassis.
- Page 26 mAINTENANCE AND qUICK bREAK DOWN GUIDE n Quick Break Down Guide, Continued..7: removing the front suspension Assembly Remove the two 3 x 20mm machine screws that secure the steering tie-rods to the steering knuckles. Remove the 3 x 15mm self-tapping screw that holds front chassis brace to the front chassis cross-brace.
- Page 27 Troubleshooting Guide, please contact your regional distributor, using the Customer Service Information on page 3. For troubleshooting information related to the radio control system included with you Rail, please refer to the separate radio control system Operating Manual.
- Page 28 ExPLODED vIEW ASSEmbLY DRAWINGS STEP 1: FRONT, REAR AND CENTRE DIFFERENTIALS 149893 149893 (149899) O-Ring 3 x 1mm -- 12 (149895) Pin 2.5 x 12.8mm -- 6 149899 149899 (149895) Pin 4 x 26.6mm -- 6 149563 149563 148602 148602 148623 148623 148602...
- Page 29 ExPLODED vIEW ASSEmbLY DRAWINGS STEP 3: FRONT AND REAR DIFFERENTIAL HOUSINGS 148593 (148593) Round Head Tapping Screw 2 x 10mm -- 8 149778 (148572) Grub Screw w/Threadlock 5 x 4mm -- 2 (149563) Ball Bearing 8 x 16 x 5mm -- 2 Step 1 148593 Step 2...
- Page 30 ExPLODED vIEW ASSEmbLY DRAWINGS STEP 5: FRONT SHOCK TOWER (148506) Cap Screw 3 x 16mm -- 4 (148558) Lock Nut 3mm -- 4 148558 (148576) Button Head Tapping Screw 3 x 10mm -- 1 (148511) Cap Screw 3 x 25mm -- 2 148558 Sub-5 148576...
- Page 31 ExPLODED vIEW ASSEmbLY DRAWINGS STEP 7: FRONT UPPER SUSPENSION ARMS (148567) Grub Screw 4 x 10mm -- 2 (149491) Turnbuckle 5 x 25mm -- 2 148707 149491 148692 8.8mm 148567 148707 148692 for right and left sides (x2) 148706 STEP 8: FRONT LOWER SUSPENSION ARMS AND AXLES (148613) Button Head Screw w/Threadlock 4 x 20mm -- 2 Step 7L 148613...
- Page 32 ExPLODED vIEW ASSEmbLY DRAWINGS STEP 9: FRONT SUSPENSION (148558) Lock Nut 3mm -- 2 (149901) Hinge Pin 4 x 67.5mm -- 2 (148615) Button Head Tapping Screw 4 x 8mm -- 2 (148648) Cap Screw 3 x 45mm -- 2 (148584) Button Head Tapping Screw 4 x 12mm -- 2 Step 5 149915...
- Page 33 ExPLODED vIEW ASSEmbLY DRAWINGS STEP 11: WING MOUNT (148581) Button Head Tapping Screw 3 x 18mm -- 4 (149271) Post 6 x 32mm -- 2 148581 149271 149271 149271 149271 149271 148581 STEP 12: REAR SHOCK TOWER (148558) Lock Nut 3mm -- 4 (148649) Cap Screw 4 x 45mm -- 1 (148559) Lock Nut 4mm -- 1 (148511) Cap Screw 3 x 25mm -- 6...
- Page 34 ExPLODED vIEW ASSEmbLY DRAWINGS STEP 13: REAR HUBS 149301 (148574) Grub Screw w/Threadlock 5 x 5mm -- 2 149483 for left side (149305) Pin 2.5 x 16.8mm -- 2 149563 149563 149305 149483 (148624) Shim 8 x 12 x 0.2mm -- 2 148624 148574 149305...
- Page 35 ExPLODED vIEW ASSEmbLY DRAWINGS STEP 15: REAR SUSPENSION (148560) Flanged Lock Nut 3mm -- 2 (149901) Hinge Pin 4 x 67.2mm -- 2 (148509) Cap Screw 3 x 20mm -- 2 (148584) Button Head Tapping Screw 4 x 12mm -- 2 148584 Step 10 Step 14R...
- Page 36 ExPLODED vIEW ASSEmbLY DRAWINGS STEP 17: FRONT CHASSIS BRACE (148559) Lock Nut 4mm -- 1 (148507) Cap Screw 4 x 50mm -- 1 (148578) Button Head Tapping Screw 3 x 12mm -- 1 148559 148697 Step 9 148578 148507 STEP 18: CHASSIS SIDE GUARDS (148601) Flat Head Tapping Screw 3 x 12mm -- 8 148680 148676...
- Page 37 ExPLODED vIEW ASSEmbLY DRAWINGS STEP 19: CHASSIS (148558) Lock Nut 3mm -- 8 (148548) Flat Head Screw w/Threadlock 4 x 10mm -- 2 (148539) Flat Head Screw 3 x 10mm -- 8 148558 148558 Step 18 R 148558 149455 149455 148539 148558 148690...
- Page 38 ExPLODED vIEW ASSEmbLY DRAWINGS STEP 21: SERVO SAVER AND STEERING LINKAGES (148558) Lock Nut 3mm -- 4 (149559) Flanged Ball Bearing 5 x 8 x 2.5mm -- 2 (149457) Servo Saver Screw 3 x 19.7mm -- 2 149567 (148509) Cap Screw 3 x 20mm -- 2 149455 149567 (149567) Bushing 6 x 10 x 3mm -- 4...
- Page 39 ExPLODED vIEW ASSEmbLY DRAWINGS STEP 22: MOTOR MOUNTING AND CENTRE DIFFERENTIAL (148570) Grub Screw w/Threadlock 4 x 4mm -- 1 (148576) Button Head Tapping Screw 3 x 10mm -- 2 (150040) Post 6 x 6mm -- 8 (148525) Button Head Screw w/Threadlock 3 x 8mm -- 2 (148509) Cap Screw 3 x 20mm -- 8 (148527) Button Head Screw w/Threadlock 3 x 12mm -- 4 148509...
- Page 40 ExPLODED vIEW ASSEmbLY DRAWINGS STEP 23: FRONT AND REAR SHOCKS (149840) Shock Shaft 3.5 x 52mm -- 2 (149840 / 149841) Lock Nut 2.6mm -- 4 (149841) Shock Shaft 3.5 x 61mm -- 2 (149840 / 149841) Washer 2.5 x 5.9 x 0.5mm -- 4 (149840 / 149841) O-Ring 2.5 x 1mm -- 4 (148660) Shock Body 14 x 45mm -- 2 (149850) O-Ring 3mm -- 4...
- Page 41 ExPLODED vIEW ASSEmbLY DRAWINGS STEP 24: SHOCK OIL 149850 silicone shock oil (Not Included) 148660 148661 After filling with shock oil, gENtly Pump shaft up and down several times to Eliminate Air Bubbles. Step 23 for front and rear (x4) STEP 25: SHOCK SPRINGS (148672) Shock Spring 58 x 1.6mm (Silver) -- 2 (148673) Shock Spring 80.5 x 1.6mm (Silver) -- 2...
- Page 42 ExPLODED vIEW ASSEmbLY DRAWINGS STEP 26: FRONT SHOCK MOUNTING (148560) Flanged Lock Nut 3mm -- 2 (148542) Flat Head Screw 3 x 20mm -- 2 right side 149347 148560 Step 25 Step 17 148542 left side STEP 27: REAR SHOCK MOUNTING (148560) Flanged Lock Nut 3mm -- 2 (148542) Flat Head Screw 3 x 20mm -- 2 left side...
- Page 43 ExPLODED vIEW ASSEmbLY DRAWINGS STEP 28: STEERING SERVO AND MOTOR/CENTRE DIFFERENTIAL MOUNTING (148576) Button Head Tapping Screw 3 x 10mm -- 6 (148600) Flat Head Tapping Screw 3 x 10mm -- 4 (148607) Flat Head Tapping Screw 4 x 12mm -- 2 (148548) Flat Head Screw w/Threadlock 4 x 10mm -- 2 148576 148698...
- Page 44 ExPLODED vIEW ASSEmbLY DRAWINGS STEP 29: FRONT SUSPENSION MOUNTING (148607) Flat Head Tapping Screw 4 x 12mm -- 2 (148598) Flat Head Tapping Screw 4 x 16mm -- 4 149984 Sub-29 Step 26 148696 Sub-29 Step 28 148607 148598 148598 Continued On Next Page Page 44...
- Page 45 ExPLODED vIEW ASSEmbLY DRAWINGS STEP 30: STEERING LINKAGE MOUNTING (148627) Button Head Screw 3 x 20mm -- 2 (148621 ) Shim 6 x 9.8 x 0.2mm -- 2 (148579) Button Head Tapping Screw 3 x 15mm -- 1 (148659) Button Head Screw 3 x 22mm -- 2 (148554) Washer Head Screw w/Threadlock 4 x 10mm -- 2 (148558) Lock Nut 3mm -- 2 148579...
- Page 46 ExPLODED vIEW ASSEmbLY DRAWINGS STEP 31: REAR SUSPENSION MOUNTING (148558) Lock Nut 3mm -- 1 (148598) Flat Head Tapping Screw 4 x 16mm -- 4 (148542) Flat Head Screw 3 x 20mm -- 1 Step 27 148558 149791 Step 30 148598 148598 148542...
- Page 47 ExPLODED vIEW ASSEmbLY DRAWINGS STEP 32: BATTERY HOLDER INSTALLATION (148600) Flat Head Tapping Screw 3 x 10mm -- 4 150039 148668 Sub-32 Sub-32 Step 31 148600 148600 148600 Continued On Next Page Page 47...
- Page 48 ExPLODED vIEW ASSEmbLY DRAWINGS STEP 33: Electronic Speed Controller MOUNTING (148529) Button Head Screw 3 x 6mm -- 2 BLue BLACk YeLLow YeLLow oRAnge 145652 Step 32 double-Sided Tape 148529 Continued On Next Page Page 48...
- Page 49 ExPLODED vIEW ASSEmbLY DRAWINGS STEP 34: BATTERY AND RECEIVER CONNECTIONS ni-MH Battery (6C) Brushless Motor Li-Po Battery (2S) neg- PoS+ neg- neg- PoS+ ni-MH Battery (6C) PoS+ Li-Po Battery (2S) Red (Positive) Black (negative) white (neutral) Brushless eSC CH 1 CH 2 CH 2 CH 3...
- Page 50 ExPLODED vIEW ASSEmbLY DRAWINGS STEP 35: STEERING LINKAGE (148558) Lock Nut 3mm -- 1 (148527) Button Head Screw w/Threadlock 3 x 12mm -- 1 (148508) Cap Screw 3 x 18mm -- 1 (148560) Flanged Lock Nut 3mm -- 1 (149333) Threaded Stud 3 x 16mm -- 1 148527 149333 149312...
- Page 51 ExPLODED vIEW ASSEmbLY DRAWINGS STEP 36: RECEIVER CASE (148576) Button Head Tapping Screw 3 x 10mm -- 4 (149860) Flanged Lock Nut 4mm -- 1 (148546) Flat Head Screw w/Threadlock 3 x 8mm -- 2 (148526) Button Head Screw 3 x 15mm -- 2 (150042) Post 6 x 19mm -- 2 149860 149860...
- Page 52 ExPLODED vIEW ASSEmbLY DRAWINGS STEP 37: ANTENNA SUPPORT TUBE Antenna Support Tube slide the Antenna through the Antenna support tube, then Push the Antenna support tube into the Antenna mount in the top of the receiver Box. tighten the Knurled Nut finger tight to secure. Step 36 do Not cut any Excess Antenna shorter.
- Page 53 ExPLODED vIEW ASSEmbLY DRAWINGS STEP 38: ROOF PLATE MOUNTS (148546) Flat Head Screw w/Threadlock 3 x 8mm -- 4 148546 148546 148546 148546 148684 148684 148678 148678 STEP 39: REAR CENTRE ROLL BAR (148582) Button Head Tapping Screw 3 x 8mm -- 4 148582 Sub-39 148582...
- Page 54 ExPLODED vIEW ASSEmbLY DRAWINGS STEP 40: FRONT CENTRE ROLL BAR (148505) Cap Screw w/Threadlock 3 x 10mm -- 2 (148582) Button Head Tapping Screw 3 x 8mm -- 2 148582 148677 148677 148677 148682 Step 39 148505 148677 Sub-40 148505 Sub-40 STEP 41: ROOF PLATE (148576) Button Head Tapping Screw 3 x 10mm -- 4...
- Page 55 ExPLODED vIEW ASSEmbLY DRAWINGS STEP 42: ROLL BAR POSTS (148582) Button Head Tapping Screw 3 x 8mm -- 6 148582 Step 41 148685 148582 148687 148683 148582 Continued On Next Page Page 55...
- Page 56 ExPLODED vIEW ASSEmbLY DRAWINGS STEP 43: ROLL BAR MOUNTING (148558) Lock Nut 3mm -- 2 (148582) Button Head Tapping Screw 3 x 8mm -- 6 148582 148582 Step 42 148558 148582 148582 148558 148582 148582 Step 36 Continued On Next Page Page 56...
- Page 57 ExPLODED vIEW ASSEmbLY DRAWINGS STEP 44: TYRES AND WHEELS Inside outside C/A Tyre glue 148665 not Included Apply c/A tyre glue to Both sides of the tyre/wheel. It's Important 148664 that the tyre is securely Affixed to the wheel. 148665 for right and left sides (x4) STEP 45: WHEEL RINGS (148502) Button Head Screw 3 x 6mm -- 24...
- Page 58 ExPLODED vIEW ASSEmbLY DRAWINGS STEP 46: WHEELS, BODY AND WING MOUNTING (149303) Wheel Nut 17mm -- 4 149319 149319 148709 149319 149319 149319 149321 149554 149303 Step 45 right side left side Step 43 149303 Step 45 Page 58...
- Page 59 REPLACEmENT PARTS LIST We stock a complete set of replacement parts for your Rail Brushless Off-Road Buggy. The replacement parts that are available, along with their respective part numbers for easy ordering convenience, are illustrated in this section. When it comes time to order replacement parts, we recommend ordering directly from your local hobby retailer.
- Page 60 REPLACEmENT PARTS LIST Qty. 2 1.6mm/Silver/L=80.5mm 3mm/6061 3mm/6061 148673 148674 148675 148676 Shock Springs - Rear Suspension Plate - Lower Front or Rear Suspension Plate - Upper Front Body Mount Set Qty. 2 Qty. 2 148677 148678 148679 148680 Roll Bar Stopper Set Roof Plate Mounts Roll Bar Connectors Roll Bar Mount Set...
- Page 61 REPLACEmENT PARTS LIST 2mm/6061 3mm/6061 148697 148699 148702 148698 Chassis Brace - Front Radio Plate Centre Differential Mount Main Gear Plate 3mm/6061 Qty. 2 Qty. 2 148703 148706 148707 148708 Servo Saver Support Plate Suspension Arms - Lower Front Suspension Arms - Upper Front Receiver Mounting Box Sorry, No Image Available Green/Carbon...
- Page 62 REPLACEmENT PARTS LIST Qty. 5 L=80mm L=48mm Qty. 2 149343 149321 149331 149333 Steering Tie-Rod Set - 4mm Steering Servo Rod Set Steering Knuckles Body Clips - Type 'R' Qty. 4 L=43.5mm 149347 149381 149453 149455 Shock Spring Spacer Bushing Set Hub Studs - Rear Servo Saver Plastic Parts Servo Saver Metal Parts...
- Page 63 REPLACEmENT PARTS LIST 3.5mm Shaft/L=61mm L=74mm 149841 149850 149851 149859 Shock Shaft Set - Rear Shock Rebuild Kit for 3.5mm Shafts Cooling Fan Y-Adapter Brushless Motor Heat-Sink Dual 149863 Fans L=74mm 30x30x10mm 149860 149862 149863 149884 Antenna Mount Motor Heat-Sink w/Cooling Fans Cooling Fan - Small Steering Servo Mount Set Qty.
- Page 64 REPLACEmENT PARTS LIST Qty. 2 6x19mm use with 145652 150042 150043 Receiver Mounting Box Posts Brushless ESC Programming Card Xtm PArt NumBEr dEscrIPtIoN rEPlAcEmENt QuANtIty 148566 Grub Screw with Threadlock 3 x 3mm Qty. 5 148570 Grub Screw with Threadlock 4 x 4mm Qty.
- Page 65 OPTION PARTS LIST We stock many option parts for your Rail Brushless Off-Road Buggy. The option parts that are available, along with their respective part numbers for easy ordering convenience, are illustrated in this section. More option parts are being added, so don't forget to check websites for details.
- Page 66 OPTION PARTS LIST n Wheels, Tyres, Hex Hubs and Wheel Nuts (Affects Handling and Appearance), Continued..Qty. 2 Front or Rear Qty. 2 Front or Rear/Satin Chrome Qty. 2 Front or Rear Qty. 2 Front or Rear 150051 150053 150054 150052 Rally Cross Tyres with Inserts Rally Cross Tyres on Blade Wheels...
- Page 67 OPTION PARTS LIST n 100% Silcone Oils (For Tuning Differentials and Shocks), Continued..146814 146815 149570 Silicone Differential Oil - 100K Wt. Silicone Differential Oil - 200K Wt. Silicone Shock Oil - 200Wt. n Silicone Parts (Protects Against Moisture, Dust and Dirt) Qty.
- Page 68 OPTION PARTS LIST n Shock Absorbers and Shock Absorber Springs (Affects Ride Quality and Handling), Continued..Qty. 2 1.7mm/Black/L=80.5mm Qty. 2 1.5mm/White/L=80.5mm Qty. 2 1.4mm/Blue/L=80.5mm Qty. 2 1.3mm/Red/L=80.5mm 149364 149366 149370 149372 Shock Springs - Rear Shock Springs - Rear Shock Springs - Rear Shock Springs - Rear Qty.
- Page 69 OPTION PARTS LIST n Aluminium, Hardened (7075) Aluminium and Titanium (Improves Durability and Appearance), Continued..Replaces 149915 Replaces 149915 Front or Rear 149992 149993 149994 Suspension Holder - 2º (7075) - Rear Suspension Holder - 3º (7075) - Rear Suspension Holder Support (7075) n General Options and Tools Qty.
- Page 70 OPTION PARTS LIST n Anodised Aluminium Side Guard and Roll Cage Options (Changes Appearance), Continued..150067 150065 Roll Bars - Rear Side (Blue) Roll Bars - Rear Upper (Blue) 150066 150068 Roll Bars - Rear Upper (Gold) Roll Bars - Rear Side (Gold) 150078 150082 Roll Bars - Rear Upper (Red)
- Page 71 RETURNING YOUR PRODUCT fOR WARRANTY REPAIR Before returning your Rail Brushless Off-Road Buggy for warranty consideration, the status of the unit must be within the terms of the Warranty Information as stated below. Do not return your model to the place of purchase. They are not authorised nor equipped to perform warranty work on XTM Racing products.
- Page 72 Features and Specifications are Subject to Change Without Notice. All contents © 2010 XTM Racing and Global Hobby Distributors All Rights Reserved. Revision 1 / 09.15.2010 Made in Taiwan Page 72...
Need help?
Do you have a question about the RAIL and is the answer not in the manual?
Questions and answers