
Related Manuals for Digigram LX-MADI


Summary of Contents for Digigram LX-MADI
- Page 1 LX-MADI User Manual v 1.0 October 2015 LX-MADI Multichannel MADI PCI Express Sound Card User Manual 0 ...
-
Page 2: Table Of Contents
LX-MADI User Manual v 1.0 October 2015 Table of contents 1 INFORMATION FOR THE USER 2 IMPORTANT NOTICE 3 FEATURES Main hardware features 3.2 Main software features 3.3 MADI features 4 REQUIREMENTS 4.1 Minimum hardware requirements Software requirements Supported operating systems 5 SOFTWARE INSTALLATION AND CONFIGURATION UNDER WINDOWS 5.1 Installation under Windows operating systems 5.2 Microsoft volume mixer panel 5.3 ASIO driver configuration 6 HOW TO CHECK THE INSTALLATION UNDER WINDOWS 7 UNINSTALLING THE DRIVERS UNDER WINDOWS 8 SPECIFICATIONS 8.1 Configuration 8.2 Inputs/Outputs 8.3 Connectors 8.4 Development environments 9 APPENDIX 9.1 LXIP schematic diagram 9.2 Connectors 1 ... -
Page 3: Information For The User
LX-MADI User Manual v 1.0 October 2015 1 INFORMATION FOR THE USER This device complies with part 15 of FCC rules. Operation is subject to the following two conditions: (1) This device may not cause ... -
Page 4: Features
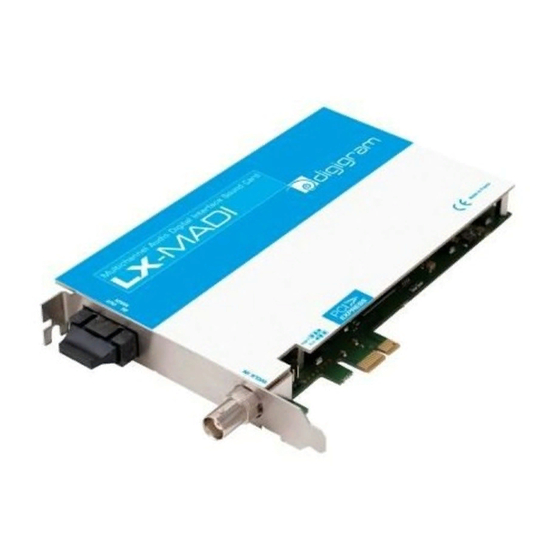
LX-MADI User Manual v 1.0 October 2015 3 FEATURES Main hardware features ● TM x 1 ( PCIe ® ® PCI EXPRESS ) bus, compatible with PCIe x1, x4, x8 or x16 slots. ● 1 optical connector for MADI I/O ● 1 BNC connector for WordClock In or Out ● Sampling frequency: From internal clock: 44.1 kHz, 48 kHz, 88.2 kHz and 96 kHz From MADI: 44.1 kHz, 48 kHz, 88.2 kHz and 96 kHz From Word Clock: 44.1 kHz, 48 kHz, 88.2 kHz and 96 kHz 3.2 Main software features ●... -
Page 5: Requirements
5 SOFTWARE INSTALLATION AND CONFIGURATION UNDER WINDOWS The installation of the software requires administrator rights on your computer. Please visit the Digigram web site at w ww.digigram.com for the most recent driver. In case you run a specific application developed or installed by a Digigram Partner, this application might require the ... - Page 6 LX-MADI User Manual v 1.0 October 2015 A “Welcome” message is displayed, click N ext to continue. The “License Agreement” window appears: read it, and ...
- Page 7 LX-MADI User Manual v 1.0 October 2015 In the “ R eady to Install the Program” w indow, click on Install to start copying the files. A Windows message may appear asking for the ...
- Page 8 LX-MADI User Manual v 1.0 October 2015 The LXMADI control panel window is displayed during the driver installation process so that you can configure its ...
- Page 9 LX-MADI User Manual v 1.0 October 2015 From the displayed “Digigram drivers” window, you can select the Stream granularity of the card (number of ...
-
Page 10: Microsoft Volume Mixer Panel
LX-MADI User Manual v 1.0 October 2015 Once the driver is installed, the 32 stereo DirectSound devices are visible from the Windows “Sound” control ... -
Page 11: Asio Driver Configuration
panel can started from < Start> , < Programs> , < Digigram> , < Digigram ASIO MADI Settings> . It can also be launched directly from the ASIO software applications, as most of them feature a “Preferences” or ... - Page 12 LX-MADI User Manual v 1.0 October 2015 Buffer size The buffer size determines the size in samples per buffer used by the Asio driver to transfer audio data from/to the board's Input/Output. The lower the buffer size, the lower the latency. The range of the buffer size settings depends on the stream granularity defined in the Digigram Control Center. You can access this parameter by clicking on the " C hange DSP granularity " button. Note that, audio dropouts may be experienced when using very small buffer size. It is possible to check if audio dropouts are experienced. First of all start the ASIO based. Allocate the ASIO channels in this application. Open this ASIO control panel, and click on the “ T est ” button. Click on “Launch test” to start the test. Errors are listed in the window. Stop the test by clicking on “ S top test ” . In case errors are reported, buffer size has to be increased. Select Activated IO ...
- Page 13 LX-MADI User Manual v 1.0 October 2015 12 ...
-
Page 14: How To Check The Installation Under Windows
LX-MADI User Manual v 1.0 October 2015 6 HOW TO CHECK THE INSTALLATION UNDER WINDOWS Once the card and the driver are installed according to the procedure described herebeforel, you can check that the card works correctly as follows. Start the “Digigram Control Center” panel from the menu < Start><Programs><Digigram> . ... - Page 15 LX-MADI User Manual v 1.0 October 2015 You can check that the card plays audio by selecting the “Diagnostics” tab. The icon of the installed card is displayed. Right click on the card icon, and select “Play sine (all ...
-
Page 16: Uninstalling The Drivers Under Windows
LX-MADI User Manual v 1.0 October 2015 ● Shut down the computer and remove the LXMADI card. Please be careful with electrostatic discharge when handling the card ( read section “Information for the user” of this document for more information) . ● Make sure the golden tracks of the LXMADI card PCI Express interface are clean; if not, you may use a dry rag to clean them. ● If there is another free PCI Express slot, insert the card in it, and power on the computer. ● Check again if the card is detected as described above. ● If the card is not detected in any PCI Express slot of this computer, you may try it in another computer. ● If the card is not detected, please contact your card supplier. 7 UNINSTALLING THE DRIVERS UNDER WINDOWS ● Open the W indows Control Panel and doubleclick on the P rograms and Features icon. ... -
Page 17: Specifications
LX-MADI User Manual v 1.0 October 2015 8 SPECIFICATIONS 8.1 Configuration TM ® Bus/Format PCI EXPRESS ( PCIe ) x1 (x2, x4, x8, x16 compatible) Size 169 mm x 99 mm x 20 mm Power requirements 0.4 A / 0.12 A (+3.3 V / +12 V) Operating: 0°C / +50°C • 5% / 90% temp / humidity (noncondensing) Storage: temp / humidity 5°C / +70°C • 0% / 95% ... -
Page 18: Appendix
LX-MADI User Manual v 1.0 October 2015 9 APPENDIX 9.1 LX-IP schematic diagram 9.2 Connectors ● Optical fibe r : MADI in and MADI out ● BNC 75 : WordClock in or out (set by software) Hardware selection through a jumper of the impedance: 75 Ohms or High impedance. High impedance: 75 Ohms: 17 ... - Page 19 LX-MADI User Manual v 1.0 October 2015 18 ...
- Page 20 reformatting of the information contained in this manual. While every effort has been made to ensure accuracy, Digigram is not responsible for errors and omissions, and reserves the right to make improvements or changes in the products and ...
Need help?
Do you have a question about the LX-MADI and is the answer not in the manual?
Questions and answers