Table of Contents
Advertisement
Quick Links
Advertisement
Table of Contents

Related Manuals for Digigram VX222v2


Summary of Contents for Digigram VX222v2
- Page 1 VX222 Professional Stereo Sound Card User’s manual...
- Page 2 Digigram S.A. Parc de Pré Milliet, 38330 Montbonnot - FRANCE Tel: +33 (0)4 76 52 55 01• Fax: +33 (0) 4 76 52 53 07• E-mail: info@digigram.com Digigram Inc. 2101 Wilson Boulevard, Suite 1004, Arlington, VA 22201-USA Tel: +1 703 875 9100 • Fax: +1 703 875 9161 • E-mail: input@digigram.com Digigram Asia Pte Ltd.
-
Page 3: Table Of Contents
VX Control panel..........................14 Sound panel ............................16 Audio Midi setup panel........................17 VX222 SETTINGS UNDER WINDOWS ..............18 DIGIGRAM WAVE MIXER ......................18 General operation..........................18 Running the program ........................18 Run at start-up..........................19 General configuration........................19 Always on top of the display ......................19 Resetting the faders to their default values................19... - Page 4 While every effort has been made to ensure accuracy, Digigram is not responsible for errors and omissions, and reserves the right to make improvements or changes in the products and programs described without notice.
-
Page 5: Information For The User
VX222 User’s Manual INFORMATION FOR THE USER This device complies with part 15 of FCC rules. Operation is subject to the following two conditions: ( ) This device may not cause harmful interference, and ( ) This device must accept any interference received, including interference that may cause undesired operation. -
Page 6: Contents Of This Package
FAQs, and discover our complete and updated audio product line! * in case you use an application developed by a Digigram partner, make sure that the driver provided for download has been approved by your application supplier! -
Page 7: Hardware Requirements
The VX222 requires installation of the drivers included in VX kit 5.0 or higher. Certain applications designed by Digigram partners may require some particular driver, such as np Runtime 6.01 or higher. For more information, please contact your software vendor. -
Page 8: Drivers
Please visit the Digigram web site at www.digigram.com for the most recent driver. In case you run a specific application developed or installed by a Digigram partner, it might require the use of a specific driver version. In this case, make sure that the updated driver has been approved by your supplier. -
Page 9: Installation Under Mac Os X
• Restart the machine. • Double click on the installation file included on the VX CDROM or downloaded from the Digigram web site. This creates the VX Driver volume on the desktop. • Double click on the VXDriver volume icon. -
Page 10: Updating The Vx Driver For Mac Os X
Click on the Finish button to complete the driver installation. The registry database is updated so that the ASIO compliant programs show the Digigram VX ASIO driver in the list of available ASIO drivers. To take full advantage of your VX222 , select the Digigram VX ASIO driver from the application program’s specific audio I/O settings. -
Page 11: Updating The Driver Under Windows 98 Se And Millennium
Go to <Start> <Settings> <Control panel> <System>. • Select the Device Manager tab. • Open the Sound, video and game controllers category. • Select the ‘Digigram VX222 ’ item. • Click on the Properties button. • Select the Driver tab. -
Page 12: Removing The Vx Driver Under Windows 2000, Xp, And Windows Server 2003
Windows Server 2003 • Go to <Start> <Settings> <Control panel> <Add/Remove Programs>. • Select the ‘Digigram VX Kit …’ and remove it. • Follow the instructions of the InstallShield wizard. Updating the VX driver under Windows 2000, XP, and Windows Server 2003 •... -
Page 13: How To Check The Installation
In the Modules Information window the installed VX Kit modules are displayed along with their versions. • In the Digigram drivers window, select the VX Setup tab for a list oft the installed cards. Each card is represented by an icon. •... -
Page 14: Vx222 Settings Under Mac Os
VX222 SETTINGS UNDER MAC OS X Several control panels are available to adjust the settings of the VX222 . Some parameters can be adjusted from different panels. If a parameter is modified in a panel, its value is automatically updated in another panel. VX Control panel Use the VX Control panel to set the following parameters of your VX card: •... - Page 15 VX222 User’s Manual...
-
Page 16: Sound Panel
Sound panel Use the Sound panel to set the following parameters of your VX card: • Input tab: source: digital (VX222 Digital), line (VX222 Line), line with digital synchronization (VX222 Line + Sync). digital input gain for both inputs (from –72 dB to +18 dB). •... -
Page 17: Audio Midi Setup Panel
VX222 User’s Manual Audio Midi setup panel This panel is accessible via Applications, Utilities. Use the Audio Midi setup panel to set the following parameters of your VX card: • Hardware monitoring: Play through. • Mute of the output: Device Mute. •... -
Page 18: Vx222 Settings Under Windows Digigram Wave Mixer
The Digigram Wave Mixer is only available if the Digigram Wave driver has been properly installed! The Digigram Wave Mixer serves to set input and output levels as well as other settings such as input type and digital data format. -
Page 19: Run At Start-Up
VX222 User’s Manual In case you have closed the program during your session, you can restart it from the menu <Start><Programs><Digigram><Digigram Mixer>. Run at start-up To enable/disable automatic run at start-up, right click on the Mixer icon in the taskbar, or go to the Mixer <Options> menu. -
Page 20: Setting The Default Values For Each Mixer Line Selected
Setting the default values for each mixer line selected Right click on the mixer icon in the taskbar, or go to the mixer Options menu. Select Save current configuration as default. Getting the default configuration values for the mixer line selected Right click on the mixer icon in the taskbar, or go to the mixer Options menu. -
Page 21: Faders
VX222 User’s Manual Faders Various faders allow you to adjusting input, output and hardware monitoring levels. The faders can be reset by double clicking on their respective buttons. Speakers (Output) Applies an analog gain on the selected output device. Wave out (Output) Applies a digital gain on all files played as well as on software monitoring. -
Page 22: Audio/Data Mode
Audio/Data mode In data mode, all digital level processing is disabled in the driver to ensure a digital stream free of any sample modification. This mode must be used to play non-PCM audio data on the digital output (Dolby AC-3 for instance). Note: Do not listen to the analog output in such a case, as clicking may cause disturbing noises! -
Page 23: Asio Control Panel For Pc
User’s Manual ASIO CONTROL PANEL FOR PC The purpose of this control panel is to set all the parameters of your Digigram card when used with its ASIO2 driver. It must be launched from the ASIO compatible application you use. -
Page 24: Clock
Clock The clock corresponds to the digital bit clock to which the card refers. When an analog input is selected, the clock source can be either the internal clock or taken from the digital input. As soon as the digital input is selected, the clock is read from this input. -
Page 25: Output
VX222 User’s Manual Output The playback digital control applies a digital gain to the selected output (i.e. to what the application plays, including the software monitoring). It can be set for each channel of the selected device, or for both channels at the same time by clicking the Link box. -
Page 26: Specifications
SPECIFICATIONS CONFIGURATION Bus/Format PCI slave mode 175 mm × 99 mm Size Digital Signal Processor 56303 at 100 MHz Power requirements (+3.3 V / +5 V / +12 V / –12V) 0.5A / 0.1A / 0.2A / 0.1A Operating: temp / humidity (non- 0°C/+50°C •... -
Page 27: Audio Specifications
VX222 User’s Manual AUDIO SPECIFICATIONS Sampling frequencies available Programmable from 8 to 50 kHz A/D and D/A converter resolution 24 bits Frequency response 20 Hz–20 kHz: ±0.2 dB Signal to noise ratio >97 dB Distortion + noise at 1 kHz <-92 dB (0.0025 %) Channel phase difference: 20 Hz/20 kHz... -
Page 28: Appendices
APPENDICES SCHEMATIC DIAGRAM XTAL CLOCK GENERATION AES/EBU IN RECEIVE TRANSMIT AES/EBU OUT LINE IN LINE OUT Headphones OUT Level adjust GP OUT GPIO INTERFACE CONTROL GP IN PCI BUS... -
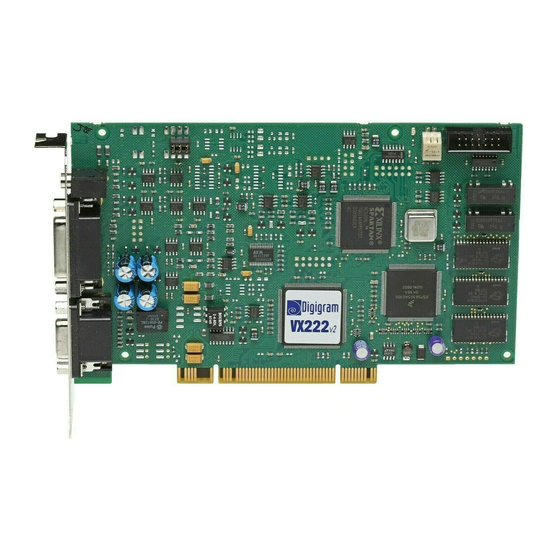
Page 29: Layout
VX222 User’s Manual LAYOUT Jumper VX222 Switch position (SW 2) Up = OFF (open) Down = ON (closed) SW1: Jumper input impedance: Position Nominal Input Level Maximum Input Level +4 dBu +22 dBu -10 dBV +10 dBu SW2: Inter board synchronization: (both levers must be set together) Position Status... -
Page 30: Analog Cable Diagram
ANALOG CABLE DIAGRAM WIRING DIAGRAM – Analog Cable Signal number Right OUT male Left OUT male Right IN female Left IN female... -
Page 31: Digital Cable Diagram
VX222 User’s Manual DIGITAL CABLE DIAGRAM WIRING DIAGRAM – Digital Cable with GPIOs 9-pin Signal Number SubD GPI OUT 1A GPI OUT 1B GPI OUT 2A GPI OUT 2B female GPI IN 1 GPI IN 2 3, 7, 8 shield AES/EBU female SYNC/IN 1... - Page 32 CABLE PINOUT Pin # ANALOG DIGITAL R OUT + GPI OUT 1A L OUT - AES/EBU IN - AES/EBU IN + R IN - GPI INPUT 2 L IN + GND/GPI INPUT COMMON GPI INPUT 1 R OUT - L OUT + GPI OUT 1B GPI OUT 2A R IN +...
Need help?
Do you have a question about the VX222v2 and is the answer not in the manual?
Questions and answers