Table of Contents
Advertisement
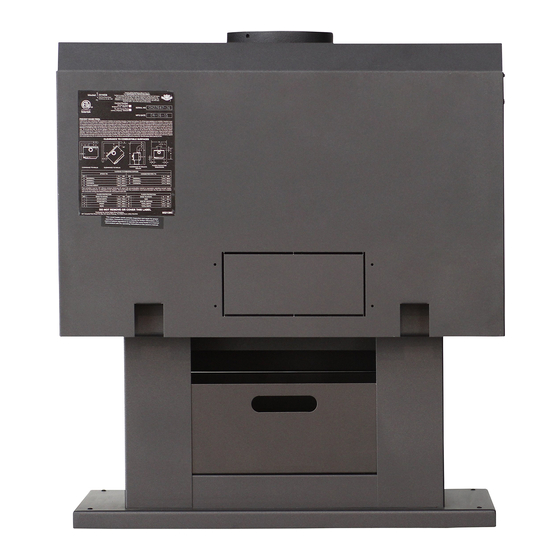
PEDESTAL PLATE HEATER
Certified to comply with 2015 particulate emission standards for single burn rate heaters. Not approved
for sale after May 15, 2020. This single burn rate wood heater is not approved for use with a flue damper.
TESTED TO UL 1482-11 (R2015), ULC-S627-00, and ASTM 2780/Method 28R
Read All Instructions Carefully Before Starting The
Installation or Operating This Heater.
Improper Installation Could Void Your Warranty!
Please read this entire manual before you install
and use your new room heater. Failure to follow
instructions may result in property damage, bodily
injury, or even death.
THIS MANUAL WILL HELP YOU TO OBTAIN EFFICIENT, DEPENDABLE SERVICE FROM THE HEATER, AND ENABLE YOU
TO ORDER REPAIR PARTS CORRECTLY. KEEP IN A SAFE PLACE FOR FUTURE REFERENCE.
French version is available for download from the US Stove website: http://www.usstove.com
La version française est disponible pour téléchargement à partir du site US Stove: http://www.usstove.com
Owner's Manual
MODEL: 2016E (B)
U. S. ENVIRONMENTAL PROTECTION AGENCY
CAUTION!
SAVE THESE INSTRUCTIONS
UNITED STATES STOVE COMPANY
227 Industrial Park Road
South Pittsburg, TN 37380
SAFETY NOTICE:
If this heater is not properly installed, a house fire
may result. For your safety, follow the installation
instructions. Contract local building or fire
officials about obtaining permits, restrictions and
installation requirements in your area.
Do not use this heater in a Mobile home or trailer!
Report # 0215WS045E
0215WS045S
852531-0602F
Advertisement
Table of Contents

Related Manuals for KING 2016E


Summary of Contents for KING 2016E
- Page 1 Owner's Manual PEDESTAL PLATE HEATER MODEL: 2016E (B) U. S. ENVIRONMENTAL PROTECTION AGENCY Certified to comply with 2015 particulate emission standards for single burn rate heaters. Not approved for sale after May 15, 2020. This single burn rate wood heater is not approved for use with a flue damper.
- Page 2 CONGRATULATIONS! You've purchased a heater from North America's oldest manufacturer of wood burning products. By heating with wood you're helping to CONSERVE ENERGY! Wood is our only Renewable Energy Resource. Please do your part to preserve our wood supply. Plant at least one tree each year.
-
Page 3: Do Not Burn
DO NOT BURN: • Residential or commercial garbage; wax and similar substances for the purpose of • Lawn clippings or yard waste; starting a fire in unaffected wood heater. • Materials containing rubber, including tires; • Railroad ties or pressure-treated wood; •... -
Page 4: Safety Rules
Safety Rules SAFETY NOTICE: If this heater is not properly installed a house fire may result. Do not use make-shift compromises during installation. Clean your stove frequently to reduce soot, creosote and ash accumulation. For your safety, follow the installation directions. Contact local building or fire officials about restrictions, permits and installation inspection requirements in your area. - Page 5 Minimum Clearance To Combustible Walls Stove Clearances Side Wall 18" (457mm) Back Wall 12" (305mm) Ceiling Height 84" (2134mm) Closest Wall to Corner 12" (305mm) Wall to Chimney Connector (Alcove) 21" (533.4mm) Side Wall to Chimney Connector 22.25" (565mm) Back Wall to Chimney Connector 15"...
- Page 6 Locating The Room Heater As A Location Is Selected, Keep The Following In Mind Keep the chimney connection as short as possible. Check Figures 2, 3, & 4. You should have at least The heater must have its own chimney flue. Do not the clearances shown from the heater and the connect any other appliance to the same flue.
-
Page 7: Blower Assembly
Mounting Cast-Iron Flue Collar This heater comes equipped with a cast-iron flue collar. Flue Collar - 40292 5/16-18 x 1-1/2" Bolts (3 req.) Weld Tab (3 req.) Gasket Blower Assembly ASSEMBLY INSTRUCTIONS DESCRIPTION PART NO. QTY. Step BLOWER ASSEMBLY MUST Blower Housing Back 25089B DISCONNECTED FROM THE SOURCE OF ELECTRICAL... -
Page 8: Chimney Connection
CHIMNEY CONNECTION Take into account the chimney’s location to insure it is not too close to neighbours or in a valley which may cause unhealthy or nuisance conditions. Your chimney connector and chimney must have the same diameter as the stove outlet (6”). If this is not the case, we recommend you contact your dealer in order to insure there will be no problem with the draft . - Page 9 Venting Into A Fireplace Many people may wish to convert an existing cooling so that the base, back and sides can be safely fireplace to heater use. Usually, safe connection placed in direct contact with combustible floors and of stovepipe to a masonry chimney requires more walls.
- Page 10 Venting Into A Masonry Chimney When considering a masonry chimney, round tiles Masonry chimneys built of concrete blocks with are preferable to square or rectangular, as round tiles or without flue liners do not meet modern building have much better airflow characteristics and are far codes.
-
Page 11: Fireplace Installation
"Fireplace" Installation FIREPLACE INSTALLATION with 8 inches of brickwork (solid masonry units) or 24 inches of stone. Connection of the stovepipe directly into the Install the stovepipe as far as possible into the existing masonry chimney over the fireplace opening thimble, but not past the inside of the flue lining. -
Page 12: Combustible Wall Chimney Connector Pass-Throughs
COMBUSTIBLE WALL CHIMNEY CONNECTOR PASS-THROUGHS Method A. 12” (304.8 mm) Clearance to Combustible fiberglass insulation, from the outer surface of the Wall Member: Using a minimum thickness 3.5” (89 wall thimble to wall combustibles. Support the mm) brick and a 5/8” (15.9 mm) minimum wall wall thimble, and cover its opening with a 24-gage thickness clay liner, construct a wall pass-through. - Page 13 Rules For Connector Pipe Installation 1. Crimped end of the pipe must be installed toward cement. Also seal the pipe at the chimney. the heater. The pipe should slide inside the flue 6. Use 3 sheet metal screws at each joint to make collar.
-
Page 14: Testing Your Wood
WOODSTOVE UTILIZATION moisture leaving your stove. Learn to adjust the air settings of your specific unit to produce the smallest Your heating unit was designed to burn wood only; amount of visible smoke. Wood that has not been no other materials should be burned. Waste and seasoned properly and has a high wood moisture other flammable materials should not be burned in content will produce excess visible smoke and burn... -
Page 15: Building A Fire
Operating Instructions OPERATIONAL TIPS FOR GOOD, EFFICIENT, AND that creates the draft. Smoke spillage into the CLEAN COMBUSTION house or excessive buildup of water or creosote in the chimney are warnings that the chimney is not • Get the appliance hot and establish a good functioning properly. -
Page 16: Chimney Maintenance
Operating Instructions CHIMNEY MAINTENANCE Inspection and Removal – The chimney connector and chimney should be inspected at least twice • Failure to clean and maintain this unit as monthly during the heating season to determine indicated can result in poor performance and if a creosote buildup has occurred. -
Page 17: Repair Parts
Deflector, Air Key Part No. Description Qty. 891084 Handle Rod 891112 Feed Door 891108 Glass w/King Logo 88087 Door Glass Gasket 891114 Top/Side Window Bracket 891115 Bottom Window Bracket 891113 Feed Door Gasket In order to maintain warranty, components must be replaced using original manufacturers parts purchased through your dealer or directly from the appliance manufacturer. - Page 18 Repair Parts Key Part No. Description Qty. 89066 Firebrick (4-1/2 X 9) 40487 Plug, Ash 24103 Firebrick, Half (4-1/2 X 4-1/2) 86645 Tube (Ø7/32), Secondary Air 88250 Board, Ceramic Fiber In order to maintain warranty, components must be replaced using original manufacturers parts purchased through your dealer or directly from the appliance manufacturer.
-
Page 19: Wiring Diagram
Brick Placement - (Top Inside View Of Firebox) BRICK BRICK 1. Insert right & left side firebrick as shown. 2. Insert rear firebrick as shown. 3. Insert bottom 1/2 firebrick and ash dump cover as shown. Wiring Diagram CAUTION: The blower assembly WARNING: do not route the supply must be disconnected from the cord near or across hot surfaces! -
Page 20: Disposal Of Ashes
Ashes - Removal And Disposal Whenever ashes get 3 to 4 inches deep in your plastic bag, no matter how long the fire has been firebox or ash pan, and when the fire has burned out. Coals have been known to stay hot for several down and cooled, remove excess ashes. -
Page 21: Limited Warranty
Limited Warranty The operation of this wood heater in a manner inconsistent with the owner’s manual will void you warranty and is also against federal regulations. United States Stove Company warrants to the original purchaser its products against premature failure of any component due to workmanship, quality, or materials as follows: TIME PERIOD: Firebox .......................... -
Page 22: How To Order Repair Parts
How to order repair parts This manual will help you obtain efficient, dependable service from your heater, and enable you to order repair parts correctly. Keep this manual in a safe place for future reference. When writing, always give the full model number which is on the nameplate attached to the heater. - Page 23 WARRANTY INFORMATION CARD Name__________________________________________ Telephone #: (_____)_____________ City____________________________________________ State_______ Zip_________________ Email Address __________________________________________________________________ Model # of Unit________________________________ Serial #___________________________ Fuel Type: qWood qOther _________________________ qCoal qPellet qGas Place of Purchase (Retailer)______________________________________________________ City____________________________________________ State_______ Zip_________________ If internet purchase, please list website address___________________________________ Date of Purchase _______________________________________________________________ Reason for Purchase: qAlternative Heat...
- Page 24 Ê É Fold Here Fold Here Fold Here PLACE STAMP HERE United States Stove Company P.O. Box 151 South Pittsburg, TN 37380...
Need help?
Do you have a question about the 2016E and is the answer not in the manual?
Questions and answers