Table of Contents
Advertisement
Advertisement
Table of Contents

Related Manuals for uPunch HN3000


Summary of Contents for uPunch HN3000
- Page 1 HN3000/HN4000 Product Manual...
-
Page 2: Table Of Contents
Changing the Settings in the HN3000 ... 14 5.0 Using the HN3000 ......26 Understanding Time Cards . -
Page 3: Introduction
Inc. The uPunch HN6000 Bundle includes the HN4000 time clock and the uPunch HN5000 Bundle includes the HN3000 time clock. This document will guide you through the steps of mounting and setting up your time clock, with an overview of the features and functionality of the time clock. -
Page 4: Mounting The Hn3000/Hn4000
2.0 MOUNTING THE HN3000/ HN4000 Install the time clock away from excessive moisture, extremely low or high temperatures, direct sunlight, dust, mechanical vibration, and shock. Installation should also take place away from the source of noise or electrical interference. Follow these steps to mount your time clock to a wall: 1. - Page 5 Cautions To reduce the risk of fire or shock hazard, observe the following instructions carefully. 1. Disconnect the power before cleaning the time clock. Do not use liquid or aerosol cleaners; use only a damp cloth. 2. Never spill liquid of any kind on the time clock. 3.
-
Page 6: Setting Up Your Optional Upunch Account
ACCOUNT uPunch time clocks include optional free cloud software. This section describes the steps you will take to create a new uPunch account and set up departments and employees. 3.1 Creating Your Account 1. Open your web browser and visit: www.trackmypunch.com/signup... - Page 7 Plan. With this plan, your time cards will be automatically shipped to you. Enter the shipping information for the time card shipments. Both warranties also include enrollment into the Lifetime Tradeup Program, which allows you to trade in your HN3000/HN4000 for a free uAttend CB6000 time clock.
- Page 8 5. Enter plan data, then click Calculate if you have the Lifetime Warranty. Click Submit. You will be prompted to enter the number of employees who will use the system, the pay period frequency, and the frequency that you would like time cards shipped to you.
- Page 9 6. Select the type of account you would like: Standard uPunch Account or Premium uPunch Account, then click Confirm. STANDARD ACCOUNT PREMIUM ACCOUNT FREE $10.00/month 20 Employees 50 Employees 5 Departments 20 Departments Holiday Settings not Allows Holiday Settings available...
- Page 10 7. Enter your company’s billing information, then click Submit. This step allows you to enter billing information for the service. Enter the billing name, billing address, and credit card information that you wish to use. This information will be stored on our system (encrypted and secure) for recurring monthly billing.
-
Page 11: Adding Departments And Employees
Once you have created your account, you will have access to the uPunch Online Help. The link appears as a ? icon and is found in the upper-right corner of the uPunch screen. 3.2 Adding Departments and Employees After you have created your uPunch account, you will need to set up at least one department and one employee. -
Page 12: Adding Departments
3.2.1 Adding Departments Follow these steps to add a department to your uPunch account: 1. Click the Departments tab on the main menu. 2. Click Add Department. 3. In the Code field, enter a code for the department. A code can be up to 20 characters. The code is used as a reference to the department and will appear on time cards. -
Page 13: Adding Employees
Save & Add New to add a new department, or click Save & Close. For help setting up departments, click the Online Help (?) link in the upper-right corner of the uPunch screen. 3.2.2 Adding Employees Follow these steps to add an employee to your uPunch account: 1. - Page 14 7. From the Department Transfer menu, select On or Off. The Department Transfer feature allows an employee to punch in and out to more than one department. 8. In the Email field, enter the user’s email address. 9. In the Phone field, enter the user’s phone number. 10.
-
Page 15: Setting Up The Hn3000
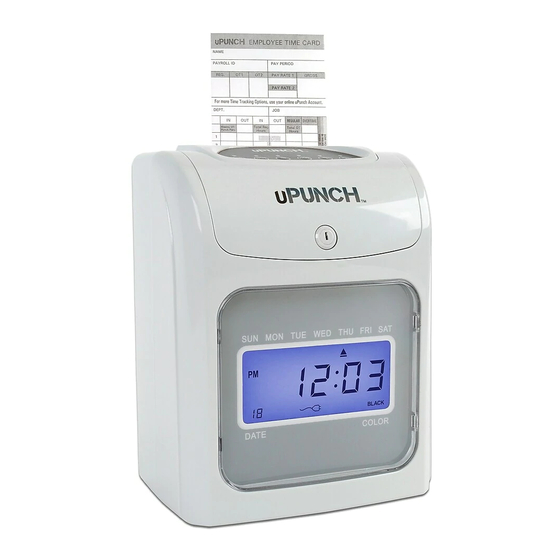
4.0 SETTING UP THE HN3000 The HN3000 time clock allows users to punch in and out with paper time cards. Before the employees can begin punching, the administrator must set up the time clock for use. To get started, plug the time clock into a surge protector or uninterruptible power supply (UPS). -
Page 16: Changing The Settings In The Hn3000
Restart the time clock MODE Advance to the next menu 4.2 Changing the Settings in the HN3000 To access the menu options on your time clock, remove the cover of the clock using the enclosed key. Then move the Set switch to the “0” position (to the right). - Page 17 Setup features of the time clock are grouped by menu options. The main menu options are numbered HN1 through HN5. Each menu has sub-menus called codes, which are displayed in a smaller size at the lower left on the clock display. MON TUE WED THU FRI SAT BLACK When a code is flashing, you can make changes using the...
- Page 18 The Back button allows you to reset an option that was confirmed incorrectly. NOTE: It is important that you match your uPunch account settings with your uPunch time clock settings. HN1—Basic Settings HN1 is the first menu in the time clock and allows you to program the following features.
- Page 19 clock and printing on the time card. Use the + and – buttons to make your selection, then press Enter to confirm the setting. STANDARD MILITARY 1:00pm 13:00h 2:00pm 14:00h 3:00pm 15:00h 4:00pm 16:00h 5:00pm 17:00h 6:00pm 18:00h 7:00pm 19:00h 8:00pm 20:00h 9:00pm...
- Page 20 to 2:00am. Use the + and – buttons to make your selection, then press Enter to confirm the setting. Setting the Month and Date of the end of Daylight Savings Time (code 06) When the code “06” appears, set the month and date of the end of Daylight Savings Time (mm-dd).
- Page 21 1 No Pay Period—Select 01 for job tracking mode. This means there is no pay period set and the clock will punch in the row that correlates with the current date. 2 Monthly—Select 02 for the Monthly option, then select the date on which the pay period will start. 3 Weekly—Select 03 for the Weekly option, then select the day on which the pay period will start.
- Page 22 NOTE: It is recommended that you leave this setting at the default. HN3—Alarm Options The HN3000 allows you to set up to 12 alarms during the week. You can set up alarms to signal the beginning and end of shifts and the beginning and end of breaks.
- Page 23 1. When the code “01” appears, use the + and – buttons to select the hour, then press Enter to confirm the setting. After you have set the hour, you will set the minute for the alarm. 2. Use the + and – buttons to select the minute, then press Enter to confirm the setting.
- Page 24 HN4—Automatic Column Shift Settings The HN3000 allows you to enter times at which the punch will automatically shift over to the next column on the time card, eliminating the need to manually press the button for the proper column.
- Page 25 After you have set the time, you will set the days of the week. 3. Use the + and – buttons to scroll through the days. A flashing triangle indicates the day that is currently selected. The + button moves your selection from right to left and the –...
- Page 26 HN5—Print Color Options The HN3000 allows you to enter times at which the punch color will change between red and black, highlighting times when employees punch in late or punch out early. You can set up to 24 times during the week when the print color will change between red and black (codes 01–24).
- Page 27 For example, if you would like to set the color change for weekdays only, you will disable the setting for Saturday and Sunday. When you see the flashing triangle on Sunday, press the Back button and the triangle will be removed. Then press the – button to select Saturday.
-
Page 28: Using The Hn3000
5.0 USING THE HN3000 Now that you have set up your time clock menus, you are ready to use your HN3000 time clock. 5.1 Understanding Time Cards The front of the time card (orange side) is numbered 1–15, indicating the first 15 days of the month, and the back of the card (brown side) is numbered 16–31. -
Page 29: Punching Time Cards
5.3 HN3000 Error Codes If an error occurs, the HN3000 will display the error code. ER 01—Wrong side of time card inserted. ER 21—Battery needs to be charged. -
Page 30: Resetting The Hn3000
Finally, move the Set switch back to the “–” position (to the left). Setting the clock to factory reset will restore the default values, including: Date, Time, Time Signal, Print Color Options, and Printing Position. See “4.2—Changing the Settings in the HN3000” to complete setup. -
Page 31: Setting Up The Hn4000
6.0 SETTING UP THE HN4000 The HN4000 time clock allows users to punch in and out with paper time cards. Before the employees can begin punching, the administrator must set up the time clock for use. To get started, plug the time clock into a surge protector or uninterruptible power supply (UPS). -
Page 32: Changing The Settings In The Hn4000
NOTE: To charge the battery, the switch must be set to the OFF position. The backlight on the display screen is not enabled if the time clock is in battery mode. Button Function Increase value Decrease value Enter Confirm set value Back Backspace the set value Clear... - Page 33 If you would like to scroll through codes without changing settings, press the Enter button. The Back button allows you to reset an option that was confirmed incorrectly. NOTE: It is important that you match your uPunch account settings with your uPunch time clock settings.
- Page 34 HN1—Basic Settings HN1 is the first menu in the time clock and allows you to program the following features. Note that the year, month, date, hour, and minute are preset to Pacific Standard Time (PST). Setting the Year (code 00) Move the Set switch to the “0”...
- Page 35 Setting the Month and Date of the start of Daylight Savings Time (code 04) When the code “04” appears, set the month and date of the start of Daylight Savings Time (mm-dd). Use the + and – buttons to make your selection, then press Enter to confirm the setting.
- Page 36 Setting the Hour and Minute of the end of Daylight Savings Time (code 07) When the code “07” appears, set the hour and minute of the end of Daylight Savings Time (hh:mm) to 2:00am. Use the + and – buttons to make your selection, then press Enter to confirm the setting.
- Page 37 5 No Pay Period—Select 05 for job tracking mode, which will disable all pay period calculation and daily calculation settings and will allow you to punch in all six columns of the time card. Use the + and – buttons to make your selection, then press Enter to confirm the setting.
- Page 38 5 Minute 3 Breakpoint—This setting means that punches will be rounded to the nearest 5-minute segment with a cutoff of 3 minutes. For example, if an employee punches in at 8:02, the punch will be rounded down to 8:00, but if they punch in at 8:03, the punch will be rounded up to 8:05, which is the next 5-minute segment.
- Page 39 Setting Lunch/Break Deduction: Number of Hours Before Break Deduction (code 04) When the code “04” appears, set the number of hours that will take place before a deduction is calculated from daily punches. Use the + and – buttons to make your selection, then press Enter to confirm the setting.
- Page 40 Setting Printing Position Adjustment: up/down (0–9) (code 08) When you initially set up your clock, you may skip this step. This setting can be changed later if you find that the printing alignment is off. If the alignment is incorrect, you can adjust the position on the time card where the punches will print.
- Page 41 and – buttons to make your selection, then press Enter to confirm the setting. Setting the Ringing Time from Group 01 to Group 12 (codes 01–12) You can set up to 12 different times, or groups, for the alarm/bell to ring during the work week. Each group is numbered 01–12.
- Page 42 4. Press Enter to confirm these settings. Next, you will select which alarm/bell will ring for this group. The internal alarm is music that the clock plays; the external bell is purchased separately. The options are: 01 External bell and internal alarm 02 External bell 03 Internal alarm 5.
- Page 43 1. Under the HN4 menu, when the code “01” appears, use the + and – buttons to select the hour for the first punch. For 8:00am, set the hour to 08 and then press Enter to confirm the setting. 2. Use the + and – buttons to select the minute. For 8:00am, set the minute to 00 and then press Enter to confirm the setting.
- Page 44 Repeat these steps for the remaining codes. To follow the example in this section, you would set up code 02 to punch at 12:00pm on Monday–Friday in column 02; code 03 to punch at 1:00pm on Monday–Friday in column 03; and code 04 to punch at 5:00pm on Monday–Friday in column 04.
- Page 45 3. Use the + and – buttons to scroll through the days. A flashing triangle indicates the day that is currently selected. The + button moves your selection from right to left and the – button moves your selection from left to right. Press the Back button to toggle each day on or off.
-
Page 46: Using The Hn4000
7.0 USING THE HN4000 Now that you have set up your time clock menus, you are ready to use your HN4000 time clock. 7.1 Understanding Time Cards One time card will be used per pay period. The front of the time card (orange side) is numbered 1–15, indicating the first 15 days of the month, and the back of the card (brown side) is numbered 16–31. -
Page 47: Time Card Calculations
1. To punch in at the beginning of a shift, press the IN button on the far left of the keypad and insert the time card. The punch will print in the first column. 2. If you punch out for a break or lunch, press the OUT button that is farthest to the left on the keypad. - Page 48 keypad simultaneously until you hear two beeps. Release the buttons and then insert the time card with the front (orange) side facing forward. Calculations will print on the front of the time card in the top row above row 1. The following totals will print: Column 2: Total of weekly overtime hours in pay period (Weekly and Bi-weekly modes).
-
Page 49: Hn4000 Error Codes
If the current pay period ending date is on the back side of the time card, after the calculation has been taken for the last day of the pay period, the clock will display “FLIP” for up to 20 seconds. This will allow you to flip your time card around and re-insert the time card back into the clock to have the summary for the pay period printed on the time card. -
Page 50: Resetting The Hn4000
7.5 Resetting the HN4000 To simply restart the time clock, press the Reset button. To restore the default values, move the Set switch to the “0” position (to the right). Then press the +, Clear, and Mode keys simultaneously until you hear three beeps. Finally, move the Set switch back to the “–”... - Page 51 The time card will look like this: Example 2: 8:02 12:04 12:34 17:04 Time clock settings: • Punch Rounding: 5 min 3 breakpoint • Break/Lunch Deduction: ON, after 8:30 hours deduct 30 minutes • Overtime = 8 hours With Punch Rounding set at the 5 min 3 breakpoint, the time card will round the punch times to the following: 8:00 12:05...
-
Page 52: Replacing Hn3000/Hn4000 Ribbon Cartridge
8.0 REPLACING HN3000/ HN4000 RIBBON CARTRIDGE To replace the ribbon cartridge in your time clock, follow these steps. Open the top cover and press the button corresponding with column 4 to move the ribbon cartridge to center. As shown in the figure below, pull the ribbon holders toward you and, holding them steady in the position, use the handle to take out the cartridge. -
Page 53: Upunch Warranty And Terms Of Service
WARRANTY AND TERMS OF SERVICE This Warranty covers the HN1000, HN2000, HN3000, HN4000, and any subsequent uPunch Device models. A. Warranty and Warranty Periods. Processing Point, Inc. (“PPoint”) warrants only to the original Purchaser that the Device will be free from... - Page 54 Warranty. Any waiver, alteration, addition, or modification to the warranties contained herein must be in writing and signed by authorized representatives of PPoint to be valid, binding, and enforceable. PPoint does not assume responsibility for any specific application to which any products or parts are applied including, but not limited to, compatibility with other equipment.
- Page 55 H. Additional Clock Discount. PPoint offers $20.00 off any uPunch device when purchased from the user’s uPunch account. I. Lifetime Trade-In Program. PPoint offers a trade-in...
- Page 56 The Connected Workplace ™ 2796 Loker Ave., Suite 111, Carlsbad, CA 92010 (800) 518-8925 Toll Free • (877) 730-3578 Fax • www.ProcessingPoint.com Rev: 12/2014...
Need help?
Do you have a question about the HN3000 and is the answer not in the manual?
Questions and answers