Table of Contents
Advertisement
Advertisement
Table of Contents

Related Manuals for Melitta Gourmet


Summary of Contents for Melitta Gourmet
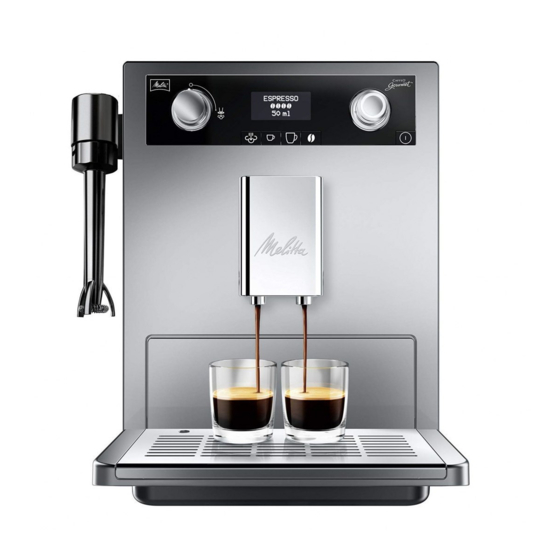
- Page 3 2-chambered Bean Select bean container, you can select from two different bean types, ensuring unique coffee enjoyment. In order that you and your guests can enjoy the Melitta CAFFEO Gourmet ®...
-
Page 4: Table Of Contents
Table of contents 1 Information about these operating instructions ........166 Symbols in the text of these operating instructions ........ 166 Intended use................... 167 Non-intended use ................... 167 2 General safety instructions ..............168 3 Appliance description ................171 Legend for Figure A ................171 Legend for Figure B................ - Page 5 9 Overview and operation of menus ............182 Accessing the main menu ..............182 Overview of sub-menus ................182 "Espresso" or "Café crème" sub-menus ..........183 "Care" sub-menu ..................183 "Energy-saving mode" sub-menu ............184 "Clock" sub-menu ................... 184 "Auto-OFF" sub-menu ................185 "Water hardness"...
-
Page 6: Information About These Operating Instructions
Symbols in the text of these operating instructions The symbols in these operating instructions indicate specifi c hazards associated with operating your Melitta CAFFEO Gourmet, or provide you with useful tips. ® ® Warning! Sections with this symbol contain information for your safety and indicate possible accident and injury hazards. -
Page 7: Intended Use
Non-intended use Non-intended use is defi ned as using the Melitta CAFFEO ® ® Gourmet in a manner that differs from the use described in these operating instructions. Warning! Non-intended use can cause injury or scalding with hot water or steam. -
Page 8: General Safety Instructions
– 2009 / 125 / EC (eco-design / ErP). The appliance has been built using the latest technology. Residual dangers nevertheless exist. You must observe the safety instructions to avoid dangers. Melitta accepts ® no liability for damage caused by failure to observe the safety instructions. - Page 9 Warning! Danger due to electrical current If the appliance or the power cable is damaged, the risk of a fatal electric shock is run. Observe the following safety instructions to avoid dangers due to electrical current: – Do not use a damaged power cable. –...
- Page 10 Warning! General safety Observe the following safety instructions to avoid personal injury and material damage: – Do not reach into the interior of the appliance during operation. – The appliance and its power cable must be kept out of the reach of children under 8 years of age.
-
Page 11: Appliance Description
Appliance description Legend for Figure A Fig. number Explanation Drip tray with cup plate and coffee grounds container (internal) Float for the water level indicator in the drip tray Height-adjustable outlet "Perfect Cappuccino" steam nozzle Valve switch for steam and hot water dispensing Water tank 2-chamber „Bean Select“... -
Page 12: Overview Of Buttons
Overview of buttons button Meaning function Espresso Press to dispense an espresso. Café crème Press to dispense a café crème. Steam Press to activate steam dispensing. dispensing Press to adjust the coffee strength to one of fi ve Coffee strength possible levels. -
Page 13: Starting Up
Starting up Please follow the steps listed below before starting up the appliance. The individual steps are explained on the following pages. • Placement • Connection • Switching on for the fi rst time • Selecting a language • Setting the time •... -
Page 14: Connection
Notes – Keep the packaging material, including hard foam elements, in order to avoid damage during transport or in case of return shipments. – It is normal to fi nd traces of coffee and water in the machine before it is started up for the fi... - Page 15 • Turn the rotary switch to select the desired minutes and press it to save the selected minutes. → The prompt to fi ll the bean container will appear on the graphic display. • Fill the bean container (see page 176) and press the rotary switch to confi...
-
Page 16: Filling The Bean Container
Filling the bean container Thanks to the 2-chamber „Bean Select“ bean container, you can use two different types of coffee at the same time. For example, fi ll one chamber with espresso beans, and the other with café crème beans. Then you can conveniently switch between the two types using the tilt lever. -
Page 17: Switching On And Off
Switching on and off For switching on when starting up the appliance for the fi rst time: see page 174. Switching on the appliance • Place a vessel under the outlet and press the ON/OFF switch → A greeting text appears on the graphic display. The appliance heats up, performs an automatic rinse and hot water fl... -
Page 18: Preparing Beverages
Preparing beverages AromaAdjust function This function serves to adjust your individual coffee strength before and during the grinding process. Prerequisite: The appliance must be ready for operation. • Press the button for coffee strength to select among the following settings: Extra mild: Particularly mild coffee enjoyment through deactivated pre- –... -
Page 19: Preparing Espresso Or Café Crème With Ground Coffee
• To stop dispensing before the programmed amount is reached, press the button for espresso or for café crème or the rotary switch. Preparing espresso or café crème with ground coffee Prerequisite: The appliance must be ready for operation. • Open the lid of the ground coffee chute (Fig. -
Page 20: Preparing Milk Froth
Preparing milk froth Prerequisite: The appliance must be ready for operation. • Place a vessel with milk under the Perfect Cappuccino. Ensure that the whisk of the Perfect Cappuccino is immersed in the milk. • Fill the appliance to one third maximum, as the volume of milk increases signifi... -
Page 21: Preparing Hot Water
• Turn the cleaned steam pipe with whisk clockwise onto the Perfect Cappuccino until it locks into place. Note We recommend using cold milk with a high protein content. It is not the fat content, but rather the protein content that is the determining factor for good milk froth. -
Page 22: Overview And Operation Of Menus
Overview and operation of menus Accessing the main menu Prerequisite: The appliance must be ready for operation. • Press and hold the rotary switch for more than two seconds. → The main menu will appear on the graphic display. • Press the rotary switch to access the selected sub-menu or to exit the menu with Exit. -
Page 23: Espresso" Or "Café Crème" Sub-Menus
"Espresso" or "Café crème" sub-menus In this sub-menu, you can set and save your personal coffee settings for the dispensed quantity, coffee strength and brewing temperature. • Select the Espresso or Café Crème sub-menu. • Turn the rotary switch until the beverage preference is highlighted for which you wish to save a setting e.g. -
Page 24: Energy-Saving Mode" Sub-Menu
"Energy-saving mode" sub-menu In this sub-menu, you can set how much time elapses before the appliance switches to the energy-saving mode. • Select the Energy-Saving Mode sub-menu. Energy-Saving Mode • Turn the rotary switch to highlight the time you Exit 5 min wish to elapse before the appliance switches to 15 min... -
Page 25: Auto-Off" Sub-Menu
"Auto-OFF" sub-menu In this sub-menu, you can set how much time elapses before the appliance switches off automatically. From the factory, the appliance is set at 30 minutes. You can also enter a specifi c time at which the appliance switches off automatically. •... -
Page 26: Water Hardness" Sub-Menu
"Water hardness" sub-menu In this sub-menu, you can set the water hardness. Use the test strip provided to determine the water hardness in your area. Comply with the instructions on the test strip package. The appliance is factory-adjusted to „very hard“ water hardness Water hardness range °d °e... -
Page 27: Statistics" Sub-Menu
9.10 "Statistics" sub-menu In this sub-menu, you can display the total number of coffee specialities prepared since the appliance was fi rst started up. • Select the Statistics sub-menu. Statistics • The total number of all prepared beverages is 00273 displayed. - Page 28 The Melitta Claris water fi lter should not remain dry over an extended period ® ® of time. We therefore recommend storing the Melitta Claris water fi lter in ® ® a glass of water in the refrigerator if the appliance will not be used for an...
-
Page 29: Care And Maintenance
Care and maintenance 10.1 General cleaning • Clean the outside of the appliance with a soft, damp cloth and ordinary dishwashing liquid. • Empty and clean the drip tray regularly; at the latest, however, when the fl oat (Fig. A, No. 2) projects out of the cup plate. •... -
Page 30: Cleaning The Brewing Unit
10.3 Cleaning the brewing unit Prerequisite: The appliance must be switched off. Note For optimal protection of your appliance, we recommend that you clean the brewing unit under running tap water once a week. • Reach into the recess on the right side of the appliance (Fig. B, No. 14) and pull off the cover to the right. -
Page 31: Rinsing The Coffee Unit (Rinsing)
– Only use Melitta cleaning tabs for fully automatic coffee makers. These ® cleaning tabs are specifi cally designed for the Melitta CAFFEO Gourmet. ® ® Use of other cleaning agents may cause damage to the appliance. - Page 32 4 Select the Care sub-menu. 5 Turn the rotary switch until Cleaning is highlighted and press it to confi rm the selection. Cleaning Exit 6 Turn the rotary switch until Start is highlighted Start and press it to start the programme. 7 Empty the drip tray and coffee grounds container.
-
Page 33: Integrated Descaling Programme
Run the integrated descaling programme every 3 months; at the latest, however, when a prompt appears on the graphic display. – Only use the Melitta ANTI CALC Espresso Machines descaling agent. ® These descaling agents are specifi cally designed for the Melitta ® CAFFEO Gourmet. ® –... - Page 34 7 If you are using a water fi lter, remove it from the water tank. 8 Add the descaling agent (e.g. Melitta ANTI CALC Espresso Machines ®...
- Page 35 → The integrated descaling programme is continued. Descaling This stage takes approximately 10 minutes. Water Empty fl ows out of the Perfect Cappuccino as well as in container the interior of the appliance and into the drip tray. and tray The prompt Empty container and tray will appear on the graphic display.
-
Page 36: Adjusting Grinding Fi Neness
10.7 Adjusting grinding fi neness The grinding fi neness level was optimally adjusted prior to delivery. Consequently, we recommend that you only readjust grinding fi neness after approximately 1,000 coffee preparation processes (about 1 year). You can only set the grinding fi neness while the mill is running. Thus, adjust grinding fi... -
Page 37: Inserting, Changing And Removing The Water Fi Lter
Change filter • Lift the lid of the water t (Fig. A, No. 6) and pull the water tank up and out of the appliance. • Carefully screw the Melitta Claris water fi lter into the thread on the ® ®... -
Page 38: Changing The Water Fi Lter
• To open the valve, turn the valve switch (Fig. A, No. 5) clockwise up to the mark at the right. → Water runs into the vessel under the Perfect Cappuccino. → Close valve will appear on the graphic display. •... -
Page 39: Removing The Water Fi Lter
The Melitta Claris water fi lter should not remain dry over an extended period ® ® of time. We therefore recommend storing the Melitta Claris water fi lter in ® ® a glass of water in the refrigerator if the appliance will not be used for an... -
Page 40: Transport And Disposal
Transport and disposal 12.1 Transport • Clean the drip tray and coffee grounds container. • Vent the appliance, page 187. • Empty the bean container. • Secure loose parts (cup plate etc.) with suitable adhesive tape. • Transport the appliance in the original packaging if possible, including the hard foam elements, to prevent transport damage. -
Page 41: Troubleshooting
Troubleshooting Problem Cause Solution Coffee only fl ows Grinding fi neness is too Set the grinding fi neness drop by drop. fi ne. coarser. Clean the brewing unit. Descale, if necessary. Run the integrated cleaning programme, if necessary. Coffee does not Water tank not fi... - Page 42 Please contact the Melitta hotline, if the above mentioned solutions do not help to ® solve the problem: +49 571/ 86 1900. Warning! Risk of crushing injury Never reach into the interior of the appliance when it is in operation.
Need help?
Do you have a question about the Gourmet and is the answer not in the manual?
Questions and answers