Remington i-Light Pro IPL6000 Use And Care Manual
Hide thumbs
Also See for i-Light Pro IPL6000:
- Use and care manual (44 pages) ,
- Instruction manual (192 pages)
Table of Contents
Advertisement
Available languages
Available languages
Advertisement
Table of Contents

Related Manuals for Remington i-Light Pro IPL6000


Summary of Contents for Remington i-Light Pro IPL6000
- Page 1 ® IPL6000 Use and Care Guide Register Your New Product Today! By registering your new Remington product, you will receive these important benefits: ® Proof of Ownership • Product Protection • Product Registration • Special Offers Register online at: www.RemingtonProducts.com...
-
Page 2: Table Of Contents
Contents PAGE 4 Introduction 5 How Does the i-Light® Pro IPL System work? 6 i-Light® Pro System Diagram Reference 7 Getting to Know Your i-Light® Pro System 8 QuIcK REFERENcE GuIDE 10 What is the Intended use for i-Light® Pro IPL System? (Indications) 12 contraindications 13 WaRNINGS 16 Benefits and Risks... - Page 3 PAGE 22 using i-Light® Pro IPL System for the First Time 22 Testing on a patch of skin 23 using i-Light® Pro IPL System Every Time 23 Getting Ready to Use 23 Unlocking the i-Light® Pro IPL system using the Skin Tone Sensor 26 Setting the ENERGY LEVEL 28 Begin Treatment 31 After Use...
-
Page 4: Introduction
Introduction Congratulations on the purchase of your Unlike most at-home hair removal meth- new i-Light® Pro Intense Pulsed Light ods, the i-Light® Pro IPL system doesn’t (IPL) Hair Removal system! You’re on cut or pull out hair—it actually works your way to being liberated from the daily below the skin’s surface to disable active chore of hair removal. -
Page 5: How Does The I-Light® Pro Ipl System Work
How does the i-Light® Pro IPL System Work? The process of light-based hair removal is system three times in the first month to well-known and has been clinically prov- ensure you hit every active hair. After that, en around the world for over 15 years. use the i-Light®... -
Page 6: I-Light® Pro System Diagram Reference
i-Light® Pro System Diagram Reference Figure1... -
Page 7: Getting To Know Your I-Light® Pro System
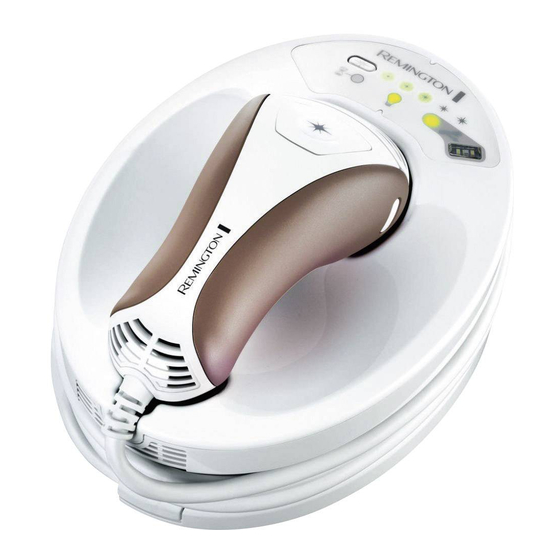
Power Switch Skin Tone Sensor Power Inlet Hand Piece Cord Base Unit Flash Window Hand Piece Skin Contact Sensors Flash Button Nose Cone Release Buttons Energy Level Selection Button Replacement Cartridge Cool Down Mode Indicator Nose Cone Cartridge Status Indicator Display Power Cord Energy Level Selection Display Lint Free Cloth... -
Page 8: Quick Reference Guide
QUICK REFERENCE GUIDE (see fig. 1, page 6) 1. PREPaRE SKIN (see page 23) 3. SELEcT ENERGY LEVEL • Shave the hair in the treatment area (see page 26-27) • Wipe skin clean and dry completely • The i-Light® Pro IPL system starts out at the lowest level •... - Page 9 4. PLacE HaND PIEcE ON aREa TO BE 5. TREaT YOuR SKIN (see page 28-31) TREaTED (see page 28) • After you hear the "CHIRP" press the FLASH BUTTON to treat skin • When a flash is delivered, you will: SKIN CONTACT SENSORS –...
-
Page 10: What Is The Intended Use For I-Light® Pro Ipl System? (Indications)
What Is the Intended Use for the i-Light® Pro IPL System? Hair color The i-Light® Pro IPL system is an over- the-counter device intended for removal It is intended for use on naturally black of unwanted hair. or brown hair. Do not use i-Light® Pro Skin Tone on white or gray hair because it will not work. - Page 11 (Indications) SKIN TONE cHaRT...
-
Page 12: Contraindications
Contraindications Important Safety Information – DO NOT use on tattoos, dark brown Read Before use! or black spots (such as dark freckles, birthmarks, moles or warts). Tattoos The i-Light® Pro IPL system is not or dark spots may absorb too much designed for everyone. -
Page 13: Warnings
WARNINGS DO NOT use on damaged skin, includ- The i-Light® Pro IPL system is a powerful device. As such it should be used with ing open wounds, cold sores, sunburns, special attention to safety. Please read all or areas where you have had a skin peel warnings and safety precautions before or other skin resurfacing procedures use and strictly follow them when using... - Page 14 WARNINGS DO NOT use if you are or may be DO NOT flash in an environment pregnant, or are breast-feeding. The where a spark could cause an explosion, i-Light® Pro IPL system has not been such as near a gas leak. tested on pregnant women.
- Page 15 DO NOT use the system if it appears DO NOT open the unit (except to damaged, and DO NOT attempt to open replace the CARTRIDGE) or attempt to or repair the i-Light® Pro IPL system. repair your system as there are no user These actions increase the risk of skin serviceable parts inside the i-Light®...
-
Page 16: Benefits And Risks
Benefits and Risks an average of 37% less hair 3-months A medically-supervised clinical study showed that the i-Light® Pro IPL system after the last treatment and 48% less hair 6-months after last treatment. was effective in the removal of unwanted hair when used as directed. - Page 17 discomfort as when a rubber band is begin using i-Light® Pro you believe lightly snapped against the skin. If the that the number of hairs regrowing in pain is too intense or persists after the treatment area is greater than the a treatment, stop using and contact number that existed before you started Customer Service (page 44).
-
Page 18: What To Expect With I-Light® Pro Ipl System
What to Expect with the i-Light® Pro IPL System During Treatment A Sound with Each Flash: When a flash ■ of light is activated, it is normal to The i-Light® Pro IPL system has been hear a subtle “pop” sound as the light designed for ease of use, and hair flashes. - Page 19 Treatment Expectations Figure 2 Immediately 1 to 2 Weeks One Month Three Months after First after Initial after Initial after Initial Treatment Treatments Treatments Treatments completed • There will be no • Hairs in treated • You should see a •...
-
Page 20: How To Use Your I-Light® Pro Ipl System
How to Use Your i-Light® Pro IPL System Set-up 2. Press both nose cone release buttons with your thumb and index finger. (1) 1. Remove base unit, power cord and Then, with both buttons pressed, gently other components from the box. remove the nose cone with your other Note: before plugging in system, check hand. -
Page 21: Each Time You Use I-Light® Pro Ipl System
6. Your i-Light® Pro IPL system is now 5. Plug the power cord into the system ready to start. Before your first use, test socket, plug the other end of the power a small patch of skin and wait 24 hours cord into an electrical outlet, and press (see page 22). -
Page 22: Using I-Light® Pro Ipl System For The First Time
Using the i-Light® Pro IPL System for the First Time Testing on a Patch of Skin change to energy level 2 (see “setting the energy level” on page 26). Move the As with any new skin care product, we system to a different spot and flash one recommend testing on a patch of skin more time. -
Page 23: Using I-Light® Pro Ipl System Every Time
Using the i-Light® Pro IPL System Every Time Getting Ready to use unlocking the i-Light® Pro IPL System using the Skin Tone Sensor Before using, shave the hair in the treat- ment area to minimize the sensation felt Every time you turn on the system, it from the flashes. - Page 24 Using the i-Light® Pro IPL System Every Time SKIN TONE SENSOR LED will be blinking orange 1. Turn the POWER SWITCH on. The 2. Always place the skin tone sensor SKIN TONE SENSOR LED will flash window directly on the area of skin ORANGE.
- Page 25 3. Place the body part to be treated over 3a. If your Skin Tone is NOT suitable for use, the SKIN TONE SENSOR (touching the the SKIN TONE SENSOR LED turns solid unit) the Sensor will immediately read ORANGE and the system will “BUZZ” the skin type.
-
Page 26: Setting The Energy Level
Using the i-Light® Pro IPL System Every Time Notes: Setting the Energy Level • Some areas are darker than others. Energy Level Selection Display lights You must use the skin sensor on each determine the intensity of the light flash different area you intend to treat. - Page 27 1. Upon start-up, the system sets itself to setting is selected. After reaching the lowest energy level (Level 1). The Level 5, pressing the ENERGY LEVEL system is now ready. SELECTION BUTTON an additional time will reset to Level 1. 2.
-
Page 28: Begin Treatment
Using the i-Light® Pro IPL System Every Time Begin Treatment SKIN CONTACT SENSORS 1. Ensure that the ENERGY LEVEL is on a 2. Apply the HAND PIECE to the skin comfortable setting (See “Setting the making sure the skin is spread evenly Energy Level”... - Page 29 3. If the SKIN CONTACT SENSORS are 4. If the SKIN CONTACT SENSORS on the NOT in full contact with the skin, the NOSE CONE are in full contact with the system will "buzz" and will not oper- skin, a series of high-pitched beeps will ate if you press the FLASH BUTTON.
- Page 30 Using the i-Light® Pro IPL System Every Time 5. Press the FLASH BUTTON. The system 6. Immediately after a flash is delivered, will flash a pulse of light onto your skin. move the HAND PIECE to a new treat- You will see a bright flash of light and ment location while keeping the FLASH simultaneously hear a sound, which is BUTTON pressed down.
-
Page 31: After Use
DO NOT flash on the same treatment spot multiple times during the same ses- sion, as this could cause skin swelling, temporary blisters or could change the color of your skin. Note: For faster coverage, hold down the FLASH BUTTON while you lift the HANDPIECE and place it back in contact with the new area to be treated. -
Page 32: Getting The Best Results
Getting the Best Results cleaning • Shave immediately before treating the After each session, it is recommended area. Doing this will let you use a higher energy level, because there will be less that you clean your system, especially hair to heat up and the treatment will be the HAND PIECE, the FLASH WINDOW, the more comfortable. -
Page 33: Taking Care Of Your I-Light® Pro Ipl System
Taking Care of Your i-Light® Pro IPL System Replacing the Disposable cloth with water and mild soap. Allow cartridge the unit to dry completely before using The DISPOSABLE CARTRIDGE can deliver again. 1,500 light flashes regardless of the • Inspect the vents in the unit and hand- energy level setting. - Page 34 Taking Care of Your i-Light® Pro IPL System Flash Bulb Usage 0 – 90% 90 – 100% > 100% Flashes 1,351 – 1,500 0 – 1,350 flashes > 1,500 flashes flashes Cartridge Status Indicator Display Cartridge Status Cartridge Status Cartridge Status Cartridge Status Indicator Display Indicator LED will...
- Page 35 3. Grasp the NOSE CONE with one hand 4. Grasp the DISPOSABLE CARTRIDGE while pressing both NOSE CONE and gently pull away from the HAND RELEASE BUTTONS with the other PIECE. Discard the used cartridge in hand and pull gently. Set the NOSE accordance with local regulations.
-
Page 36: Disposing Of Your I-Light® Pro Ipl System
Disposing of your i-Light® Pro IPL System Please follow the regulations where you live for disposal of electric systems when recycling or disposing of your i-Light® Pro base unit, hand piece or disposable cartridge. Troubleshooting PROBLEM POSSIBLE WHAT YOU SHOULD DO CAUSE My i-Light®... - Page 37 Troubleshooting PROBLEM POSSIBLE WHAT YOU SHOULD DO CAUSE When I place The system is Unlock the system with the SKIN TONE the HAND PIECE locked. SENSOR, using the steps on page 24-25. against my skin, Note that the system must be unlocked again nothing happens.
- Page 38 Troubleshooting PROBLEM POSSIBLE WHAT YOU SHOULD DO CAUSE A light flash You have not The system requires about 2 seconds to recover is not waited enough between flashes. When your i-Light® Pro system emitted time between is ready to flash (and assuming the SKIN CONTACT when I press flashes for the SENSORS are flush against the skin), the system will...
- Page 39 PROBLEM POSSIBLE WHAT YOU SHOULD DO CAUSE The outer ENERGY The i-Light® Contact Customer Service (see page 44) LEVEL lights are for help. flashing alternately system isn’t and the i-Light® working Pro system is properly. beeping every ½ second. The second and The SKIN Lift the HAND PIECE from the BASE UNIT and fourth ENERGY...
- Page 40 Troubleshooting PROBLEM POSSIBLE WHAT YOU SHOULD DO CAUSE All the lights on The NOSE CONE is Check to ensure that the NOSE CONE the system are removed or not on is properly affixed to the HAND PIECE. flashing and the properly.
- Page 41 PROBLEM POSSIBLE WHAT YOU SHOULD DO CAUSE Dirt or debris The i-Light® Pro See page 32 for instructions on how is stuck to the system needs to be to clean your IPL system. If you still window. cleaned. can’t get it clean, contact Customer Service (see page 44) for help.
-
Page 42: Performance Guarantee
• Connecting it to incorrect current and product and sales receipt with your voltage name, address and day time phone • Any other conditions beyond our control number to: Remington Returns Center, 507 Stokely Dr., P.O. Box 1, Deforest, WI 53532. For more information call 800-736-4648. - Page 43 Performance Guarantee Dist. by: Spectrum Brands, Inc. Money-back Offer If within 90 days after you have pur- Spectrum Brands, Inc., chased your Remington branded ® Middleton, WI 53562 product, you are not satisfied and would 2/14 Job# 2014-1-20-77 like a refund, return it with the sales slip Made in china.
-
Page 44: Contact Information
Contact Information customer Service 800-736-4648 Online: www.RemingtonProducts.com Address: Spectrum Brands, Inc., 3001 Deming Way Middleton, WI 53562 Specifications Spot Size Speed 2.25 sec Technology Xenon Flash Lamp (IPL) Max Energy Level 8 J/cm Wavelength 650-1200 nm Electrical Requirements 120 VAC Operation and Safety UL 60335, EN 60335, CSA STD C22.2 No. - Page 45 D E S A R R O L L A D O P O R ¡Registre su nuevo producto hoy! Al registrar su nuevo producto Remington recibirá importantes beneficios: ® Prueba de pertenencia • Protección del producto • Registro del producto • Ofertas especiales...
- Page 46 Índice Página 48 Introducción 49 ¿cómo funciona el Sistema i-Light® Pro IPL? 50 Diagrama del Sistema i-Light® Pro 51 Familiarizándose con su Sistema i-Light® Pro 52 Guía rápida de REFERENcIa 54 Para que sirve el sistema i-Light® Pro IPL? (Indicaciones) 56 contraindicaciones 57 advertencias 60 Beneficios y riesgos...
- Page 47 Página 67 cada vez que utilice el Sistema i-Light® Pro IPL 67 Preparándose para su uso 67 Desbloqueo del Sistema i-Light® Pro IPL mediante la utilización del Sensor de Tono de Piel 70 Configuración del NIVEL DE ENERGÍA 72 Inicio del tratamiento 75 Luego de su uso 76 Obtención de los mejores resultados 77 cómo cuidar su Sistema i-Light®...
- Page 48 Introducción ¡Felicitaciones por la compra de su nuevo A diferencia de la mayoría de los méto- sistema de Depilación de Luz Pulsada dos de depilación caseros, el sistema Intensa i-Light® Pro! Esta a un paso de i-Light® Pro IPL no corta o tira el vello liberarse de la tarea diaria de depilación.
- Page 49 ¿Cómo funciona el Sistema i-Light® Pro IPL? El proceso de depilación en base al uso que actúe sobre todo vello activo. Luego de luz es conocido y ha sido clínicamente de ello, utilice el sistema i-Light® Pro probado en todo el mundo por más de cuando lo necesite para aplicar en los vel- 15 años.
- Page 50 Diagrama del Sistema i-Light® Pro Figura 1...
- Page 51 Interruptor de encendido Sensor tono de piel Toma de energía Cable dispositivo manual Unidad base Ventana flash Dispositivo manual Sensores de contacto con la piel Botón de disparo del flash Botones de liberación cubierta cónica Botón de selección del nivel de energía Cartucho de reemplazo Indicador de modo de enfriamiento...
- Page 52 Guía rápida de REFERENCIA (ver Fig. 1, página 50) 1. PREPaRE La PIEL (ver página 67) 3. SELEccIONE EL NIVEL DE ENERGÍa (Ver página 70) • Afeite el vello en la zona a tratar. • El sistema • Limpie la piel y seque completamente. i-Light®...
- Page 53 4. cOLOQuE EL DISPOSITIVO MaNuaL 5. TRaTE Su PIEL (Ver página 72-75) EN EL ÁREa a TRaTaR (Ver página 72) • Luego de oír el “SONIDO” presione el BOTÓN FLASH para tratar la piel. • Cuando se emita un destello (flash) SENSORES DE CONTACTO CON LA PIEL pasara lo siguiente: - Vera una luz brillante.
- Page 54 Para que sirve el sistema i-Light® Pro IPL? (Indicaciones) color del vello El sistema i-Light® Pro IPL es un disposi- tivo de venta libre diseñado para la remo- El sistema está diseñado para ser uti- ción a largo plazo del vello no deseado. lizado en vellos naturalmente negros o Tono de piel castaños.
- Page 55 TaBLa DE TONO DE PIEL...
- Page 56 Contraindicaciones Información de seguridad importante - energía lumínica, lo que podría ¡Leer antes de usar! ocasionar inflamación de la piel, ampollas temporales o cambio en la El sistema i-Light® Pro no está diseñado coloración de su piel. Consulte la tabla para todos.
- Page 57 ADvERTENCIAS NO uTILIZaR en piel dañada, incluy- El sistema i-Light® Pro IPL es un disposi- tivo poderoso. Como tal, se deberá utili- endo heridas abiertas, aftas, quemadu- zar con especial atención a la seguridad. ras de sol o áreas donde haya recibido Le rogamos leer todas las advertencias tratamientos exfoliantes u otros pro- y precauciones de seguridad antes de...
- Page 58 ADvERTENCIAS NO uTILIZaR si está embarazada o NO DEScaRGaR en una atmósfera existe la posibilidad de estar embarazada, donde una chispa podría causar una o si está amamantando. El sistema explosión, como por ejemplo, cerca de i-Light® Pro IPL no ha sido probado en una fuga de gas.
- Page 59 NO OPERaR con el enchufe o cable NO cuBRIR los componentes de las dañado. Mantener el cable alejado de ranuras de ventilación de la UNIDAD BASE superficies calientes (tales como cocinas, o DISPOSITIVO MANUAL del sistema chimeneas, radiadores u hornos). i-Light®...
- Page 60 Beneficios y riesgos Un estudio clínico supervisado médicamente participantes evidenciaron en promedio 37% demostró que el sistema i-Light® Pro IPL menos vellos 3 meses después del último proporcionó una depilación duradera cuando tratamiento y 48% menos vellos 6 meses se utilizó según lo indicado. después del último tratamiento.
- Page 61 mente la piel. Si el dolor es muy intenso o de vellos que están volviendo a crecer en el persiste luego del tratamiento, debe dejar de área de tratamiento es superior al número usar el sistema y comunicarse con Servicio existente antes de iniciado el tratamiento, al Cliente (páginas 86-89).
- Page 62 ¿Qué esperar del Sistema i-Light® Pro IPL? Durante el tratamiento • Un sonido con cada descarga (flash): Cuando se emite una descarga de luz, El sistema i-Light® Pro ha sido diseñado es normal escuchar un leve sonido para utilizar con facilidad y las sesiones cuando la ampolleta emite el destello de depilación deberían hacerse con de luz.
- Page 63 EXPEcTaTIVaS DEL TRaTaMIENTO Figura 2 Inmediatamente 1 a 2 semanas un mes luego del Tres meses luego de después del trat- después del trat- tratamiento inicial completar los trata- amiento inicial amiento inicial mientos iniciales • No hay cambio • Los vellos en •...
- Page 64 Cómo utilizar su Sistema i-Light® Pro IPL configuración 2. Presione ambos botones de liberación de la cubierta cónica con su pulgar y dedo índice. 1. Saque la unidad base, el cable de alimen- Luego, con ambos botones presionados retire tación y otros componentes de la caja. suavemente la cubierta cónica con su otra Nota: antes de conectar el sistema, revíselo mano.
- Page 65 6. Ahora su sistema i-Light® Pro IPL está listo 5. Conecte el cable de alimentación en el para ser usado. Antes ponga a prueba una enchufe del sistema, conecte el otro extremo pequeña porción de piel y espere 24 horas del cable de alimentación en una toma eléc- (ver página 66).
- Page 66 Utilización del Sistema i-Light® Pro IPL por Primera vez Realización de una prueba en una no se siente cómodo(a) utilizando el sistema en el nivel de energía 2, entonces el nivel de porción de piel energía 1 es la configuración correcta para Al igual que con un nuevo producto para la comenzar.
- Page 67 Cada vez que usa el Sistema i-Light® Pro IPL Preparándose para su uso Desbloqueo del Sistema i-Light® Pro IPL mediante la utilización del Sensor de Antes de utilizar el sistema, afeite el vello en Tono de Piel el área de tratamiento para minimizar la sen- sación de la descarga de luz.
- Page 68 Cada vez que usa el Sistema i-Light® Pro IPL El INDICADOR LED DEL SENSOR DE TONO DE PIEL parpadeará en naranjo 1. Accione el INTERRUPTOR DE 2. Siempre coloque la ventana del sensor ENCENDIDO. El INDICADOR LED DEL de tono de piel directamente en el área SENSOR DE TONO DE PIEL parpadeará...
- Page 69 3a. Si su Tono de Piel NO es adecuado 4. Una vez que el sistema se habilita, la para el uso del sistema, el INDICADOR LUZ DE NIVEL DE ENERGÍA y la LUZ LED DEL SENSOR DE TONO DE PIEL se INDICADORA DE LA VIDA ÚTIL DEL coloca NARANJO y el sistema emitirá...
- Page 70 Cada vez que usa el Sistema i-Light® Pro IPL Notas: configuración del nivel de energía • Si cree que el SENSOR DE TONO DE PIEL Las luces de la Pantalla de Selección de Nivel no ha efectuado una lectura correcta, puede de Energía determinan la intensidad del destel- intentarlo de nuevo luego de 5 segundos.
- Page 71 1. Al arrancar, el sistema se configura a si Notas: mismo en el nivel de energía más bajo • Periódicamente el dispositivo manual o (Nivel 1). Ahora está listo para descargar unidad base alcanzará cierta temperatura el primer destello de luz (flash). y entrará...
- Page 72 Cada vez que usa el Sistema i-Light® Pro IPL Inicio del tratamiento SENSORES DE CONTACTO CON LA PIEL 1. Procure que el NIVEL DE ENERGÍA se 2. Aplique el DISPOSITIVO MANUAL encuentre en una configuración en la piel, procurando que ésta se cómoda (Ver “Configuración del Nivel extienda de manera pareja y uniforme.
- Page 73 3. Si los SENSORES DE CONTACTO CON 4. Si los SENSORES DE CONTACTO CON LA PIEL NO están en pleno contacto LA PIEL en la CUBIERTA CÓNICA están con esta última, el sistema emitirá un en pleno contacto con esta última, se “sonido”...
- Page 74 Cada vez que usa el Sistema i-Light® Pro IPL 5. Presione el BOTÓN FLASH. El sistema 6. Inmediatamente luego de la descarga emitirá una descarga de luz en su piel. de luz, mueva el DISPOSITIVO MANUAL Verá un haz de luz brillante y simul- a una nueva posición de tratamiento táneamente escuchará...
- Page 75 NO aPLIQuE una descarga de luz en la misma zona de tratamiento durante la misma sesión, ya que esto podría causar inflamación de la piel, ampollas tempora- les o cambios en la coloración de su piel. Nota: para una cobertura más rápida mantenga presionado el BOTÓN FLASH mientras levanta el DISPOSITIVO MANUAL y lo vuelve a poner en contacto con la...
- Page 76 Obtención de los mejores resultados Limpieza • Afeite la zona a tratar antes de empezar el tratamiento. Hacer esto le permitirá utilizar Luego de cada sesión, se recomienda un nivel de energía superior, debido a que que limpie su sistema, especialmente el habrá...
- Page 77 Cómo cuidar de su Sistema i-Ligt PRO IPL Reemplazo del cartucho desechable de la DEL FLASH, SENSORES DE CONTACTO CON lámpara cartucho LA PIEL y la ventana del SENSOR DE TONO DE PIEL. Si es necesario, puede sumergir El CARTUCHO DESECHABLE entregará aprox- el paño en agua y jabón suave.
- Page 78 Cómo cuidar su Sistema i-Light® Pro IPL Uso ampolleta flash 0 – 90% 90 – 100% > 100% Flashes 1,351 – 1,500 0 – 1.350 flashes > 1,500 flashes flashes Luz indicadora de vida útil del cartucho Luz indicadora de vida El indicador LED El indicador LED El indicador LED de...
- Page 79 3. Tome la CUBIERTA CÓNICA con una mano 4. Tome el CARTUCHO DESECHABLE y retírelo mientras presiona ambos BOTONES DE suavemente del DISPOSITIVO MANUAL. LIBERACIÓN DE LA CUBIERTA CÓNICA con Bote el cartucho a la basura de acuerdo a la otra mano y tire suavemente. Coloque las regulaciones locales.
- Page 80 Eliminación de su Sistema i-Light® Pro IPL Sírvase respetar las normas del lugar donde vive respecto a la eliminación de sistemas elé- ctricos al momento de reciclar o desechar su unidad base i-Light® Pro, dispositivo manual o cartucho desechable. Detección de problemas PROBLEMA POSIBLE CAUSA QUÉ...
- Page 81 PROBLEMA POSIBLE CAUSA QUÉ DEBE HACER Cuando coloco El sistema está Desbloquee el sistema con el SENSOR DE TONO el DISPOSITIVO bloqueado. DE PIEL siguiendo los pasos de la página 68. MANUAL contra mi Tenga en cuenta que el sistema debe volver a piel, no pasa nada.
- Page 82 Detección de problemas PROBLEMA POSIBLE CAUSA QUÉ DEBE HACER No se emite No ha esperado El sistema requiere menos de 2 segundos para una descarga tiempo suficiente recuperarse entre descargas de luz. Cuando su de luz cuando entre descargas de sistema i-Light®...
- Page 83 PROBLEMA POSIBLE CAUSA QUÉ DEBE HACER Las luces exteriores El sistema i- Comuníquese con Servicio al Cliente para de NIVEL DE Light® no está obtener ayuda (ver páginas 86-89). ENERGÍA están funcionando ad- parpadeando ecuadamente. alternadamente y el sistema i-Light® emite sonidos de bip cada ½...
- Page 84 Detección de problemas PROBLEMA POSIBLE CAUSA QUÉ DEBE HACER Todas las luces No ha esperado El sistema requiere de al menos 2 segundos para en el sistema es- tiempo suficiente recuperarse entre descargas de luz. Cuando su tán parpadeando entre descargas sistema i-Light®...
- Page 85 PROBLEMA POSIBLE CAUSA QUÉ DEBE HACER La ventana tiene El sistema i-Light® Consulte la página 76 para obtener polvo o residuos. Pro necesita una instrucciones sobre cómo limpiar su limpieza. sistema IPL. Si aún no puede limpiarlo, comuníquese con Servicio al Cliente (ver páginas 86-89 para obtener ayuda).
- Page 86 FELICITACIONES, el artículo que usted acaba de adquirir ha sido del mismo sin ningún costo para el consumidor y a reembolsar al diseñado y construido con la más avanzada tecnología Remington consumidor los gastos de envío o transportación del producto.
- Page 87 Para hacer uso de su GARANTIA: 3. El tiempo de reparación en ningún caso será mayor a 30 treinta días - Deberá presentar esta tarjeta. En caso que ella no esté fechada y contados a partir de la fecha de recepción del producto en nuestro timbrada al momento de la compra deberá...
- Page 88 GaRaNTIa GaRaNTIa PaRa PRODucTOS REMINGTON Importado en Argentina Por: EN cENTRO aMERIca Rayovac Argentina S.R.L.Humboldt 2495 Piso #3 (C1425FUG) C.A.B.A. Argentina. RAYOVAC CENTRO AMERICA Garantiza este producto por un periodo de C.U.I.T No. 30-70706168-1 2 años en todas sus partes, contra cualquier defecto de fabricación a partir de la fecha de compra.
- Page 89 - Enrollando el cable alrededor del artefacto causando que el cable se gaste y re rompa prematuramente. Fabricado bajo las - Cualquier otra condición fuera de nuestro especificaciones de Remington. control. HEcHO EN cHINa REPÚBLIca DOMINIcaNa Rayovac Republica Dominicana S.A.
-
Page 90: Servicio Al Cliente
Importado por: RAYOVAC ARGENTINA S.R.L. Humboldt 2495 Piso #3, Buenos Aires – ARGENTINA CUIT No: 30-70706168-1 Hecho en CHINA. Certificado: No: T 3250/1 Información de contacto Servicio al cliente: En línea: www.ProductosRemington.com Dirección: Spectrum Brands, Inc., 3001 Deming Way Middleton, WI 53562 Especificaciones Tamaño del haz Velocidad...
Need help?
Do you have a question about the i-Light Pro IPL6000 and is the answer not in the manual?
Questions and answers