Table of Contents
Advertisement
Available languages
Available languages
Quick Links
OWNERS MANUAL
MANUAL DEL USUARIO
GUIDE D'UTILISATION
Models / Modelos / Modèles :
DSR103, DSR103AUX
Booster
Arrancador
Aide démarrage
DSR103
™
DSR103AUX
PLEASE SAVE THIS OWNER'S MANUAL AND READ BEFORE EACH USE.
This manual will explain how to use the booster and charger safely and effectively.
Please read and follow these instructions and precautions carefully.
POR FAVOR GUARDE ESTE MANUAL DEL PROPIETARIO Y LEER ANTES DE
CADA USO. En este manual se explica cómo utilizar el arrancador y cargador con
seguridad y eficacia. Por favor, lea y siga las siguientes instrucciones y precauciones.
ESSAYER DE GARDER LE MANUEL D'INSTRUCTIONS ET LE LIRE AVANT
CHAQUE UTILISATION. Ce manuel explique comment utiliser l'unité d'une façon
sûre et efficace. S'il vous plaît lisez et suivez ces instructions et précautions.
0099001650-00
Advertisement
Table of Contents

Related Manuals for Schumacher DSR103


Summary of Contents for Schumacher DSR103
- Page 1 OWNERS MANUAL MANUAL DEL USUARIO GUIDE D’UTILISATION Models / Modelos / Modèles : DSR103, DSR103AUX Booster Arrancador Aide démarrage DSR103 ™ DSR103AUX PLEASE SAVE THIS OWNER’S MANUAL AND READ BEFORE EACH USE. This manual will explain how to use the booster and charger safely and effectively.
-
Page 2: Important Safety Instructions
1. IMPORTANT SAFETY INSTRUCTIONS SAVE THESE INSTRUCTIONS. 1.1 SAVE THESE INSTRUCTIONS – 1.10 Use only the included charger for This manual contains important safety recharging the booster. and operating instructions. WARNING! RISK OF EXPLOSIVE GASES. WARNING! 1.11 WORKING IN THE VICINITY OF A RISK OF ELECTRIC SHOCK OR FIRE. -
Page 3: Preparing To Use The Booster
3. PREPARING TO USE THE BOOSTER IMPORTANT: AFTER PURCHASE, contact with your eyes, nose and mouth. CHARGE YOUR BOOSTER FOR Use baking soda and water to neutralize 24 HOURS, BEFORE USE. the battery acid and help eliminate airborne corrosion. Do not touch your WARNING! RISK OF CONTACT WITH eyes, nose or mouth. -
Page 4: Charging The Internal Battery Of The Booster
7. CHARGING THE INTERNAL BATTERY OF THE BOOSTER • Press the Voltmeter button to show the 4. The charger’s green POWER LED charge level of the battery. will light. • After starting the engine at 2000 rpm, 5. Charging will begin within ten minutes leave the booster connected to the and finish automatically. - Page 5 Maintaining the Battery of time. However, problems with the battery, improper connections or other The SC3DSR maintains 12V batteries, unanticipated conditions could cause keeping them at full charge. excessive current draws. Occasionally NOTE: The maintain mode technology monitoring your battery and the charging allows you to safely charge and maintain process is recommended.
- Page 6 8.6 Internal fuse replacement Connect to a heavy gauge metal part of the frame or engine block. The booster is equipped with an internal 8. If the batteries are side by side: fuse. It can melt following a short circuit or Connect the red clamp (+) to the a too-long start attempt.
-
Page 7: Maintenance Instructions
NOTE: If it is necessary to close the • To allow the voltage of the booster hood during the jump starting process, battery to build up again. ensure that the hood does not touch • To allow the renewal of gases inside the AUXILIARY DC cables or cut the the battery. -
Page 8: Specifications
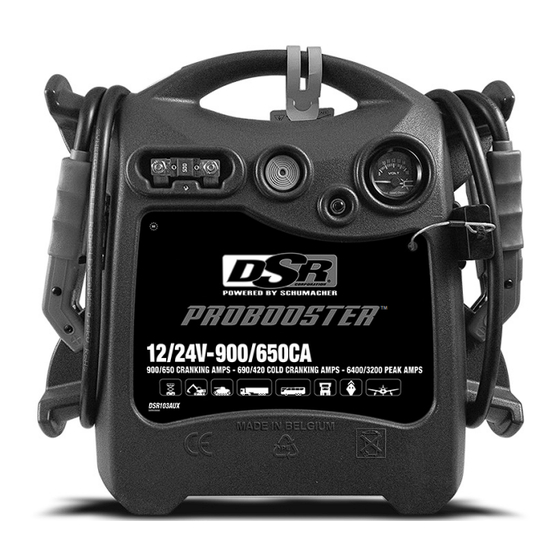
11. SPECIFICATIONS Booster Internal battery type ............Maintenance-free AGM lead-acid Nominal voltage ..................12V/24V DC Capacity ......................2 x 32 Ah Peak amps, 12V...................... 6400 Peak amps, 24V...................... 3200 Cranking amps, 12V ....................900 Cranking amps, 24V ....................650 Cold cranking amps, 12V ..................690 Cold cranking amps, 24V .................. - Page 9 PROBLEM REASON SOLUTION The Booster has no power. The booster’s battery is not Check the battery charge charged. status by pressing the Voltmeter button. Recharge the battery. The internal fuse has blown. Replace the fuse. The battery in the booster won’t The battery is bad (will not Replace the battery.
-
Page 10: Before Returning For Repairs
Manufacturer does not provide any warranty for any accessories used with this product that are not manufactured by Schumacher Electric Corporation and approved for use with this product. This Limited Warranty is void if the product is misused, subjected to careless handling, repaired, or modified by anyone other than Manufacturer or if this unit is resold through an unauthorized retailer. -
Page 11: Instrucciones De Seguridad Importantes
1. INSTRUCCIONES DE SEGURIDAD IMPORTANTES GUARDE ESTAS INSTRUCCIONES. 1.1 GUARDE ESTAS INSTRUCCIONES – 1.10 Use solo el cargador incluido para Este manual contiene instrucciones de recargar el arrancador. funcionamiento y seguridad importantes. ADVERTENCIA: ADVERTENCIA: RIESGO DE RIESGO DE GASES EXPLOSIVOS. DESCARGA ELÉCTRICA O FUEGO. -
Page 12: Preparación Para Utilizar El Arrancador
ojos mientras trabaje en forma cercana a potable corriente por al menos 10 minutos la batería. y obtenga atención médica en forma inmediata. 2.9 Si el ácido de la batería tiene contacto con su piel o su ropa, lave de inmediato 2.10 Si el ácido de la batería es accidentalmente el área afectada con agua y jabón. -
Page 13: Carga De La Batería Interna Del Arrancador
6.1 CARGADOR LED CLAMPS REVERSED Botón de Start / Stop (inicio / parada) [pinzas invertidas] (rojo) parpadea: Pulse para comenzar inmediatamente Las conexiones están inversas. la carga de su batería conectada correctamente. Si no se presiona el LED CHARGING [carga] (amarillo/ botón, la carga debe comenzar en diez naranja) encendido: El cargador minutos. -
Page 14: Instrucciones De Operación
6. El LED verde parpadeante indica que Modo de Mantenimiento la batería está totalmente cargada. (Monitoreo a Modo de Flote) Cuando la luz LED CHARGED/ 7. Cuando la carga esté completa, MAINTAINING (verde) esté pulsando, desconecte el cargador de energía de quiere decir que pasó... - Page 15 8.4 Para arrancar el motor del vehículo Conecte a una pieza metálica de calibre grueso del marco o del bloque motor. IMPORTANTE: El uso del arrancador sin una batería instalada en el vehículo puede 8. Si las baterías están al lado una dañar el sistema eléctrico del vehículo.
- Page 16 8.5 Inversión de polaridad ADVERTENCIA: UNA CHISPA PROVOCADA CERCA DE LA BATERÍA Si la polaridad no está correcta, sonará el PUEDE CAUSAR LA EXPLOSIÓN zumbador: DE LA BATERÍA. PARA REDUCIR EL • A la condición de que - todavía queda RIESGO DE PROVOCAR CHISPAS al menos 4 voltios en las baterías del CERCA DE LA BATERÍA:...
-
Page 17: Instrucciones De Mantenimiento
esté en cortocircuito. El fusible interno 10. Una vez que arranque el motor, se quemará. desconecte el selector de voltaje de salida. A continuación, desconecte el • Asegúrese de que las abrazaderas cable de CC auxiliar del vehículo y luego estén conectadas correctamente. -
Page 18: Localización Y Solución De Problemas
12. REPUESTOS Arrancador Medidor ..................... 5399200032Z Pulsador ....................0499000177Z Batería interna (12 V, 32 Ah) ..............5799000042Z Pinzas de la batería .................. 2299002913Z Fusible (AMG de alta resistencia, 500 A)..........3999002114Z Cargador Cargador SC3DSR ................... 2299002873Z Kit de enchufe ................... 2299002914Z 13. -
Page 19: Antes De Devolver A Reparaciones
Lunes-viernes 7:00 to 5:00 Para REPARACIÓN O DEVOLUCIÓN, comuníquese con Servicios al Cliente al 1-800-621-5485. NO ENVÍE LA UNIDAD hasta que usted reciba AUTORIZACIÓN DE DEVOLUCIÓN DE MERCANCÍA (RMA) de Servicios al Cliente de Schumacher Electric Corporation. • 19 •... -
Page 20: Garantía Limitada
El Fabricante no presta garantía por lo accesorios utilizados con este producto que no sean los fabricados por Schumacher Electric Corporation y que no estén aprobados para su uso con este producto. La presente Garantía Limitada será nula si el producto se utiliza en forma errónea, se trata de manera inadecuada, es reparado o modificado... -
Page 21: Consignes De Sécurité Importantes
1. CONSIGNES DE SÉCURITÉ IMPORTANTES CONSERVEZ CES INSTRUCTIONS. 1.1 CONSERVEZ CES INSTRUCTIONS – 1.10 Utilisez seulement le chargeur inclus pour Ce manuel contient d’importantes recharger le survolteur. consignes de sécurité et d’exploitation. AVERTISSEMENT! AVERTISSEMENT! RISQUE DE CHOC RISQUE DE GAZ EXPLOSIFS. ÉLECTRIQUE OU D’INCENDIE. -
Page 22: Préparation À L'utilisation Du Booster
2.8 Portez des lunettes et une protection du pénètre dans vos yeux, immédiatement et corps, y compris des lunettes de sécurité abondamment l’œil avec de l’eau froide et des vêtements protecteurs. Évitez de pendant au moins 10 minutes et consulter toucher vos yeux lorsque vous travaillez à... -
Page 23: Charge De La Batterie Interne Du Booster
6.1 CHARGEUR Bouton de marche/arrêt DEL d’INVERSION DES PINCES Appuyez pour charger immédiatement (rouge) clignotant : la batterie alors qu'elle est correctement Les connexions ont été inversées. branchée. Si vous n’appuyez pas sur le Voyant DEL de CHARGE bouton, la charge devrait débuter dans (jaune / orange) allumée : 10 minutes. -
Page 24: Consignes D'utilisation
7.3 Modes de charge Mode de maintien (Surveillance du mode de flottement) Mode de charge automatique Lorsque le voyant DEL vert (CHARGÉ / Lorsqu’une charge automatique est MAINTIEN) émet des pulsations, le chargeur effectuée, le chargeur reste en mode s’est placé en mode de maintien. Ce mode automatique après que la batterie est permet de garder la batterie complètement chargée. - Page 25 8.4 Démarrage d’un moteur de véhicule. Connectez à une grosse pièce de métal de la carrosserie ou du bloc moteur. IMPORTANT : Utilisation de la booster 8. Si les batteries sont côte à côte : sans batterie installée dans le véhicule Connectez la pince rouge (+) à...
- Page 26 8.5 Inversion de polarité MISE EN GARDE : LA PRÉSENCE Si la polarité n’est pas correcte, l’alarme D’UNE ÉTINCELLE À PROXIMITÉ sonnera : PEUT ENTRAÎNER L’EXPLOSION DE LA BATTERIE. RÉDUIRE LE RISQUE • Pour autant qu’il reste au moins 4 volts D’ÉTINCELLE PRÈS DE LA BATTERIE : dans les batteries du véhicule.
-
Page 27: Instructions D'entretien
IMPORTANT : à 0 volt. Cela pourrait endommager l’alternateur. • Ne branchez jamais le survolteur à une batterie ou à un démarreur qui 10. Lorsque le moteur a démarré, est court-circuité. Le fusible interne débranchez le sélecteur de tension explosera. de sortie. -
Page 28: Piêces De Rechange
12. PIÊCES DE RECHANGE Survolteur Compteur ....................5399200032Z Bouton poussoir ..................0499000177Z Batterie interne (12 V, 32 Ah) ..............5799000042Z Pinces de serrage ..................2299002913Z Fusible (AMG ultra-robuste, 500 A) ............3999002114Z Chargeur Chargeur SC3DSR ................... 2299002873Z Kit de plug ....................2299002914Z 13. - Page 29 PROBLÈME CAUSE POSSIBLE SOLUTION La batterie est bien branchée mais La tension de la batterie est basse. Appuyez sur le bouton MARCHE/ le VOYANT DEL DE CHARGE ARRÊT pour débuter la charge ne s’est jamais allumé. immédiatement. Le VOYANT DEL DE BATTERIE La tension de la batterie est La batterie pourrait être DÉFECTUEUSE...
-
Page 30: Avant De Retourner Pour Les Réparations
PREMIER ACHETEUR DE CE PRODUIT. CETTE GARANTIE LIMITÉE N’EST PAS TRANSFÉRABLES NI CESSIBLES. Schumacher Electric Corporation (le « Fabricant ») garantit ce démarreur et le chargeur pour un (1) an à compter de la date d’achat au détail contre les défauts de matériaux ou de fabrication qui peuvent se produire dans des conditions normales d’utilisation et... -
Page 31: Warranty Card / Tarjeta De Garantía
ORIGINAL receipt because it will be required for any warranty claims. This warranty is not transferable. Send warranty card only. DO NOT SEND UNIT TO THIS ADDRESS FOR REPAIR. Mail this card to: Schumacher Electric Corporation 801 Business Center Drive Mount Prospect, IL 60056-2179 Name ______________________________________________________________... -
Page 32: Carte De Garantie
éventuelle réclamation au titre de la garantie. Cette garantie n’est pas transférable. Envoyer la carte de garantie seulement. NE PAS ENVOYER L’UNITÉ À CETTE ADRESSE POUR RÉPARATION. Envoyer cette carte à : Schumacher Electric Corporation 801 Business Center Drive Mount Prospect, IL 60056-2179 (É.-U ) Nom _______________________________________________________________...
Need help?
Do you have a question about the DSR103 and is the answer not in the manual?
Questions and answers