Advertisement
Advertisement

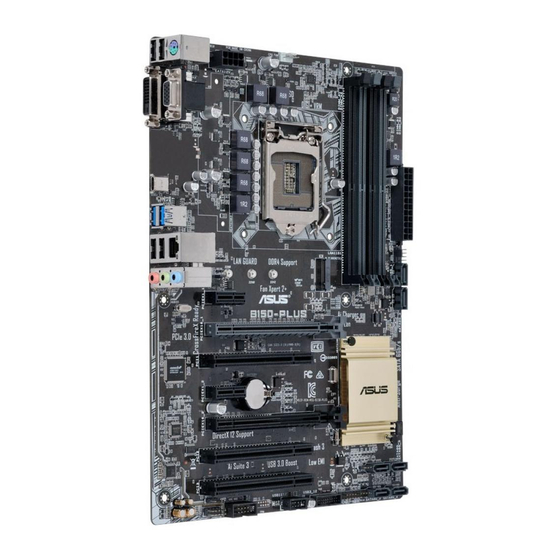
Related Manuals for Asus B150-A


Summary of Contents for Asus B150-A
- Page 1 Motherboard Pin Definition E11133 Revised Edition v2 December 2015...
-
Page 2: Table Of Contents
Contents Motherboard Pin Definition Headers ....................... 1-3 Jumpers ...................... 1-4 Internal Connectors ................... 1-6 Onboard LEDs ..................1-16 Onboard buttons and switches .............. 1-17 Motherboard Pin Definition... -
Page 3: Motherboard Pin Definition
Headers Clear RTC RAM (2-pin CLRTC) This header allows you to clear the Real Time Clock (RTC) RAM in CLRTC CMOS. You can clear the CMOS memory of date, time, and system setup parameters by erasing the CMOS RTC RAM data. The onboard button cell battery powers the RAM data in CMOS, which include system setup information such as system passwords. -
Page 4: Jumpers
Jumpers Clear RTC RAM (3-pin CLRTC) This jumper allows you to clear the Real Time Clock (RTC) CLRTC RAM in CMOS. You can clear the CMOS memory of date, time, and system setup parameters by erasing the CMOS RTC RAM Normal Clear RTC data. - Page 5 USB device wake-up (3-pin USBPWF) Set these jumpers to +5V to wake up the computer from S1 sleep USBPWF mode (CPU stopped, DRAM refreshed, system running in low power mode) using the connected USB devices. Set to +5VSB to wake up from S3 and S4 sleep modes (no power to CPU, DRAM in slow +5VSB (Default)
-
Page 6: Internal Connectors
Internal Connectors Serial port connector (10-1 pin COM) This connector is for a serial (COM) port. Connect the serial port module cable to this connector, then install the module to a slot opening at the back of the system chassis. PIN 1 CPU and chassis fan connectors (4-pin CPU_FAN, 4-pin CHA_FAN) Connect the fan cable to the fan connector on the motherboard,... - Page 7 The system may become unstable or may not boot up if the power is inadequate. • If you are uncertain about the minimum power supply requirement for your system, refer to the Recommended Power Supply Wattage Calculator at http://support.asus. com/PowerSupplyCalculator/PSCalculator.aspx?SLanguage=en-us for details. Speaker connector (4-pin SPEAKER) The 4-pin connector is for the chassis-mounted system warning speaker.
- Page 8 Front panel audio connector (10-1 pin AAFP) This connector is for a chassis-mounted front panel audio AAFP I/O module that supports either HD Audio or legacy AC`97 audio standard. Connect one end of the front panel audio I/O module cable to this connector. PIN 1 PIN 1 We recommend that you connect a high-definition front...
- Page 9 LVDS connector (40-pin LVDS) This connector is for an LCD monitor that supports Low- LVDS voltage Differential Signaling (LVDS) interface. Enable LVDS in the BIOS setup if the LVDS output is PIN 20 PIN 1 disabled by default. PIN 40 PIN 21 Embedded DisplayPort (40- pin eDP) This connector is for an internal embedded DisplayPort connection.
- Page 10 System panel connector (10-1 pin F_PANEL) This connector supports several chassis-mounted functions. F_PANEL • System power LED (2-pin PWR_LED) +PWR LED PWR BTN This 2-pin connector is for the system power LED. Connect the chassis power LED cable to this connector. The system power LED lights up when you turn on the system power, and blinks when the system is in sleep mode.
- Page 11 System panel connector (20-5 pin PANEL) This connector supports several chassis-mounted PANEL functions. +PWR_LED- SPEAKER PWR_SW • System power LED (4-pin +PWR_LED-) This 2-pin connector is for the system power LED. Connect the chassis power LED cable to this connector. The system power LED lights up when PIN 1 you turn on the system power, and blinks when the system is in sleep mode.
- Page 12 System panel connector (20-3 pin F_PANEL) This connector supports several chassis-mounted PANEL functions. +PWR_LED- SPEAKER PWR_SW • System power LED (4-pin +PWR_LED-) This 2-pin connector is for the system power LED. Connect the chassis power LED cable to this CHASSIS connector. The system power LED lights up when PIN 1 you turn on the system power, and blinks when the system is in sleep mode.
- Page 13 TPM connector (20-1 pin TPM) This connector supports a Trusted Platform Module (TPM) system, which can securely store keys, digital certificates, passwords, and data. A TPM system also helps enhance network security, protects digital identities, and ensures platform integrity. PIN 1 TPM connector (14-1 pin TPM) This connector supports a Trusted Platform Module (TPM) system, which can securely store keys, digital certificates, passwords, and data.
- Page 14 Flat panel display brightness connector (8-pin LCD_BLKT_PANEL) This connector is for the LCD panel backlight and brightness LCD_BLKT_PANEL controls. It enables the LCD panel backlight, provides backlight control signals, and provides brightness control signals for the PIN 1 brightness button on the front panel. LCD panel monitor switch header (2-pin PANEL_SW) This 2-pin header is for connecting a monitor switch that can turn off PANEL_SW...
- Page 15 DMIC connector (4-pin DMIC) The DMIC connector is for connecting the digital microphone module DMIC used in All-in-One chassis. PIN 1 Custom header (14-pin CUSTOM) The custom header is for connecting customized modules for CUSTOM additional features. PIN 1 Prog_LED Ground SMB_SLK +3.3 VSB...
-
Page 16: Onboard Leds
Onboard LEDs Standby Power LED The motherboard comes with a standby power LED that lights SB_PWR up to indicate that the system is ON, in sleep mode, or in soft-off mode. This is a reminder that you should shut down the system and unplug the power cable before removing or Standby Power Powered Off... -
Page 17: Onboard Buttons And Switches
Due to memory tuning requirement, the system automatically reboots when each timing set is tested. If the installed DIMMs still fail to boot after the whole tuning process, replace the DIMMs with ones recommended in the Memory QVL (Qualified Vendors Lists) in this user manual or on the ASUS website at www.asus.com. • If you turn off the computer and replace DIMMs during the tuning process, the system continues memory tuning after turning on the computer. To stop memory tuning, turn off the computer and unplug the power cord for about 5–10 seconds. - Page 18 Clear CMOS button (CLR_CMOS) Press this button to clear the BIOS setup information only when the systems hangs due to overclocking. KeyBot button (KeyBot) Press this button to activate the KeyBot feature. KEBOT The KeyBot feature supports USB keyboards only. Sonic SoundStage button (SOUNDSTAGE) Press this button to activate the Sonic SoundStage feature.
Need help?
Do you have a question about the B150-A and is the answer not in the manual?
Questions and answers