Samsung NV75K5571RS Use & Installation Manual
Hide thumbs
Also See for NV75K5571RS:
- User & installation manual (48 pages) ,
- User & installation manual (96 pages)

Related Manuals for Samsung NV75K5571RS


Summary of Contents for Samsung NV75K5571RS
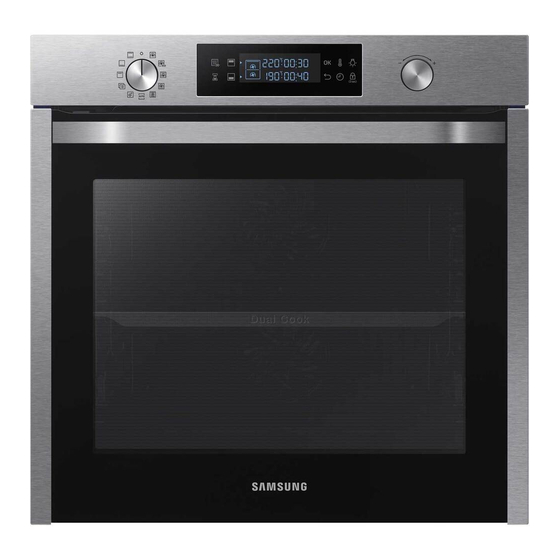
- Page 1 Built-in Oven User & Installation manual NV75K5571RS / NV75K5571BS NV75K5571RS_EU_DG68-00738A-00_EN.indd 1 1/13/2016 11:30:09 AM...
-
Page 2: Table Of Contents
Contents Cooking smart Using this manual Manual cooking The following symbols are used in this User Manual: Auto cook programmes Safety instructions Test Dishes Collection of frequent Auto cook recipes Important safety precautions Correct Disposal of This Product (Waste Electrical & Electronic Equipment) Maintenance Auto energy saving function Cleaning... -
Page 3: Using This Manual
Using this manual Safety instructions Thank you for choosing SAMSUNG Built-In Oven. Installation of this oven must be performed only by a licensed electrician. The This User Manual contains important information on safety and instructions installer is responsible for connecting the appliance to the mains power supply in intended to assist you in the operation and maintenance of your appliance. - Page 4 Safety instructions The method of fixing is not to depend on the use of adhesives The appliance and its accessible parts become hot during use. since they are not considered to be a reliable fixing means. Care should be taken to avoid touching heating elements. Children less than 8 years of age shall be kept away unless During use the appliance becomes hot.
- Page 5 If your oven needs repair, contact trays or tins on it. The aluminum foil blocks the heat, which may result in damage a SAMSUNG Service center or your dealer. to the enamel surfaces and cause poor cooking results.
-
Page 6: Correct Disposal Of This Product (Waste Electrical & Electronic Equipment)
Make sure all parts and accessories are included in the product package. If you household waste at the end of their working life. To prevent have a problem with the oven or accessories, contact a local Samsung customer possible harm to the environment or human health from centre or the retailer. -
Page 7: Power Connection
(earthgrounding), which must be longer than the others. If you use a plug-type socket, the plug must remain accessible after the oven is installed. Samsung is not responsible for accidents caused by missing or faulty Rotisserie spit and... -
Page 8: Cabinet Mount
If installing the oven in a built-in cabinet, the cabinet must have its plastic surfaces and adhesive parts resistant up to 90 °C, and adjacent furniture must be resistant Min. 560 up to 75 °C. Samsung is not responsible for damage to furniture from the oven’s Min. 50 heat emission. - Page 9 Mounting the oven After installation is complete, remove the protective film, tape, and other packing material, and take out the provided accessories from inside the oven. To remove Make sure to leave a gap (A) of at least the oven from the cabinet, first disconnect power to the oven and remove 5 mm between the oven and each side of 2 screws on both sides of the oven.
-
Page 10: Before You Start
Before you start Initial settings Smart safety mechanism When you power on the oven for the first time, the default time of “12:00” appears If you open the door while the oven is operating, the oven light turns on and on the display where the hour element (“12”) blinks. - Page 11 Basic use Rotisserie spit and Put the tray at rack position 1 to collect cooking juices, or For better cooking experience, familiarise yourself with how to use each accessory. Shashlik * on the bottom of the oven for a large serving of meat. It is recommended to use the spit accessories for meat under Wire rack The wire rack is designed for grilling and roasting.
-
Page 12: Dual Cook Mode
Before you start Operations Dual cook mode Control panel You can use both the upper and lower compartments to cook two different recipes, The front panel comes in a wide range of materials and colours. For improved or simply choose one compartment to cook with. quality, the actual appearance of the oven is subject to change without notice. -
Page 13: Common Settings
Common settings 10 Oven light Press to turn the internal light on or off. The oven light turns on automatically when the door is open It is common to change the default temperature and/or cooking time across all or when the oven operation starts. And it turns off cooking modes. - Page 14 Operations Cooking time End time 1. Turn the mode selector to choose a mode 1. Turn the mode selector to choose a mode or function. or function. 2. Press the button, and then turn the 2. Press twice, and turn the value dial to value dial to set a desired time up to 23 set a desired end time.
- Page 15 Delay End To clear the cooking time Delay End is designed to make cooking more convenient. You can clear the cooking time. This is useful if you want to stop the oven manually at any time during the process. Case 1 1.
-
Page 16: Cooking Modes (Except For Grill)
Operations To clear the end time Cooking modes (except for Grill) You can clear the end time. This is useful if you want to stop the oven manually at 1. Turn the mode selector to select an any time during the process. cooking mode. - Page 17 Dual cook mode The oven starts preheating with icon until the internal temperature reaches the You can use the provided divider to separate the cooking chamber in the upper target temperature. and lower compartments. This allows users to enable two different cooking modes Preheating is recommended for all cooking simultaneously, or to simply choose one compartment to cook with.
-
Page 18: Cooking Modes (Grill)
Operations Cooking modes (Grill) Temperature range (°C) Suggested Mode Dual temperature 1. Turn the mode selector to select Single (°C) Upper Lower * 40-250 40-250 Bottom heat + The bottom heating element generates heat, which Convection is evenly distributed by the convection fan. Use this 2. -
Page 19: Dual Cook Mode Temperature Setting Range
Dual cook mode Dual cook mode temperature setting range Grilling with Dual cook mode is useful for small serving sizes to save power. By You can use both the upper and lower compartments simultaneously for different default, only the Large grill option in the upper compartment is available because cooking operations. -
Page 20: To Stop Cooking
Operations To stop cooking Upper compartment is limited to (°C) If Lower is set to (°C) Minimum Maximum While cooking is in process, turn the mode selector to “ ”. The oven turns off in a few seconds. This is because, to avoid accepting incorrect commands by users, the oven waits a few seconds so that they can correct their selection. -
Page 21: Special Function
Special function Auto cook Add special or additional functions to improve your cooking experience. Special For inexperienced cooks, the oven offers a total of 50 auto cooking recipes. Take functions are not enabled in Dual cook mode. advantage of this feature to save you time or shorten your learning curve. The cooking time and temperature will be adjusted according to the selected recipe. -
Page 22: Cleaning
Operations Dual cook mode Cleaning 1. Insert the divider in level 3 to activate Two cleaning modes are available for you. This function saves you time by Dual cook mode. removing the need for regular manual cleaning. The remaining time appears on the display during this process. - Page 23 4. Use a dry cloth to clean inside the oven. 3. Turn the value dial to select Pyro cleaning (C 2), and then press OK. 4. Turn the value dial to select a cleaning time from 3 levels: 1 hr 50 min, 2 hr 10 min, and 2 hr 30 min.
-
Page 24: Timer
Operations Cooking smart Timer Manual cooking Timer helps you check the time or operating duration while cooking. WARNING on acrylamide 1. Press Acrylamide produced while baking starch-contained food such as potato chips, French fries, and bread may cause health problems. It is recommended to cook these foods at low temperatures and avoid overcooking, heavy crisping, or burning. - Page 25 Baking Type of Temp. Time Food Accessory Level We recommend to preheat the oven for best results. heating (°C) (min.) Type of Temp. Time Apple pie Wire rack, 160-170 65-75 Food Accessory Level heating (°C) (min.) Ø 20 cm tin Sponge cake Wire rack, Ø...
- Page 26 Cooking smart Grilling Type of Temp. Time Food Accessory Level We recommend preheat the oven using large grill mode. Turn over after half of heating (°C) (min.) time. Poultry(Chicken/Duck/Turkey) Type of Temp. Time Chicken, Whole, Wire rack + 80-100* Food Accessory Level heating...
- Page 27 Frozen ready-meal Pro-Roasting This mode includes an automatic heating-up cycle up to 220 °C. The top heater Type of Temp. Time and the convection fan are operating during the process of searing the meat. After Food Accessory Level heating (°C) (min.) this stage the food is cooked gently by the low temperature of pre-selection.
- Page 28 Cooking smart ECO convection Dual cook This mode uses the optimized heating system so that you save the energy during Before using dual cook function insert the divider into the oven. We recommend cooking your dishes. The times of this category are suggested to not be preheated preheat the oven for best results.
-
Page 29: Auto Cook Programmes
You can also use upper or lower compartment only to save power. The cooking Auto cook programmes time can be extended when you use separated compartment. We recommend preheat the oven for best results. Single cook The following table presents 40 auto programmes for cooking, roasting and Upper baking. - Page 30 Cooking smart Code Food Weight (kg) Accessory Level Code Food Weight (kg) Accessory Level 1.2-1.5 Wire rack 0.3-0.5 Universal tray Put ingredients for Ratatouille in casserole dish with lid. Prepare rolls (chilled ready dough). Put on baking paper Ratatouille A 12 Bread rolls Start programme, after preheating beep sounds, put dish on Universal tray.
- Page 31 Code Food Weight (kg) Accessory Level Code Food Weight (kg) Accessory Level 0.7-0.8 Wire rack 0.9-1.1 Wire rack + Universal tray Prepare dough using a 20-24cm ovenproof dish. Start 1.1-1.3 A 19 Brownies programme, after preheating beep sounds, put dish in A 26 Chicken, whole Rinse and clean chicken.
- Page 32 Cooking smart Code Food Weight (kg) Accessory Level Code Food Weight (kg) Accessory Level 0.3-0.5 0.3-0.6 Universal tray Wire rack 0.5-0.7 0.6-0.9 A 32 Sole Put Sole on baking paper on the universal tray. Cut Start programme, after preheating beep sounds, put the A 38 Frozen pizza surface with knife.
- Page 33 Dual cook Code Food Weight (kg) Accessory Level The following table presents 10 auto programmes for cooking, roasting and 0.3-0.5 Universal tray baking. You can use only upper cavity or lower cavity and use the upper and lower Frozen oven 0.5-0.7 cavity at the same time.
-
Page 34: Test Dishes
Cooking smart Test Dishes 2. Grilling Preheat the empty oven for 5 minutes using Large Grill function. According to standard EN 60350-1 Type of Time Type of food Accessory Level Temp. (°C) 1. Baking heating (min.) The recommendations for baking refer to a preheated oven. Do not use the fast White bread Wire rack 270 (max) -
Page 35: Collection Of Frequent Auto Cook Recipes
Collection of frequent Auto cook recipes Lasagne Ingredients 2 tbsp olive oil, 500 g minced beef, 500 ml tomato sauce, Potato gratin 100 ml beef stock, 150 g dried lasagne sheets, 1 onion (chopped), 200 g grated cheese, 1 tsp each of dried parsley Ingredients 800 g potatoes, 100 ml milk, 100 ml cream, 50 g beaten whole flakes, oregano, basil... - Page 36 Cooking smart Apple pie Quiche Lorraine Ingredients • Pastry: 275 g flour, tbsp salt, 125 g white castor sugar, 8 g Ingredients • Pastry: 200 g plain flour, 80 g butter, 1 egg vanilla sugar, 175 g cold butter, 1 egg(beaten) •...
- Page 37 Homemade pizza Rack of Pork rib Ingredients • Pizza dough: 300 g flour, 7 g dried yeast, 1 tbsp olive oil, 200 Ingredients 2 racks pork spare ribs, 1 tbsp black peppercorns, 3 bay leaves, ml warm water, 1 tbsp sugar and salt 1 onion (chopped), 3 garlic cloves (chopped), 85 g brown sugar, •...
-
Page 38: Maintenance
Maintenance Door Cleaning Do not remove the oven door unless for cleaning purposes. To remove the door for WARNING cleaning, follow these instructions. • Make sure the oven and accessories are cool before cleaning. WARNING • Do not use abrasive cleaning agents, hard brushes, scouring pads or cloths, steel The oven door is heavy. - Page 39 Door glass 5. Remove the third sheet from the door in the arrow direction. Depending on the model, the oven door is equipped with 3-4 sheets of glass 6. Clean the glass with soapy water and a placed against each other. Do not remove the door glass unless for cleaning clean cloth.
-
Page 40: Replacement
• Before replacing a bulb, turn off the oven and unplug the power cord. • Use only 25-40 W/220-240 V, 300 °C heat-resistant bulbs. You can purchase approved bulbs at a local Samsung service center. • Always use a dry cloth when handling a halogen bulb. This is to prevent the bulb from being tampered with fingerprints or sweat, resulting in a shortened lifecycle. -
Page 41: Troubleshooting
If you encounter a problem with the oven, first check the table below and try the The oven exterior • If the oven is installed • Keep the gaps specified suggestions. If the problem continues, contact a local Samsung service centre. is too hot during in a place without good in the product installation operation. - Page 42 Troubleshooting Problem Cause Action Problem Cause Action Cooking is • The fan automatically runs • This is not a product The oven does not • If the door is often opened • Do not frequently open finished, but the for a certain amount of malfunction, so there is no cook properly.
-
Page 43: Information Codes
Turn off the C-d0 Occurs when a button is pressed and oven and try again. If the held for a period of time. problem continues, contact a local Samsung service centre. English 43 NV75K5571RS_EU_DG68-00738A-00_EN.indd 43 1/13/2016 11:30:31 AM... -
Page 44: Appendix
Do not open the door frequently during cooking to maintain the oven temperature and to save energy. Model identification NV75K5571RS / NV75K5571BS • Plan oven use to avoid turning the oven off between cooking one item and the Cavity type... - Page 45 Memo NV75K5571RS_EU_DG68-00738A-00_EN.indd 45 1/13/2016 11:30:31 AM...
- Page 46 Memo NV75K5571RS_EU_DG68-00738A-00_EN.indd 46 1/13/2016 11:30:31 AM...
- Page 47 Memo NV75K5571RS_EU_DG68-00738A-00_EN.indd 47 1/13/2016 11:30:31 AM...
- Page 48 (*0,20 €/Anruf aus dem dt. Festnetz, aus dem Mobilfunk max. 0,60 €/Anruf) ITALIA 800-SAMSUNG (800.7267864) www.samsung.com/it/support CYPRUS 8009 4000 only from landline, toll free www.samsung.com/gr/support 80111-SAMSUNG (80111 726 7864) only from land line GREECE (+30) 210 6897691 from mobile and land line LUXEMBURG 261 03 710 www.samsung.com/be_fr/support NETHERLANDS 0900-SAMSUNG (0900-7267864) (€...
Need help?
Do you have a question about the NV75K5571RS and is the answer not in the manual?
Questions and answers