Table of Contents
Advertisement
Advertisement
Table of Contents

Related Manuals for BlackVue DR430-2CH


Summary of Contents for BlackVue DR430-2CH
-
Page 2: Table Of Contents
Table of Contents Introduction ...................3 Keeping the BlackVue dashcam updated ......... 30 Formatting the microSD card ..................30 Important safety information ............4 Format using Windows Viewer ......................30 Format using Mac Viewer ......................... 32 Overview ..................7 Upgrading the firmware .....................34 In the box .........................7 Changing settings .............. -
Page 3: Introduction
Note y A formatted microSD card is provided in the BlackVue dashcam when you purchase the product. After turning on the power of the dashcam, the microSD card will be initialized and programs such as BlackVue Viewer will be installed. -
Page 4: Important Safety Information
Do not operate the product with wet hands. Doing so may cause electric shock. y Do not install the product in an environment with high humidity, or combustible gases or liquids. Doing so may cause an explosion and/or fire. BLACKVUE... - Page 5 Plug in the power cord firmly so that it cannot easily be disconnected. Failure to do so may cause fire. y Do not cover the product with any material. Doing so may cause external deformation of the product or fire. Use the product and peripherals in a well-ventilated location. DR430-2CH...
- Page 6 Do not remove the microSD card while the microSD card is saving or reading data. The data can be damaged or malfunctions may occur. y It is recommended that you install the software and firmware from the BlackVue download page. You can access the BlackVue download page on the BlackVue website (www.blackvue.com).
-
Page 7: Overview
To improve the performance of the product, the contents of this manual are subject to change without prior notice. y For more information about the package components and accessories, visit the BlackVue website (www.blackvue.com). y You can find the microSD card in the BlackVue dashcam. -
Page 8: At A Glance
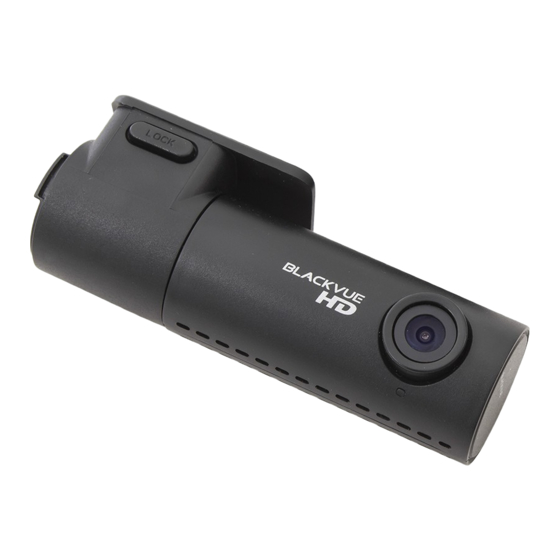
At a glance The following diagrams explain each part of the BlackVue dashcam. Front camera 115.9 mm Lock button Camera lens Front security LED Mounting bracket : Blinks slowly in normal and parking mode. : Blinks quickly when an event is being recorded (impact detected) or motion is detected in parking mode. -
Page 9: Removing And Inserting The Front Camera
To remove the front camera from its bracket, press the LOCK button and pull the front camera out of the mounting bracket. y To insert the front camera into its bracket, push the front camera into the mounting bracket until it "clicks" in. DR430-2CH... -
Page 10: Rear Camera
To remove the rear camera from its bracket, hold the mounting bracket and pull the rear camera out. y To insert the rear camera into its bracket, push the rear camera into the mounting bracket until it "clicks" in. BLACKVUE... -
Page 11: Installation
Installation Installing the BlackVue dashcam Install the front camera behind the rear view mirror. Install the rear camera at the top of the back windshield. Remove any foreign matter and clean and dry the windshield before installation. Warning y Do not install the product in a location where it can obstruct the driver's field of vision. - Page 12 Adjust the angle of the lens by rotating the body of the camera. We recommend pointing the lens slightly downwards (≈10° below horizontal), so as to record video with a 6:4 road to background ratio. Peel off the protective lens cover. BLACKVUE...
- Page 13 Use the pry tool to lift the edges of the rubber window sealing and molding and tuck in the rear camera connection cable as you work your way towards the rear. You can also make use of the cable clips to neatly arrange the cable. Rear camera connection cable DR430-2CH...
- Page 14 Plug the power cord into the cigarette lighter socket and the front camera. Turn on the engine. The BlackVue dashcam will power up and start recording. Video files are stored on the microSD card. When the microSD card fills up, the newest video files will start to replace the oldest video files (called loop recording) - so you will always have the most recent video files.
-
Page 15: Playing And Managing Videos
To remove the microSD card, gently press on the card to release the lock then carefully pull the card out. To insert the microSD card, gently push the card into the slot until it locks into place and close the side cover. Open side cover To remove To insert DR430-2CH... -
Page 16: Opening Video Files In Blackvue Viewer
Insert the card into the microSD card reader and connect it to a computer. Find and run the BlackVue Viewer program. For Windows users Open Windows Explorer and click on the microSD card (Removable Disk (F:), or the name of your card location). Go to F:\BlackVue\ Application\Viewer for Windows\ and run BlackVue.exe. BLACKVUE... -
Page 17: For Mac Users
For Mac users Open Finder and select the microSD card reader from the list in the left frame. Go to \BlackVue\Application\Viewer for Mac\ and run BlackVue Viewer. DR430-2CH... -
Page 18: Viewer Screen Composition
Play previous file Front/Rear reverse view Front/Rear screen mode Flip horizontally Recorded File list View upside-down Full Screen view Timeline for sec selection Playback/Pause Playback speed control Stop Volume control Next frame Timeline for min selection Play next file BLACKVUE... -
Page 19: Mac Viewer
Front/Rear reverse view Front/Rear screen mode Flip horizontally Recorded File List View upside-down Full Screen view Previous frame Timeline for sec selection Timeline for min selection Playback time Playback/Pause Volume control Next frame Playback speed control Play next file DR430-2CH... -
Page 20: Playing Video
The dashcam requires a constant power source to record in parking mode. See "Parking mode hardwiring kit (Optional)" on page 45 for more information. y To install the BlackVue Viewer program on your computer, go to the BlackVue website (www.blackvue.com) and download the installable version of the BlackVue Viewer. -
Page 21: Checking The Displayed Time
The time the video was recorded is displayed in the lower left corner of the video in the playback screen. If the displayed time in the recorded videos is incorrect please see "Setting your time zone" on page 38. Using BlackVue Viewer You can customize the playback options of the recorded videos, such as the screen size, playback speed, and volume using the playback option buttons. -
Page 22: Zoom Options
Zoom to 100%: Right-click on the video image to view at 100% zoom. Click and drag to move the video image around. Windows Viewing the G-Sensor graph You can check the impact sensitivity (G-Sensor) information in the main window. BLACKVUE... -
Page 23: Checking The Gps Data
Map Zoom-in/out GPS tracking You can check the vehicle's speed and the location of the recorded video in BlackVue Viewer while a video is playing back (GPS tracking). Double click a file in the file list to play. Click the Map tab. -
Page 24: Gps Tracking - Advanced Mode
Double click a file in the file list to play. Click the button. Switch Speed Unit Latitude & Longitude Car Location Map Type Selection Red icon indicates the starting point of the playing back file Car Location Driving Route Red line indicates event recording BLACKVUE... -
Page 25: Managing Videos
Managing videos You can manage the recorded videos through the BlackVue Viewer program. You can also format the microSD card and upgrade the firmware. Note y If the microSD card is full, by default the dashcam will record over the oldest videos first. -
Page 26: Deleting Videos
Deleting videos For Windows users Select the video from the recorded video list. Right-click the video. Click Delete. For Mac users Go to \BlackVue\Record\. Select the video from the recorded video list. Click Move to Trash. BLACKVUE... -
Page 27: Exporting Videos
Enter a file name and the start and end points (min:sec) of the segment you want to export. To export without audio select “Sound Off”. Click the OK button. Select the folder in which to save the file and enter the file name. Click the Save button. DR430-2CH... - Page 28 For Mac users Go to \BlackVue\Record\. Select the video from the recorded video list. Click Copy "file name". BLACKVUE...
-
Page 29: Verifying Videos
Verifying videos The following function is only available in BlackVue Viewer for Windows. Select the video from the recorded video list. Right-click the video. Click Verification. Click the OK button. DR430-2CH... -
Page 30: Keeping The Blackvue Dashcam Updated
Keeping the BlackVue dashcam updated Formatting the microSD card Format the microSD card once a month, or when the BlackVue dashcam tells you the card needs maintenance. Please format the microSD card using BlackVue Windows or Mac Viewer. Format using Windows Viewer Download BlackVue Viewer from www.blackvue.com >... - Page 31 Select the microSD card drive and click OK. DR430-2CH...
-
Page 32: Format Using Mac Viewer
Format using Mac Viewer Download BlackVue Viewer from www.blackvue.com > Support > Downloads and install the program on your computer. Insert the microSD card into the microSD card reader. Connect the microSD card reader to a Mac. Launch the copy of BlackVue Viewer that is installed on your computer. - Page 33 Format the microSD card if the recorded video quality appears to be poor. y Only use official BlackVue microSD cards. Other cards may have compatibility issues. y PittaSoft Co., Ltd. will not be held responsible for any problems caused by using another manufacturer's microSD card.
-
Page 34: Upgrading The Firmware
For Mac users, click and select About BlackVue from the menu. Check the current firmware version of your BlackVue dashcam and proceed only if your version is not the latest one. Windows Format the microSD card. See "Formatting the microSD card" on page 30. - Page 35 Go to the BlackVue website (www.blackvue.com > Support > Download) and download the latest firmware for your BlackVue dashcam model in zip format. Unzip the downloaded file and copy the BlackVue folder to the microSD card. Insert the microSD card into the dashcam and connect the power to initiate the firmware upgrade. Make sure the power remains on until the upgrade is completed.
-
Page 36: Changing Settings
Select your preferred language for the BlackVue Viewer interface from the dropdown list. BlackVue settings Click on the button or the menu to open the BlackVue settings panel. You will be able to change most of the BlackVue settings to customize its operation. Select a Language Settings... -
Page 37: Basic Settings
Click the Basic tab. Change the settings. Click Save & Close. Firmware Select your preferred language for the firmware from the language dropdown list. The audio announcements by the dashcam will be in the selected language. DR430-2CH... - Page 38 Select km/h, MPH, or turn off. Video files duration (in minutes) Select video clip duration in minutes If enabled, the dashcam switches from normal mode to parking mode when Auto switching to parking mode on/off the vehicle is stationary for 5 minutes. BLACKVUE...
-
Page 39: Sensitivity Settings
Change the settings. Click Save & Close. Sensitivity in normal and parking mode Adjust the sensitivity of the G-Sensor while driving (normal mode) or parked (parking mode). Set the sensitivity to zero to turn off Event recordings by impact detection. DR430-2CH... - Page 40 Set the thresholds by adjusting the control bars next to each G-Sensor axis. Any G-Sensor data that crosses over the threshold on any of the 3 axes will trigger an Event recording. BLACKVUE...
- Page 41 Set a speed limit (up to 300 km/h or 200 MPH) for the speed alert. When the vehicle exceeds the speed limit, normal mode recording switches to an event recording (with a beep sound) and after a preset duration switches back to normal mode recording. DR430-2CH...
-
Page 42: Other Settings
Applying the settings You can automatically apply the configuration by inserting the microSD card into the BlackVue dashcam and turning it on. Configure the settings before using the dashcam. To reset all settings to their defaults press the reset button in the settings screen of the BlackVue Viewer program. -
Page 43: Optional Accessories
Note y Check the size of the microSD lock loop on the BlackVue dashcam before purchasing a padlock. y Even when the microSD card slot is locked with a padlock, there is the possibility that the card may be forcibly removed by breaking the lock loop, cover or dashcam. -
Page 44: Gps Receiver (Optional)
GPS receiver. Note y If you purchased the product without an external GPS receiver, please visit the BlackVue website (www.blackvue.com) for information about purchasing a GPS receiver separately. -
Page 45: Parking Mode Hardwiring Kit (Optional)
Parking mode hardwiring kit (Optional) The BlackVue dashcam will turn off when the engine is turned off. To record video while the engine is turned off, a hardwiring kit (such as the Power Magic Pro) is required. The Power Magic Pro powers your dashcam when the engine is off by hardwiring it to the automotive battery. -
Page 46: Troubleshooting
Note y Set the time to the estimated time in the future when you will start recording with the BlackVue dashcam. Please take into account the time it will take to remove the microSD card from your computer, insert it into your dashcam and boot up. -
Page 47: Frequently Asked Questions
Frequently asked questions About using the BlackVue dashcam y How can I protect the microSD card? See page 43. y How can I remove the camera from the mounting bracket? See page 9. y When do the LEDS blink quickly? See page 8. -
Page 48: About Recording Videos
How can I change the language? See page 36. y How can I change the time? See page 46. y How can I change the brightness of the video? See page 37. y How can I turn off normal mode recording? See page 37. BLACKVUE... - Page 49 See page 39. y How can I adjust the voice guidance settings? See page 42. y How can I adjust the volume of the voice guidance? See page 42. y How can I upgrade the firmware? See page 34. DR430-2CH...
-
Page 50: Product Specifications
Product specifications Model Name DR430-2CH Front: Black / Width 115.9 mm x Height 34 mm / 68 g Color/Size/Weight Rear: Black / Width 67.4 mm x Height 25 mm / 28 g Memory microSD Card (16 GB / 32 GB / 64 GB / 128 GB) - Page 51 High Temp. Cut-off Approx. 80°C (176°F ) Front: FCC, CE, RoHS, RCM, WEEE Certifications Rear: FCC, CE, RoHS, RCM, WEEE BlackVue Viewer Software * Windows XP or higher (Windows 8 supported) and Mac Leopard OS X (10.5) or higher DR430-2CH...
-
Page 52: Recording Time
If the microSD card is full, older files are deleted first to make space for newly-recorded videos. Copy important files, such as event recording files, to other storage media. y Total recording time is different depending on the memory capacity of the microSD card and the resolution of the video. BLACKVUE... -
Page 53: Disposal And Recycling Information
Contact local authorities to learn about disposal and recycling options available in your area. 2. The correct disposal of your BlackVue dashcam will help prevent potential negative consequences for the environment and human health. -
Page 54: Customer Support
It is prohibited to reproduce, copy, modify, or translate this instruction manual without permission. BlackVue is the registered trademark of Pittasoft Co., Ltd. Pittasoft Co., Ltd. reserves all rights regarding all works related to the BlackVue brand such as product design, trademarks, and product-promotional videos. It is prohibited to reproduce, copy, modify, or use related works without permission.
Need help?
Do you have a question about the DR430-2CH and is the answer not in the manual?
Questions and answers