Table of Contents
Advertisement
Advertisement
Table of Contents

Related Manuals for Baby Lock Jazz BLMJZ


Summary of Contents for Baby Lock Jazz BLMJZ
-
Page 3: Important Safety Instructions
Never operate this sewing machine if it has a damaged cord or plug, if it is not working properly, if it has been dropped or damaged, dropped into water. Return this sewing machine to the nearest authorized Baby Lock retailer for examination, repair, electrical or mechanical adjustment. The sewing machine's rating is 100V-120Vac 20.If one of the LED lamps is damaged or broken, it must be replaced by the manufacture or its... -
Page 5: Introduction
To repair or adjust the machine If the machine breaks down or needs adjustment, first follow the troubleshooting table to inspect and adjust the machine yourself. If the problem is still there, consult your local authorized Baby Lock retailer. -
Page 6: Table Of Contents
TABLE OF CONTENTS IMPORTANT SAFETY INSTRUCTIONS RECYCLING (EU ONLY) INTRODUCTION UNPACKING/REPACKING INSTRUCTIONS INSTRUCTIONS BEFORE YOU USE THE MACHINE MAIN PARTS ACCESSORIES FLAT BED ATTACHMENT REMOVING THE FLAT BED ATTACHMENT OPENING THE ACCESSORY COMPARTMENTS FREE ARM STYLE CONNECTING THE MACHINE POWER CONNECTION FOOT CONTROLLER CHANGING THE PRESSER FOOT CHANGING THE NEEDLE... -
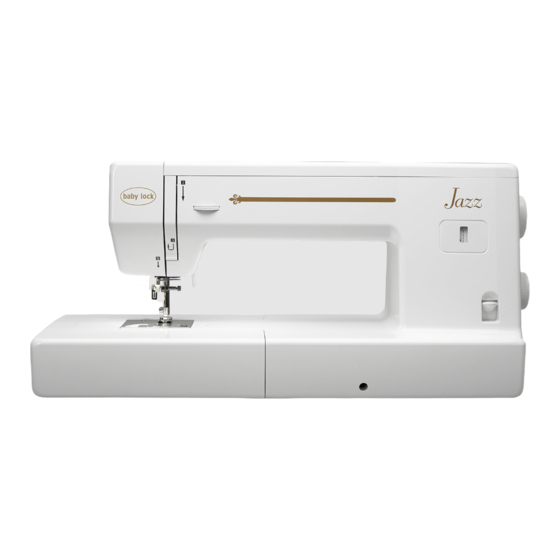
Page 7: Main Parts
MAIN PARTS Face Cover Knee Lifter Mounting Slot Reverse Lever Flat Bed Attachment With Accessory Compartments Thread Cutter Pattern Indicator Thread Take-Up Lever (inside) Stitch Length Dial Thread Tension Regulator Stitch Width Dial Thread Guide Plate Presser Foot Pressure Adjustment Dial Spool Pin Bobbin Winder Stop Spool Cap... - Page 8 MAIN PARTS Carrying Handle Drop Feed Dog Lever Main Power Switch Power Cord Receptacle Power Cord & Foot Controller Lower Thread Guide Needle Threader Lever Needle Threader Buttonhole Lever Presser Foot Holder Screw Needle Plate Bobbin Cover Presser Foot Lever Presser Foot Holder Needle Clamp Screw Needle Bar Thread Guide...
-
Page 9: Accessories
90/14 3 needles Screwdrivers Darning/Free Motion Quilting Foot 1/4 Inch Quilting Foot 17. Knee Lifter 18. Quilting Guide 19. Vertical Spool Pin 20. Spool Pin Felt (2) (One on machine) 21. Dust Cover FLAT BED ATTACHMENT Removing The Flat Bed Attachment The accessories are stored in the compartments inside Flat bed attachment the flat bed attachment. -
Page 10: Connecting The Machine
These behaviors may damage the cord and cause fire or electric shock. If the cord or plug is damaged, take the machine to your authorized Baby Lock retailer for repairs before continuing use. Unplug the power cord if the machine is not to be used for a long period of time, otherwise a fire may result. -
Page 11: Changing The Presser Foot
CAUTION Always turn off the power before you change the presser foot. if you leave the power on and step on the controller, the machine will start and you may be injured. Always use the correct presser foot for the stitch pattern you have chosen. -
Page 12: Threading The Machine
THREADING THE MACHINE Bobbin Winding WINDING THE BOBBIN 8.After the bobbin winds a few turns, stop the 1.Place a spool of thread onto the spool pin with machine and cut the thread as close to the hole as thread winding off counterclockwise and slide possible. -
Page 13: Lower Threading
Lower Threading This machine uses Class 15 bobbins. To purchase additional bobbins, please see your Baby Lock retailer. 4.While lightly holding down bobbin with your right hand, guide the thread through the slot, pull the thread toward you to cut it with cutter as shown, and then replace the bobbin cover and close. -
Page 14: Upper Threading
Upper Threading If necessary, horizontal spool pin may be raised so it can be used in a vertical position. Raise presser foot lever. Rotate the handwheel toward you to raise the take-up lever into the highest position. Place a spool of thread onto the spool pin and secure with proper size spool cap. -
Page 15: Using Needle Threader
Using Needle Threader Set needle in highest position. needle sizes 11,12,14 and 16. Drawing Up the Lower Thread Raise the presser foot lever. Hold the needle thread loosely with your left hand and turn the handwheel toward you until the needle goes down into the needle plate and back up to the highest position. -
Page 16: Controls
CONTROLS Pattern Selection Dial and Indicator The stitch patterns are printed on inside of the machine's top cover. To choose a stitch, simply turn the pattern selection dial in either direction until the desired stitch is shown within the Pattern Indicator window. -
Page 17: Stitch Width Dial
Stitch Width Dial The numbers marked on the dial represent the stitch width. THE HIGHER THE NUMBER, THE WIDER THE STITCH. When the Straight or Triple Stretch Stitch is selected, Stitch Width Dial the needle position can be changed from right to left by adjusting the stitch width dial. -
Page 18: Knee Lifter
Knee Lifter Using the knee lifter, you can raise and lower the presser foot with your knee, leaving both hands free to handle the fabric. Align the tabs on the knee lifter with the notches in the knee lifter mounting slot on the front of the machine. Insert the knee lifter bar as far as possible. -
Page 19: Setting The Thread Tension
SETTING THE THREAD TENSION Turn the tension dial to a lower number to decrease the upper thread tension. Turn the tension dial to a higher number to increase the upper thread tension. To sew zigzag stitches, the upper thread tension should be set to a slightly weaker tension than when sewing straight stitches. -
Page 20: Fabric, Thread And Needle Combinations
FABRIC, THREAD AND NEEDLE COMBINATIONS Like shown in drawing, stitches on top side of fabric are good but bottom side tends to have a bunch of thread, it usually means that the upper thread is not threaded correctly or thread tension regulator may not be set correctly. -
Page 21: Straight Stitch Sewing
STRAIGHT STITCH SEWING Stitch Length Stitch All Purpose Stitch Name Pattern Dial Width Dial Foot [mm(inch)] [mm(inch)] 0-7* Straight Stitch (0-1/4) (0-3/16) *The stitch width dial has multi-functions depending on stitch selected. Turn the stitch width dial to adjust the needle position. Setting the dial to 0 selects the right needle position;... - Page 22 Finishing Sewing You can use stitches to lock the threads at the end of the seam. To lock stitches,stitch to the end of seam and stop. Push down on the reverse sewing lever and stitch backwards for 1 cm (3/8 inch) from the fabric edge. Removing the Material from the Machine Stop the machine.
-
Page 23: Zigzag Stitch Sewing
ZIGZAG STITCH SEWING Stitch Length Stitch All Purpose Stitch Name Pattern Dial Width Dial Foot [mm(inch)] [mm(inch)] 0-7* Zigzag Stitch (0-3/16) (0-1/4) Satin Stitch Zigzag Stitch Setting the Zigzag Stitch length in the range produces a satin stitch. The Satin stitch Turn the pattern selection dial to the Zigzag can be used for making buttonholes and a few stitch, and then start sewing. -
Page 24: Overcasting-Overlocking
The guide (A) on the blind hem foot ensures even feeding of the fabric when blind hem stitching. The guide (A) is adjusted by turning the adjusting screw (B). Place fabric so that the straight stitches are on the extended hem edge and the zigzag stitches just catch one thread of the folded edge. - Page 25 Position the fabric against the guide plate of the overcasting foot so that the needle falls near the edge of the fabric. Some stitches can sew the seam and overcasting at the same time. Therefore, it is convenient for sewing easy to ravel and stretch fabrics.
-
Page 26: Multi-Stitch Zigzag
MULTI- STITCH ZIGZAG Stitch Length Stitch All Purpose Stitch Name Pattern Dial Width Dial Foot [mm(inch)] [mm(inch)] Elastic Zigzag 5-7* Stitch (3/16-1/4) (0-1/16) Used for sewing on elastic band and overcast stitching on knit fabrics. Elastic Sewing Stretch elastic in front and back of needle while sewing. Be careful not to bend needle while stitching. -
Page 27: Sewing Buttonholes
SEWING BUTTONHOLES Using the Buttonhole Foot Stitch Length Stitch Stitch Name Pattern Dial Width Dial [mm(inch)] [mm(inch)] 1-Step 3.5-7* Buttonhole (1/8-1/4) (0-1/16) Mark position and length of buttonhole on fabric. Set button on the base and slide base forward to secure button. * If button does not fit on the base, adjust slide on base to diameter of button plus thickness of button. -
Page 28: Buttonholes Fine Tuning
BUTTONHOLE FINE TUNING BUTTONHOLE FINE TUNING ADJUSTMENTS TOOL Large Screwdriver Various types of fabric may have different stitching results when a buttonhole is sewn. The stitch density of the buttonhole's left or right side could be found to be unbalanced.The buttonhole fine tuning will allow you to make adjustments by slightly turning the screw with included large screwdriver. -
Page 29: Insert Zippers And Piping
INSERT ZIPPERS AND PIPING Stitch Stitch Stitch Name Pattern Length Dial Width Dial [mm(inch)] [mm(inch)] Straight Stitch (center) (0-3/16) (1/8) You can use the zipper foot to sew different types of zippers, and can easily position it to the right or left side of the needle. When sewing the right side of the zipper, attach the presser foot holder to the left pin of zipper foot. -
Page 30: Straight Stitch Seaming And Quilting
STRAIGHT STITCH SEAMING AND QUILTING Using the 1/4 Inch Quilting Foot Stitch Length Stitch Stitch Name Pattern Dial Width Dial [mm(inch)] [mm(inch)] Straight Stitch (center) (0-3/16) (1/8) Achieving an accurate seam allowance Set the pattern selection dial to the Straight Stitch. Set the stitch length between 0 (0 inch) and 4 (3/16 inch). -
Page 31: Patch Work
Patch Work Stitch Stitch Stitch Name Pattern Length Dial Width Dial [mm(inch)] [mm(inch)] SS Gold 7 3.5-7* SS Gold 4 Feather Stitch (1/8-1/4) For additional decorative purposes, use a SS Gold 7 variety of different fabrics. Decorative SS Gold 4 3.5-7* Cross Stitch (1/8-1/4) -
Page 32: Scallop Stitch
SCALLOP STITCH Stitch Length Stitch Open Toe All Purpose Stitch Name Pattern Dial Width Dial Foot Foot [mm(inch)] [mm(inch)] 3.5-7* Scallop Stitch (0-1/16) (1/8-1/4) These stitches are used to sew a decorative edge on garments and table cloths using the Opening Toe Foot or the All Purpose Foot. SCALLOP HEM (1) Fold the fabric with right sides together and sew near the edge. -
Page 33: Twin Needle Sewing
Using Twin Needles With the twin needle, you can sew parallel lines of the same stitch with two different colored threads. Both upper threads should have the same thickness and quality. Use the vertical spool pin and spool pin felt.(Refer to page 7) Installing Twin Needle &... - Page 34 All Purpose Presser Foot For detail on changing the presser foot, please refer to page 9. The stitch width must be adjusted at 3.5 mm only, for safety reason and the needle must be checked to make sure it safely clears the presser foot and needle plate before sewing by slowly turning handwheel manually.
-
Page 35: Caring For Your Machine
Important Maintenance Message Baby Lock recommends taking your machine to an authorized Baby Lock retailer for regular maintenance. Such steps will help to ensure you receive continued, uninterrupted hours of machine operation for the future. -
Page 36: Troubleshooting
TROUBLESHOOTING If the machine stops working properly, check the following possible problems. If the problem is still there, contact your authorized Baby Lock retailer. Needle is not raised to highest position. Eye of needle too small Insert needle size 11 or higher... -
Page 37: Stitch Reference Chart
STITCH REFERENCE CHART *The Stitch Width Dial has multi-functions depending on stitch selection. Refer to page 19 for complete details. Stitch Stitch Length Dial Stitch Name Pattern Application Width Dial [mm(inch)] [mm(inch)] 1-Step 3.5-7* Buttonhole Creating buttonholes (1/8-1/4) (0-1/16) Stitch Stitch Length Dial Stitch Name Pattern... - Page 38 STITCH REFERENCE CHART Stitch Stitch Length Dial Stitch Name Pattern Application Width Dial [mm(inch)] [mm(inch)] Patchwork stitching and 1-7* Bridging decorative stitching (1/16-3/16) (1/16-1/4) Stitch Stitch Length Dial Stitch Name Pattern Application Width Dial [mm(inch)] [mm(inch)] Overcasting Overcasting on thin or medium 1-7* Stitch weight fabrics...
- Page 39 STITCH REFERENCE CHART Stitch Stitch Length Dial Stitch Name Pattern Application Width Dial [mm(inch)] [mm(inch)] SS Gold 7 Overcasting on thin or medium SS Gold 4 Overlock weight fabric 3.5-7* Overcasting on thick fabrics (1/8-1/4) Stitch Stitch Length Dial Stitch Name Pattern Application Width Dial...
-
Page 40: Stitch Reference Chart
STITCH REFERENCE CHART Stitch Stitch Length Dial Stitch Name Pattern Application Width Dial [mm(inch)] [mm(inch)] SS Gold 7 Decorative SS Gold 4 Decorative stitching 3.5-7* Stitch (1/8-1/4) Stitch Stitch Length Dial Stitch Name Pattern Application Width Dial [mm(inch)] [mm(inch)] SS Gold 7 Decorative SS Gold 4 Decorative stitching... - Page 42 English IBBLMJZ Printed in Taiwan...
Need help?
Do you have a question about the Jazz BLMJZ and is the answer not in the manual?
Questions and answers