ALLEN & HEATH Qu-16 Setting Up
Hide thumbs
Also See for Qu-16:
- User manual (60 pages) ,
- Service manual (37 pages) ,
- Getting started manual (24 pages)
Advertisement
Table of Contents
Qu-Pad Help – Setting Up
The Qu mixer can be set up and controlled using an iPad. The iPad connects to the mixer through a wireless
router plugged into the Network port. This creates up a private Wi-Fi network for the mixer. It does not
provide access to the Internet or other networks.
1.1 Requirements
Number of connections – Qu supports a maximum of 8 connections including
up to 2 iPads running Qu-Pad. The others can be Qu-You.
Apps - You can get the Allen & Heath
Apple Store. You can also get the
control using iOS devices including iPad, iPhone and iPod Touch. A version of
Qu-You is available for Android devices from Google Play. These apps are free
and can work with any Qu mixer.
Qu mixer - An Allen & Heath Qu mixing console running
firmware, with a suitable wireless router (wireless access point) connected to
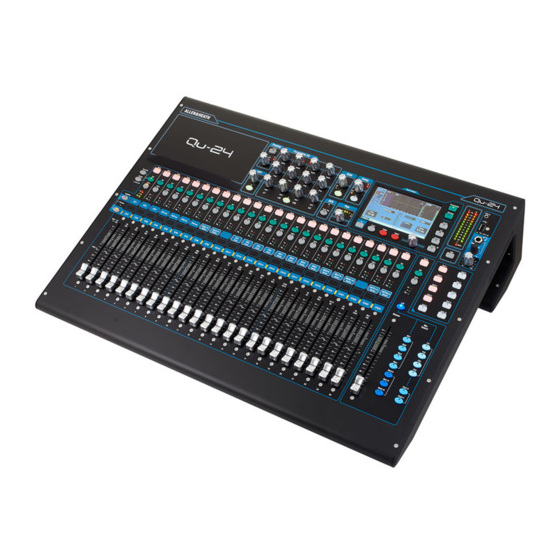
its Network port. Supported mixers: Qu-16, Qu-24, Qu-32, Qu-Pac and Qu-SB
Version number - The Qu mixer firmware and Qu-Pad version must be
compatible. Both must run the same feature version number, for example V1.9.
The maintenance version number can be different, for example Qu-Pad V1.90
will run with Qu mixer V1.91.
iPad - Qu-Pad supports all models of iPad running iOS7.1 or higher. iPad1 is
not supported. The current version tested at time of this release is iOS9.
Qu-Pad handles a large amount of processing and metering data. For best
performance shut down other applications running in the background. Make
sure the iPad is charged before using it for a session.
Wireless Router - Qu-Pad is a professional mixing tool that justifies network
equipment of suitably high performance, quality and reliability. For best results
use a dual band (2.4 and 5GHz) wireless router (wireless access point) with
auto channel selection. This can automatically set itself to an available or least
congested channel when you power it up.
1.2 Set up the Wireless Network
Qu mixer Network port
Cat5 cable
Wireless router setup – Connect the router to a PC or Mac using a Cat5 cable.
Follow the instructions provided by the router manufacturer to access its setup
menus. Once set up, disconnect the router from the computer and then plug it
into the Qu mixer Network port using a Cat5 cable.
We recommend that you set a router password (key) for security. You can
also change the router SSID (name) to identify your network in the list that
appears on your device.
Router location - Position the router high enough avoid obstacles such as
people and equipment. Avoid locating it behind pillars or walls, near metal
beams or on top of loudspeakers.
Qu-You
Wireless router
Lan port
Qu-Pad
mixing control app from the
app for musicians personal monitor
V1.9
iPad running Qu-Pad app
Engineer's control
version
Qu-You monitor app
Musician's personal monitors
Advertisement
Table of Contents

Related Manuals for ALLEN & HEATH Qu-16


Summary of Contents for ALLEN & HEATH Qu-16
- Page 1 (wireless access point) connected to its Network port. Supported mixers: Qu-16, Qu-24, Qu-32, Qu-Pac and Qu-SB Version number - The Qu mixer firmware and Qu-Pad version must be compatible. Both must run the same feature version number, for example V1.9.
-
Page 2: Connect The Ipad
1.3 Connect the iPad Qu network address - The mixer must have a TCP/IP (network) address compatible with the router. The Qu default is DHCP enabled which means that the router will automatically allocate a compatible address to the mixer when connected. If the mixer address has been changed and Qu-Pad does not connect then check its network settings. - Page 3 A hard reset clears all current settings, all Scenes, User Libraries and User Permissions. For Qu-16, Qu-24, Qu-32, Qu-Pac, hold down the front panel Reset and Setup keys for 5 seconds while powering up the mixer. For Qu-SB, use a pointed object to press and hold in the recessed Network / Factory Reset switch while powering up the mixer.
- Page 4 Qu-Pad Help – Operation All Qu mixer functions including setup and operation can be accessed using the Qu-Pad app for iPad. This Help provides a quick guide to get you started mixing with Qu-Pad. For more information please refer to the latest version of Qu Mixer Reference Guide available for download from the Allen & Heath web site www.allen-heath.com/key-series/qu-series.
- Page 5 1.2 Processing Screen – Live mixing This is the main screen for live mixing. There are two panels. The upper panel presents the processing for the selected channel with tabs on the left to select processing type. The lower panel presents the fader strips with tabs on the left to select different layers.
- Page 6 Library - Touch to open the Library page for the currently selected tab (Channel, Gate, PEQ, GEQ, Compressor, FX). Touch to select and then Recall a Factory or User library preset. Factory libraries cannot be overwritten. You can store, name, recall, overwrite or delete up to 100 User libraries.
-
Page 7: Setup Screen
PEQ - Touch and drag the PEQ band dots to adjust the HPF (high pass filter) and to shape the EQ. Drag up/down to adjust Gain and sideways to adjust Frequency. Touch a dot to select a band and use the Width slider or pinch horizontally, diagonally or vertically either side of the dot to adjust the width (octaves) of the band. - Page 8 Insert a channel by dragging it on top of the strip you want to position it in front of. Add a channel at the end by dragging it and holding your finger at the right of the window until it scrolls to the end. Drop it into the space that becomes available.
-
Page 9: Home Screen
jack tip or ring contact to the sleeve. You can assign a different function to each by scrolling through the menu. Touch Apply to confirm. Plug the footswitches in and touch Calibrate to set how they should function. Follow the onscreen instructions. ‘Soft latch’ lets you use a momentary switch for a latching function. -
Page 10: Scenes Screen
Home – Touch the Shut Down button to safely close processes such as data transfer and USB audio before turning power off. User - Three User Profiles are available to protect selected functions and restrict user access, for example for volunteer operators in houses of worship, or guest engineers visiting venues. - Page 11 Scenes – This page presents a list of the 100 Qu Scenes. Swipe up/down to scroll through the list. Touch to select. You can store, name, recall and clear scenes as you do at the mixer. A confirmation popup appears if you are about to recall, overwrite or clear a scene.
- Page 12 Surface (not available on Qu-SB) – Scroll through the list of options to choose the sources for the mixer Alt Out and AES Out sockets. dSNAKE In – Patch remote AudioRack sockets to the mixer channels. You can patch one socket to one or more channels. A channel can only have one socket patched to it.
Need help?
Do you have a question about the Qu-16 and is the answer not in the manual?
Questions and answers