
Related Manuals for Chevrolet ranger rt


Summary of Contents for Chevrolet ranger rt
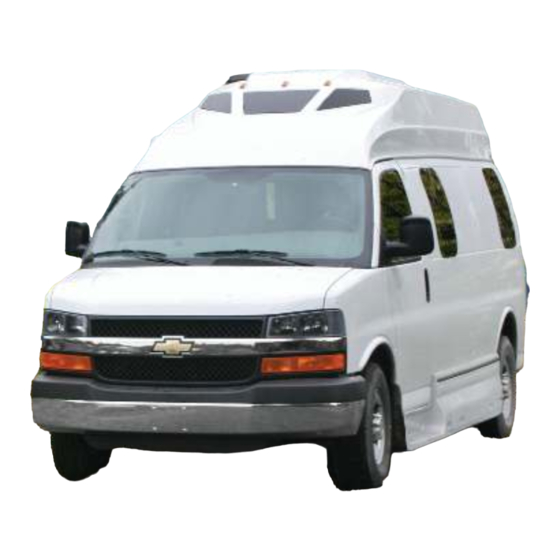
- Page 1 Owner's Manual RangerRT Roadtrek, Inc. PDF generated at: Thu, 04 Sep 2014 14:17:03 EDT...
-
Page 2: Table Of Contents
Contents Articles Introduction Copyright Do's and Don'ts Before you head out Coming Home Interior Living Space Sleeping Facilities Bathroom Facilities Appliances Outside your Roadtrek Utilities Heating and Cooling Electrical System Monitor Panel Distribution Panel Alarms and Warnings Maintenance... - Page 3 Spare Tire Storage Obtaining Service Specifications Warranty Registration Regulatory Notices HOWTO: Monitor Panel HOWTO: Setting Up Your Campsite HOWTO: Shore Power HOWTO: Potable Water Use HOWTO: Waste Water Dumping HOWTO: Cable and TV Reception HOWTO: Propane System HOWTO: Water System Winterizing HOWTO: De-Winterizing...
-
Page 4: Introduction
Introduction Introduction Congratulations on the purchase of your Roadtrek and welcome to the Roadtreking family. The information included in this manual is meant to help and guide you through the use of your vehicle so that you know how to properly use the many functions your Roadtrek has to offer. -
Page 5: Copyright
Copyright Copyright This manual is released under a Creative Commons Attribution-NonCommercial-NoDerivatives 4.0 International License In summary, you may: • • Copy any portion of this manual in any form for personal use; • • Distribute this manual complete with all of its original unmodified content; •... -
Page 6: Do's And Don'ts
Do's and Don'ts Do's and Don'ts Symbol Legend For your information. May be useful information to know. Warning. Not following this can lead to bad results. Caution. You really should follow this to avoid bad results. Don't do it. Doing this can result in injury, severe damage, or death. Information, cautions, and warnings Level Item... - Page 7 Do's and Don'ts To remove the TV, remove the four mounting bolts on the back of the TV mounting bracket and remove the RCA cables, power supply cable and antenna cable. PROPANE Do not store propane tanks inside your vehicle. Propane tanks are equipped with safety devices which relieve excessive pressure by discharging gas to the atmosphere.
- Page 8 Do's and Don'ts FLAMMABLE Do not store gasoline or other flammable liquids inside your vehicle. LIQUIDS AND GASSES HEATING Never use cooking appliances or unvented propane heaters for space heating purposes. They need fresh air for safe operation. HEATING The heating furnace provides its own outside combustion air and exhausts to the outside. HEATING Portable fuel burning equipment, including wood, charcoal, and liquid fuel grills and stoves, should not be used inside your vehicle.
- Page 9 Do's and Don'ts AWNINGS Close the sliding side door prior to opening or closing the awning. CLOVERLEAF The cloverleaf dining table is heavy. Use proper lifting techniques. DINING TABLE EXTRA COUNTER Make sure the stove is off and has cooled prior to lowering the stove cover. SPACE BATTERY Battery acid can burn your skin and damage clothing.
- Page 10 E-85 fuel. ENGINE BATTERY The Chevrolet engine battery will be drawn down by the GM electronics to a no-start condition if left unattended for extended periods. Plug the vehicle in, drive the vehicle for at least three hours every two weeks to keep the engine and auxiliary batteries charged, or disconnect the engine battery to keep it in good condition.
-
Page 11: Before You Head Out
Before you head out Before you head out Your new Roadtrek is ready to go with just a little bit of preparation. To prepare for your first trip, you should: • • Read this manual. • • Contact your dealer with any questions. •... -
Page 12: Coming Home
Coming Home Coming Home When you come home, there are a few maintenance tasks you should do to get your Roadtrek ready to go for next time. Refer to other sections in this manual for the procedures listed here. • On your way home, dump the gray and black tanks at a convenient facility. See the HOWTO: Waste Water Dumping section for a concise description of the procedure to do this. - Page 13 Coming Home • • Plug in overnight to fully charge batteries. • • Turn off and clean out the refrigerator and prop the door open to let it air out • • Turn off two important switches to keep from draining your batteries •...
-
Page 14: Interior Living Space
Interior Living Space Interior Living Space Pushbutton Latch closed Pushbutton latch open Your Roadtrek is equipped with cabinet latches which prevent the contents from falling out while the vehicle is in motion. The pushbuttons on the cabinet latches toggle from latched (button in) to openable (button out) by pressing the button. To open a cabinet, press the button to pop the latch, pull gently on the latch, and the cabinet door will open. - Page 15 Interior Living Space If you load a large amount of weight into a cabinet, experience large swings in temperature or humidity, drive on bumpy roads at high speeds frequently, or sometimes as part of normal wear and tear, the cabinet hinges may go out of adjustment. You will know the cabinet is out of adjustment when it will not open with the button out, or not latch with the button in.
- Page 16 Interior Living Space Galley cabinets Immediately beneath the galley countertop there are drawers to the left and right of the food preparation surface to hold silverware and small cooking utensils. The center panel in front of the sink is fixed, and is not a drawer. The refrigerator is below these drawers on the right;...
- Page 17 Interior Living Space Lights The oval ceiling lights are all individually controlled, and are tap lights - to turn them off or on, press on the lens area. The battery disconnect switch must be on for any of these lights to work. These are LED lights, and consume very little electricity. Tables Table leg storage in wardrobe to left of Table leg T-Nut attachment...
- Page 18 Interior Living Space Front Table Front lounge table Front lounge table stored behind driver's seat The front table top is stored behind the driver's seat. Rotating plastic tabs keep it in place. © 2014 by Roadtrek, Inc.
- Page 19 Interior Living Space Rear Table Rear dining table Rear dining table storage The rear tabletop is stored under the driver's side rear bench seat, and its leg is stored inside the wardrobe. The dining table for the rear seating area is located under the driver's side rear bench cushion, directly across from the TV. Lift the cushion and remove the table top.
- Page 20 Interior Living Space Computer Desk Computer desk Computer desk support The computer desk is located on the driver's side in the rear lounge area. Lift up the table leaf and use the support to hold it in position. © 2014 by Roadtrek, Inc.
- Page 21 Interior Living Space Captain's Seats The two captain's seats in the front of your Ranger are adjustable fore and aft by pulling up on the bar under the front of the seat, and will swivel when the swivel tab - the black metal bar on the side of the chair base - is pressed up.
- Page 22 Interior Living Space Ventilation Your Roadtrek is equipped with a ceiling mounted ventilation fan. The fan has a cover that must be raised by turning the large knurled knob before the fan will operate. Raise the cover, then turn the switch to the desired speed. The fan also has a thermostat, which will allow you to set the temperature at which the fan comes on.
-
Page 23: Window Treatments
Interior Living Space Window Treatments Curtains Curtain rails and clips The window curtains slide on tracks. It's best to use two hands, one at each track, to pull curtains closed and open. The curtains have snaps and clips at the end of the track to hold them in place. The front curtain meets in the middle and is secured with hook and loop fasteners along this edge. -
Page 24: Sleeping Facilities
Sleeping Facilities Sleeping Facilities Your Roadtrek has beds that can be configured as a king bed or twin bed. Experiment with different configurations to find what works best for you. Power Sofa Ranger power sofa switch Twin beds The switch to lower the sofa into the bed position is located on the passenger side in the rear next to the thermostat. The seatbelts for the power sofa are attached to the floor behind the power sofa. - Page 25 Sleeping Facilities Twin Beds You create two twin beds by lowering the sofa. The sofa makes a continuous sleeping surface with the two bench seats, leaving the center aisle to make it easy to get in and out of bed. King bed Making the king bed King Bed...
- Page 26 Sleeping Facilities Front Seat Bed Front captain's seat in position for folding Passenger side folding mattress in mattress position To set up a front bed with the optional folding mattress, turn the front passenger side captain's seat so that it is facing outward toward the front door, remove the second row seat back by lifting it up, and place the optional folding mattress on the front and second row seat bottom cushions.
-
Page 27: Bathroom Facilities
Bathroom Facilities Bathroom Facilities Door Bathroom door pin The bathroom doors are secured by a pin which is attached to the right door. To secure the doors for driving, close the left door first, then the right door, and then push the pin down so that it engages behind the lip at the front of the bathroom floor. Push gently on the top to secure the latch along the upper enclosure lip. - Page 28 Bathroom Facilities Toilet Toilet pedal The enclosed bathroom in the Ranger contains a marine toilet. To flush the toilet, press the foot pedal located at the bottom of the front of the toilet bowl. © 2014 by Roadtrek, Inc.
- Page 29 Bathroom Facilities Shower Shower connection and knob Shower curtain and light Shower drain To take a shower, unscrew the drain stopper in the center of the bathroom floor. Release the hook and loop fastener straps retaining the shower curtain, and slide the shower curtain along its track to enclose the shower space. Screw the end of the shower hose onto the connection right behind the bathroom sink faucets, and pull the knob on the spout up.
-
Page 30: Outside Shower
Bathroom Facilities Exhaust fan The Ranger has an exhaust fan in the bathroom. Push upward and pull down on the white bar to open and close the vent, and turn on the fan by pushing the power button. Outside Shower The outside shower is located on the driver's side, towards the rear wheel. -
Page 31: Appliances
Appliances Appliances TV and DVD player The TV and DVD player are located in the rear lounge area on the passenger side. Both the television and the DVD player use 120 volt current, so the inverter, generator, or shore power must be on and available for them to work. - Page 32 Appliances Hot Water The Ranger is equipped with an electric water heater. The heater requires 120 volt AC proper operation. You must be connected to shore power or run the optional generator to use the water heater. The water heater switch is located at the lower left of the water heater.
- Page 33 Appliances Cooktops Standard Inductive Electric Cooktop The electric cooktop is an inductive 120 volt electric appliance you can take out and place on the counter to use, and then store in the cabinet when not needed. As with the microwave, the batteries and inverter will allow brief use, but you will need to plug in to shore power or run the van motor or the optional generator if you plan on making extended use of this appliance.
- Page 34 Appliances Optional Propane Cooktop The propane cooktop needs fresh air for its safe operation. Make sure to open a window and open turn on the overhead fan for proper ventilation. The igniters are powered by 12 volt coach battery power, so turn the battery disconnect switch on before using the propane cooktop.
-
Page 35: Outside Your Roadtrek
Outside your Roadtrek Outside your Roadtrek Awning crank loop Awning crank storage Awning support Awning Your Roadtrek has a roll up awning. The awning is extended with a crank stowed inside the rear door, against the back of the power sofa. Attach the handle to the socket at the end of the awning, crank the handle to extend the awning, and lower the supports on each side. - Page 36 Outside your Roadtrek Passenger Side Compartment The door just in front of the rear tire on the passenger side is for the batteries. These are maintenance free AGM batteries. You do not need to do any maintenance to these batteries and you do not need to check them in any way. Driver's Side Compartments Front Compartment Center compartment showing optional...
-
Page 37: Exterior Shower
Outside your Roadtrek Exterior Shower The outside shower hose attaches to the faucet inside the rearmost driver's side storage compartment, behind the rear wheel. This faucet provides hot and cold running water from the same sources as your inside faucets. When finished, disconnect and store the shower hose and nozzle. - Page 38 Outside your Roadtrek Start the zipper on the left side Installed screen You can access the underbed storage area without removing the screen Start the zipper at each bottom corner by pushing the bottom stop (the metal end) of the zipper into the two back-to-back zipper sliders, and zipping the top slider upward.
- Page 39 Outside your Roadtrek Optional Side Door Screen In addition to the rear door screen, there is also an optional side door screen which will allow you to keep the side door open for ventilation without admitting insects. There is a zipper in the screen so you can enter and exit without removing the screen.
-
Page 40: Utilities
Utilities Utilities Just like your house, your Ranger has fresh water, electricity, waste water disposal, heating, and cooling systems.These systems are self contained and travel with you. Your vehicle should be reasonably level to allow normal operation of the system. Fresh Water Fresh water is contained in a tank that is filled via gravity fill located in the driver's side door pillar. -
Page 41: Water Pump
Utilities The city water connection is in the small rearmost side compartment, on the left side. Unscrew the white plastic protective cap and connect your clean hose to the water faucet and this connection point. Turn the faucet on and check for leaks, tightening the connections as necessary. - Page 42 Utilities Black Tank The black water tanks contains toilet waste. Please refer to the HOWTO: Waste Water Dumping section for an explanation of which materials you can and can't flush down the toilet. Indicators The gray and black water tank level indicators on the control panel will give you an approximate indicator of your tank levels.
-
Page 43: Heating And Cooling
Heating and Cooling Heating and Cooling Thermostat The thermostat controls the air conditioning unit. Set the thermostat on "cool" and set the desired temperature. Some models also have a small heat strip in the air conditioning which will blow warm air, but this produces heat directly from electricity and is not recommended for heating the cabin for extended periods of time unless you are attached to shore power or running the engine. -
Page 44: Heat Pump
Heating and Cooling Heat Pump The heat pump can provide both heating and cooling for your Roadtrek using electric shore power or generator power. The heat pump gives you the advantage of heating your unit with electricity if you would prefer to use electricity rather than the propane the furnace uses. - Page 45 Heating and Cooling Propane Furnace The furnace is installed with the factory installed propane option. The furnace is controlled by the combination thermostat located above the rear bed. The furnace requires propane and 12V power. The furnace uses minimal electricity compared to the heat pump, and can be used without shore power or generator use.
-
Page 46: Electrical System
Electrical System Electrical System Coach Batteries The coach batteries in your Roadtrek are sealed AGM batteries. Do not attempt to open them. There is no user maintenance possible on these batteries. Battery Disconnect Switch The battery disconnect switch provides power to all 12 volt appliances, such as the water pump, the refrigerator, and so forth. - Page 47 Electrical System Alternator Charger and Battery Isolator While driving, your Roadtrek will also charge the coach batteries from the vehicle alternator through an isolator. The isolator allows extra vehicle alternator-produced electricity to charge your coach batteries in addition to keeping your engine (chassis) battery charged.
- Page 48 Electrical System On board 120 Volt AC power Standard 750W Inverter The standard configuration includes a 1250 watt inverter. This inverter provides 120 volt AC (household current) for a few of the outlets in your Roadtrek; primarily the ones running the TV and the DVD player.
- Page 49 Electrical System Shore Power The shore power connection is through the shore power cord, stored in the driver's side large compartment. See Outside your Roadtrek for location. The switchover from shore power to inverter is automatic. To connect to external (shore) power, open the side compartment and remove the power cord. Plug the power cord into the campsite 30 amp power source.
-
Page 50: Monitor Panel
Monitor Panel Monitor Panel The monitor panel is located inside the side door, above the doorframe, to the left of the bathroom. Power Sources The monitor panel controls 2 separate power sources; the 12 volt DC power and the 120 volt AC power via the inverter, shore power, or optional generator. -
Page 51: Other Switches
Monitor Panel Battery Disconnect Inverter switch Inverter The inverter provides 120 volt AC (household current) to the 120 volt appliances and wall outlets. Shore Power Shore power is the name for power supplied by a utility company that you plug into to provide power to your Roadtrek. See HOWTO: Shore Power for a concise guide to plugging in and unplugging from shore power. - Page 52 Monitor Panel Patio light switch Water pump switch Water Pump Switch The centered switch to the right of the leftmost four switches is the water pump switch. It should be on only when you have water in the fresh water tanks and wish to use the sinks, showers, or toilet. The pump should not be run without water. As with the patio light switch, pressing the top of the button turns the pump on, and pressing the bottom turns it off.
- Page 53 Monitor Panel Tank and charge indicators To the right of the switches are the indicator lights for the the battery charge level, the fresh water tank level, and the black and gray water tank levels. The battery disconnect switch has to be on for this display to work. Press the button for each to see the display.
-
Page 54: Distribution Panel
Distribution Panel Distribution Panel The distribution panel is located below the Monitor Panel. The 120 volt AC breakers and the 12 volt DC fuses are behind a black plastic cover on the right side. AC Breaker Panel Flip the cover to the right and note the sticker under the cover with the identifying information on each breaker. When storing the Ranger for the winter, turn off the battery disconnect switch, the inverter, and all circuit breakers in this panel. -
Page 55: Alarms And Warnings
Alarms and Warnings Alarms and Warnings Propane and CO alarm Your vehicle has been equipped with a combination propane leak and carbon monoxide detection device for your protection. It is located slightly above floor level directly behind the rear bathroom door. Be sure the detector is operating while using your vehicle. - Page 56 Alarms and Warnings The detector may chirp every 15 seconds or so if the coach batteries are running low. The Carbon Monoxide and Propane Leak detector is located on the passenger side, near the floor under the TV. These detectors have a service life, beyond which point they need to be replaced.
-
Page 57: Smoke Alarm
Alarms and Warnings Smoke Alarm The smoke alarm is located to the right of the Monitor Panel. It requires a 9V battery and periodic replacement. Please refer to the Owner's Manual for the unit in your vehicle. Smoke alarm is shipped with battery reversed. Check battery installation if the smoke alarm does not work. Fire Extinguisher Your Roadtrek comes equipped with a dry chemical fire extinguisher suitable for all fires. -
Page 58: Maintenance
See the automotive chassis manufacturer's owner's manual and documents for tire warranty information. Inflation pressure information is on the sticker inside the galley cabinet door. The current Chevrolet Express manual recommends checking tire pressures regularly - at least every month, and definitely before a long trip. Tire rotation intervals depend on wear and other factors, but the current Chevrolet Express manual recommends tires should be rotated at least every maintenance interval - every 12,000 km/7500 miles. -
Page 59: At Least Monthly
Maintenance When You Stop for Fuel, or Weekly Check engine oil level. Look for low or underinflated tires. At Least Monthly Check tire pressure, including your spare. Check coolant level in the coolant recovery reservoir. Check windshield washer fluid, brake fluid and power steering fluid levels. Check operation of all exterior lamps, including brake lamps, turn signals and hazard warning flashers. -
Page 60: At Least Twice A Year
Maintenance Gravity fill on driver's Tank drain, under doorpost driver's doorstep At Least Twice A Year Check windshield wiper operation. Clean wiper blades with clean cloth dampened with washer fluid. Wiper blades should be replaced at least once a year. Check radiator, heater and air-conditioning hoses for leaks or damage. -
Page 61: At Least Once A Year
Maintenance Inspect black water tank vent and remove any debris or other obstructions. The black water tank vent is on the roof, passenger side, in the bathroom area. Clean air conditioner filter. See air conditioner manual for details. Thoroughly clean and wax the roof of the van. At Least Once a Year Lubricate all door hinges, locks and latches, especially the exposed hinges on exterior doors. -
Page 62: Spare Tire Storage
Spare Tire Storage Spare Tire Storage Rear Door Spare Tire Spare tire retaining pin Spare tire lift latch Supplied with your new Roadtrek are two types of small keys. One is for the storage compartments, and the other is to unlock the chrome surround on your spare tire. Find both keys, put one of each on your key ring, and carry them with you whenever you drive your Roadtrek. - Page 63 To use the spare tire, lower the tire, unlock the chrome surround with the key supplied with your Roadtrek, unbolt the tire from the carrier with your lug wrench, and lift the tire off the carrier. Follow the Chevrolet manual for instructions on the use of the jack and other tire change procedures.
-
Page 64: Obtaining Service
Obtaining Service Obtaining Service When your Roadtrek needs service, determine if the issue is with the Roadtrek upfits or the GM Chassis. For Roadtrek upfits, contact your Roadtrek dealer. For chassis-related issues, contact GM service. Advise the service writer that you have an Express 2500 3/4 ton van, rather than a "motorhome". -
Page 65: Specifications
Specifications Specifications For general chassis specifications, please refer to the GM manual. For specifications relating to your vehicle, including occupancy, weight rating, tire size, inflation, and so on refer to the sticker on the driver's side B pillar (right side of the door frame, near the latch). -
Page 66: Warranty
The automotive Chassis is warranteed by General Motors. Please refer to the Chevrolet Warranty Information booklet for details. All automotive service, maintenance and repairs are to be performed by any Chevrolet dealer. See the Chevrolet Warranty Information booklet for details. Such items are not warranted by Roadtrek. Roadtrek will pay for the removal and reinstallation of motorhome components necessary to perform automotive recalls and warranty for the duration of the original manufacturer's warranty. - Page 67 Warranty 5. 5. Incidental damages connected with the failure of the Vehicle such as lost time, inconvenience, loss of use of the Vehicle, cost of rental cars, gasoline, telephone, travel or lodging. 6. 6. Damages caused by environmental factors including, but not limited to, hailstorms, tornadoes, sandstorms, stone chips, lightning, floods, earthquakes, airborne fallout, chemicals, tree sap, ocean spray, road hazards.
-
Page 68: Appliance Warranty
Warranty 5. 5. Only parts and accessories and other material, available through Roadtrek Motorhomes are to be used in the performance of warranty service. Express shipping costs are not covered by this warranty policy. 6. 6. Warranty repairs performed a second time by a Dealer (due to incorrect or inadequate diagnosis, improper assembly or repair, or lack of proper testing when the original warranty repair was performed) are considered as shop comebacks and are not reimbursable. - Page 69 Warranty Propane or Gasoline Generator The generator is covered by the manufacturer's warranty. 1. 1. The generator warranty may be voided if the manufacturer's maintenance and run requirements are not met. AGM Battery Warranty Batteries are warranted by the battery manufacturer for one year from the "In Service Date" of the Roadtrek. 1.
-
Page 70: Registration
Registration Registration Please send this form in or email the information to sales@roadtrek.com when you purchase your Roadtrek. © 2014 by Roadtrek, Inc. - Page 71 Registration References [1] mailto:sales@roadtrek. com © 2014 by Roadtrek, Inc.
-
Page 72: Regulatory Notices
Regulatory Notices Regulatory Notices If you believe that your vehicle has a defect which could cause a crash or could cause injury or death, you should immediately inform the National Highway Traffic Safety Administration, (NHTSA) in addition to notifying Roadtrek Motorhomes. -
Page 73: Howto: Monitor Panel
HOWTO: Monitor Panel HOWTO: Monitor Panel The monitor panel is located inside the side door, above the doorframe. Depending on the options you have, there may be a gasoline generator starter switch and hour run meter to the right. Battery Disconnect Switch The battery disconnect switch turns the coach battery power off and on. - Page 74 HOWTO: Monitor Panel Battery disconnect switch Inverter switch You will hear a "clunk" as the battery disconnect switch is pressed - this is a big relay connecting the coach batteries to the electrical loads. If you hear a clunk-clunk, or nothing at all, it's possible that your batteries are depleted to the point where they cannot drive the relay.
- Page 75 HOWTO: Monitor Panel The inverter switch is on the left side of the monitor panel, above and to the right of the battery disconnect switch. It has an indicator light inside it that comes on to let you it's on. If you are not using any 120 volt electricity, turn the inverter off to conserve battery power, since it uses a small amount of electricity even when it's not powering any appliances.
- Page 76 HOWTO: Monitor Panel Water Pump Switch The button to the right of the four leftmost switches is the water pump switch. It should be on only when you have water in the fresh water tanks and wish to use the sinks, showers, or toilet. The pump should not be run without water. As with the patio light switch, pressing the top of the button turns the pump on, and pressing the bottom turns it off.
- Page 77 HOWTO: Monitor Panel Tank Levels and Battery Charge Indicator To the right of the monitor panel switches are the indicator lights for the battery charge level, the propane tank level, the fresh water tank level, and the black and gray water tank levels. Press the button for each to see the display.
- Page 78 HOWTO: Monitor Panel Generator switch, prime/off position Generator hour meter Optional Gasoline Generator Switch and Hour Meter To start the generator, first push the bottom of the rocker switch for 5 seconds to PRIME, then push the top of the switch to START.
-
Page 79: Howto: Setting Up Your Campsite
HOWTO: Setting Up Your Campsite HOWTO: Setting Up Your Campsite What Do You Need To Hook Up? In a Roadtrek, the answer to this question is - a lot less than you think. Rather than slog through the setup ordeal that Class As and fifth wheels and other trailers go through, Class Bs are much more nimble. - Page 80 HOWTO: Setting Up Your Campsite Connected Fresh Water vs. Using your Tanks There's no real advantage to leaving the water hooked up all the time - it's easier just to get your hose out and fill your tanks, and then put the hose away. No leaks, no hose to trip over, no need to disassemble and store all that stuff when it's time to hit the road again.
- Page 81 HOWTO: Setting Up Your Campsite Technically, you could set up a sewer connection like the big rigs' semi-permanent giant sewer hose on an inclined pathway to the dump, but why bother? Just dispense with all that unsightly and potentially hazardous plumbing, and dump your tanks when they're full.
- Page 82 HOWTO: Setting Up Your Campsite Leveling your Roadtrek Roadtreks don't have or need the built-in leveling jacks and stands large RVs have - it's usually easy enough to move back and forth in your campsite until you're reasonably level. However, many Roadtrek owners buy and carry leveling blocks for those places where finding a level spot is difficult.
-
Page 83: Howto: Shore Power
HOWTO: Shore Power HOWTO: Shore Power Connecting To Shore Power Your Roadtrek has a shore power cord, which is permanently attached inside the driver's side storage compartment. Open this compartment and pull the cord out to attach to the campsite or house electrical outlet. There is a "mousehole" in the rear of the storage compartment to thread the cable through if you wish to close the compartment while plugged in. - Page 84 HOWTO: Shore Power Campsite Connections Most RV parks and campgrounds have AC power of various voltages and amperages available at each site. The power will typically be in a pedestal with a cover that flips up. If you cannot find your power pedestal or you're not sure how to open it, ask the campground personnel.
- Page 85 HOWTO: Shore Power 15A outlet Breakers A typical campsite’s power pedestal will have three types of plug-in receptacles: 15 amp, 30 amp and 50 amp. The 15A receptacle is typically the same as you would find in your home. The 30A and 50A receptacles are specific to the RV industry. Other receptacles look similar but may not be wired the same.
- Page 86 HOWTO: Shore Power 15A to 30A adapter 50A to 30A adapter It is possible that a campground (or perhaps a friend's driveway) will not have a 30A receptable available for your use. You can purchase a 15A to 30A adapter and connect to an ordinary 15A household outlet. Be aware that in those situations, you will have limited power compared to a 30A circuit.
-
Page 87: Howto: Potable Water Use
HOWTO: Potable Water Use HOWTO: Potable Water Use Your Roadtrek can operate in either fully self-contained mode, or can be connected to a water supply such as a campsite's faucet. The city water connection is in the driver's side rearmost compartment. Unscrew the white plastic protective cap and connect your clean hose to the water faucet and this connection point. - Page 88 HOWTO: Potable Water Use You can connect to a city water connection whenever your Roadtrek is not winterized. The city water inlet connection is located in the small compartment just in front of the driver's side rear tire. Roadtrek recommends that you use a potable-water hose. These are usually white in color. City water fill location City water valve in closed (handle Attaching pressure regulator to city...
- Page 89 HOWTO: Potable Water Use To disconnect the city water connection: • • Turn off the external water source. • • Open a faucet to relieve the pressure in the system. Failure to do so will not damage your vehicle, but may result in an unexpected shower when you disconnect the hose.
-
Page 90: Howto: Waste Water Dumping
HOWTO: Waste Water Dumping HOWTO: Waste Water Dumping Wastewater storage and dumping Your house is permanently connected to your septic system or a municipal sewer; you don't have to worry about the wastewater you generate because gravity takes it away. Your Roadtrek doesn't have that connection, and has to hold any wastewater until you have the opportunity to dump it at an approved dump station. - Page 91 HOWTO: Waste Water Dumping Dumping the tanks Gray and black tank valve handles Waste water hose in stowed position • • Open the access door just to the rear of the driver`s side door. This will expose the black and gray water valves. Support the door in the open position by using the support arm.
- Page 92 HOWTO: Waste Water Dumping Pin you need to remove to raise the flap Waste water hose pipe in lowered and lower the hose pipe position • • Locate the R-shaped pin (spring type cotter pin) that retains the aluminum flap on the end of the waste water pipe. You can see this pin through the hole below the gray and back handles.
- Page 93 HOWTO: Waste Water Dumping Waste water hose being pulled out of the Small cap at end of the hose removed to pipe allow for hose extension • • When you have the wastewater hose extended to the drain, twist the end to detach the big cap from the lugs which hold it in place.
- Page 94 HOWTO: Waste Water Dumping Hose extended toward the dump site Retaining lugs for hose end - the end has already been twisted open • • Open the black water tank gate valve by pulling the black handle out. Open the valve slowly. Water is heavy, and if the tank is near full it will come out of the hose with surprising speed and force.
- Page 95 HOWTO: Waste Water Dumping • • Use the dumpsite rinse hose to clean the end of the hose. • • Replace the big cap onto the end of the waste water hose, twisting it to lock it into place. • • Push the blue waste hose back into the waste hose pipe. •...
-
Page 96: Howto: Cable And Tv Reception
HOWTO: Cable and TV Reception HOWTO: Cable and TV Reception Your Roadtrek comes with a TV and a DVD player, along with a rooftop TV antenna and a cable TV connection. The TV and DVD are located in the rear on the passenger side. The Cable TV/Antenna switch and power injector for the built-in antenna are in the cabinet just above the DVD player. - Page 97 HOWTO: Cable and TV Reception TV antenna switch and power injector © 2014 by Roadtrek, Inc.
- Page 98 HOWTO: Cable and TV Reception Over-the-air TV To watch TV using the Roadtrek rooftop antenna: • • Have 120 volt AC power available (inverter on OR shore power plugged in) • • Turn on TV • • Make sure the power injector is on (the barrel connector is plugged into the top of the injector) •...
- Page 99 HOWTO: Cable and TV Reception Cable TV To connect your Roadtrek to cable TV at a campsite or even in your driveway, first locate the Roadtrek's cable TV connection in the small rearmost drivers side compartment. It has a square gray plastic cover about 3 cm on each side which is hinged at the top, and opens to expose the barrel connector the cable hooks to.
- Page 100 HOWTO: Cable and TV Reception TV cable connected AB switch selected for cable (bottom button) Push the bottom button on the A-B switch in the cabinet above the TV. The bottom button connects your TV to the cable connection, and the top button connects it to the over-the-air signals from your rooftop antenna. ©...
-
Page 101: Howto: Propane System
HOWTO: Propane System HOWTO: Propane System If you have the propane option, your vehicle is equipped with a propane system which, when properly handled and maintained, will provide trouble and worry free operation of your propane fueled appliances. With the propane option, you get a propane furnace and a propane cooktop. - Page 102 HOWTO: Propane System Propane Tank Location The propane tank is located in the large driver's side storage compartment along the bottom of the vehicle. To access the tank for filling and to turn the manual tank shutoff valve off and on, open the side compartment. Main Shutoff valve Propane tank Propane tank main shutoff valve...
- Page 103 HOWTO: Propane System Propane Tank Filling Propane fill valve Propane bleed To fill the tank, first turn off all propane appliances, then turn off the tank shutoff valve. We recommend that you find a qualified LPG technician to fill the tank. The following is an outline of the process to help you understand and not intended to be complete, nor to substitute for formal training or instruction.
- Page 104 HOWTO: Propane System Propane relief valve Sending unit for propane level indicator. Propane relief valve There is also a needle gauge you can observe directly on the tank here which may be more accurate than the indicator lights inside. Under no circumstances should anyone fill the tank to more than 80% capacity; doing so can cause liquid propane to flow into the regulators.
- Page 105 HOWTO: Propane System Propane Sender The propane tank has a level indicator with a remote sender to the Monitor Panel. Both the three-light system on the monitor panel and the gauge on the tank will give you a rough idea of your propane level; you will get a more accurate indication when you fill up.
- Page 106 HOWTO: Propane System Propane tanks must not be placed or stored inside your vehicle. Propane tanks are equipped with safety devices which relieve excessive pressure by discharging gas to the atmosphere. The Roadtrek's propane tank is mounted outside the vehicle and will vent propane where it can dissipate; any tank inside the vehicle will vent into the passenger compartment, creating an explosive propane-air mixture inside the enclosed space, which also contains many potential sources of ignition.
-
Page 107: Howto: Water System Winterizing
HOWTO: Water System Winterizing HOWTO: Water System Winterizing Do you really need to winterize? If your Roadtrek is going to remain heated to comfortable temperatures, and the temperatures during the day are well above freezing (above 40 deg. F or above 4 deg. C) and the forecast is for temperatures just below freezing for a few hours at night with calm winds, then you don`t need to winterize. - Page 108 HOWTO: Water System Winterizing How to winterize using anti-freeze • • Get three gallons of RV antifreeze. DO NOT use automotive antifreeze. RV antifreeze is non-toxic and safe for potable water lines. Typical RV anti-freeze Compartment lid screw • • Buy three gallons of pink RV/marine antifreeze. •...
- Page 109 HOWTO: Water System Winterizing First two water heater bypass valves Third water heater bypass valve • • To access the water heater bypass valves, remove the cushion from the driver's side rear seat and undo the Robertson screw securing the compartment lid. Lift the lid and locate the three bypass valves with black handles on the water lines. The third valve is hidden behind the water pump.
- Page 110 HOWTO: Water System Winterizing Water heater fittings Fresh tank drain Water pump filter • • To remove and drain the water heater, open the wardrobe to the left of the galley counter. Turn off and unplug the water heater, and loosen the two water line fittings on the left side of the top of the water heater. These are plastic fittings- unscrew them counterclockwise by hand if possible, or gently use a pair of pliers cushioned with a cloth rag.
- Page 111 HOWTO: Water System Winterizing • • Divide the remaining half gallon of antifreeze between the three drains - shower, bathroom sink, and galley sink - and the toilet. • • Open the fresh water drain valve and allow a small amount of antifreeze to leak out. •...
-
Page 112: Howto: De-Winterizing
HOWTO: De-Winterizing HOWTO: De-Winterizing If you winterized only for a short time (less than a week) you can skip to the second step. First step You will need 2 gallons of water and 1 cup of fresh bleach. (Bleach loses its potency over time; always start with bleach that is less than 6 months old.) 1. - Page 113 HOWTO: De-Winterizing Water heater fittings Fresh tank drain • • Re-install the water heater if you stored it outside the vehicle. Leave it unplugged and off. Check to be sure the two fittings at the top of the water heater are hand tight. Tighten slightly at this stage and recheck after you undo the bypass valves, repressurizing the water heater.
- Page 114 HOWTO: De-Winterizing Water heater bypass valves Third water heater bypass valve • • Open a hot water faucet and fill the water heater with water. Check for leaks at the two fittings at the top of the water heater. These are plastic fittings - tighten them clockwise by hand if possible, or gently use a pair of pliers cushioned with a cloth rag.
Need help?
Do you have a question about the ranger rt and is the answer not in the manual?
Questions and answers