
Related Manuals for MasterCraft 054-6602-4


Summary of Contents for MasterCraft 054-6602-4
- Page 1 054-6602-4 Planer INSTRUCTION IMPORTANT: Read and understand this instruction manual thoroughly before MANUAL using the product.
-
Page 2: Table Of Contents
headline bars TAbLe Of CONTeNTS Technical Specifications Safety Guidelines 5–8 Key Parts Diagram 9–10 Important Information 11–12 continuation tabs Assembly Instructions 13–14 Operating Instructions 15–17 Maintenance 18–20 Troubleshooting notes Part list 22–23 Warranty 24–25 warnings NOTe: If any parts are missing or damaged, or if you have any questions, please call our toll-free helpline at 1-800-689-9928 SAVe THeSe INSTRUCTIONS • This manual contains important safety and operating... -
Page 3: Technical Specifications
054-6602-4 | contact us 1.800.689.9928 RULeS fOR SAfe OPeRATION TeCHNICAL SPeCIfICATIONS WARNING! Input 6.0 A Rating 120V~, 60Hz Safety symbols in this Instruction Manual are used to flag possible dangers. The safety symbols and their explanations require your full understanding. The safety warnings do not, by themselves,... - Page 4 054-6602-4 | contact us 1.800.689.9928 eLeCTRICAL SAfeTy • Disconnect the plug from the power source and/or the battery pack from the power tool before making any adjustments, changing accessories, or storing power tools. Such preventive safety • Power tool plugs must match the outlet. Never modify the plug in any way. Do not use any adapter measures reduce the risk of starting the power tool accidentally. plugs with earthed (grounded) power tools. Unmodified plugs and matching outlets will reduce risk of • Store idle power tools out of the reach of children and do not allow persons unfamiliar with the...
-
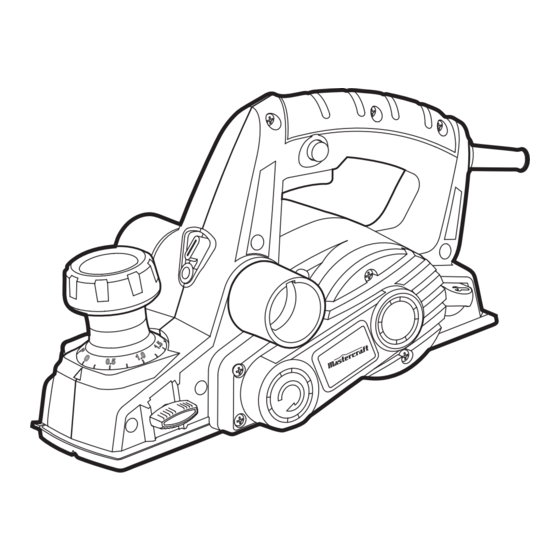
Page 5: Key Parts Diagram
054-6602-4 | contact us 1.800.689.9928 SAfeTy gUIdeLINeS fOR PLANeR PACKAge CONTeNTS • Wait for the cutter to stop before setting the tool down. An exposed, rotating cutter may engage the Planer, edge guide, blade change wrench (installed on the planer), rabbetting depth scale, dust bag, vacuum surface and result in possible loss of control and serious injury. -
Page 6: Important Information
054-6602-4 | contact us 1.800.689.9928 IMPORTANT INfORMATION Part Part Before attempting to use this tool, become familiar with all of its operating features and safety requirements. On/off trigger switch Clamping element For optimum performance and safety, read the following operating instructions carefully before using. -
Page 7: Assembly Instructions
054-6602-4 | contact us 1.800.689.9928 bLAde CHANge wReNCH STORAge ASSeMbLy INSTRUCTIONS fig 4 AReA (fig 4) edge gUIde Your tool is equipped with a blade wrench that is fig 6 conveniently located in the handle base where it is 1. -
Page 8: Operating Instructions
054-6602-4 | contact us 1.800.689.9928 SeTTINg THe RAbbeTTINg dePTH OPeRATINg INSTRUCTIONS 1. Loosen rabbetting depth-stop locking nut and set the desired rabbet depth by aligning the depth scale on SwITCHINg ON ANd Off (fig 10) fig 10 the rabbetting depth stop with the indicator line. - Page 9 054-6602-4 | contact us 1.800.689.9928 PLANINg (fig 11) PLANINg wITH THe edge gUIde fig 11 fig 12 1. Unplug the planer and adjust the edge guide and The edge guide can be used to control the width of the cutting depth as appropriate.
-
Page 10: Maintenance
054-6602-4 | contact us 1.800.689.9928 MAINTeNANCe RePLACINg THe PLANeR bLAdeS fig 14 befORe eACH USe ReMOVINg THe OLd PLANeR bLAdeS 1. Disconnect the plug from the power source. 1. Inspect the planer, the trigger switch, the cord and the accessories for damage. -
Page 11: Troubleshooting
054-6602-4 | contact us 1.800.689.9928 dRIVe beLT TROUbLeSHOOTINg The drive belt is a normal maintenance part and should be inspected periodically for wear. If the drive belt Problem Possible Causes Solution shows signs of drying out, cracking or tearing, it should be replaced. If the drive belt will not track properly or 1. - Page 12 054-6602-4 | contact us 1.800.689.9928 exPLOded VIew No. Part No. description No. Part No. description 054660201 Front Sole Plate 054660229 Backplane Positioning Bar 054660202 Big Spring 054660230 Spring 054660203 Steel Ball 054660231 Support 054660204...
-
Page 13: Warranty
This Mastercraft product is guaranteed for a period of 3 years from the date of original retail purchase against defects in workmanship and materials, except for the following components: a) Component A: Batteries, chargers and carrying case, which are guaranteed for a period of 2 years from the...
Need help?
Do you have a question about the 054-6602-4 and is the answer not in the manual?
Questions and answers