Table of Contents
Advertisement
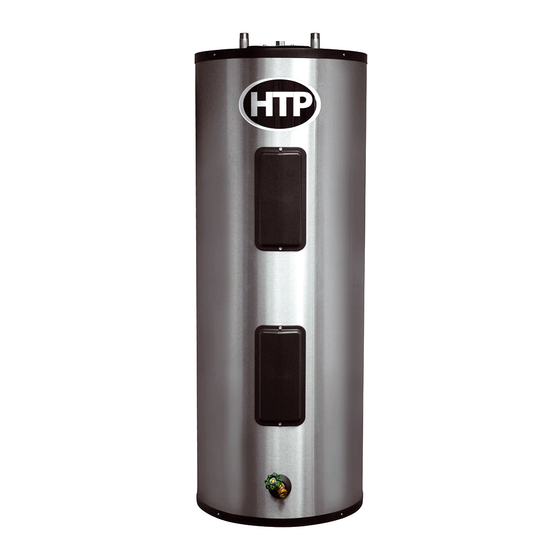
Everlast
Electric Water
Heater
INSTALLATION
START-UP
MAINTENANCE
PARTS
Everlast
Water Heater Models
EV-6 / EV-12 / EV-20 / EV-30
EV-30LB / EV-45LB / EV-50 / EV-80
California Proposition 65 Warning: This product contains chemicals known to the State of California to cause cancer, birth defects, or
other reproductive harm.
NOTICE: HTP reserves the right to make product changes or updates without notice and will not be held liable for typographical errors
in literature.
The surfaces of these products contacted by consumable water contain less than 0.25% lead by weight, as required by the Safe
Drinking Water Act, Section 1417.
NOTE TO CONSUMER: PLEASE KEEP ALL INSTRUCTIONS FOR FUTURE REFERENCE.
120 Braley Rd. P.O. Box 429
East Freetown, MA 02717-0429
www.htproducts.com
LP-04 REV. 4.15.14
Advertisement
Table of Contents

Related Manuals for HTP Everlast EV-6


Summary of Contents for HTP Everlast EV-6
- Page 1 California Proposition 65 Warning: This product contains chemicals known to the State of California to cause cancer, birth defects, or other reproductive harm. NOTICE: HTP reserves the right to make product changes or updates without notice and will not be held liable for typographical errors in literature.
-
Page 2: Table Of Contents
The following defined terms are used throughout this manual to bring attention to the presence of hazards of various risk levels, or to important product information. DANGER indicates an imminently hazardous situation which, if not avoided, will result in death or serious injury. WARNING indicates a potentially hazardous situation which, if not avoided, could result in death or serious injury. -
Page 3: Part 1 - General Safety Information
PART 6 – MAINTENANCE ................................ 13 PART 7 – TROUBLESHOOTING .............................. 15 NOTES ......................................17 HTP CUSTOMER INSTALLATION RECORD FORM ........................18 PART 1 – GENERAL SAFETY INFORMATION INSTALLER – Read all instructions in this manual before installing. Perform steps in the order given. -
Page 4: When Servicing The Water Heating System
Be sure to disconnect electrical power before performing service. Failure to do so could result in an electrical shock, property damage, serious personal injury, or death. This water heater is not designed or intended for use in space heating applications. Failure of a water heater due to unapproved use IS NOT covered by the warranty. -
Page 5: Specifications And Performance Ratings
Locate the water heater where any leakage from the relief valve, related piping, tank, or connections will not result in damage to surrounding areas or lower floors of the building. The water heater should be located near a floor drain, or installed in a drain pan. HTP WILL NOT be held liable for leakage damages. - Page 6 Incorrect ambient conditions can lead to damage to the heating system and put safe operation at risk. Ensure that the installation location adheres to the information included in this manual. Failure to do so could result in property damage, serious personal injury, or death.
-
Page 7: Part 3 - Heater Piping
PART 3 – HEATER PIPING A. PLUMBING It is mandatory that all plumbing be done in accordance with federal, local, and state plumbing codes and practices. Failure to properly install the water heater WILL VOID the warranty. It is also necessary to use both thread tape and pipe dope on all mechanical plumbing connections. -
Page 8: Filling The Heater
C. FILLING THE HEATER When filling the water heater, open a hot water tap to release air in the tank and piping. Failure to do so could lead to improper water heater operation. Make certain that the field installed drain valve is completely closed. Open the shut- off valve in the cold water supply line. -
Page 9: Installation Diagrams
F. INSTALLATION DIAGRAMS Figure 3 – Piping Detail - NOTE: Drawing is meant only to demonstrate system piping concept. The installer is responsible for all equipment and detailing required by local codes. LP-04 REV. 4.15.14... - Page 10 Figure 4 – Mobile Home and Point of Use Piping Detail - NOTE: Drawing is meant only to demonstrate system piping concept. The installer is responsible for all equipment and detailing required by local codes. LP-04 REV. 4.15.14...
-
Page 11: Part 4 - Heater Wiring
PART 4 – HEATER WIRING This unit is factory wired to a junction box on top of the water heater. A 4 x 4 x 2 junction box is located on top of the unit for field wiring connection. These heaters are equipped and wired as standard 120 volt AC (for point of use heaters) and 240 volt AC (for dual element heaters). -
Page 12: Part 5 - Operating The Heater
PART 5 – OPERATING THE HEATER Tank must be full of water before power is turned on. Heating elements will be damaged if energized for even a short time while tank is dry. Failures due to “dry-firing” are NOT covered by warranty. After water and electrical connections have been made and tank is filled with water, turn on power to heater. -
Page 13: Part 6 - Maintenance
DO NOT replace heating element with a generic heating element. Only HTP heating elements are approved for use with this water heater. Failure to follow this warning will result in premature product failure and VOID the warranty. - Page 14 Monthly (Every two weeks in hard water locations) It is recommended that a few quarts of water be drained from the heater. This will flush sediment deposits from the bottom of the heater and lengthen the heater’s service life. Turn off power to the heater during flushing operation, so the element(s) will not be damaged. Failure to shut off power to the heater when draining may damage the heating elements.
-
Page 15: Part 7 - Troubleshooting
T&P Relief Valve Maintenance Instructions: Annually: Certain naturally occurring mineral deposits may adhere to the valve, blocking waterways and rendering the valve inoperative. The T&P Relief Valve lever must be operated to ensure the waterways are clear. If waterways are clear, hot water will discharge from the valve. - Page 16 Figure 8 – LP-04-F Parts Blowout Drawing ITEM Replacement Description QTY. Part # 4500 WATT ELECTRIC ELEMENT (W/O-RING) (EV-30 – EV-80) 6060P-938 1500 WATT ELECTRIC ELEMENT (W/O-RING) (EV-6 – EV-20) E1010 6060P-187 ELECTRICAL BOX COVER TP1500 3/4" T&P VALVE - 100XL-8 6060P-633 THERMODISC MOUNTING CLIP TD1015...
-
Page 17: Notes
NOTES LP-04 REV. 4.15.14... -
Page 18: Htp Customer Installation Record Form
HTP CUSTOMER INSTALLATION RECORD FORM The following form should be completed by the installer for you to keep as a record of the installation in case of a warranty claim. After reading the important notes at the bottom of the page, please also sign this document.
Need help?
Do you have a question about the Everlast EV-6 and is the answer not in the manual?
Questions and answers