Table of Contents
Advertisement
Quick Links
Everlast
Commercial Electric
Water Heater
USE AND CARE MANUAL
INSTALLATION
START-UP
MAINTENANCE
PARTS
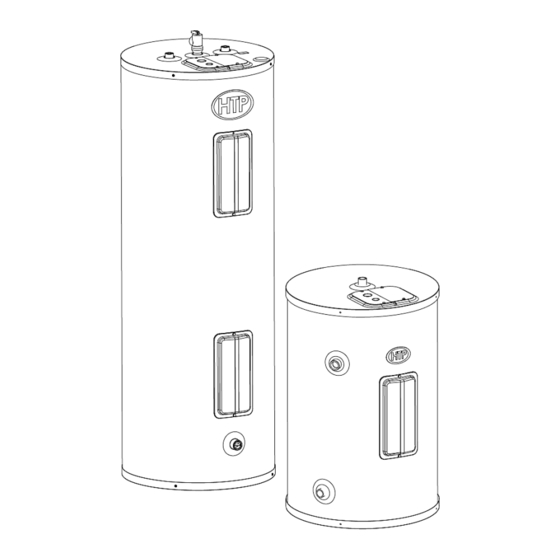
Everlast Commercial Models
EVC010 / 015 / 020 / 030 / 040 / 050
California Proposition 65 Warning: This product contains chemicals known to the State of California to cause cancer, birth defects, or
other reproductive harm.
This manual must only be used by a qualified heating installer/service technician. Read all instructions in this manual before installing.
Perform steps in the order given. Failure to comply could result in substantial property damage, severe personal injury, or death.
NOTICE: HTP reserves the right to make product changes or updates without notice and will not be held liable for typographical errors
in literature.
NOTE TO CONSUMER: PLEASE KEEP ALL INSTRUCTIONS FOR FUTURE REFERENCE.
120 Braley Rd. P.O. Box 429
East Freetown, MA 02717-0429
www.htproducts.com
LP-379 REV. 6.13.13
Advertisement
Table of Contents

Related Manuals for HTP Everlast EVC010


Summary of Contents for HTP Everlast EVC010
- Page 1 Perform steps in the order given. Failure to comply could result in substantial property damage, severe personal injury, or death. NOTICE: HTP reserves the right to make product changes or updates without notice and will not be held liable for typographical errors in literature.
-
Page 2: Important Safety Instructions
In some circumstances, the property owner or his/her agent assumes the role, and at government installations, the commanding officer or departmental official may be the AHJ. NOTE: HTP, Inc. reserves the right to modify product technical specifications and components without prior notice. IMPORTANT SAFETY INSTRUCTIONS... -
Page 3: Table Of Contents
FOR THE INSTALLER This manual must only be used by a qualified heating installer/service technician. Read all instructions in this manual before installing. Perform steps in the order given. Failure to comply could result in substantial property damage, severe personal injury, or death. This water heater must be installed by qualified and licensed personnel. -
Page 4: Part 1 - General Safety Information
HTP CUSTOMER INSTALLATION RECORD FORM ............................. 25 Commercial Limited Warranty ....................................26 PART 1 – GENERAL SAFETY INFORMATION A. PRECAUTIONS This water heater is approved for indoor installations only. Clearance to combustible materials: 0” top, bottom, sides and back. Heater must have room for service: 24”... -
Page 5: Installations In The State Of California
D. INSTALLATIONS IN THE STATE OF CALIFORNIA California Law requires that residential water heaters must be braced, anchored, or strapped to resist falling or horizontal displacement due to earthquake motions. For residential water heaters up to 52 gallon capacity, a brochure with generic earthquake bracing instructions can be obtained from: Office of the State Architect, 400 P Street, Sacramento, CA 95814, or you may call 916-324-5315, or ask a water heater dealer. -
Page 6: Specifications And Performance Ratings
B. SPECIFICATIONS AND PERFORMANCE RATINGS Figure 1 – LP-379-J SPECIFICATIONS AND DIMENSIONS WATER TEMPERATURE RATINGS STORAGE SHIPPING HOT / COLD MINIMUM MAXIMUM HIGH MODELS CAPACITY WEIGHT WATER DELIVERE DELIVERED TEMP. (GAL) (LBS EST.) INLETS D TEMP. TEMP. LIMIT 10 ¼” 17 ½”... -
Page 7: Locating The Water Heater
The water heater should be located near a floor drain, or installed in a drain pan. HTP WILL NOT be held liable for leakage damages. - Page 8 The service life of the water heater’s exposed metallic surfaces, such as the junction box, is directly influenced by proximity to damp and salty marine environments. In such areas, higher concentration levels of chlorides from sea spray coupled with relative humidity can lead to degradation of water heater components.
-
Page 9: Part 3 - Heater Piping
NOTE: Piping and filling this water heater WITHOUT installing an element kit will result in a leakage of water, property damage, and possible personal injury. Damages due to such a condition WILL VOID the warranty. HTP, Inc. is not liable for any damages caused by such a condition. -
Page 10: Thermal Expansion
1. Install a shut-off valve and the combination inlet / drain valve to the inlet connection near the bottom of heater. Connect the cold water supply line to the shut-off valve. Refer to Piping Detail, Figure 4. 2. Connect hot water line to the connection marked “HOT” on the top of the heater. 3. -
Page 11: Filling The Heater
NOTE: Piping and filling this water heater WITHOUT installing an element kit will result in a leakage of water and possible personal injury. Damages due to such a condition WILL VOID the warranty. HTP, Inc. is not liable for any damages caused by such a condition. -
Page 12: Installation Diagrams
To protect against injury, you should install a mixing valve in the water system. This valve will reduce point of discharge temperature by mixing cold and hot water in branch supply lines. Such valves are available from your local plumbing supplier. Table 3 details the relationship of water temperature and time with regard to scald injury and may be used as a guide in determining the safest water temperature for your applications. - Page 13 Figure 5 – Mobile Home and Point of Use Piping Detail for EVC010, EVC015, and EVC020 Models - NOTE: Drawing is meant only to demonstrate system piping concept. The installer is responsible for all equipment and detailing required by local codes.
-
Page 14: Part 4 - Heater Wiring
Figure 6 – Piping Detail for EVC030, EVC040, and EVC050 Models - NOTE: Drawing is meant only to demonstrate system piping concept. The installer is responsible for all equipment and detailing required by local codes. PART 4 – HEATER WIRING Tank must be full of water before power is turned on. - Page 15 and fittings or other approved conductive material. A grounding wire is provided on the junction bracket. This grounding wire must be used in the installation. Figure 7 – Single Element Model Wiring Detail for EVC010, EVC015, and EVC020 Models ONLY...
- Page 16 Figure 8 – Dual Element Model Wiring Detail for EVC030, EVC040, and EVC050 Models ONLY Be sure to ground the water heater. The preferred way to ground is with rigid metal conduit between the main panel and the water heater junction box with approved end fittings (check codes on the use of flexible conduit). If making a separate ground, a green ground wire is provided in the water heater junction box.
-
Page 17: Part 5 - Installation Checklist
PART 5 – INSTALLATION CHECKLIST WATER HEATER LOCATION Close to area of heated water demand Indoors and protected from freezing temperatures Area free of flammable vapors Provisions made to protect area from water damage Sufficient room to service heater WATER SUPPLY Water heater completely filled with water Air purged from water heater and piping Water connections tight and free of leaks... -
Page 18: Heating Element Replacement Procedure
DO NOT replace heating element with a generic heating element. Only HTP heating elements are approved for use with this water heater. Failure to follow this warning will result in premature product failure and VOID the warranty. -
Page 19: Part 7 - Maintenance
STEP #2 – Remove the element with a 1 ½” socket wrench or element tool. STEP #3 – Ensure thread and opening are completely free of debris. STEP #4 – Put a small amount of NSF approved lubricant and sealant on the O-Ring. Figure 10 –... - Page 20 Periodically (At least twice a year) Check around the water heater and related plumbing for leaks. If the combination temperature and pressure relief valve discharges periodically, or water is leaking from around the heating elements, there may be a problem with your water system. DO NOT ATTEMPT TO REPAIR LEAKS YOURSELF! Contact a qualified service contractor for assistance.
-
Page 21: Part 8 - Troubleshooting
PART 8 – TROUBLESHOOTING The following table details operating issues, possible causes, and service remedies. ISSUE POSSIBLE CAUSE SERVICE REMEDIES 1. Turn switch ON 1. Manual disconnect switch turned off 2. *Rewire per Fig. 5, Wiring Detail 2. Improper Wiring 3. - Page 22 Figure 11 – Parts Blowout Drawing – EVC010, EVC015, EVC020...
- Page 23 Figure 12 – Parts Blowout Drawing – EVC030, EVC040, EVC050...
-
Page 24: Notes
NOTES... -
Page 25: Htp Customer Installation Record Form
HTP CUSTOMER INSTALLATION RECORD FORM The following form should be completed by the installer for you to keep as a record of the installation in case of a warranty claim. After reading the important notes at the bottom of the page, please also sign this document. -
Page 26: Owner Responsibilities
COVERAGE A. During the first year after the original date of installation in the dwelling, HTP warrants that it will repair or replace, at its option, any defective or malfunctioning component of the stainless steel electric water heater with a component of equivalent size and current model. - Page 27 NO OTHER WARRANTIES Your HTP warranty gives you specific legal rights, and you may also have other rights that vary from state to state. Some states do not allow the exclusion or limitation of incidental or consequential damages so this limitation or exclusion may not apply to you.
Need help?
Do you have a question about the Everlast EVC010 and is the answer not in the manual?
Questions and answers