Doro Primo 365 Operating Instructions Manual
Hide thumbs
Also See for Primo 365:
- Operating instructions manual (88 pages) ,
- Quick start manual (2 pages)
Table of Contents
Advertisement
Quick Links
Advertisement
Table of Contents

Subscribe to Our Youtube Channel
Related Manuals for Doro Primo 365


Summary of Contents for Doro Primo 365
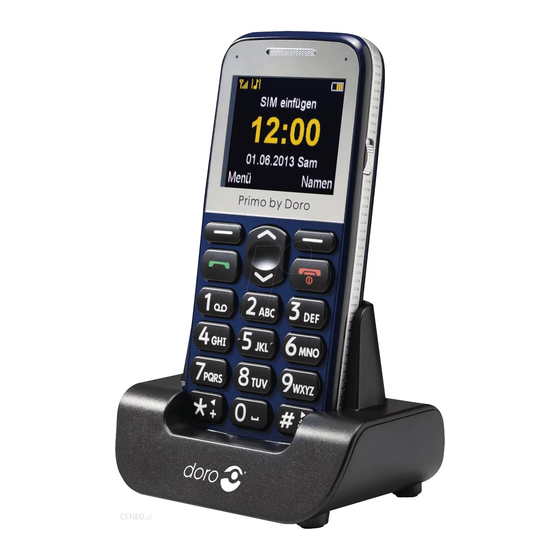
- Page 1 Primo 365 by Doro Operating Instructions by Doro...
-
Page 3: Number Keys
1. Left Soft Key Press it to enter the main menu 2. Right Soft Key Press it to open the phonebook 3. Dialing key Press to dial a number or to accept a call; Press it once to enter Call Log. - Page 4 7. * key In standby mode, press to input “*”/ “+” / “P”/“W” In editing mode, press to input special characters In standby mode, long press to switch between Normal and Silent mode In editing mode, press to switch input methods 9.
-
Page 5: Table Of Contents
Contents Installation ........5 Scope of delivery ......5 Installing the SIM card, memory card and the battery .5 Charging . - Page 6 Headset ........18 Emergency calls ......18 Emergency button .
- Page 7 Connecting the phone to a computer ... . .39 Drag and drop content between phone and a computer ....... . .39 Disconnect the USB cable safely .
- Page 8 User profiles ....... . .67 Organizer ........69 Calendar .
-
Page 9: Installation
Installation Scope of delivery • 1 mobile telephone • 1 energy-efficient switching power supply • 1 charger station • 1 battery pack Li-Ion 3.7 V / 1200 mAh • 1 stereo headset • 1 micro-SD card • 1 operating instructions IMPORTANT! Turn off the phone and disconnect the charger before removing the battery cover. - Page 10 1. Remove the cover from the battery compartment by sliding your fingernail into the small notches on the side of the bottom of the phone and pulling the cover upward. If the battery is installed, slide your fingernail in the notch next to the emergency call button and lift one side of the battery to remove it.
- Page 11 bracket. Make sure that the memory card contacts are facing down and that the "nose" is placed in accor- dance with the marked area (see figure). The contacts of the memory card must not be scratched or bent. 4. Insert the battery by sliding it into the battery slot with the contacts facing down and to the right.
-
Page 12: Charging
Charging CAUTION Only use batteries, charger and accessories that have been approved for use with this particular model. Connecting other accessories may be dangerous and may invalidate the phone's type approval and guarantee. If the battery is low, the empty symbol for the battery sta- tus blinks and a warning signal sounds. -
Page 13: Symbols
Note! To save power the LCD backlight goes off after a while. Press any button to illuminate the display. Full battery capacity will not be reached until the battery has been charged 3–4 times. Batteries degrade over time, which means that call time and standby time will nor- mally decrease with regular use. -
Page 14: Display Status Symbols
Display status symbols Signal strength Battery level New entry in the call list (Missed call) Keypad locked Alarm active Bluetooth on GPRS connection Headset connected USB connection MMS being sent Ringer on Ringer off Vibration only Ringtone and vibration... -
Page 15: Operation
First vibration, then ringtone Unread SMS Unread MMS Operation Activating the phone Hold the read button on the telephone for approx. 4 seconds to turn it on/off. If the SIM card is valid but protected with a PIN code (Per- sonal Identification Number), Input PIN is displayed. -
Page 16: Standby (Idle Mode)
played. The SIM card must now be unlocked with the PUK code (Personal Unblocking Key). 1. Enter the PUK code and confirm with OK. 2. Enter a new PIN code and confirm with OK. 3. Re-enter new PIN code and confirm with OK. Standby (Idle mode) When the phone is ready to use, and you have not keyed in any characters, the phone is in standby. -
Page 17: Making A Call From The Phonebook
3. Press to end the call. Tip: For international calls, always enter a + symbol before the country code to be able to use the address book optimally in any country. Press the * button twice to enter an international area code. -
Page 18: Volume Control
Volume control Use the side buttons +/– to adjust the sound volume during a call. The volume level is indicated on the display. In standby or during an incoming call, set the ringtone volume using the +/- buttons. The last used settings will be saved. Entering text By repeatedly pressing the number buttons to select cha- racters, you can enter texts. -
Page 19: Call Options
Capitalization of the first letter after a period (start of a sentence) ALL CAPS all lower case numbers Call options During a call, you can access other functions using the soft keys ( Options (left selection button) A menu with the following options is displayed: Hold/Retrieve Hold/continue current call. -
Page 20: Call Waiting
microphone from a distance of maximum 1 m. Using the side buttons +/-, you can set the volume of the loudspea- ker. Press H-Held or the button on the back of the device again to return to normal mode. Attention: Before you switch to loudspeaker, hold the device at least 1 m from your ear to avoid loud noises that might accidentally damage your... -
Page 21: Call Information
Call information During a call, the outgoing or incoming phone number and the elapsed call time is displayed. If the identity of the cal- ler is withheld, Unknown is displayed. Keylock To lock/unlock the keyboard, activate the slide switch on the left side of the device. -
Page 22: Silent
Silent Silent is a fixed profile with Keypad tone, Message tone and Ring tone disabled, while Vibration, Tasks and Alarm are unchanged. Tip: Press and hold shortcut button to activate/deactivate Silent. Headset When a headset is connected, the internal microphone in the phone is automatically disconnected. -
Page 23: Emergency Button
without a valid SIM card. You can get additional informa- tion from your provider. Notice! Please be aware that in Germany, since 2009, it is no longer possible to make an emergency call to 112 wit- hout a valid SIM card. Credit is not required - but the SIM card must be valid, registered and activated. - Page 24 "SOS Setting" menu if you want to use it. In the SOS Set- ting , p. 41, you can find information on how to acti- vate this function and enter the contacts in the number list and edit the emergency call SMS. •...
- Page 25 lular network (which signalizes an established call on the network). Notice! Some private security companies accept automatic calls from their customers. Contact the security company before you use the corresponding number. IMPORTANT • After sending the emergency call SMS, the numbers in the number list are called sequentially.
-
Page 26: Telephone Book
Telephone book 250 entries can be stored in the phone's telephone book. The number of entries that can be stored on the SIM card depends on the respective SIM card. Creating an entry in the telephone book 1. Press Menu, scroll to Phonebook and press OK. 2. -
Page 27: Creating Ice Entry (In Case Of Emergency)
Press the * button twice to enter the international area code +. Creating ICE entry (In Case of Emergency) With this additional information and medical information, first responders can access this information from the victim's phone in case of emergency. In the event of a trauma, it is critical to have this information as early as possible which can increase the chances of survival. - Page 28 Edit 1. Edit the entry. Delete characters with Clear. 2. Then press Options, select Save and press Select. Delete - Press Select to remove the selected entry from the telephone book. Press Yes to confirm or No to cancel. Copy - Press Select to copy the selected entry from the telephone to the SIM card or vice versa.
-
Page 29: Ice (In Case Of Emergency)
the SIM and the telephone's memory are dis- played. Memory status - Displays the memory used (Phone/SIM) Copy contacts - Option to copy selected contacts from the telephone to the SIM card and vice versa Move contacts - Option to move selected con- tacts from the telephone to the SIM card and vice versa ATTENTION: The contacts will be deleted from... - Page 30 1. Press Menu, scroll to Phonebook and press OK. ICE and press OK, then use 2. Select scroll the list of entries. 3. Press Edit, to add or edit information in each entry, see Entering text , p. 14. Delete with Clear. After every entry in the ICE menu, press Save.
- Page 31 Vaccination: Any relevant vaccination. Medication: Any medication that you are treated with. Other info: Other information (e.g. organ donor, living will, consent to treat).
-
Page 32: Messaging
Messaging Creating and sending SMS or press Menu, scroll to 1. Press shortcut button Messaging and press OK. 2. Select New and press OK. 3. Type your message, see Entering text , p. 14, then press Options. 4. Select Send to and then Add from Phonebook, select an existing recipient from the telephone book and press OK. -
Page 33: Creating And Sending Mms
ration. Press * twice for the international prefix +. Note! Before you can send any SMS, you need to save your message centre number. The number to your service centre is supplied by your service provider and is usually set on the SIM card. If not, you can enter the number yourself. - Page 34 To do this, go to Menu -> Messaging -> Settings -> MMS -> Data account. Select the data account for your provi- der and confirm with OK. Then, you can return to the home screen by pressing the button. If your provider is not on the list, see Services, p.
-
Page 35: Inbox, Sent, Outbox
5. Press Options and select Send, to send the mes- sage. Additional options include: Send options - Settings for Delivery report, Read report, Priority, Delivery time. Edit recipient - Editing option for the recipient's num- Remove recipient - Delete recipient Remove all recipients - Delete all recipients Selecting Save to Drafts saves the MMS in the drafts folder for later use. -
Page 36: Call History
Advanced Use number - The sender's number is available for further use, e.g. to directly save the number as a contact Use USSD - If the SMS contains a USSD, this is displayed for further options. Copy to phone/SIM - You can copy the SMS from the SIM card to the telephone and vice versa. -
Page 37: Camera (Take Photos)
2. Use to scroll through the list. 3. Press to dial the telephone number or press Options, to access the following settings: View - Display details about the selected entry. Call - Call the number. Send text message - Send an SMS to the number. Send multimedia message - Send an MMS to the number. -
Page 38: Image Viewer
Notice! Zooming can negatively impact the image quality. 4. Press Back to exit the camera or Options, to access the following options: Photos - Display all saved photos. Scroll through the list using * and Camera settings - Set the value for Anti-flicker - 60 Hz are set as the default and is ideal. -
Page 39: Audio Player
4. Select one of the following options and press OK to confirm: View - Display the image. Image information - Display different parameters for the image. Browse style - Select the presentation in the over- view. Send As multimedia message - Send the image as an MMS. - Page 40 3. Press List, select a song and press Options - Play - Select. The song will play. With , you can pause and start the playback. To stop playback, press Using the * and buttons, you can switch to the previous or next song.
-
Page 41: Fm Radio
FM radio Listen to the radio on your mobile telephone. Hint The reception is significantly improved when using a headset because the cable functions as an antenna. 1. Press Menu, scroll to Multimedia and press OK. 2. Select FM radio and press OK. 3. -
Page 42: File Manager
Settings Background play - Select On to continue liste- ning to the radio when exiting the menu. To deacti- vate the radio, end the background playback in the FM radio menu. Loudspeaker - Select, whether the loudspeaker should be switched on when a headset is con- nected or if the audio should only be played on the headset. -
Page 43: Connecting The Phone To A Computer
Connecting the phone to a computer Connect the phone to a computer and start transferring pictures and sounds. All you have to do is connect the delivered USB cable between the phone and computer. From your computer's file explorer, you can drag and drop content between your phone and the computer. -
Page 44: Disconnect The Usb Cable Safely
Note! When the memory card is mounted to the computer, the phone cannot access the memory card. Some functiona- lity and applications in the phone, such as the camera, may not be accessible. You can transfer files by using a USB cable on most devices and operating systems supporting a USB Mass Storage interface. -
Page 45: Settings
Settings Note! The settings described in this chapter are carried out in standby mode. Press to return to standby mode. SOS Setting Emergency alert Turn the emergency call function on and off. 1. Press Menu, scroll to Settings and press OK. 2. - Page 46 2. Select SOS Settings and press OK. 3. Select SOS Alarm tone and press OK. 4. Select On or Off and press OK. Call delay Setting the call delay when pressing the emergency call button. 1. Press Menu, scroll to Settings and press OK. 2.
- Page 47 5. Confirm the question Save? with Yes. SOS SMS Turn SMS sending on and off when pressing the emer- gency call button. 1. Press Menu, scroll to Settings and press OK. 2. Select SOS Settings and press OK. 3. Select SOS SMS and press OK. 4.
-
Page 48: Top 10 Setting
Top 10 setting Set the entry as one of the first 10 contacts listed in the phonebook. 1. Press Menu, scroll to Settings and press OK. 2. Select Top 10 setting and press OK. 3. Select one of the empty entries and press Add. 4. - Page 49 4. Select Set home city and press OK. 5. Select a city from the list and press OK. 6. Select Set time/date and press OK. 7. Enter the time (HH:MM) and press 8. Enter the date (DD/MM/YYYY) and press , select whether Daylight saving 9.
- Page 50 5. Set the time format (12 or 24 hours) with * and and press 6. Set the date format using * and and press 7. Select the desired date separation symbol with * and and press Save. Language The default language for the phone menus, messages etc. is determined by the SIM card.
- Page 51 Display You can set the display for the standby display. 1. Press Menu, scroll to Settings and press OK. 2. Select Phone and press OK. 3. Select Display and press OK. 4. Select Wallpaper and press OK. 5. Select the source for the image you want to select and press OK.
-
Page 52: Network Settings
Flight mode Flight mode means the radio part of the cell phone is tur- ned off. Telephone calls cannot be placed and SMS or MMS cannot be sent or received. All other functions in the menu are available. 1. Press Menu, scroll to Settings and press OK. 2. - Page 53 called roaming. Contact your service provider for more information. 1. Press Menu, scroll to Settings and press OK. 2. Select Network settings and press OK. 3. Select Network selection and press OK. 4. Select one of the following options and press OK to confirm: New search - Start a new search if the connection is interrupted.
-
Page 54: Bluetooth
Notice A GPRS connection is necessary when sending/recei- ving MMS. Bluetooth® IMPORTANT If you are not using a Bluetooth connection, select Power/ off or Visibility / off. Do not pair with unknown devices. You can establish a wireless connection with other Blue- tooth-compatible devices such as headsets. - Page 55 Connect - Connect your cell phone with the device. Rename - Change the name of the device. Authorize - Set the connection options for this device. Important For hands-free devices in cars, authorization can be very useful. Authorize the hands-free device in your car under this menu item to avoid having manually connect/pair when leaving the car or turning the device on and off.
-
Page 56: Security Settings
Bluetooth headset) and display of your Bluetooth address. Security settings PIN lock You can select whether or not the SIM card PIN should be required when turning the phone on. Several SIM card providers do not allow the PIN query to be shut off. 1. - Page 57 4. Enter the PIN2 for your SIM card and press OK. 5. Follow the instructions on the display. Phone lock If the telephone lock is activated, you need the telephone lock code to turn on the phone. To do this, you must enter the lock code (factory default 0000).
-
Page 58: Connectivity
Connectivity Data account This menu contains information about your data account. This information is required to use the MMS function. The settings for MMS are provided by your service provider and can be sent to you automatically per SMS. The set- tings parameters for MMS are preset for the 4 large net- work operators in Germany. - Page 59 5. Select Set as default and press OK. This activates this profile. If your services provider is not on the list, proceed as fol- lows: 1. Press Menu, scroll to Settings and press OK. 2. Select Connectivity and press OK. 3.
- Page 60 Proxy address - Address of the proxy server. Proxy port - Enter the proxy port. Proxy user name - Enter the proxy user. Proxy password - Enter the proxy password. Primary DNS - Address of the primary DNS ser- ver. Secondary DNS - Address of the secondary DNS server.
-
Page 61: Shortcuts
before the MMS function can be activated for your account. Contact your service provider’s customer ser- vice. To end the setup without saving your settings, press Shortcuts You can configure the list of shortcuts to certain menus using the button in the standby display. 1. -
Page 62: Restore Factory Settings
Restore factory settings Reset the telephone to the factory settings. 1. Press Menu, scroll to Settings and press OK. 2. Select Restore factory settings and press OK. 3. Enter the current telephone lock code (default 000) and confirm the reset. Important When resetting, all contacts in the telephone memory will be irrevocably deleted. - Page 63 4. Select one of the following options and press OK: Set by network - Use the network default settings. Hide ID - Your telephone number will never be dis- played. Send ID - Your telephone number will always be dis- played.
- Page 64 vate or Status query (see call waiting, p. 59 for all of the options). 1. Press Menu, scroll to Call history and press OK. 2. Select Call settings and press OK. 3. Select Call divert and press OK. 4. Select one of the following options and press OK: Divert all voice calls - Diverts all voice calls.
- Page 65 2. Select Call settings and press OK. 3. Select Call barring and press OK. 4. Select one of the following options and press OK: Outgoing calls - Press OK and select: All voice calls - The user can accept incoming calls but not place calls.
- Page 66 Auto redial This function performs an autonomous redial. 1. Press Menu, scroll to Call history and press OK. 2. Select Call settings and press OK. 3. Select Advanced settings and press OK. 4. Select Auto redial and press OK. 5. Switch the function On or Off and press OK. Call time reminder If this function is switched on, you will be notified of the elapsed call time once or several times by a notification...
-
Page 67: Sms Settings
Answer mode Settings options for accepting incoming calls. 1. Press Menu, scroll to Call history and press OK. 2. Select Call settings and press OK. 3. Select Advanced settings and press OK. 4. Select Answer mode and press OK. 5. Select one of the following options and press OK: Any key - Incoming calls can be accepted by pressing any key (except the right soft key and the red hang up button). - Page 68 mally preassigned to the SIM card. When the number of your SMS center is stored on the SIM card, it will be displayed. If not, you can enter the number yourself. You can get additional informa- tion from your provider. Validity period - Select the desired validity period using the * and buttons.
-
Page 69: Mms Settings
Memory status - Display of the available/used memory for SMS on the SIM card and in the tele- phone. Save sent message - Select whether sent SMS should be saved in the "Sent" folder (On) or not (Off) using the * and buttons. -
Page 70: Voice Mail (Mailbox)
Common settings Compose - Settings options for Slide time, Crea- tion mode, Auto signature and Signature. Sending - Settings options for Delivery report, Read report, Priority, Delivery time and Send and save. Retrieval - Settings options for different query cri- teria. -
Page 71: User Profiles
and press Select. 6. Select one of the two possible entries and press Opti- ons. Call: Calls the voice mailbox. Hint: Alternatively, you can also press the 1 button for approx. 3 s to call your voice mailbox. Edit: Name and telephone number for the voice mail- box. - Page 72 3. Select one of the following options and press Select: Activate: The profile is activated with the correspon- ding settings. Customize: Edit the settings for the selected profile. Select one of the following menu points using and press Options. Select Change, edit the settings and press OK.
-
Page 73: Organizer
Keytone volume - Select the volume for key stro- kes. System alert - Select whether or not system notifi- cations should be displayed. Reset: The profile will be reset to the factory settings. Organizer Calendar 1. Press Menu, scroll to Organizer and press OK. 2. -
Page 74: Alarm
Go to today - Displays the current date in the calen- dar. Go to weekly view/ Go to monthly view - Change the display between week and month view. Alarm 1. Press Menu, scroll to Organizer and press OK. 2. Select Alarm and press OK. 3. -
Page 75: Services
Services This menu contains preprogrammed services from your network operator. The services are dependent upon the network support and subscription. 1. Press Menu, scroll to Organizer and press OK. 2. Select Services and press OK. Calculator The calculator can perform basic arithmetic functions. 1. -
Page 76: Appendix
Appendix Safety instructions CAUTION The unit and the accessories can contain small parts. Keep all of the equipment out of the reach of small children. The mains adapter is the disconnect device between the product and mains power. The mains socket outlet must be close to the equipment and easily accessible. -
Page 77: Medical Units
This unit complies with guidelines for radiation when it is used either in a normal position against your ear, or when it is at least 1.5 cm from your body. If the unit is carried close to your body in a case, belt holder or other holder, these holders should not contain any metal, and the pro- duct should be placed at the distance from your body spe- cified above. -
Page 78: Pacemakers
Pacemakers The Health Industry Manufacturers Association recom- mends that a minimum separation of 15 cm be maintained between a handheld wireless phone and a pacemaker to avoid potential interference with the pacemaker. Persons with pacemakers: • Should always keep the phone more than 15 cm from their pacemaker when the phone is turned on. -
Page 79: Protect Your Hearing
ment near places where fuel is stored and sold, chemical factories and places where blasting is in progress. Areas with risk for explosion are often – but not always – clearly marked. This also applies to below decks on ships; the transport or storage of chemicals;... -
Page 80: Emergency Calls
Emergency calls IMPORTANT! Mobile phones use radio signals, the mobile phone net- work, the terrestrial network and user-programmed functi- ons. This means that connection cannot be guaranteed in all circumstances. Therefore, never rely only on a mobile phone for very important calls such as medical emergen- cies. -
Page 81: Care And Maintenance
mobile phone equipment is incorrectly installed and the airbag fills with air. It is prohibited to use the unit in flight. Turn off the unit before you board a plane. Using wireless telecom units inside a plane can pose risks to air safety and interfere with telecommunications. -
Page 82: Guarantee And Service Information
warms up to normal temperature, condensation can form on the inside which can damage the electronic circuits. • Do not try to open the unit in any other way than that which is indicated here. • Do not drop the unit. Do not knock or shake it either. If it is treated roughly the circuits and precision mecha- nics can be broken. - Page 83 tee period of 6 months. Ownership of replaced goods shall be transferred to IVS GmbH. We request that you register the goods in the original packaging incl. all accessories with a copy of the receipt with a meaningful description of the fault immediately after discovering the fault with our hotline.
- Page 84 Mechanical damages (e.g., plastic deformations, torn soldering connections) Damages that indicate improper use (e.g., foreign bodies inside, chemical residues) lighting and overvoltage damages Modifications to the burden of proof to the detriment of the customer is not connected to the above regulations. Operating instructions and potentially provided software are excluded from the guarantee.
-
Page 85: Technical Data
of life, limb or health or due to the violation of essential contractual obligations. The claim for compensation of damages for violations of essential contractual agree- ments is however limited to typical contractual, foresee- able damages insofar as there is no liability due to intent, gross negligence, the loss of life, limb or health or in accordance with product liability laws. -
Page 86: Specific Absorption Rate (Sar)
Specific Absorption Rate (SAR) This device meets applicable international safety require- ments for exposure to radio waves. The Primo 365 by Doro measures GSM900: 0.625 W/kg (10g Head)/0.823 W/kg (10g Body); DCS1800: 0.164 W/kg (10g Head)/0.211 W/kg (10g Body) The maximum limit according to WHO is 2.0 W/kg measu-... -
Page 87: Declaration Of Conformity
Declaration of Conformity We declare that Primo 365 by Doro conforms to the essential requirements and other relevant regulations con- tained in the Directives 1999/5/EC (R&TTE). A copy of the Declaration of Conformity is available at www.ivsgmbh.de The CE symbol confirms the conformity of the tele- phone with the above directive. - Page 90 Internet: www.ivsgmbh.de IVS GmbH Im Frauental 14 92224 Amberg © IVS GmbH 2013 All rights reserved IVSUMEN_Primo 365 by Doro - V 1.0...
Need help?
Do you have a question about the Primo 365 and is the answer not in the manual?
Questions and answers