Table of Contents
Advertisement
Advertisement
Table of Contents

Related Manuals for Doro Primo 405


Summary of Contents for Doro Primo 405
- Page 1 Primo 405 by Doro Operating Instructions...
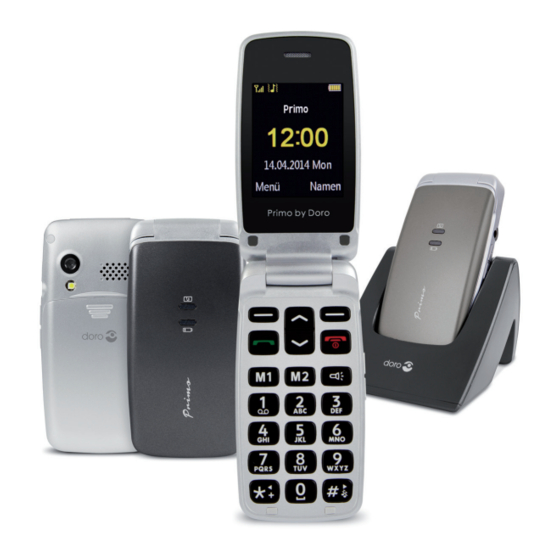
- Page 3 1. Receiver loudspeaker Making phone calls holding the cell phone to the ear 2. Display 3. Left soft key Selection of the main menu Right soft key Opening the telephone directory 4. Call button Dialling and answering call; opening the call log. 5.
-
Page 5: Table Of Contents
Contents Installation ........... .4 Package contents . - Page 6 Messaging ........... .17 Creating and sending SMS .
- Page 7 Organizer ........... . .41 Calendar .
-
Page 8: Installation
Installation Package contents • 1 mobile phone • 1 energy-efficient switch-mode power supply • 1 charging cradle • 1 rechargeable battery Li-Ion 3.7 V / 1.000 mAh • 1 micro-SD memory card (128 MB/already installed) • 1 stereo headset • 1 operating instructions IMPORTANT! First switch the phone off and disconnect it from the battery charger before you... - Page 9 3. Micro-SD card To use the performance features of your phone that require more memory, in particular photos, music etc., a micro SD memory card is needed. In your phone a 128 MB memory card is already installed. For replacing proceed as follows: Slightly press onto card holder on the left side and carefully push it in towards the left hand casing edge.
-
Page 10: Charging
Charging CAUTION Use rechargeable batteries, battery chargers and accessories that are approved for this specific model only. Connecting other accessories involves risks and may lead to the lapse of the approval of the device type and the loss of warranty. When the battery performance is low, the empty battery symbol flashes to indi- cate the battery state and an alarm signal will sound. -
Page 11: Symbols
Symbols Auxiliary functions The following symbols refer to information on auxiliary functions in the operating instructions for: visibility handling listening safety Display status symbols Signal strength Battery charging status New entries in the call log (missed calls) An alarm time is set Bluetooth enabled Existing GPRS connection Headset connected... -
Page 12: Operation
Operation Activating the phone Hold the read button on the telephone for approx. 5 seconds to turn it on/off. If the SIM card is valid but protected with a PIN code (Personal Identification Number), Enter PIN is displayed. Enter the SIM PIN code and press OK ( upper left corner of keypad). -
Page 13: Changing The Language, Time And Date
Changing the language, time and date The default language is determined by the SIM card. See Telephone settings, starting from page 27, for changing the language, time and date. Making phone calls 1. Enter the phone number with the area code. You can delete digits with Delete. -
Page 14: Volume Control
Volume control You can adjust the volume during a call using the side buttons +/–. The volume will be shown on the display. Entering text You can enter texts by repeatedly pressing the numeric keys for selection of the characters. Repeatedly press the corresponding key until the desired character is displayed. -
Page 15: Call Waiting
H-Free (right soft key) Activates the loudspeaker so you do not have to hold the phone to your head while speaking. Speak clearly into the microphone from a distance of maximum 1 m. Using the side buttons +/-, you can set the volume of the loudspeaker. Press H-Held to return to normal mode. -
Page 16: Silent
Silent Silent is a fixed profile with Keypad tone, Message tone and Ring tone disabled, while Vibration, Tasks and Alarm are unchanged. Tip: Press and hold shortcut button # to activate/deactivate Silent. Headset When a headset is connected, the internal microphone in the phone is automa- tically disconnected. -
Page 17: Telephone Book
Telephone book 300 entries can be stored in the phone's telephone book. The number of entries that can be stored on the SIM card depends on the respective SIM card. Creating an entry in the telephone book 1. Press Menu, scroll to Phonebook and press OK. 2. -
Page 18: My Number
My number Here, you enter your own mobile number or landline number. Select View -> OK, press Add…, then enter your name and number and press Options to Save the number or to end the process with Cancel. Creating ICE entry (In Case of Emergency) With this additional information and medical information, first responders can access this information from the victim's phone in case of emergency. - Page 19 Phonebook settings In this menu, you will find the following options: Preferred storage - Set the storage location and the view settings for the contacts (Phone/SIM/ Both). When Both is selected, contacts from both the SIM and the telephone's memory are displayed. Top 10 Settings - Defining the ten most important telephone numbers.
-
Page 20: Ice (In Case Of Emergency)
Add to direct key- Here, you have the option to assign one selected con- tact each to the direct dialling keys M1 and M2 to be able to call them in the future through one-touch dialling. Select one of the storage spaces M1 or M2 for the current contact and then press on Save. -
Page 21: Messaging
Blood type: Your blood type. Vaccination: Any relevant vaccination. Medication: Any medication that you are treated with. Other info: Other information (e.g. organ donor, living will, consent to treat). Messaging Creating and sending SMS or press Menu, scroll to Messaging and press 1. -
Page 22: Creating And Sending Mms
Creating and sending MMS MMS may contain text and media objects such as images or sound recordings. Therefore, both you and the recipient need the mobile radio option for MMS and also a mobile phone which supports sending and receiving of MMS. The setting parameters for MMS are preset by the large network providers in Germany. - Page 23 5. Press Options and select Send, to send the message. Additional options include: Send options - Settings for Delivery report, Read report, Priority, Deli- very time. Edit recipient - Editing option for the recipient's number Remove recipient - Delete recipient Remove all recipients - Delete all recipients Change to Cc - Recipient get a copy Change to Bcc - Recipient get a blind copy (not visible for other recipients)
-
Page 24: Inbox, Sent, Outbox
Inbox, Sent, Outbox or press Menu, scroll to Messaging and press 1. Press shortcut button 2. Select Inbox / Outbox / Sent and press OK. 3. Select a message and press View. Use to scroll through the mes- sage. 4. Press Options for the following options: Reply by SMS - Create an SMS to the sender Reply by MMS - Create an MMS to the sender Call sender - Call the sender... -
Page 25: Camera (Take Photos)
2. Use to scroll through the list. to dial the telephone number or press Options, to access the 3. Press following settings: View - Display details about the selected entry. Call - Call the number. Send text message - Send an SMS to the number. Send multimedia message - Send an MMS to the number. -
Page 26: Image Viewer
Image settings Settings for the Image size and Image quality. The best results are with the following setting: image size: 640x480 / image quality: good. For MMS an image size of 640x480 is ideal. White balance - Select between different profiles for different lighting condi- tions (e.g. -
Page 27: Audio Player
Audio player Play sound files that are stored on the telephone. 1. Press Menu, scroll to Multimedia and press OK. 2. Select Audio player and press OK. 3. Press List, select a song and press Options - Play - Select. The song will play. -
Page 28: Fm Radio
FM radio Listen to the radio on your mobile telephone. Hint The reception is significantly improved when using a headset because the cable functions as an antenna. 1. Press Menu, scroll to Multimedia and press OK or press 2. Select FM radio and press OK. 3. -
Page 29: File Manager
File manager Edit the contents of the memory card. 1. Press Menu, scroll to Organizer and press OK. 2. Select File manager and press OK. 3. After pressing Options, the following options are available to you: Open - Displays the file structure. The options include: Open, New folder, Rename, Delete. -
Page 30: Disconnect The Usb Cable Safely
Note! When the memory card is mounted to the computer, the phone cannot access the memory card. Some functionality and applications in the phone, such as the camera, may not be accessible. You can transfer files by using a USB cable on most devices and operating systems supporting a USB Mass Storage interface. -
Page 31: Settings
Settings Note! The settings described in this chapter are carried out in standby mode. Press to return to standby mode. Basic settings Time and date Setting the time and date 1. Press Menu, scroll to Settings and press OK. 2. Select Time and date and press OK. 3. - Page 32 1. Press Menu, scroll to Settings and press OK. 2. Select Phone settings and press OK. 3. Select Language and press OK. 4. Select a language from the list and press OK. Preferred input method Select the preferred input method for entries into the telephone book and for SMS/MMS.
-
Page 33: Call Settings
LCD backlight Settings for brightness and duration of the display backlight. 1. Press Menu, scroll to Settings and press OK. 2. Select Phone settings and press OK. 3. Select LCD backlight and press OK. , mark the Brightness or Time (sec) and set the desired 4. - Page 34 Call waiting You can answer more than one call simultaneously. If there is an incoming call during a telephone conversation, a signal tone is emitted. To hold the active call and to answer the incoming call, press Options, select Accept and then OK. 1.
-
Page 35: Voice Mail (Mailbox)
Call barring To restrict the use of your telephone, specific types of calls can be blocked. Note! To use the call barring function, a password is required. You have to request this password from your network operator. 1. Press Menu, scroll to Settings and press OK. 2. - Page 36 4. Define the name (freely selectable) and the number of your mailbox ser- vices with Name and Number. Confirm with OK. Tip: To call your mailbox press and hold the 1 key for approx. 3 seconds. The mailbox must be pre-defined (name and number) Auto redial This function performs a redial automatically.
-
Page 37: Network Settings
Any key - incoming calls can be accepted by pressing any key (except the right soft key and the red hang up button). Auto answer when headset mode - if a headset is plugged in, the inco- ming call will be automatically accepted after a short time. Network settings Your telephone selects the network operator automatically if this operator can be received in your area. -
Page 38: Security Settings
Security settings PIN lock You can select whether or not the SIM card PIN should be required when turning the phone on. Several SIM card providers do not allow the PIN query to be shut off. 1. Press Menu, scroll to Settings and press OK. 2. -
Page 39: Restore Factory Settings
Phone lock If the telephone lock is activated, you will need the code to unlock the telephone when switching the phone on. To this end, you have to enter the blocking code (factory setting is 0000). You can change this blocking code (see below). 1. -
Page 40: Bluetooth
Bluetooth® IMPORTANT If you are not using a Bluetooth connection, select Power/ off. Do not connect to unknown devices. You can establish a wireless connection to other Bluetooth-compatible devices such as headsets. 1. Press Menu, scroll to Connectivity and press OK. 2. - Page 41 1. Press Menu, scroll to Connectivity and press OK. 2. Select Data accounts and press OK. 3. Select the entry of your service provider and press Options. 4. Select Set as default and press OK. Following this, the profile is created. Note: An automatic configuration by your mobile service provider via SMS is not possible.
-
Page 42: Sms Settings
IP address - IP address provided by the network provider. Subnet mask - Subnet mask provided by the network provider. 5. Press OK. 6. Select your new profile and press Options. 7. Select Set as default and press OK. You can also activate or edit an MMS profile by selecting it and pressing Opti- ons to Activate/Edit/Delete the account. -
Page 43: Mms Settings
Validity period - select the desired validity period with * and #. Message type - select the message type with * and #. Delivery report - set the delivery report to on or off with * and #. Reply path - set the reply path to on or off with * and #. Memory status - display of the available/used memory for SMS on the SIM card and in the telephone. -
Page 44: Settings For Service Message
Settings for service message 1. Press Menu, scroll to Messaging and press OK. 2. Select Message settings and press OK. 3. Select Service message and press OK. 4. Setting options for different criteria. Contact your network operator for more information, if required. User profiles You can save different profiles (special settings depending on the user or envi- ronment), into which you can switch when necessary. -
Page 45: Organizer
Keytone volume - Select the volume for key strokes. Cover open / Cover close - Select tones for flipping open or closing the mobile phone or Silent. System alert - Select whether or not system notifications should be dis- played. Reset: The profile will be reset to the factory settings. -
Page 46: Calculator
Calculator The calculator can perform basic arithmetic functions. 1. Press Menu, scroll to Organizer and press OK. 2. Select Calculator and press OK. 3. Enter the first number. Use # to enter decimal points. 4. Using , select the calculation type (+, -, x, ÷). 5. -
Page 47: Stopwatch
Stopwatch 1. Press Menu, scroll to Organizer and press OK. 2. Select Stopwatch and press OK. 3. Select a kind of stopwatch and press OK. 4. Depending on your selection you can make a sub-selection. 5. Start and Stop the function with the softkeys or with the keys ( / * / # when using the n-way stopwatch. -
Page 48: Appendix
Appendix Safety instructions CAUTION The device and its accessories may contain small parts. Keep the device out of the reach of small children. The power supply is used as separating unit between product and main connection. The main socket must be in close proximity to the device and should be easily accessible. -
Page 49: Cardiac Pacemakers
shielded. Consult a doctor or the manufacturer of the device to find out if it is sufficiently protected against external radio signals or if you have any other questions. Cardiac pacemakers The manufacturers of cardiac pacemakers recommend a distance of at least 15 cm between the mobile phone and the cardiac pacemaker in order to avoid mal- functions of the pacemaker. -
Page 50: Protection From Too High Volume At The Ear
Protection from too high volume at the ear This device has been tested and it complies with the requirements for the noise level according to the norms EN 50332-1 and/or EN 50332-2. WARNING Loud noises over an extended period of time may cause damage to hearing. -
Page 51: Care And Maintenance
use of wireless telecommunication devices in airplanes may impair the flight security and disturb the on-board telecommunication system. Furthermore, the use of these devices might be forbidden by law. Care and maintenance Your telephone is a technically advanced product and it must be handled with utmost care. -
Page 52: Warranty And Service Information
Warranty and service information If the product shows any defect resulting from manufacturing and/or material faults within 24 months starting from the purchase date, we kindly ask you to contact our Hotline at 0180 5 00 50 60 (This call will involve connection fees of 0.14 EUR/Min calling from the German land line network –... - Page 53 A change of the regulation regarding the burden of proof to the detriment of the client is not part of the above regulations. Operating instructions and software provided are excluded from the warranty. This warranty is valid for new goods purchased in Germany. Warrantor is: IVS GmbH Im Frauental 14 92224 Amberg...
-
Page 54: Technical Data
Technical data Network: Dualband GSM 900 / 1800 Display: 2.2”, 220 x 176 Pixels Bluetooth®: BT 3.0 Camera: 0.3 MP MMS: FM radio: Torch: Rechargeable battery: Li-Ionen 3,7V, 1000 mAh Standby time: up to 10 days Call duration: up to 5 hours Phone directory entries: ICE function: Card slot, upgradeable:... -
Page 55: Specific Absorption Rate (Sar)
Specific Absorption Rate (SAR) This device meets applicable international safety requirements for exposure to radio waves. 900MHz: Head 0.408 W/kg 10g Body 0.660 W/kg 10g 1800MHz: Head 0.163 W/kg 10g Body 0.255 W/kg 10g The maximum limit according to WHO is 2.0 W/kg measured over 10 g tissue. Approval and Conformity This mobile phone complies with the fundamental requirements of the R&TTE Directive 1999/5/EC for radio installations and telecommunication transmission... - Page 56 Internet: www.ivsgmbh.de IVS GmbH Im Frauental 14 92224 Amberg © IVS GmbH 2014 All rights reserved IVSUMEN_Primo 405 by Doro - V 1.0...
Need help?
Do you have a question about the Primo 405 and is the answer not in the manual?
Questions and answers